1. Einleitung
Vielen Dank für Ihren Einkauf.asing the COBY DTV-700 Digital to Analog TV Converter. This device allows you to receive digital broadcast television signals and convert them for display on older analog televisions. It also functions as a multimedia player, supporting various audio, video, and image formats via its USB port, and offers recording capabilities. Please read this manual thoroughly before operating the device to ensure proper use and to maximize your viewErfahrung.
2. Packungsinhalt
Bitte kreuzen Sie das Kästchen für die folgenden Elemente an:
- COBY DTV-700 Digital to Analog TV Converter
- Fernbedienung
- AC/DC-Netzteil
- AV-Kabel (RCA)
- Benutzerhandbuch (dieses Dokument)
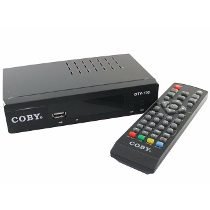
Image 2.1: The COBY DTV-700 Digital to Analog TV Converter. This image shows the compact design of the converter unit, typically black with various ports and indicators.
3. Sicherheitshinweise
Um einen sicheren Betrieb zu gewährleisten und Schäden zu vermeiden, beachten Sie bitte folgende Vorsichtsmaßnahmen:
- Das Gerät darf weder Regen, Feuchtigkeit noch extremen Temperaturen ausgesetzt werden.
- Öffnen Sie nicht das casing; alle Wartungsarbeiten sind qualifiziertem Personal zu überlassen.
- Sorgen Sie für eine ausreichende Belüftung rund um das Gerät, um eine Überhitzung zu vermeiden.
- Verwenden Sie nur das mitgelieferte Netzteil.
- Das Gerät sollte nicht direkter Sonneneinstrahlung, Wärmequellen oder starken Magnetfeldern ausgesetzt werden.
- Batterien und Elektronikschrott sind gemäß den örtlichen Vorschriften verantwortungsvoll zu entsorgen.
4. Produktüberschreitungview
4.1 Frontplatte
The front panel typically includes:
- Betriebsanzeige: Leuchtet, wenn das Gerät eingeschaltet ist.
- Tasten „Kanal hoch/runter“: For changing channels.
- Menü-Schaltfläche: Greift auf das Hauptmenü zu.
- USB-Anschluss: For connecting USB storage devices for media playback and recording.
4.2 Rückseite
Die Rückseite bietet alle notwendigen Anschlüsse:
- AMEISE IN: Connects to your antenna for receiving digital signals.
- HDMI-AUSGANG: Connects to an HDMI-compatible TV for high-definition output.
- AV OUT (RCA): Connects to older analog TVs using composite video (yellow) and stereo audio (red/white) cables.
- KOAXIALER AUSGANG: Digital audio output (if available).
- DC IN: Connects to the provided AC/DC power adapter.
5. Einrichtung
5.1 Anschließen des Konverters
- Antenne anschließen: Connect your digital antenna to the ANT IN port on the rear of the DTV-700.
- Anschluss an den Fernseher:
- For Analog TVs: Use the supplied AV cable. Connect the yellow plug to the video input of your TV, and the red/white plugs to the corresponding audio inputs. Connect the other end to the AV OUT ports on the DTV-700.
- For Digital/HDTVs: Use an HDMI cable (not included). Connect one end to the HDMI-Ausgang port on the DTV-700 and the other end to an available HDMI input on your TV.
- Strom anschließen: Plug the AC/DC power adapter into the DC-Eingang port on the DTV-700, then plug the adapter into a wall outlet.
5.2 Erste Einrichtung und Kanalsuche
- Turn on your TV and select the correct input source (e.g., AV1, HDMI1) that corresponds to your connection.
- Power on the DTV-700 using the remote control or the power button on the front panel.
- The first time you power on, an initial setup wizard may appear. Follow the on-screen prompts to select your language and country.
- Initiate an automatic channel scan. This will search for all available digital channels in your area. This process may take several minutes. Do not interrupt the scan.
- Once the scan is complete, the converter will tune to the first available channel.
6. Bedienungsanleitung
6.1 Fernbedienungsfunktionen
The remote control provides full functionality for your DTV-700. Ensure two AAA batteries are inserted correctly (batteries not included).
- LEISTUNG: Schaltet das Gerät ein oder aus.
- CH +/-: Schaltet die Kanäle nach oben oder unten.
- LAUTSTÄRKE +/-: Passt die Lautstärke an.
- SPEISEKARTE: Greift auf das Hauptmenü zu.
- EXIT: Beendet das aktuelle Menü oder die aktuelle Funktion.
- INFO: Zeigt aktuelle Kanalinformationen an.
- OK / Navigation Buttons: Bestätigt Auswahlen und navigiert durch Menüs.
- REC: Starts recording the current program.
- PLAY/PAUSE, STOP, FF, REW: Medienwiedergabesteuerung.
- USB: Schaltet in den USB-Medienwiedergabemodus.
6.2 Kanalnavigation
Verwenden Sie die CH +/- buttons on the remote or front panel to browse channels. You can also directly enter a channel number using the numeric keypad on the remote.
6.3 Hauptmenü
Drücken Sie die SPEISEKARTE button to access settings for Program, Picture, Sound, Time, Option, and System. Use the navigation buttons to select options and OK zur Bestätigung.
7. Medienwiedergabe
The DTV-700 supports media playback from a USB storage device (e.g., USB flash drive, external hard drive). Insert your USB device into the USB port on the front panel.
7.1 Unterstützte Formate
- Musik: MP3, WMA
- Foto: JPGs, BMPs, PNGs
- Video: MKV, AVI, DIVX, XVID, MOV, VOB, FLV, DAT, MPEG, MP4, TS
7.2 Medienwiedergabe
- Stecken Sie ein USB-Speichergerät in den USB-Anschluss.
- Drücken Sie die USB button on the remote control or navigate to the 'Multimedia' section in the main menu.
- Select the desired media type (Music, Photo, Video) and browse your files.
- Wählen Sie mit den Navigationstasten eine file und drücke OK zum Spielen.
8. Aufnahmefunktionen
The DTV-700 allows you to record live TV programs to a connected USB storage device.
8.1 Sofortaufnahme
Drücken Sie während des Ansehens einer Sendung die Taste AUFNAHME Drücken Sie die Taste auf der Fernbedienung, um die Aufnahme zu starten. STOPPEN , um die Aufnahme zu beenden.
8.2 Scheduled Recording (PVR)
Access the PVR (Personal Video Recorder) or Schedule menu via the main menu to set up timed recordings. You will need to specify the channel, start time, end time, and date for the recording.
9. Fehlerbehebung
| Problem | Mögliche Ursache/Lösung |
|---|---|
| Kein Bild oder Ton |
|
| Poor picture quality / No channels |
|
| Fernbedienung funktioniert nicht |
|
| USB-Medien werden nicht wiedergegeben |
|
10. Spezifikationen
- Modell: DTV-700
- Marke: Coby
- Eingang: Digital TV Antenna (ATSC/DVB-T/T2 compatible, depending on region)
- Ausgabe: HDMI, AV (RCA Composite Video/Audio)
- USB-Anschluss: Yes (for media playback and PVR)
- Unterstützte Medienformate:
- Music: MP3, WMA
- Foto: JPG, BMP, PNG
- Video: MKV, AVI, DIVX, XVID, MOV, VOB, FLV, DAT, MPEG, MP4, TS
- Leistung: AC/DC Adapter (Input: 100-240V ~ 50/60Hz, Output: typically 5V-12V DC)
- Abmessungen: Ungefähr 20 x 15.6 x 6.2 cm (Verpackungsabmessungen)
- Gewicht: Approximately 490 g (Package weight)
- Batterien der Fernbedienung: 2 x AAA (nicht enthalten)
11. Wartung
To ensure the longevity and optimal performance of your DTV-700 converter:
- Reinigung: Use a soft, dry cloth to clean the exterior of the unit. Do not use liquid cleaners or abrasive chemicals.
- Belüftung: Stellen Sie sicher, dass die Lüftungsöffnungen nicht blockiert sind, um eine Überhitzung zu verhindern.
- Lagerung: Wenn Sie das Gerät über einen längeren Zeitraum lagern, trennen Sie es vom Stromnetz und bewahren Sie es an einem kühlen, trockenen Ort auf.
12. Garantie und Support
Informationen zur Garantie und zum technischen Support finden Sie auf der Ihrem Produkt beiliegenden Garantiekarte oder auf der offiziellen Coby-Website. webBewahren Sie Ihren Kaufbeleg als Kaufnachweis für eventuelle Garantieansprüche auf.
Coby is committed to providing quality products and customer satisfaction. If you encounter any issues not covered in this manual, please contact Coby customer service for assistance.


