Einführung
This manual provides instructions for the setup, operation, and maintenance of your iHome iH402B Dual Charging Alarm Clock. This device features dual alarms, a USB charging port, and a removable USB battery pack for portable power. Please read these instructions carefully before using your device.
Produkt überview
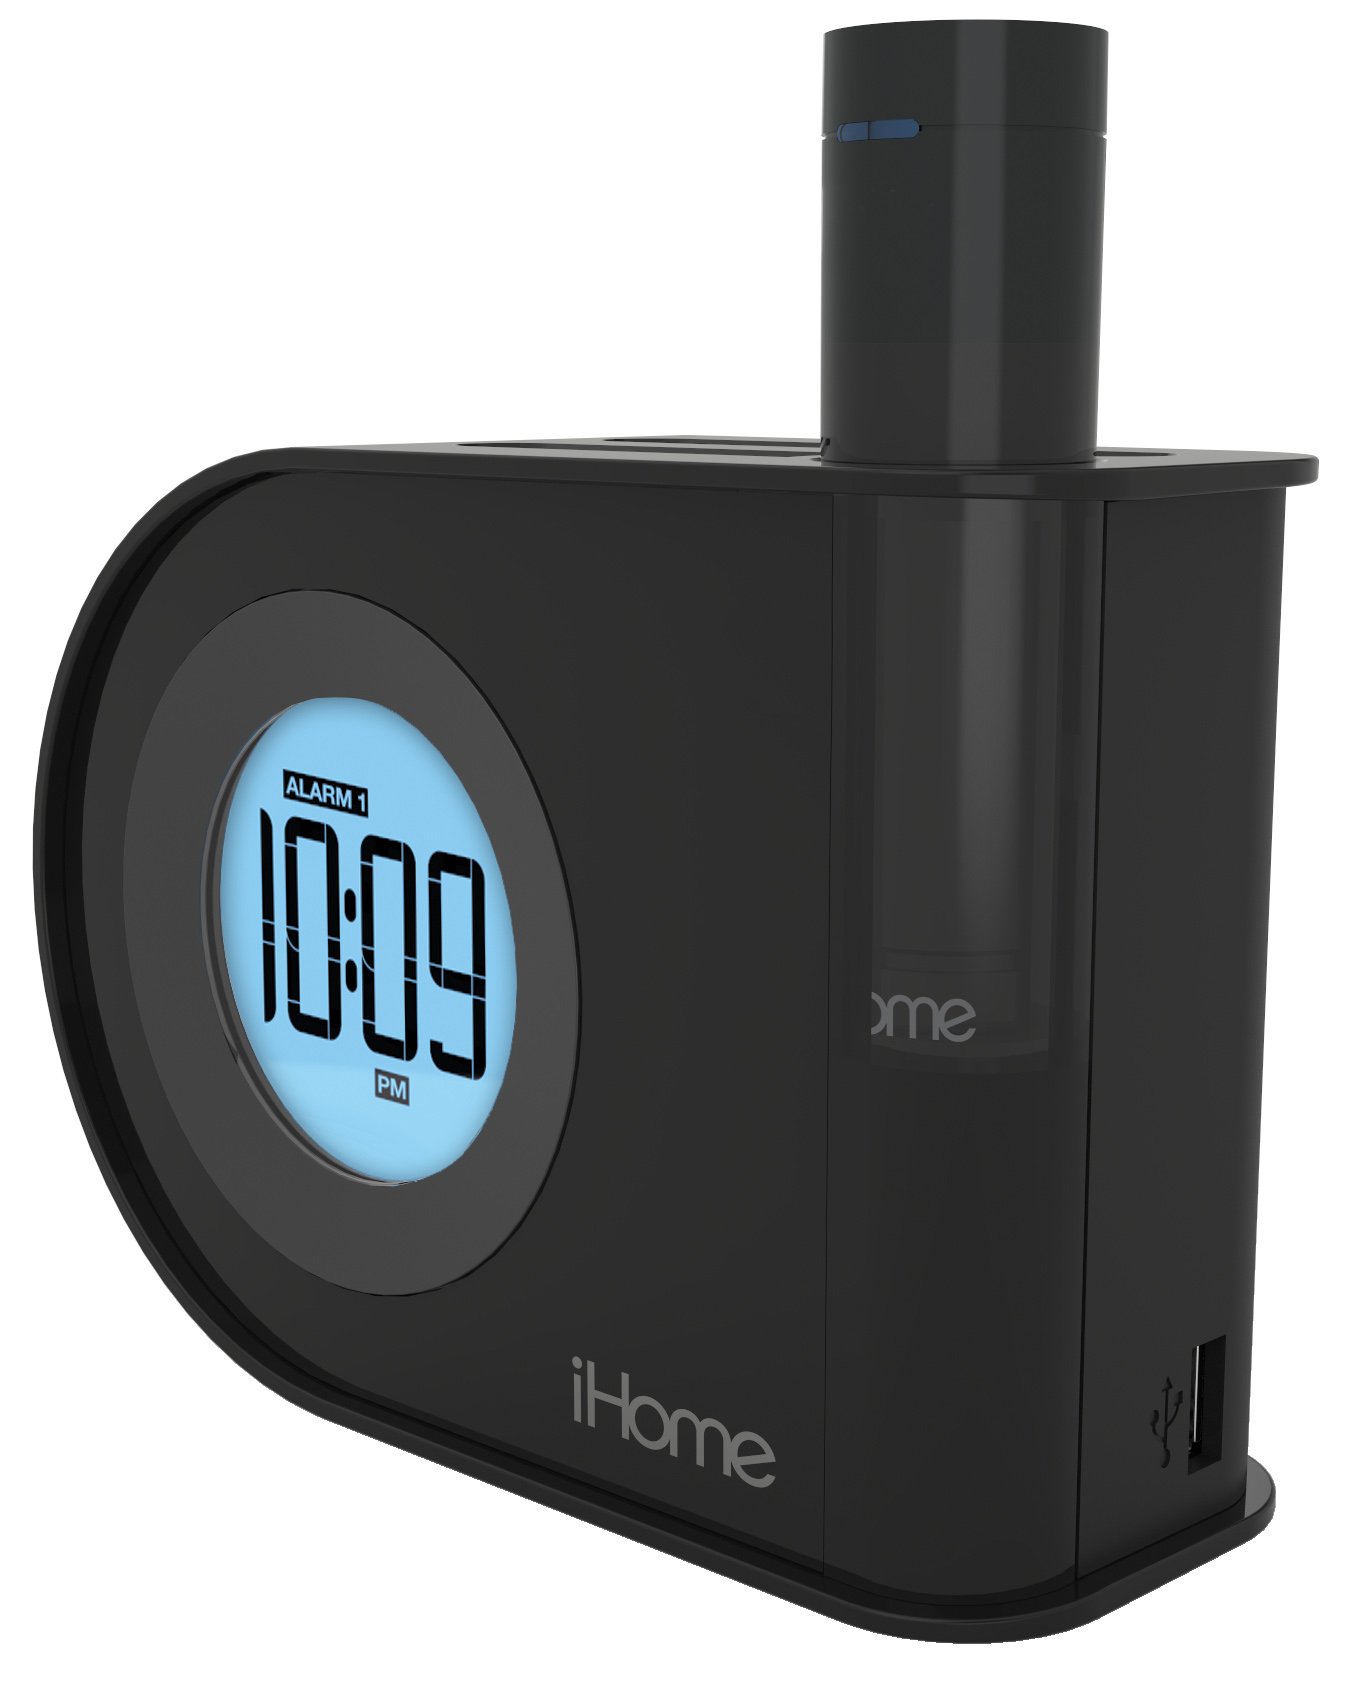
Bild: The iHome iH402B alarm clock displaying 10:09 PM, with a smartphone and a tablet connected via USB cables for charging. The removable power pack is visible on the right side of the clock.
The iH402B is designed to provide reliable timekeeping and alarm functions, along with convenient charging capabilities for your mobile devices. It includes a main unit with a digital display, a built-in USB charging port, and a unique pop-out removable lithium-ion battery pack with its own USB port.
Aufstellen
1. Stromanschluss
Connect the power adapter (not included, but required for primary power) to the DC jack on the back of the iH402B unit and then plug the adapter into a standard wall outlet. The unit will power on and the display will illuminate.
2. Batterie-Backup
The iH402B requires 2 AA batteries (included) for battery backup. Install these batteries into the compartment located on the bottom of the unit. This backup ensures that time and alarm settings are maintained during a power outage.
3. Uhrzeit einstellen
- Halten Sie die Zeiteinstellung button (refer to unit for exact location).
- Verwenden Sie die + or - buttons to adjust the hour. Observe the PM indicator for correct AM/PM setting.
- Drücken Sie die Zeiteinstellung button again to confirm the hour and proceed to minute adjustment.
- Verwenden Sie die + or - Tasten zum Einstellen der Minuten.
- Drücken Sie die Zeiteinstellung Drücken Sie die Taste ein letztes Mal, um die Zeit zu speichern und den Zeiteinstellungsmodus zu verlassen.
4. Daylight Saving Time (DST) Switch
Suchen Sie die Sommerzeit switch on the back of the unit. Slide the switch to the appropriate position (DST or Standard Time) to instantly adjust the clock for seasonal time changes.
Bedienungsanleitung
1. Alarme einstellen (Alarm 1 und Alarm 2)
The iH402B features two independent alarms. Follow these steps for each alarm:
- Halten Sie die 1-Alarm or 2-Alarm Drücken Sie die Taste so lange, bis die Alarmzeit auf dem Display blinkt.
- Verwenden Sie die + or - buttons to adjust the desired alarm hour. Ensure the AM/PM indicator is correct.
- Drücken Sie die jeweilige Taste Alarm button again to confirm the hour and proceed to minute adjustment.
- Verwenden Sie die + or - Tasten zum Einstellen der gewünschten Alarmminuten.
- Drücken Sie die Alarm button one last time to save the alarm time. The alarm indicator will light up, confirming the alarm is active.
- Um einen aktiven Alarm auszuschalten, drücken Sie die entsprechende Taste. Alarm button once. The alarm indicator will turn off.
An alarm volume switch (High/Low) is located on the back of the unit to adjust the buzzer volume.
2. Schlummerfunktion
Wenn ein Alarm ertönt, drücken Sie die Taste Schlummern button (typically a large button on top of the unit) to temporarily silence the alarm. The alarm will sound again after a preset interval (usually 9 minutes).
3. Helligkeit des Displays
The display brightness can be adjusted. Locate the Dimmer or Helligkeit button (refer to unit for exact location). Press it repeatedly to cycle through various brightness levels, including an option to turn the display off entirely.
4. USB aufladen
The iH402B offers two ways to charge your mobile devices:
- Eingebauter USB-Anschluss: Connect your device's USB charging cable to the USB port located on the side or back of the main unit.
- Removable USB Battery Pack: The unit includes a pop-out lithium-ion battery pack with its own USB port. To use it, press the release button (typically on the back) to eject the pack. Connect your device's USB charging cable to the port on the battery pack. To recharge the battery pack, reinsert it into the main unit.

Bild: Ein näherer view of the iHome iH402B, highlighting the USB charging capabilities. A smartphone is connected to the built-in USB port, and a tablet is connected to the removable power pack, which is inserted into the alarm clock.
Wartung
1. Reinigung
Wipe the unit with a soft, dry cloth. Do not use liquid cleaners or abrasive materials, as they may damage the finish.
2. Batteriewechsel (Notstromversorgung)
If the display flickers or settings are lost during a power interruption, the AA backup batteries may need replacement. Open the battery compartment on the bottom of the unit, remove the old batteries, and insert two new AA batteries, observing correct polarity.
Fehlerbehebung
- Das Gerät lässt sich nicht einschalten: Ensure the power adapter is securely plugged into both the unit and a working wall outlet. Check the power source.
- Der Alarm ertönt nicht: Verify that the alarm is set and activated (alarm indicator lit). Check the alarm volume switch on the back of the unit.
- USB-Ladefunktion funktioniert nicht: Ensure the unit is powered on. Check the USB cable connection to both the alarm clock/battery pack and your device. Some devices may require more power than the removable pack can provide for a full charge.
- Time/settings lost during power outage: Replace the AA backup batteries.
- Display is too dim or off: Adjust the display brightness using the dedicated button.
Technische Daten
| Marke | iHome |
| Modellnummer | iH402B |
| Anzeigetyp | Digitales |
| Stromquelle | Battery Powered (for backup), Electrical (main) |
| Pufferbatterien | 2 AA-Batterien (im Lieferumfang enthalten) |
| Konnektivität | USB |
| Technische Daten | 2.36 x 5.71 x 4.06 Zoll |
| Artikelgewicht | 1.5 Pfund |
| Hersteller | SDI Technologies, Inc. |
Garantie und Support
Informationen zur Garantie und zum technischen Support finden Sie in der Ihrer Bestellung beiliegenden Dokumentation oder auf der offiziellen iHome-Website. webBewahren Sie Ihren Kaufbeleg für Garantieansprüche auf.


