Chief KRA221SXRH Expansion Arm Kit Instruction Manual
Model: KRA221SXRH
1. Einleitung
This manual provides detailed instructions for the installation and use of the Chief KRA221SXRH Expansion Arm Kit. This kit is designed to expand existing Chief K1C series monitor arm installations, allowing for additional monitor configurations.
The KRA221SXRH facilitates upgrading a single-arm K1C120SXRH to a dual-arm K1C220SXRH setup or adding a third and/or fourth arm to a multi-workstation configuration when used with the KRA226 grommet plate accessory.
2. Sicherheitshinweise
Read all instructions carefully before installation. Failure to do so may result in personal injury or property damage.
Ensure that the mounting surface can safely support the combined weight of the arm kit, monitors, and any attached accessories.
Do not overtighten screws. Overtightening can cause damage to the product or mounting surface.
Kleinteile von Kindern fernhalten.
Sollten Sie Zweifel am Installationsprozess haben, konsultieren Sie einen qualifizierten Fachmann.
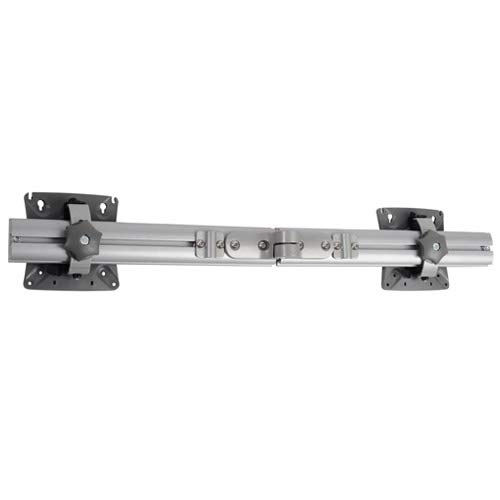
3. Packungsinhalt
Verify that all components are present and undamaged before proceeding with installation. If any parts are missing or damaged, contact Chief customer support.
Expansion Arm (KRA221SXRH)
Montage-Hardware-Kit
Bedienungsanleitung (dieses Dokument)
Image: Components of the Chief KRA221SXRH Expansion Arm Kit. This image displays the primary arm component and associated mounting hardware.
4. Einrichtung und Installation
This section outlines the steps to install the KRA221SXRH Expansion Arm Kit. Ensure you have all necessary tools and an existing Chief K1C series mount in place.
4.1. Expanding a Single-Arm K1C120SXRH to a Dual-Arm K1C220SXRH
Prepare the Existing Mount: Ensure your existing K1C120SXRH single-arm mount is securely installed.
Attach the Expansion Arm: Locate the designated attachment point on the existing K1C mount's pole or central hub. Align the KRA221SXRH expansion arm with this point.
Sichern Sie den Arm: Use the provided mounting hardware (screws, washers, etc.) to firmly attach the expansion arm. Refer to the specific diagrams in your K1C base mount manual for precise screw locations and torque specifications.
Mount the Second Monitor: Attach your second monitor to the newly installed expansion arm using the VESA mounting plate.
Kabelmanagement: Route monitor cables through the integrated cable management channels of both arms for a clean setup.
4.2. Adding a Third or Fourth Arm (Requires KRA226 Grommet Plate)
For configurations requiring three or four arms, the Chief KRA226 Grommet Plate Accessory is necessary. This accessory provides additional mounting points for expansion arms in a center-of-table setup.
Install KRA226 Grommet Plate: If not already installed, follow the instructions provided with the KRA226 grommet plate to securely mount it to your workstation.
Attach Expansion Arms: Identify the available mounting points on the KRA226 grommet plate. Attach the KRA221SXRH expansion arms to these points using the provided hardware.
Monitore montieren: Secure your monitors to the expansion arms.
Anpassen und Sichern: Make any necessary adjustments to monitor height, tilt, and swivel. Ensure all connections are tight and secure.
5. Anpassungen
Once installed, the KRA221SXRH expansion arm allows for various adjustments to optimize your viewErfahrung.
Höhenverstellung: Lösen Sie den Kragen clamp on the main pole (if applicable to your K1C base mount), adjust the arm to the desired height, and retighten the clamp.
Neigen und Schwenken: Use the adjustment knobs or screws on the monitor head to set the desired tilt and swivel angles for your monitor.
Arm Extension/Retraction: The arm can be extended or retracted to bring the monitor closer or further away from the user.
Drehung: Monitors can typically be rotated from landscape to portrait orientation.
Always ensure that adjustments are made smoothly and that all locking mechanisms are securely fastened after positioning to prevent accidental movement.
6. Wartung
Regular maintenance ensures the longevity and safe operation of your Chief KRA221SXRH Expansion Arm Kit.
Regelmäßige Inspektion: Überprüfen Sie regelmäßig alle Schrauben und Verbindungen, um sicherzustellen, dass sie fest sitzen. Ziehen Sie sie gegebenenfalls nach.
Reinigung: Clean the arm surfaces with a soft, damp Mit einem Tuch abwischen. Vermeiden Sie scheuernde Reiniger oder Lösungsmittel, die die Oberfläche beschädigen könnten.
Schmierung: No lubrication is typically required for the moving parts of this arm kit.
Gewichtsbeschränkungen: Do not exceed the maximum weight capacity specified for your K1C series monitor arm and the expansion kit.
7. Fehlerbehebung
Problem
Mögliche Ursache
Lösung
Arm feels loose or wobbly.
Die Befestigungsschrauben sind nicht fest genug angezogen.
Check and retighten all mounting screws on the expansion arm and the main K1C mount.
Der Monitor hängt durch oder hält seine Position nicht.
Weight capacity exceeded or tension adjustment needed.
Ensure monitor weight is within limits. Adjust the tension mechanism on the monitor head if available (refer to your K1C base mount manual).
Difficulty attaching expansion arm.
Falsche Ausrichtung oder fehlende Hardware.
Review installation steps. Ensure correct orientation and that all necessary hardware is used. Confirm compatibility with your existing K1C mount.
If you encounter issues not listed here, please contact Chief customer support for assistance.
8. Spezifikationen
Modell: KRA221SXRH
Produktart: Expansion Arm Kit
Kompatibilität: Chief K1C series monitor arms (e.g., K1C120SXRH, K1C220SXRH)
Farbe: Schwarz
Artikelgewicht: Ungefähr 11.5 Pfund (5.2 kg)
Produktabmessungen: Ungefähr 17.5 x 6.5 x 33.75 Zoll (44.45 x 16.51 x 85.73 cm)
Besondere Merkmale: Designed for expanding existing K1C installations, supports multi-monitor configurations with KRA226 accessory.
9. Garantie und Support
For information regarding warranty coverage, please refer to the official Chief website or the warranty documentation included with your original K1C series monitor arm. Chief provides customer support for product inquiries, technical assistance, and troubleshooting.
Chief PDR-Serie Große Flachbildschirm-Wandhalterung mit zwei Armen – Installationsanleitung Detaillierte Installationsanleitung für die Chief PDR-Serie Doppelarm-Wandhalterung, entwickelt für große Flachbildschirme. Beinhaltet die Wandmontage, die Befestigung des Bildschirms, das Kabelmanagement, die Spannungseinstellung und die Konfiguration der Schwenkarme. Enthält Sicherheitshinweise, Produktspezifikationen und Kontaktinformationen.
Installationsanleitung für die Chief MSBV VESA-Schnittstellenhalterung Detaillierte Installationsanleitung für die Chief MSBV VESA-Schnittstellenhalterung, eine Montagelösung für Displays. Behandelt Sicherheit, Abmessungen, Teile, VESA-Kompatibilität (100 x 100 bis 400 x 200) und Montageverfahren. Enthält Kontaktinformationen für Legrand | AV.
Chief RMF3/RMT3/RLF3/RLT3 Installationsanleitung Ausführliche Installationsanleitung für die Flachbildschirmhalterungen RMF3, RMT3, RLF3 und RLT3 von Chief mit detaillierten Angaben zu Hardwareanforderungen, Montageschritten und Sicherheitsvorkehrungen für verschiedene Wandtypen.
Chief Thinstall Große Neigungs-Universalhalterung – Installationsanleitung Ausführliche Installationsanleitung für die Chief Thinstall™ Large Tilt Universalhalterung (LTTU). Diese Anleitung enthält detaillierte Schritte zur Wandplattenmontage, Displaybefestigung, Neigungseinstellung und Kabelführung und gewährleistet so eine sichere und korrekte Einrichtung Ihres Displays.