1. Einleitung
This manual provides essential information for the safe and efficient operation of your ANSMANN Future 3in1 LED Flashlight. Please read these instructions carefully before using the product and retain them for future reference.
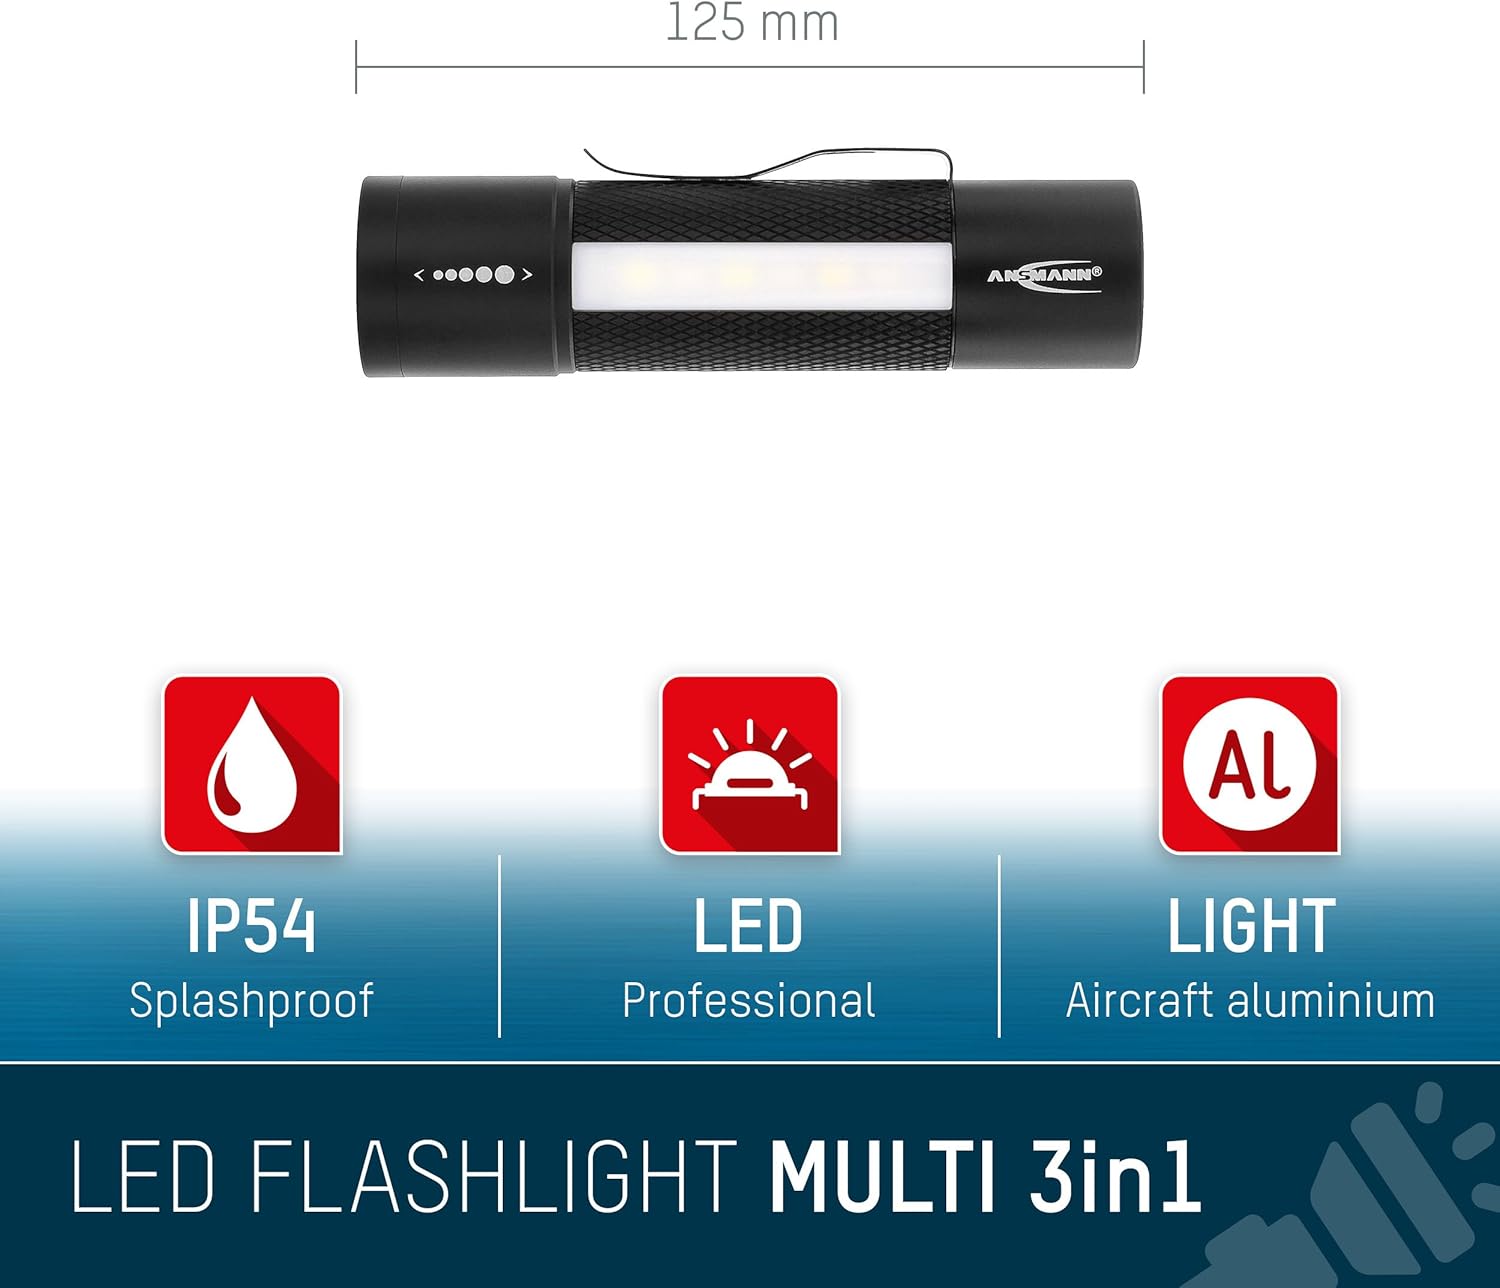
Figure 1: ANSMANN Future 3in1 LED Flashlight overview, highlighting its compact size, IP54 splashproof rating, professional LED, and aircraft-grade aluminum construction.
2. Sicherheitshinweise
Beachten Sie die folgenden Sicherheitsvorkehrungen, um Verletzungen oder Schäden am Produkt zu vermeiden:
- Do not look directly into the LED beam. The intense light can cause temporary vision impairment or eye damage.
- Ensure batteries are inserted with correct polarity (+/-). Incorrect insertion can damage the device.
- Mischen Sie keine alten und neuen Batterien oder verschiedene Batterietypen.
- Um ein Auslaufen zu verhindern, entfernen Sie die Batterien, wenn die Taschenlampe längere Zeit nicht benutzt wird.
- This flashlight is IP54 rated, meaning it is protected against dust ingress and splashing water. It is not designed for submersion in water.
- Außerhalb der Reichweite von Kindern aufbewahren.
3. Produktüberschreitungview
The ANSMANN Future 3in1 LED Flashlight features a robust aluminum housing and offers three distinct lighting functions:
- Main LED Beam: Located at the front, with adjustable focus.
- Seitlicher Arbeitsscheinwerfer: A bright white LED panel on the side for area illumination.
- Side Signal Light: A red LED panel on the side for warning or signaling purposes.
Additional features include a powerful magnetic base for hands-free operation and a sturdy pocket clip.

Figure 2: The seamless optic focusing system allows for quick adjustment of the light beam.
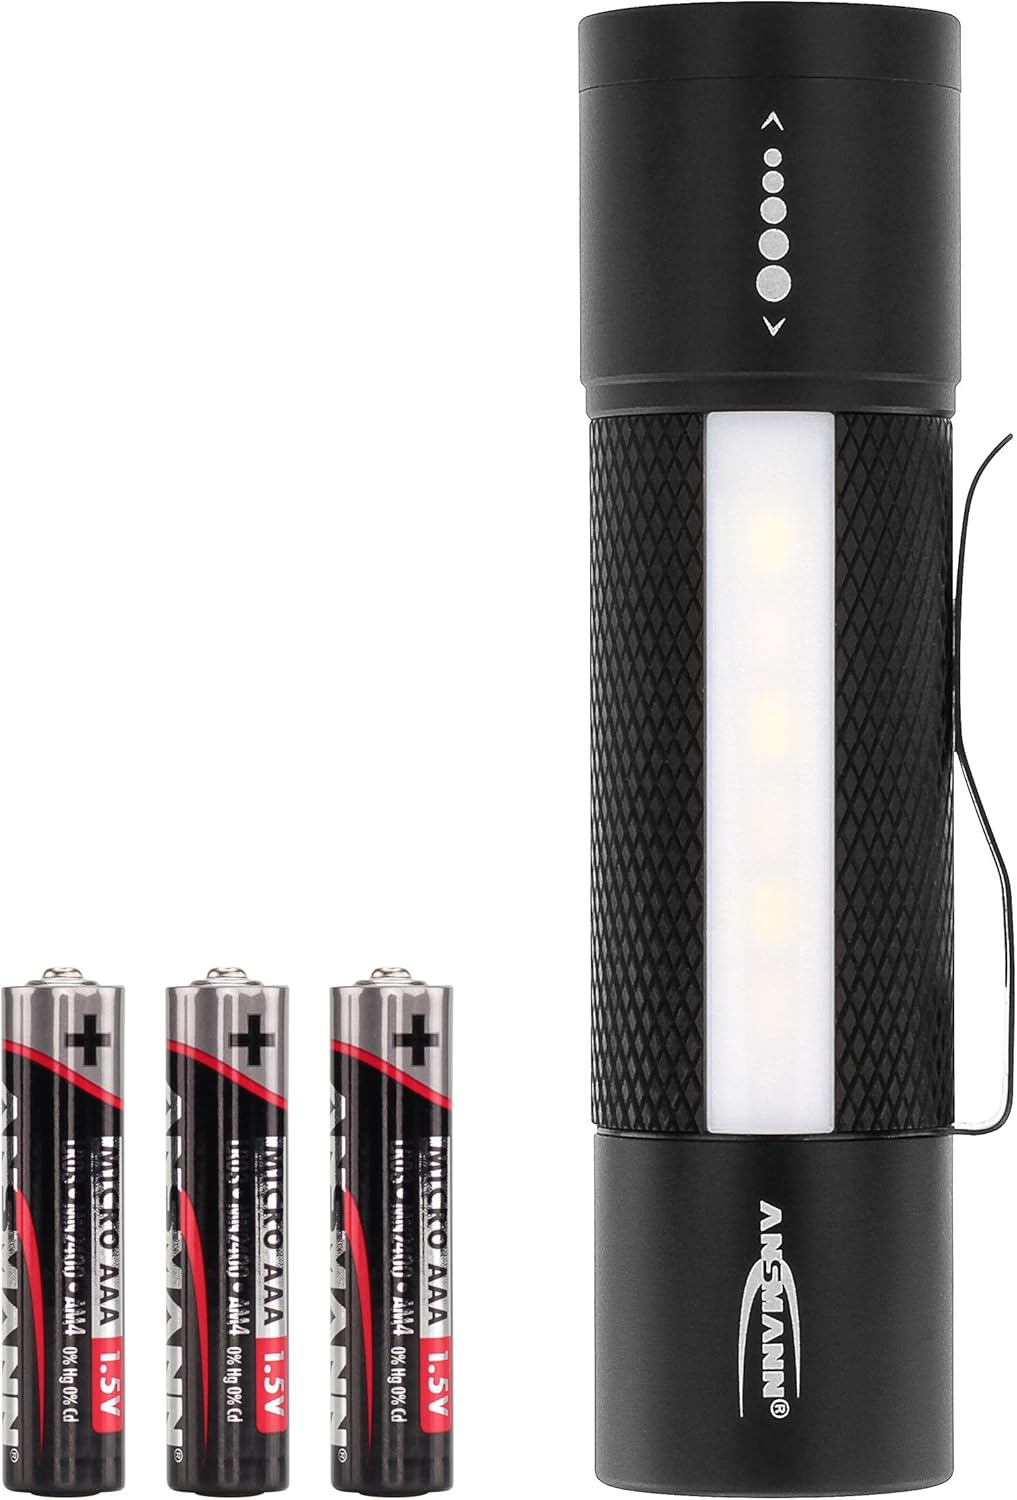
Figure 3: The powerful magnetic base enables convenient hands-free operation by attaching to metal surfaces.
4. Einrichtung
4.1. Einlegen der Batterie
- Unscrew the end cap of the flashlight by turning it counter-clockwise.
- Insert three (3) AAA 1.5V alkaline batteries into the battery holder, ensuring correct polarity (+ and -) as indicated inside the holder.
- Carefully reinsert the battery holder into the flashlight body.
- Screw the end cap back on clockwise until it is securely tightened.

Figure 4: Battery compartment with the end cap removed, showing the battery holder for three AAA batteries.
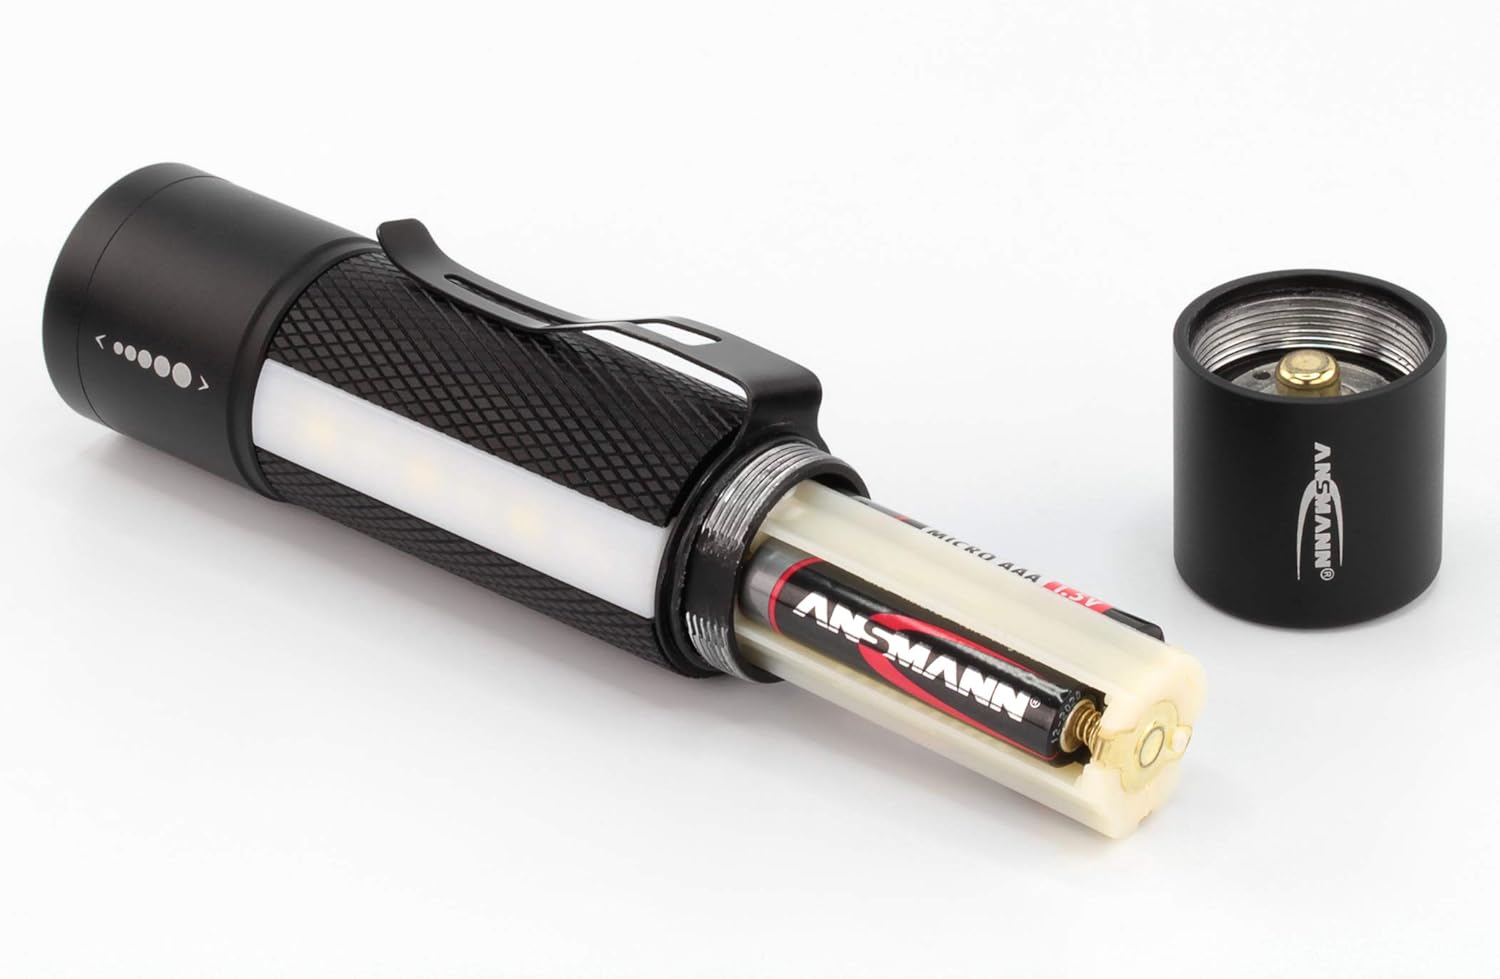
Figure 5: The flashlight requires three AAA batteries for operation.
5. Bedienungsanleitung
5.1. Ein-/Ausschalten und Modusauswahl
The flashlight features a single button located on the end cap to cycle through its functions:
- Erster Druck: Activates the main LED beam.
- Zweites Drücken: Switches to the white side work light.
- Drittes Drücken: Switches to the red side signal light.
- Vierte Presse: Schaltet die Taschenlampe aus.
- Quick Off: To turn off the flashlight from any mode, press and hold the button for approximately 2 seconds.

Figure 6: The main LED beam provides powerful illumination for various tasks.

Figure 7: The white side work light is ideal for close-range illumination and hands-free tasks.

Figure 8: The red side signal light can be used for emergencies or to maintain night vision.
5.2. Fokuseinstellung
To adjust the focus of the main LED beam, simply slide the head of the flashlight forward or backward. Sliding it forward narrows the beam for a focused spot, while sliding it backward widens the beam for a broad floodlight.
6. Wartung
- Reinigung: Wischen Sie das Gehäuse der Taschenlampe mit einem weichen,amp Tuch. Keine Scheuer- oder Lösungsmittel verwenden.
- Batteriepflege: Always replace all three AAA batteries simultaneously with new, identical batteries. Do not attempt to recharge non-rechargeable batteries.
- Lagerung: If the flashlight will not be used for an extended period, remove the batteries to prevent potential leakage and damage. Store in a cool, dry place.
7. Fehlerbehebung
| Problem | Mögliche Ursache | Lösung |
|---|---|---|
| Die Taschenlampe lässt sich nicht einschalten. | Die Batterien sind leer oder falsch eingelegt. | Ersetzen Sie die Batterien durch neue und achten Sie dabei auf die richtige Polarität. |
| Das Licht ist schwach oder flackert. | Die Batterien sind schwach. | Ersetzen Sie alle Batterien durch neue. |
| Mode switching is inconsistent. | Button not pressed firmly or quickly enough. | Ensure firm and distinct presses of the power button. |
8. Spezifikationen
| Marke | ANSMANN |
| Modellnummer | 1600-0137 |
| Abmessungen (L x B x H) | 12.55 x 3.3 x 3.3 cm |
| Gewicht | 183 g |
| Stromquelle | 3 x AAA 1.5V Alkaline Batteries (included) |
| Lichtquelle | LED |
| Luminous Flux (Main Beam) | 180 Lumen |
| Strahldistanz | Bis zu 130 Meter |
| Laufzeit | Bis zu 11 Stunden |
| Leistung | 3 Watt |
| IP-Schutzart | IP54 (spritzwassergeschützt) |
| Material | Aluminium in Flugzeugqualität |
| Besondere Merkmale | Stepless focus, White side work light, Red side signal light, Magnetic base, Pocket clip |

Figure 9: Product packaging illustrating key features and the 3-year warranty.
9. Garantie und Support
9.1. Garantieinformationen
The ANSMANN Future 3in1 LED Flashlight is covered by a 3 Jahr Herstellergarantie Diese Garantie gilt ab Kaufdatum und deckt Material- und Verarbeitungsfehler bei normalem Gebrauch ab. Bitte bewahren Sie Ihren Kaufbeleg für Garantieansprüche auf.
9.2. Kundendienst
For technical support, warranty claims, or any questions regarding your ANSMANN Future 3in1 LED Flashlight, please contact ANSMANN customer service:
- E-Mail: info@ansmann.de
- EPREL Produktinformationen: https://eprel.ec.europa.eu/qr/721168


