Einführung
This manual provides comprehensive instructions for the setup, operation, and maintenance of your GPX Digital AM/FM Clock Radio, model C224B. Please read this manual thoroughly before using the device to ensure proper functionality and to maximize your user experience. Keep this manual for future reference.
Produkt überview
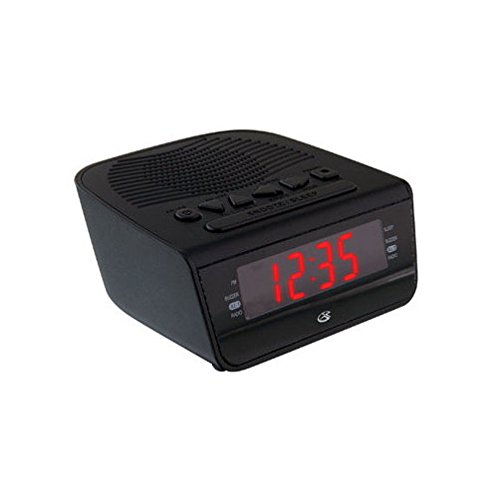
Abbildung 1: Front view of the GPX Digital AM/FM Clock Radio. This image shows the compact black unit with its digital display and control buttons.
The GPX Digital AM/FM Clock Radio (C224B) is designed for reliable timekeeping and audio entertainment. Key features include a clear multi-display clock, AM/FM radio tuner, dual alarm functionality, and a battery backup option to ensure continuous operation during power interruptions. Its compact and modern design makes it suitable for various indoor settings.
Aufstellen
1. Auspacken
Carefully remove the clock radio from its packaging. Ensure all components are present: the clock radio unit and the power adapter.
2. Stromanschluss
- Plug the power adapter into the DC input jack located on the back of the clock radio.
- Plug the other end of the power adapter into a standard wall outlet (AC 120V, 60Hz).
- The display will illuminate, indicating the unit is receiving power.
3. Installation einer Notstromversorgung (optional)
Für Notstromversorgung während eines Ausfallstages, install batteries (not included).
- Suchen Sie das Batteriefach an der Unterseite des Geräts.
- Öffnen Sie die Abdeckung des Batteriefachs.
- Insert the required batteries (e.g., 2 x AAA, check unit for specific type) according to the polarity markings (+ and -).
- Schließen Sie den Batteriefachdeckel fest.
Notiz: Batteries are for backup only and will not power the display or radio functions continuously. They preserve time and alarm settings during a power interruption.
Bedienungsanleitung
1. Uhrzeit einstellen
- Halten Sie die ZEITEINSTELLUNG Drücken Sie die Taste, bis das Display blinkt.
- Verwenden Sie die STUNDE Und MINUTE Tasten, um die Zeit einzustellen.
- Drücken ZEITEINSTELLUNG Zur Bestätigung und zum Verlassen des Zeiteinstellungsmodus erneut den Zeiteinstellungsmodus aufrufen.
2. Alarme einstellen (Alarm 1 und Alarm 2)
This unit features dual alarms, allowing you to set two independent wake-up times.
- Halten Sie die ALARM 1 EINST (oder ALARM 2 EINST) button until the alarm time flashes.
- Verwenden Sie die STUNDE Und MINUTE buttons to adjust the desired alarm time.
- Drücken ALARM 1 EINST (oder ALARM 2 EINST) again to confirm the time.
- Immediately after confirming the time, use the ALARMMODUS button to select the alarm source: SUMMER or RADIO.
- The alarm icon (e.g., AL1 or AL2) will appear on the display, indicating the alarm is active.
To turn off an alarm, press the corresponding ALARM 1 EIN/AUS (oder ALARM 2 EIN/AUS) button. The alarm icon will disappear.
3. AM/FM-Radiobetrieb
- Drücken Sie die RADIO EIN/AUS Taste, um das Radio einzuschalten.
- Drücken Sie die BAND Taste zum Umschalten zwischen AM- und FM-Bändern.
- Verwenden Sie die TUNE + or TUNE - Tasten zum manuellen Einstellen des gewünschten Senders.
- To automatically scan for the next available station, press and hold TUNE + or TUNE - für einige Sekunden.
- Stellen Sie die Lautstärke mit den LAUTSTÄRKE + or VOLUME - Schaltflächen.
- Um das Radio auszuschalten, drücken Sie die RADIO EIN/AUS erneut die Taste.
4. Schlummerfunktion
Wenn ein Alarm ertönt, drücken Sie die Taste SCHLAFEN Mit dieser Taste kann der Alarm für etwa 9 Minuten stummgeschaltet werden. Nach Ablauf der Schlummerzeit ertönt der Alarm erneut.
5. Schlaffunktion
The sleep function allows the radio to play for a set duration before automatically turning off.
- Während das Radio spielt, drücken Sie die Taste SCHLAFEN Durch wiederholtes Drücken der Taste können die verfügbaren Schlafzeiten durchgeschaltet werden (z. B. 90, 60, 30, 15 Minuten, AUS).
- Das Radio schaltet sich nach der gewählten Zeit automatisch aus.
Wartung
1. Reinigung
To clean the unit, wipe the exterior with a soft, slightly damp cloth. Do not use abrasive cleaners or solvents, as these may damage the finish. Ensure the unit is unplugged before cleaning.
2. Batteriewechsel
If the battery backup function is not working, or if the unit loses time during a power outage, the backup batteries may need replacement. Follow the "Battery Backup Installation" steps in the Setup section to replace them.
Fehlerbehebung
| Problem | Mögliche Ursache | Lösung |
|---|---|---|
| Gerät lässt sich nicht einschalten. | Netzteil nicht angeschlossen oder Steckdose defekt. | Vergewissern Sie sich, dass das Netzteil fest mit dem Gerät und einer funktionierenden Steckdose verbunden ist. Versuchen Sie es mit einer anderen Steckdose. |
| Der Alarm ertönt nicht. | Alarm nicht eingestellt, Alarmlautstärke zu niedrig oder Alarm ausgeschaltet. | Verify alarm time and source (buzzer/radio) are set correctly. Ensure alarm is activated (icon visible). Increase radio volume if alarm source is radio. |
| Schlechter Radioempfang. | Schwaches Signal oder Störungen. | Adjust the position of the unit or the antenna (if external). Move away from other electronic devices that may cause interference. |
| Zeit/Einstellungen nach Stromausfall verlorentage. | Die Notstrombatterien sind defekt oder nicht installiert. | Install fresh backup batteries or replace existing ones. |
Technische Daten
- Modell: C224B
- Energiequelle: AC 120V, 60Hz (main); Battery Powered (backup)
- Anzeigetyp: LED-Digitalanzeige
- Radiobänder: AM/FM
- Abmessungen (ca.): 5.12 Zoll B x 5.12 Zoll H
- Ungefähres Gewicht.): 3 Pfund
- Farbe: Schwarz
- Material: Plastik
Garantie und Support
For warranty information or technical support, please refer to the warranty card included with your product or visit the official GPX website. Do not attempt to repair this unit yourself, as this may void your warranty.
GPX Official WebWebsite: www.gpx.com


