1. Sicherheitshinweise
Bitte lesen Sie vor der Installation und Inbetriebnahme alle Anweisungen sorgfältig durch. Bewahren Sie diese Anleitung zum späteren Nachschlagen auf.
- WARNUNG: Stromschlaggefahr. Vor Installation oder Wartung die Stromzufuhr an der Sicherung oder dem Leitungsschutzschalter unterbrechen.
- Die Installation sollte von einem qualifizierten Elektriker oder einer Person mit elektrotechnischen Kenntnissen durchgeführt werden.
- Sicherstellung der Versorgungsvoltage is compatible with the light fixture (240 Volts as per specifications).
- Die Vorrichtung darf in keiner Weise verändert werden.
- This product is not dimmable. Do not connect to a dimmer switch.
- Keep away from babies and children to avoid danger of suffocation from packaging materials.
2. Produktüberschreitungview
The Lepro 8.7-inch 15W LED Flush Mount Ceiling Light is designed for various indoor applications, including bathrooms, kitchens, bedrooms, hallways, and laundry rooms. Its slim, waterproof, and dustproof design ensures durability and seamless integration into any interior style.
Hauptmerkmale:
- IP54 Water Resistant and Dustproof: Sealed design protects against splashing water and dust, making it suitable for damp Umgebungen wie Badezimmer.
- Schlankes Design: Blends seamlessly with any interior, ideal for low or sloped ceilings.
- Lange Lebensdauer: Integrated LED lights are rated for over 20,000 hours of operation.
- Warmweißes Licht: Provides 3000 Kelvin soft warm white illumination.
- Hohe Helligkeit & Energieeinsparung: 15 watts, 1500 lumens, equivalent to a 100-watt incandescent bulb, offering up to 88% energy savings.
- Hoher Farbwiedergabeindex (CRI > 80): Ensures colors appear natural and vibrant.
- Wide Illumination Range: Effectively illuminates an area of 9 to 12 square meters (95-130 sq. ft).
- Nicht dimmbar: This light fixture is not compatible with dimmer switches.
Spezifikationen:
| Marke | Lepro |
| Modellnummer | PR1500024-WW |
| Farbe | Warmweiß |
| Material | Plastik |
| Technische Daten | 8.7"L x 8.7"B x 1.97"H (220 mm x 220 mm x 50 mm) |
| Artikelgewicht | 1.21 Pfund (0.55 Kilogramm) |
| Stromquelle | AC |
| Bandtage | 240 Volt |
| Wastage | 15 Watt |
| Helligkeit | 1500 Lumen |
| Farbtemperatur | 3000 Kelvin |
| Farbwiedergabeindex (CRI) | >80 (typically 85) |
| Durchschnittliches Leben | 20,000 Stunden |
| Wasserbeständigkeit | IP54 (wasserdicht) |
| Installationstyp | Unterputz |
| Besonderheit | Nicht dimmbar |
3. Packungsinhalt
Vor Beginn der Installation prüfen Sie, ob alle Komponenten vorhanden und unbeschädigt sind.
- LED-Deckenleuchte zur bündigen Montage
- Montagehalterung
- Montagezubehör (Schrauben, Dübel)
- Anti-scratch pads (3 pieces)
- Bedienungsanleitung

Image: Contents of the product package, showing the light fixture and mounting hardware.
4. Installationsanweisungen
Follow these steps carefully to install your Lepro LED Flush Mount Ceiling Light. Ensure power is OFF before starting.
Video Guide:
Video: Official installation guide for Lepro ceiling lights, demonstrating the step-by-step process.
- Schritt 1: Stromzufuhr unterbrechen
Before starting any electrical work, turn off the power at the circuit breaker or fuse box to prevent electric shock.
Image: A hand switching off a wall light switch, emphasizing the importance of cutting power before installation.
- Step 2: Remove the Mounting Bracket from the Fixture
Locate the bracket lock on the back of the light fixture. Press the bracket lock to detach the mounting bracket from the lamp Körper.
Image: Diagram illustrating the removal of the mounting bracket from the light fixture by pressing a lock mechanism.
- Schritt 3: Montieren Sie die Montagehalterung
Measure the hole spacing on the mounting bracket. Depending on your ceiling type (wooden, cement, or junction box), use the appropriate screws and wall anchors to securely fix the mounting bracket to the ceiling. Ensure the bracket is flush against the ceiling.
Image: Diagram showing the mounting bracket installation process for various ceiling types, including drilling holes for cement ceilings and attaching to a junction box.
- Step 4: Apply Anti-scratch Pads
Paste the three provided anti-scratch pads to the back of the lamp body. These pads help protect the ceiling surface and ensure a snug fit.
Image: Diagram illustrating where to attach the anti-scratch pads on the rear of the light fixture.
- Schritt 5: Verbinden Sie die Drähte
Open the waterproof wires compartment on the light fixture. Insert the live (L) and neutral (N) wires from your ceiling into the corresponding polarities on the wire connector. Ensure a secure connection. Close the compartment.
Image: Diagram showing the electrical wiring connection process, highlighting the live (L) and neutral (N) terminals.
- Step 6: Attach the Light Fixture
Align the light fixture with the installed mounting bracket. Push the lamp body firmly against the ceiling and twist it clockwise until it locks securely into place. Ensure the light is flush with the ceiling.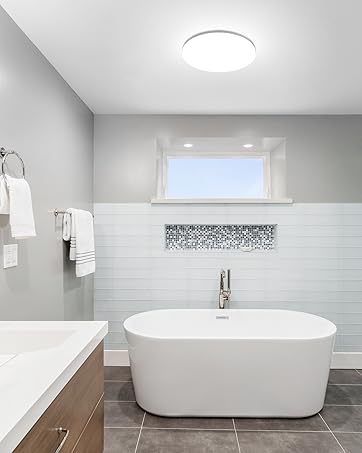
Image: Diagram showing the light fixture being attached to the mounting bracket on the ceiling.
- Schritt 7: Stromversorgung wiederherstellen
Once the light fixture is securely installed, restore power at the circuit breaker or fuse box. Test the light to ensure it functions correctly.
5. Bedienung
This Lepro LED Flush Mount Ceiling Light is designed for simple operation. Once installed and powered, it functions as a standard on/off light fixture.
- Ein-/Ausschalten: Verwenden Sie Ihren üblichen Wandschalter, um die Leuchte ein- oder auszuschalten.
- Nicht dimmbar: This fixture provides a fixed brightness and cannot be dimmed. Do not use with dimmer switches.
6. Wartung
To ensure the longevity and optimal performance of your light fixture, follow these maintenance guidelines:
- Reinigung: Disconnect power before cleaning. Wipe the fixture with a soft, dry or slightly damp Tuch. Verwenden Sie keine scharfen Chemikalien oder Scheuermittel.
- Kein Glühbirnenwechsel: This fixture uses integrated LED lights that are designed to last for 20,000 hours. There are no user-replaceable bulbs.
- Inspektion: Überprüfen Sie die Leuchte regelmäßig auf Beschädigungen oder lose Verbindungen. Sollten Sie Mängel feststellen, schalten Sie die Stromzufuhr ab und wenden Sie sich an einen qualifizierten Elektriker.
7. Fehlerbehebung
If you encounter any issues with your light fixture, refer to the following troubleshooting steps:
| Problem | Mögliche Ursache | Lösung |
|---|---|---|
| Licht geht nicht an. | Keine Stromversorgung. Wackelkontakt. Defekter Wandschalter. | Leistungsschalter/Sicherung prüfen. Ensure wires are securely connected (power off first). Testen Sie den Wandschalter mit einem anderen Gerät. |
| Licht flackert. | Wackelkontakt. Incompatible dimmer switch (if installed). | Überprüfen Sie die Kabelverbindungen (vorher Strom abschalten). Ensure no dimmer switch is used, as this fixture is not dimmable. |
| Das Licht ist nicht hell genug. | Room size exceeds recommended illumination area. Dust accumulation on the diffuser. | Consider additional lighting for larger areas. Clean the diffuser (power off first). |
8. Garantie und Support
This Lepro LED Flush Mount Ceiling Light comes with a 3 Jahr Garantie ab Kaufdatum.
For warranty claims, technical support, or any questions regarding your product, please contact Lepro customer service through the retailer where you purchased the product or visit the official Lepro webWebsite für Kontaktinformationen.
Bitte bewahren Sie Ihren Kaufbeleg zur Überprüfung der Garantie auf.


