Produkt überview
The APPS2Car Dashboard Pad Mounting Disk is designed to provide a stable, smooth, and glass-like surface for suction cup car mounts. This allows for the secure attachment of various devices such as phone mounts, GPS units, and dash cam holders, even on textured or uneven dashboard surfaces. Each pack contains three 70mm diameter disks, featuring upgraded 3M adhesive for strong and reliable adhesion.
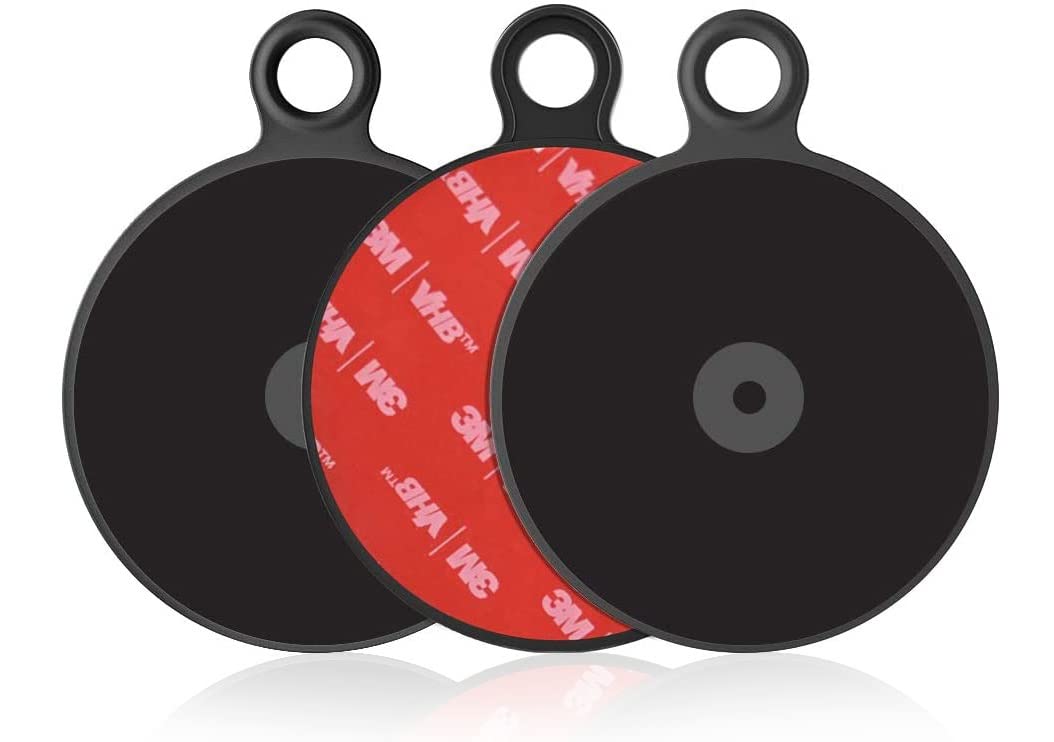
Image: Three APPS2Car Dashboard Pad Mounting Disks, highlighting their design and adhesive backing.
Im Leistungsumfang enthalten
- 3 x 70mm Dashboard Pad Mounting Disk

Image: The product packaging showing three mounting disks.
Hauptmerkmale
- Upgrade 3M Sticky Tapes: Provides smooth, glass-like surfaces for pedestals of suction cup car mounts to work more effectively.
- 3M PE foam adhesive: The adhesive at the bottom can be fixed on textured surfaces.
- Universelle Kompatibilität: Has a diameter of around 2.76 inches (70mm), applicable to most suction cup GPS/mobile holders on the market.
- Einfache Installation: No tools required for installation.
- Langlebige Materialien: Constructed from Plastic, Acrylonitrile Butadiene Styrene, and Rubber for heat-resistant and strong sticky performance.
Setup und Installation
Follow these steps for optimal adhesion and performance of your dashboard pad.
- Schritt 1: Reinigen Sie die Oberfläche. Thoroughly clean and dry the dashboard surface to remove any dust, debris, or oils. Ensure the surface is flat and suitable for adhesive application.
- Step 2: Prepare the Pad. Carefully peel the red protective film from the 3M adhesive backing of the dashboard pad.
- Step 3: Apply the Pad. Place the sticky side of the pad down onto the desired clean dashboard surface. Press firmly for at least 10 seconds to ensure a strong adhesive grip.
- Step 4: Allow Adhesion Time. For best results, allow 24 hours for the adhesive to fully cure and bond with the surface before attaching any suction cup mounts or devices.
- Step 5: Attach Suction Cup Mount. Once the pad is securely adhered, place your suction cup phone mount, GPS, or dash cam holder firmly onto the center of the mounting pad.

Image: Visual guide for the installation process of the dashboard pad.
Important Notes for 3M Adhesive
- Do not stick the 3M adhesive pad on soft, rugged, textured, or leather surfaces.
- Ensure the desired surface is clean and dry before application.
- This product is designed for one-time use. Repositioning after initial application may compromise adhesion.
- Press firmly for at least 10 seconds and allow 24 hours for adhesion before use.
- If the protective film is difficult to peel off, wet the opening with a drop of water and then slowly peel it off.

Image: Precautions and tips for handling the 3M adhesive backing.
Installationsvideo-Anleitung
Video: A short demonstration of peeling the adhesive and applying the pad to a dashboard. This video highlights the ease of application and the appearance of the pad once installed.
Bedienungsanleitung
Once the APPS2Car Dashboard Pad Mounting Disk is securely installed and the adhesive has cured (after 24 hours), you can attach any suction cup mount to its smooth surface. Simply press the suction cup firmly onto the center of the pad until it creates a vacuum seal. Ensure the suction cup is clean and free of dust for optimal grip.

Bild: Examples of various devices and mounts securely attached to the dashboard pad.
Wartung
To maintain the effectiveness of your APPS2Car Dashboard Pad Mounting Disk, keep its surface clean and free of dust or debris. Wipe gently with a soft, damp cloth if necessary. Avoid using harsh chemicals or abrasive materials that could damage the surface or adhesive.
The adhesive is designed for long-term, one-time use. If the pad needs to be removed, it may leave a residue, which can typically be cleaned with a damp paper towel or an adhesive remover like GooGone.
Fehlerbehebung
| Ausgabe | Mögliche Ursache | Lösung |
|---|---|---|
| Pad not adhering securely. | Surface is not clean, dry, or flat; insufficient pressure during application; not enough curing time. | Ensure dashboard surface is thoroughly cleaned and dried. Apply firm, even pressure for at least 10 seconds. Allow 24 hours for the adhesive to fully bond before use. Avoid soft, rugged, or textured surfaces. |
| Suction cup mount not sticking to the pad. | Suction cup or pad surface is dirty; suction cup is damaged. | Clean both the suction cup and the pad surface with a damp cloth. Ensure the suction cup is in good condition. |
| Adhesive residue left after removal. | Strong adhesive bond. | Residue can be removed with a damp paper towel or an adhesive remover such as GooGone. |
Technische Daten
| Attribut | Detail |
|---|---|
| Technische Daten | 2.9 x 2.9 x 0.06 Zoll |
| Artikelgewicht | 1.76 Unzen |
| Artikelmodellnummer | Staffel 00 |
| Hersteller | Wiiki-Tech |
| Marke | APPS2Car |
| Farbe | Schwarz |
| Material | Plastic, Acrylonitrile Butadiene Styrene, Rubber |
| Anzahl der Artikel | 3 |
| Besondere Merkmale | Heat-Resistant, Easy Installation, Strong Sticky, Universal Compatibility |
Garantie und Support
APPS2Car is committed to providing high-quality products. For any questions, concerns, or support regarding your Dashboard Pad Mounting Disk, please refer to the product listing on Amazon or contact APPS2Car customer service directly.
Visit the official APPS2Car Store for more information and products: APPS2Car Store


