1. Einleitung
This manual provides essential instructions for the safe assembly, operation, maintenance, and troubleshooting of your Craftsman Model 315.243130 Miter Saw. Please read this manual thoroughly before using the tool to ensure proper function and to prevent personal injury or damage to the saw. Keep this manual for future reference.
2. Allgemeine Sicherheitshinweise
Always follow basic safety precautions to reduce the risk of fire, electric shock, and personal injury. Familiarize yourself with all warnings and operating instructions.
- Augenschutz tragen: Always wear safety goggles or safety glasses with side shields that comply with current standards.
- Gehörschutz tragen: Während des Betriebs Ohrstöpsel oder Gehörschützer verwenden.
- Kleiden Sie sich angemessen: Do not wear loose clothing, gloves, neckties, or jewelry that can get caught in moving parts. Secure long hair.
- Arbeitsbereich instand halten: Halten Sie den Arbeitsbereich sauber, gut beleuchtet und frei von Unordnung.
- Kinder fernhalten: Do not allow children or untrained personnel near the saw during operation.
- Verwenden Sie die richtige Klinge: Only use blades designed for your miter saw and appropriate for the material being cut.
- Werkstück sichern: Immer clamp the workpiece firmly to the fence or table before cutting.
- Avoid Forcing Tool: Allow the saw to cut at its own pace. Forcing it can lead to kickback or damage.
- Stromversorgung trennen: Vor dem Einstellen von Einstellungen, dem Wechseln der Sägeblätter oder der Durchführung von Wartungsarbeiten muss die Säge immer vom Stromnetz getrennt werden.
3. Produktüberschreitungview
This section identifies the main components of your Craftsman 315.243130 Miter Saw.
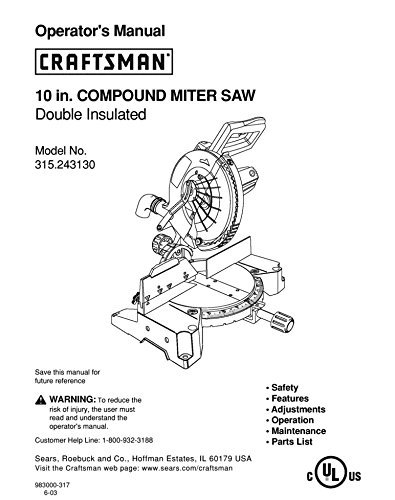
Abbildung 1: Überview of the Craftsman 315.243130 Miter Saw. Key components include the blade guard, fence, miter scale, bevel lock, and dust port.
- Motorgehäuse: Contains the motor and drive mechanism.
- Klingenschutz: Retracts during cutting and covers the blade when not in use.
- Gehrungstisch: The rotating base on which the workpiece rests.
- Zaun: Provides support for the workpiece and ensures accurate cuts.
- Miter Lock Handle: Secures the miter table at the desired angle.
- Bevel Lock Knob: Secures the saw head at the desired bevel angle.
- Staubanschluss: Connects to a dust collection system for a cleaner work environment.
- Stromschalter: Aktiviert und deaktiviert die Säge.
4. Aufbau und Montage
Follow these steps to safely set up your miter saw before initial use.
- Auspacken: Nehmen Sie alle Komponenten vorsichtig aus der Verpackung. Prüfen Sie sie auf Transportschäden.
- Montage: Securely mount the miter saw to a stable workbench or a compatible miter saw stand using appropriate bolts and washers. Ensure it is level and cannot tip.
- Klingenmontage (falls nicht vorinstalliert):
- Trennen Sie die Stromversorgung.
- Klappen Sie die untere Klingenschutzhaube hoch.
- Drücken Sie die Spindelarretiertaste.
- Use the provided wrench to loosen the blade bolt (typically left-hand thread).
- Den äußeren Flansch und die alte Klinge entfernen.
- Install the new blade with the teeth pointing in the direction of rotation (usually indicated by an arrow on the blade and saw).
- Replace the outer flange and tighten the blade bolt securely.
- Lösen Sie die Spindelarretierung.
- Einstellen des Zauns: Ensure the fence is square to the blade at 90 degrees. Adjust if necessary using a square and the provided adjustment screws.
- Checking Miter and Bevel Stops: Verify that the 0-degree miter and bevel stops are accurate. Calibrate if needed according to the specific instructions in your saw's original manual.
- Staubsammlung: Attach a dust bag or connect a vacuum system to the dust port for efficient chip removal.
5. Bedienungsanleitung
Understand the basic operations for making various cuts with your miter saw.
5.1. Making a Crosscut (90-degree)
- Ensure the miter table is locked at 0 degrees and the bevel is at 0 degrees.
- Place the workpiece firmly against the fence and flat on the miter table.
- Clamp the workpiece securely to prevent movement during the cut.
- Hold the handle firmly, depress the trigger, and allow the blade to reach full speed.
- Slowly lower the blade through the workpiece.
- Sobald der Schnitt abgeschlossen ist, lassen Sie den Auslöser los und warten Sie, bis das Sägeblatt vollständig zum Stillstand gekommen ist, bevor Sie den Sägekopf anheben.
- Entfernen Sie das Werkstück.
5.2. Making a Miter Cut
- Den Gehrungsverriegelungsgriff lösen.
- Rotate the miter table to the desired angle (e.g., 45 degrees).
- Ziehen Sie den Gehrungsverriegelungsgriff fest an.
- Follow steps 2-7 from "Making a Crosscut."
5.3. Making a Bevel Cut
- Lösen Sie den Neigungsfeststellknopf.
- Tilt the saw head to the desired bevel angle (e.g., 45 degrees).
- Ziehen Sie den Neigungsfeststellknopf fest an.
- Follow steps 2-7 from "Making a Crosscut."
6. Wartung
Regular maintenance ensures the longevity and safe operation of your miter saw. Always disconnect the saw from the power source before performing any maintenance.
- Reinigung: After each use, clear sawdust and debris from the saw, especially around the blade guard, motor vents, and miter table. Use compressed air or a brush.
- Klingeninspektion: Regularly inspect the blade for dullness, missing teeth, or cracks. Replace damaged blades immediately.
- Schmierung: Apply a light coat of machine oil to moving parts, such as the miter detent plate and pivot points, as recommended in the original manual.
- Kohlebürsten: Check carbon brushes periodically (refer to the original manual for frequency). Replace them when they are worn down to the wear limit mark.
- Netzkabel: Überprüfen Sie das Netzkabel auf Beschädigungen. Benutzen Sie die Säge nicht, wenn das Kabel ausgefranst oder durchtrennt ist.
- Befestigungsmaterial: Periodically check all nuts, bolts, and screws for tightness. Tighten as needed.
7. Fehlerbehebung
In diesem Abschnitt werden häufig auftretende Probleme behandelt, die bei Ihrer Gehrungssäge auftreten können.
| Problem | Mögliche Ursache | Lösung |
|---|---|---|
| Säge startet nicht | Kein Strom, defekter Schalter, verschlissene Kohlebürsten. | Check power connection, test outlet, inspect power cord. If problem persists, consult a qualified technician. |
| Klinge klemmt oder raucht | Dull blade, incorrect blade for material, workpiece not clamped, forcing the cut. | Replace blade, use appropriate blade, secure workpiece firmly, reduce feed rate. |
| Ungenaue Schnitte | Fence or miter/bevel stops out of adjustment, loose blade. | Calibrate fence and stops, ensure blade is securely tightened. |
| Übermäßige Vibration | Loose blade, damaged blade, saw not securely mounted. | Check blade tightness, replace damaged blade, ensure saw is firmly mounted. |
If you encounter issues not listed here or if solutions do not resolve the problem, contact Craftsman customer support or a certified service center.
8. Spezifikationen
These are general specifications for the Craftsman 315.243130 Miter Saw. Refer to the original product documentation for precise details.
- Modellnummer: 315.243130
- Klingendurchmesser: Typically 10 inches or 12 inches (verify with original manual)
- Motor: Universal motor, 120V AC, 60 Hz (spezifisch amperage/HP varies)
- Leerlaufdrehzahl: Approximately 4,800 RPM (verify with original manual)
- Miter Capacity: 0 to 45 degrees left and right
- Fasenkapazität: 0 to 45 degrees left (some models may bevel right)
- Gewicht: Varies by model configuration (refer to original manual)
9. Garantie und Kundendienst
For information regarding your product's warranty, please refer to the original purchase documentation or the official Craftsman website. This manual is a reprint and does not include specific warranty details.
For technical assistance, replacement parts, or service inquiries, please contact Craftsman customer support directly through their official channels.
- Offiziell WebWebsite: Www.craftsman.com
- Kundendienst: Weitere Informationen finden Sie im webWebsite für aktuelle Kontaktinformationen.


