Einführung
This manual provides detailed instructions for the safe installation, operation, and maintenance of your Project Source 11-Inch Flush Mount Light fixture. Please read this manual thoroughly before beginning installation and retain it for future reference. This product is designed for indoor use only.
Sicherheitshinweise
WARNUNG: Stromschlaggefahr. Vor Installation oder Wartung die Stromzufuhr an der Sicherung oder dem Leitungsschutzschalter unterbrechen.
- Alle elektrischen Anschlüsse müssen den örtlichen Vorschriften, Verordnungen oder dem National Electric Code (NEC) entsprechen.
- Wenn Sie hinsichtlich des Installationsvorgangs unsicher sind, wenden Sie sich an einen qualifizierten Elektriker.
- Installieren Sie diese Leuchte nicht in feuchten oder trockenen Umgebungen.amp Standorte.
- Ensure all wires are properly connected and secured to prevent short circuits.
- Überschreiten Sie nicht die maximale Wassermengetage wurde für diese Leuchte spezifiziert.
- Gehen Sie vorsichtig mit Glaskomponenten um, um ein Zerbrechen zu vermeiden.
Packungsinhalt
Vergewissern Sie sich vor Beginn der Installation, dass alle Komponenten vorhanden sind:
- Project Source 11-Inch Flush Mount Light Fixture (2 units)
- Mounting Hardware Kit (screws, wire nuts)
- Bedienungsanleitung (dieses Dokument)
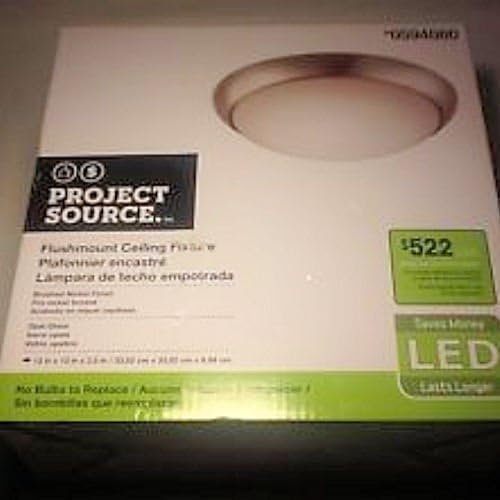
Image: The retail packaging box for the Project Source 11-Inch Flush Mount Light. The box is white with green accents, featuring an image of the light fixture and "PROJECT SOURCE" branding.
Setup und Installation
Erforderliche Werkzeuge (nicht im Lieferumfang enthalten):
- Kreuzschlitzschraubendreher
- Abisolierzangen
- Isolierband (optional)
- Schutzbrille
Installationsschritte:
- Strom ausschalten: Locate the circuit breaker or fuse box that controls the power to the light fixture location. Turn off the power completely before proceeding.
- Alte Armatur entfernen (falls zutreffend): Vorhandene Leuchten sollten vorsichtig entfernt werden, wobei die Verdrahtungsanschlüsse zu beachten sind.
- Verkabelung vorbereiten: If necessary, strip approximately 1/2 inch of insulation from the ends of the house supply wires.
- Kabel anschließen:
- Verbinden Sie Schwarz Kabel von der Leuchte zum Schwarz (hot) wire from the ceiling box using a wire nut.
- Verbinden Sie Weiß Kabel von der Leuchte zum Weiß (neutral) wire from the ceiling box using a wire nut.
- Verbinden Sie grünes oder blankes Kupfer Erdungsdraht von der Leuchte zum grünes oder blankes Kupfer ground wire from the ceiling box using a wire nut.
Ensure all wire nuts are securely tightened. Wrap electrical tape around wire nuts for added security if desired.
- Montagevorrichtung: Carefully tuck all wires into the junction box. Align the fixture's mounting holes with the screws on the junction box or mounting bracket. Secure the fixture to the ceiling using the provided screws.
- Install Glass Diffuser: Gently place the glass diffuser into the fixture and secure it according to the fixture's design (e.g., twist-lock, spring clips, or decorative nuts).
- Strom wiederherstellen: Turn the power back on at the circuit breaker or fuse box. Test the light fixture to ensure it functions correctly.

Image: A pair of Project Source 11-Inch Flush Mount Light fixtures. Each fixture features a brushed nickel base and a domed, frosted white glass diffuser, designed to provide soft, diffused light.
Bedienungsanleitung
The Project Source 11-Inch Flush Mount Light is designed for simple operation. Once properly installed and wired, the light fixture is controlled by a standard wall switch connected to the circuit. Flip the wall switch to the "ON" position to illuminate the fixture, and to the "OFF" position to turn it off.
Note: This fixture uses integrated LED technology and does not require bulb replacement.
Wartung
Um die Langlebigkeit und das Aussehen Ihrer Leuchte zu gewährleisten, befolgen Sie diese einfachen Wartungshinweise:
- Reinigung: Vor der Reinigung sicherstellen, dass die Stromzufuhr zur Leuchte am Sicherungskasten abgeschaltet ist. Verwenden Sie ein weiches, trockenes oder leicht angefeuchtetes Tuch.amp cloth to wipe down the exterior surfaces. Do not use abrasive cleaners, solvents, or polishes as they may damage the finish or glass.
- Glaspflege: The frosted glass diffuser can be carefully removed for cleaning if necessary. Wash with mild soap and water, rinse thoroughly, and dry completely before reattaching.
- Kein Glühbirnenwechsel: This fixture features integrated LED components. There are no bulbs to replace. If the light stops working, refer to the Troubleshooting section.
Fehlerbehebung
If your light fixture is not functioning as expected, consult the following common issues and solutions:
| Problem | Mögliche Ursache | Lösung |
|---|---|---|
| Licht geht nicht an. |
|
|
| Das Licht flackert oder wird schwächer. |
|
|
| Der Glasdiffusor ist locker. |
|
|
Wenn das Problem nach dem Ausprobieren dieser Lösungen weiterhin besteht, wenden Sie sich bitte an einen qualifizierten Elektriker oder an den Kundendienst.
Technische Daten
| Besonderheit | Detail |
|---|---|
| Marke | Projektquelle |
| Modell | 11-Inch Flush Mount Light (2-Pack) |
| Technische Daten | 11 x 11 x 3 Zoll |
| Artikelgewicht | 4.1 Pfund |
| Material | Glas |
| Maximal kompatibles Wattage | 120 Watt |
| Art der Glühbirne | Integrierte LED |
| Stil | Klassiker |
Garantie und Support
This product is a refurbished item. Please refer to the seller's specific return and warranty policy at the point of purchase for details regarding coverage and support for refurbished products. General support for Project Source products may be available through their official channels.
Für technische Unterstützung oder weitere Anfragen wenden Sie sich bitte direkt an den Händler oder Hersteller.


