1. Einleitung
This document serves as the instruction manual for the Bousnic Replacement Remote, designed for use with Bousnic P-Collar 320 and P-Collar 320B dog training receiver collars. This product includes only the remote control. Receiver collars, charging cables, and other accessories are not included and must be acquired separately if needed.
The remote features an intuitive LCD display and provides various training modes to assist in effective dog training.
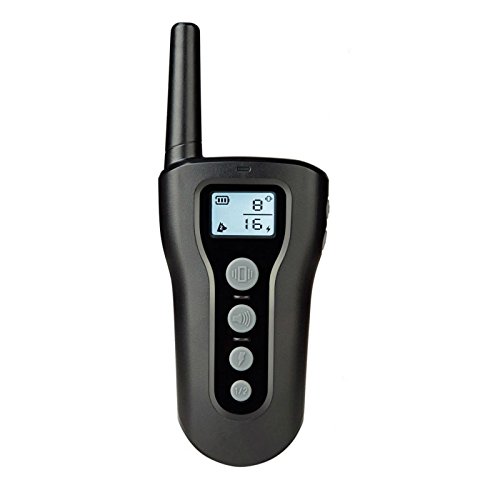
Image: Bousnic Replacement Remote Control with LCD display.
2. Sicherheitshinweise
- Wichtiger Hinweis: Die Fernbedienung ist nicht wasserdicht. To prevent damage, keep it away from water and moisture.
- Ensure the remote is handled with care to avoid drops or impacts that could damage internal components.
- Store the remote in a safe place, out of reach of pets, to prevent chewing or damage.
3. Einrichtung
The Bousnic Replacement Remote comes with a built-in Lithium Polymer battery. Before first use, it is recommended to fully charge the remote. A charging cable is not included with this replacement remote.
Aufladen der Fernbedienung
- Connect a compatible charging cable (not included) to the remote's charging port.
- Stecken Sie das andere Ende des Ladekabels in ein USB-Netzteil (nicht im Lieferumfang enthalten) oder in einen USB-Anschluss Ihres Computers.
- The battery indicator on the LCD display will show charging status. Once fully charged, disconnect the remote from the charger.
4. Anweisungen zum Koppeln
To ensure proper functionality, the replacement remote must be paired with your existing Bousnic receiver collar. Follow these steps:
- Turn on the remote and select the desired channel (e.g., channel 1 or 2).
- Turn off the receiver collar by pressing and holding its power button until the red indicator light turns off.
- Press and hold the receiver collar's power button for a few seconds until the green light on the receiver starts flashing. This indicates the receiver has entered pairing mode.
- While the receiver's green light is flashing, press either the beep button or the vibration button on the remote.
- Press the beep button or the vibration button again to confirm successful pairing. If paired correctly, you will hear a beep tone or feel a vibration from the receiver collar.

Image: Illustration of receiver collar modes (Beep, Vibration, Static Shock).
5. Bedienungsanleitung
The Bousnic remote offers multiple training modes to suit your dog's needs. The LCD display shows the selected mode, intensity level, and battery status.
Verfügbare Modi:
- Vibrationsmodus: Delivers a gentle vibration to the receiver collar. The intensity can typically be adjusted.
- Piepmodus: Emits an audible tone from the receiver collar. This is often used as a warning or for positive reinforcement.
- Statischer Schockmodus: Provides a static stimulation. The intensity levels are adjustable to ensure humane training. Use this mode responsibly and at the lowest effective level.
Switching Modes and Adjusting Intensity:
Refer to the buttons on your remote for mode selection and intensity adjustment. Typically, there are dedicated buttons for each mode and up/down buttons to change intensity levels, which are displayed on the LCD screen.

Image: Bousnic remote control demonstrating a 1000 ft control range.
6. Wartung
- Reinigung: Reinigen Sie die Fernbedienung mit einem weichen, trockenen Tuch. Verwenden Sie keine scharfen Chemikalien oder Scheuermittel.
- Lagerung: Bewahren Sie die Fernbedienung bei Nichtgebrauch an einem kühlen, trockenen Ort auf. Vermeiden Sie extreme Temperaturen.
- Batteriepflege: To prolong battery life, avoid fully discharging the remote frequently. Charge it regularly, especially if it will be stored for an extended period.
7. Fehlerbehebung
Fernbedienung reagiert nicht:
- Batterie prüfen: Ensure the remote's battery is sufficiently charged. Recharge if necessary.
- Wake Up Remote: Some remotes may enter a sleep mode to conserve battery. Press any button to wake it up before attempting to use a training function.
Kopplungsprobleme:
- Repeat Pairing Steps: Carefully follow the pairing instructions in Section 4 again. Ensure the receiver collar is in pairing mode (green light flashing) when you press a function button on the remote.
- Empfängerbatterie prüfen: Ensure the receiver collar has sufficient battery power.
- Nähe: Ensure the remote and receiver collar are close to each other during the pairing process.
8. Spezifikationen
| Besonderheit | Detail |
|---|---|
| Marke | BOUSNIC |
| Kompatible Modelle | P-Collar 320, P-Collar 320B |
| Artikelgewicht | 3.2 Unzen |
| Abmessungen der Artikelverpackung (L x B x H) | 6.61 x 4.45 x 1.81 Zoll |
| Batterien | 1 Lithium-Polymer-Akku (im Lieferumfang enthalten) |
| Im Lieferumfang enthaltene Komponenten | Remote Control (only) |
| Hersteller | Bousnic |
| Datum der ersten Verfügbarkeit | 8. April 2018 |
9. Garantie und Support
For information regarding product warranty, returns, or technical support, please refer to the original product packaging or contact Bousnic customer service directly. Contact details can typically be found on the manufacturer's official webWebsite oder über Ihre Einkaufsplattform.


