Einführung
This manual provides detailed instructions for the installation, operation, and maintenance of your Aurora 50 Inch Off Road LED Light Bar, Model ALO-S1-50-P7E7J. Please read this manual thoroughly before installation and use to ensure proper function and safety.
Produkt überview
The Aurora 50 Inch Off Road LED Light Bar is designed for demanding off-road conditions, providing powerful illumination with a combination beam pattern. It features a robust construction and includes a comprehensive wiring harness for installation.
Hauptmerkmale:
- Hohe Leistung: Produces 21,500 lumens with 250 watts of power.
- Langlebige Konstruktion: IP69 rated housing made from high-quality 6063 aluminum, paired with a UV and scratch-resistant GE Lexan lens.
- Sichere Versiegelung: Sealed with 316 stainless steel screws for an impenetrable seal, suitable for extreme off-road environments.
- Complete Wiring Harness: Includes an on/off switch with LED indicator light, in-line fuse, and a 12V 40A relay for professional installation.
- Fortschrittliche LED-Technologie: Utilizes 5 Watt Cree LED Chips for efficient and powerful lighting.

Abbildung 1: Aurora 50 Inch Off Road LED Light Bar. This image displays the full length of the LED light bar, showcasing its sleek black housing and the array of individual LED lights.
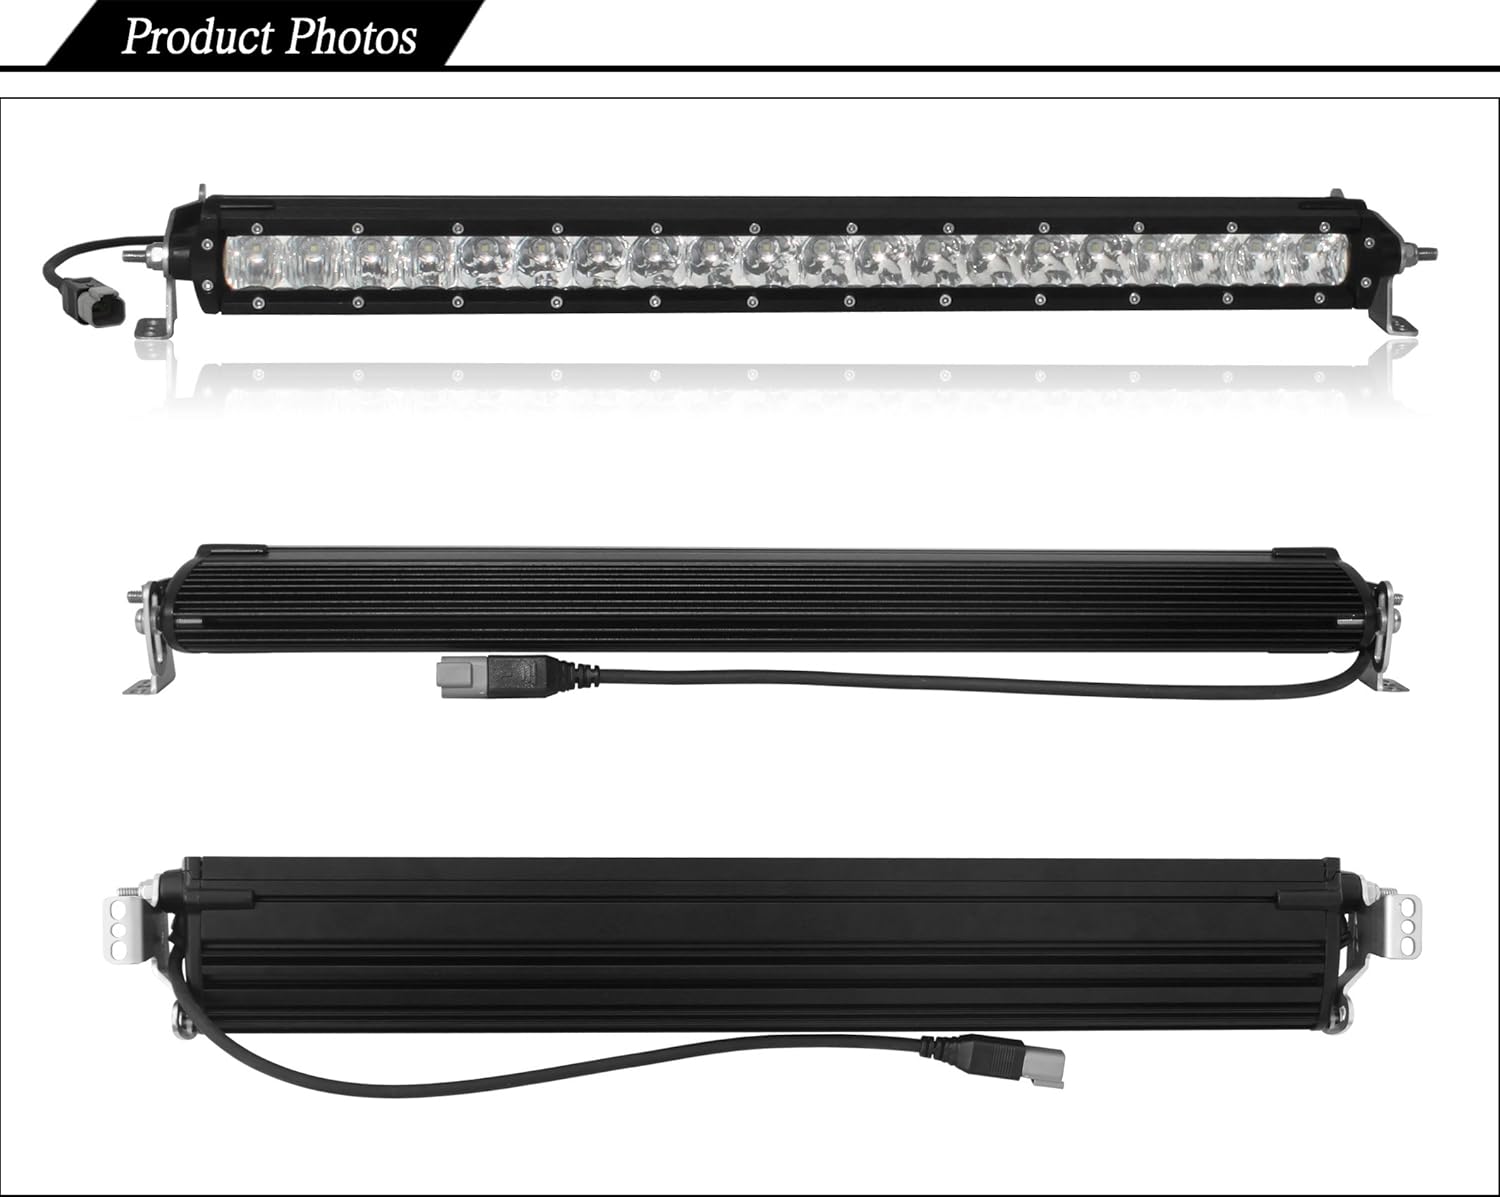
Abbildung 2: Aurora 50 Inch LED Light Bar from various angles. This image provides detailed views of the light bar's front, top, and bottom, highlighting its construction and design.
Technische Daten

Abbildung 3: Key specifications of the Aurora LED Light Bar. This image provides a visual summary of the product's technical details, including size, beam type, dimensions, number of LEDs, wattage, amperage, lumens, and IP rating.
| Besonderheit | Detail |
|---|---|
| Modellnummer | ALO-S1-50-P7E7J |
| Größe | 50 Zoll |
| Abmessungen (L x B x H) | 51.9 x 3.2 x 1.8 Zoll |
| Gewicht | 14.3 Pfund |
| Strahltyp | Kombination |
| Anzahl der LEDs | 50 |
| LED-Typ | Cree XTE 5 Watt |
| Wastage | 250 Watt |
| Betriebslautstärketage | 10-30V DC |
| Amp Ziehen | 12.4 Amps |
| Lumen | 21,500 lm |
| IP-Schutzart | IP69 (Waterproof & Shock Resistant) |
| Lebensdauer | 50,000 Stunden |
| Betriebstemperatur | -40 bis 145 Grad Fahrenheit |
| Gehäusematerial | 6063 Aluminium |
| Linsenmaterial | GE Lexan (UV- und kratzfest) |
| Hardware-Material | 316 Edelstahl |
| Sicherheitsbewertung | SAE Certified |
| Besondere Merkmale | Deutsch connector, Integrated Temperature protection |

Abbildung 4: Dimensional chart for Aurora S1 Series light bars. This image illustrates the length and width measurements for various models within the S1 series, including the 50-inch version, which helps in planning mounting locations.
Setup und Installation
Proper installation is crucial for the performance and longevity of your LED light bar. It is recommended that installation be performed by a qualified professional. Always disconnect the vehicle's battery before beginning any electrical work.
Enthaltene Komponenten:
- Aurora 50 Inch LED Light Bar
- Montagehalterungen (vormontiert oder separat)
- Deluxe Wiring Harness (with on/off switch, LED indicator, in-line fuse, 12V 40A relay)
- Necessary Hardware (bolts, nuts, washers, Allen wrench)

Abbildung 5: Example of a mounting bracket and an Allen wrench. This image shows the type of bracket used for securing the light bar and the tool required for adjustment or installation.
Installationsschritte:
- Montageort wählen: Select a secure and appropriate location on your vehicle for the light bar. Ensure it does not obstruct vision or airflow.
- Montagehalterungen anbringen: Securely fasten the provided mounting brackets to the light bar. Use the included hardware and Allen wrench for adjustment.
- Montage der Lichtleiste: Position the light bar with attached brackets onto the chosen location on your vehicle. Mark and drill any necessary holes. Secure the light bar firmly using appropriate fasteners.
- Verlegung des Kabelbaums: Carefully route the deluxe wiring harness from the light bar to the vehicle's battery and the desired switch location. Ensure the wiring is protected from sharp edges, heat, and moving parts.
- Elektrische Komponenten anschließen:
- Connect the Deutsch connector from the light bar to the wiring harness.
- Connect the positive (+) wire of the harness to the positive terminal of the vehicle's 12V battery.
- Connect the negative (-) wire of the harness to the negative terminal of the vehicle's 12V battery or a suitable ground point on the chassis.
- Install the in-line fuse as close to the battery as possible.
- Mount the on/off switch in an accessible location within the vehicle's cabin.
- Stellen Sie sicher, dass alle Verbindungen sicher und ordnungsgemäß isoliert sind.
- Testfunktionalität: Reconnect the vehicle's battery. Activate the on/off switch to verify the light bar operates correctly.
- Strahl anpassen: If necessary, adjust the angle of the light bar to achieve the desired beam pattern.
Wichtiger Sicherheitshinweis: Always ensure that the light bar is securely mounted and all electrical connections are properly made to prevent hazards.
Bedienungsanleitung
The Aurora LED Light Bar is designed for straightforward operation.
- Einschalten: Locate the installed on/off switch. Press the switch to the "ON" position. The LED indicator on the switch will illuminate, and the light bar will turn on.
- Ausschalten: Press the switch to the "OFF" position. The LED indicator will turn off, and the light bar will cease operation.
Notiz: This light bar is intended for off-road use only. Check local regulations regarding the use of auxiliary lighting on public roads.
Wartung
Regular maintenance will help ensure the longevity and optimal performance of your Aurora LED Light Bar.
- Reinigung: Periodically clean the lens and housing with a soft cloth and mild soap and water. Avoid abrasive cleaners or harsh chemicals that could damage the lens or finish.
- Inspektion: Regularly inspect the mounting hardware for tightness and the wiring harness for any signs of wear, fraying, or damage. Tighten any loose bolts and repair or replace damaged wiring as needed.
- Steckerprüfung: Ensure the Deutsch connector remains clean and free of debris to maintain a secure electrical connection.
Fehlerbehebung
If you encounter issues with your Aurora LED Light Bar, refer to the following troubleshooting guide:
| Problem | Mögliche Ursache | Lösung |
|---|---|---|
| Die Lichtleiste schaltet sich nicht ein. |
|
|
| Die Lichtleiste ist schwach oder flackert. |
|
|
| Feuchtigkeit im Inneren der Linse. |
|
|
Garantie und Support
For information regarding product warranty, returns, or technical support, please refer to the original purchase documentation or contact the seller directly. Keep your proof of purchase for any warranty claims.
The product is manufactured by Aurora LED Lighting.


