1. Einleitung
Welcome to the user manual for your Modecom Oberon Pro Glass USB 3.0 White PC Case. This manual provides essential information for the proper installation, operation, and maintenance of your computer chassis. Please read this manual thoroughly before beginning assembly to ensure correct setup and to prevent damage to your components or the case itself.
Sicherheitsvorkehrungen:
- Vor dem Einbau oder Ausbau von Bauteilen muss immer die Stromversorgung von der Steckdose getrennt werden.
- Handle components with care to avoid electrostatic discharge (ESD). Consider using an anti-static wrist strap.
- Halten Sie Kleinteile und Verpackungsmaterialien von Kindern fern.
- Sorgen Sie für ausreichende Belüftung rund um das Gehäuse, um eine Überhitzung zu vermeiden.
2. Produktüberschreitungview
The Modecom Oberon Pro Glass is a stylish mid-tower PC case designed to house your computer components. It features a tempered glass side panel for showcasing your build and a clean white finish. The front panel includes convenient USB 3.0 ports for high-speed data transfer.
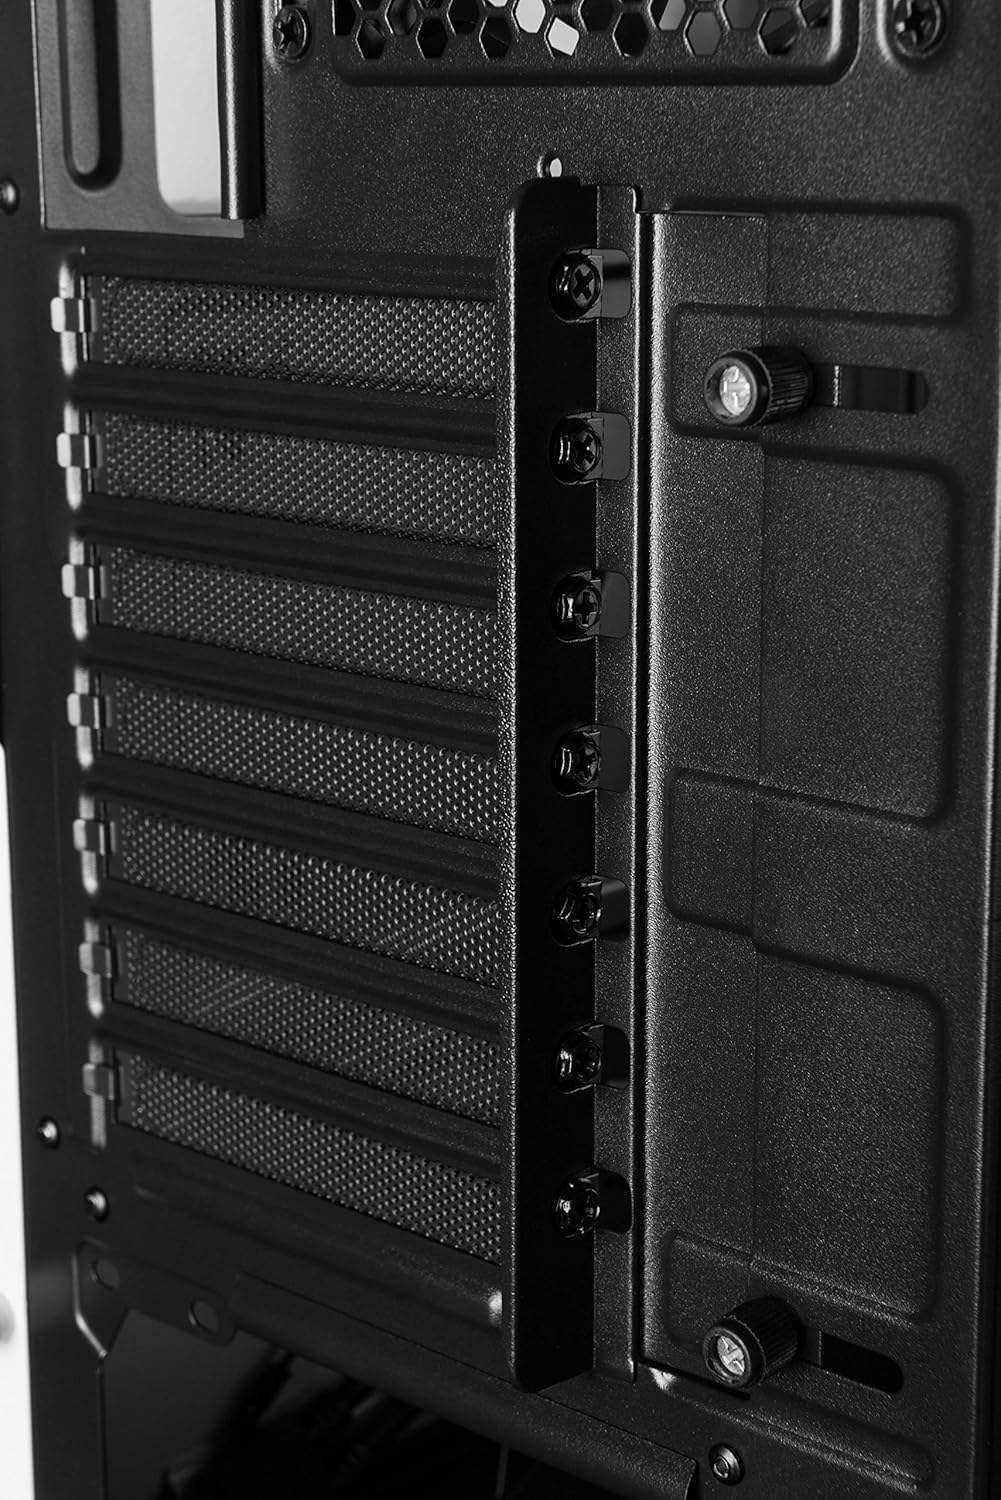
Abbildung 2.1: Vorne rechts view of the Modecom Oberon Pro Glass PC Case. This image displays the white exterior, the front panel with ventilation, and the top-mounted I/O ports including USB 3.0.
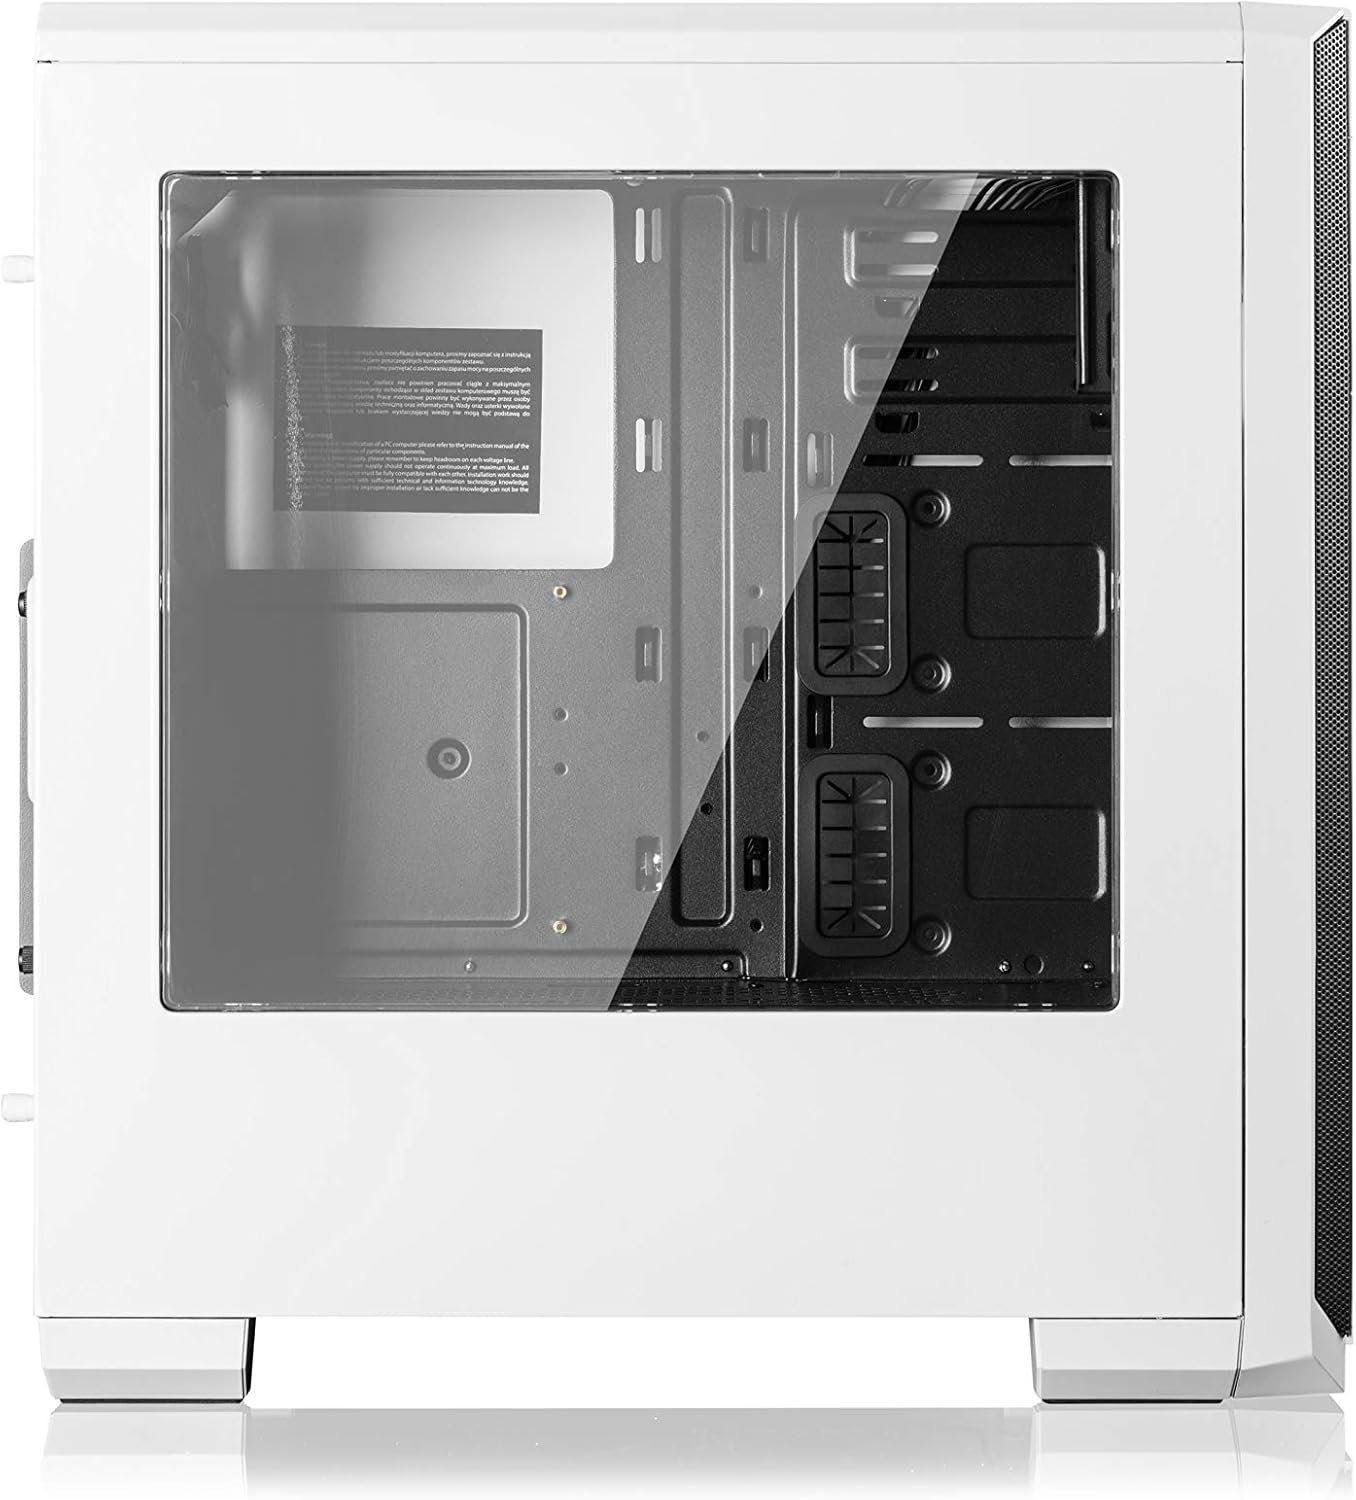
Abbildung 2.2: Seite view of the Modecom Oberon Pro Glass PC Case, highlighting the tempered glass side panel. This panel allows for a clear view of the internal components when installed.
3. Einrichtung und Installation
Follow these steps to install your computer components into the Modecom Oberon Pro Glass PC Case.
3.1. Auspacken und Erstinspektion
- Nehmen Sie das PC-Gehäuse vorsichtig aus der Verpackung.
- Prüfen Sie das Gehäuse auf Transportschäden. Kontaktieren Sie Ihren Händler umgehend, falls Sie Schäden feststellen.
- Remove the tempered glass side panel by unscrewing the thumb screws, typically located at the rear corners of the panel. Set the panel aside on a soft, flat surface to prevent scratches.
3.2. Motherboard-Installation

Abbildung 3.1: Innere view of the Modecom Oberon Pro Glass PC Case, showing the motherboard tray, drive bays, and cable management cutouts.
- Install the I/O shield that came with your motherboard into the designated opening at the rear of the case.
- Ensure the motherboard standoffs are correctly aligned for your motherboard's form factor (ATX, Micro ATX, or ITX). Install additional standoffs if necessary.
- Setzen Sie das Motherboard vorsichtig auf die Abstandshalter und achten Sie dabei auf die Ausrichtung der Schraubenlöcher.
- Befestigen Sie das Motherboard mit den mitgelieferten Schrauben. Nicht zu fest anziehen.
3.3. Installation des Netzteils (PSU)
- Position your PSU in the dedicated compartment, typically at the bottom rear of the case.
- Align the screw holes on the PSU with those on the case's rear panel.
- Secure the PSU with the provided screws.
3.4. Installation des Speichermediums (HDD/SSD)
- Locate the 3.5" HDD bays and 2.5" SSD mounting points within the case.
- For 3.5" HDDs, slide the drive into a bay and secure it with screws or tool-less clips if available.
- For 2.5" SSDs, mount them to the designated trays or screw points, typically behind the motherboard tray or in specific drive cages.
3.5. Expansion Card Installation (GPU, PCIe cards)

Abbildung 3.2: Hinterer Innenraum view of the Modecom Oberon Pro Glass PC Case, illustrating the expansion slot covers and thumb screws for securing PCIe cards.
- Remove the necessary expansion slot covers from the rear of the case, corresponding to your card's slot on the motherboard.
- Insert your expansion card (e.g., graphics card) firmly into the PCIe slot on the motherboard.
- Secure the card to the case with the provided screws or retention mechanism.
3.6. Front Panel Connector Installation
- Connect the front panel cables (USB 3.0, HD Audio, Power Switch, Reset Switch, Power LED, HDD LED) to their respective headers on your motherboard. Refer to your motherboard manual for exact pin layouts.
3.7. Kabelmanagement
- Nutzen Sie die Kabeldurchführungen und Befestigungspunkte hinter dem Mainboard-Tray, um die Kabel ordentlich zu verlegen. Dies verbessert die Luftzirkulation und die Optik.
- Once all components are installed and cables managed, reattach the tempered glass side panel and secure it with the thumb screws.
4. Bedienung
After successful installation, your PC is ready for operation.
- Einschalten: Drücken Sie den Netzschalter auf der Oberseite des I/O-Panels des Gehäuses.
- Using Front Panel Ports: The front panel includes USB 3.0 ports and audio jacks. Connect your USB devices (e.g., flash drives, external hard drives) to the USB ports for data transfer. Plug your headphones or microphone into the respective audio jacks.
5. Wartung
Regelmäßige Wartung trägt dazu bei, die optimale Leistung und Langlebigkeit Ihrer PC-Komponenten zu gewährleisten.
- Staubfilter: Periodically remove and clean the dust filters (if present) to maintain good airflow and prevent dust buildup inside the case. Use compressed air or a soft brush.
- Außenreinigung: Wischen Sie die Außenflächen des Gehäuses mit einem weichen, fusselfreien Tuch ab.amp Mit einem Tuch abwischen. Vermeiden Sie scheuernde Reiniger oder Lösungsmittel, die die Oberfläche oder das gehärtete Glas beschädigen könnten.
- Gehärtetes Glaspaneel: Clean the tempered glass with a glass cleaner and a microfiber cloth to avoid streaks and scratches.
6. Fehlerbehebung
Sollten Probleme auftreten, beachten Sie bitte die folgenden grundlegenden Schritte zur Fehlerbehebung:
- System schaltet sich nicht ein:
- Stellen Sie sicher, dass das Netzteil eingeschaltet und ordnungsgemäß an die Wandsteckdose angeschlossen ist.
- Überprüfen Sie, ob das Netzschalterkabel an der Vorderseite korrekt mit dem Anschluss auf dem Motherboard verbunden ist.
- Überprüfen Sie alle Stromanschlüsse an das Motherboard und die Komponenten.
- USB-Anschlüsse funktionieren nicht:
- Confirm that the front panel USB 3.0 cable is securely connected to the corresponding header on the motherboard.
- Test with different USB devices.
- Übermäßiger Lärm:
- Identify the source of the noise (e.g., case fans, CPU cooler fan, GPU fan).
- Ensure all fans are free from obstructions and properly secured.
- Clean any dust buildup on fans.
Bei komplexeren Problemen konsultieren Sie bitte die Handbücher Ihrer Komponenten oder suchen Sie professionelle Hilfe.
7. Spezifikationen
| Besonderheit | Beschreibung |
|---|---|
| Marke | Modecom |
| Modellname | Oberon Pro Glass |
| Modellnummer | AT-OBERON-PG-20-000000-0002 |
| Gehäusetyp | Mittelturm |
| Farbe | Weiß |
| Material | Polycarbonat (PC) |
| Kompatible Mainboards | ATX, Micro ATX, ITX |
| Front I / O Ports | USB 3.0, Audio In/Out |
| Stromversorgung | W/O PSU (Power Supply Unit not included) |
| Artikelgewicht | 2 Kilogramm |
| Internationaler Artikelcode | 05901885248370 |
8. Garantie und Support
Garantieinformationen:
Modecom provides a guarantee of spare parts availability for 2 years from the date of purchase. This ensures that essential components for repair or replacement will be accessible within this period.
Kundendienst:
For technical assistance, warranty claims, or further inquiries, please refer to the official Modecom website or contact your local retailer where the product was purchased. Ensure you have your product model number and proof of purchase available when seeking support.


