Einführung
The Sharp Atomic Clock provides precise timekeeping and temperature monitoring for your home or office. Featuring a large, easy-to-read display, this clock automatically synchronizes with the atomic time signal (WWVB) broadcast from Fort Collins, Colorado, ensuring accuracy without manual adjustments. It also includes a wireless outdoor sensor to display both indoor and outdoor temperatures.
Produkteigenschaften
- Atomzeitgenauigkeit: Automatically synchronizes with the WWVB atomic time signal for precise timekeeping.
- Jumbo 3" Easy-to-Read Numbers: Large digital display for clear visibility of time, date, and temperature.
- Indoor/Outdoor Temperature Display: Monitors both indoor ambient temperature and outdoor temperature via a wireless sensor.
- Drahtloser Außensensor: Transmits outdoor temperature data to the main unit.
- Batteriebetrieben: Operates on batteries for flexible placement (batteries not included).
- Automatische Sommerzeitumstellung (DST): Automatically adjusts for daylight saving time changes.
- Wählbare Zeitzonen: Allows selection of various US time zones.
- 12/24-Stunden-Format: Option zur Anzeige der Uhrzeit im 12-Stunden- oder 24-Stunden-Format.
- Celsius/Fahrenheit Display: Wechseln Sie zwischen den Temperatureinheiten Celsius und Fahrenheit.
Packungsinhalt
Bitte vergewissern Sie sich, dass alle benötigten Teile vorhanden sind, bevor Sie mit der Einrichtung fortfahren.
- Sharp Atomic Clock Main Unit
- Drahtloser Außensensor
- Bedienungsanleitung
Note: Batteries are not included. The main unit requires 2 AA batteries, and the outdoor sensor requires 2 AA batteries.
Aufstellen
1. Einlegen der Batterie
- Öffnen Sie das Batteriefach auf der Rückseite der Hauptuhreinheit.
- Legen Sie 2 AA-Batterien unter Beachtung der richtigen Polarität (+ und -) ein.
- Schließen Sie den Batteriefachdeckel.
- Open the battery compartment on the wireless outdoor sensor.
- Insert 2 AA batteries into the outdoor sensor, observing the correct polarity.
- Close the outdoor sensor's battery compartment cover.
2. Erste Synchronisierung und Einstellungen
After battery installation, the clock will attempt to receive the WWVB atomic time signal and connect to the outdoor sensor. This process may take several minutes or up to 24 hours depending on your location and environmental interference.
- Zeitzone: Press the "TIME ZONE" button (often labeled "UP TIME ZONE") on the back of the clock to cycle through available time zones (PST, MST, CST, EST). Select your desired time zone.
- 12/24-Stunden-Format: Press the "12/24" button to switch between 12-hour and 24-hour display.
- Celsius Fahrenheit: Press the "°C/°F" button to toggle between Celsius and Fahrenheit temperature display.
- Outdoor Sensor Pairing: If the outdoor temperature does not appear, press the "CHANNEL" button on the main unit to search for the sensor signal. Ensure the outdoor sensor is within range and not obstructed.
For optimal signal reception, place the clock away from large metal objects, electronic devices, and areas with heavy concrete or brick walls. The outdoor sensor should be placed in a shaded, dry location, protected from direct sunlight and precipitation, for accurate readings.
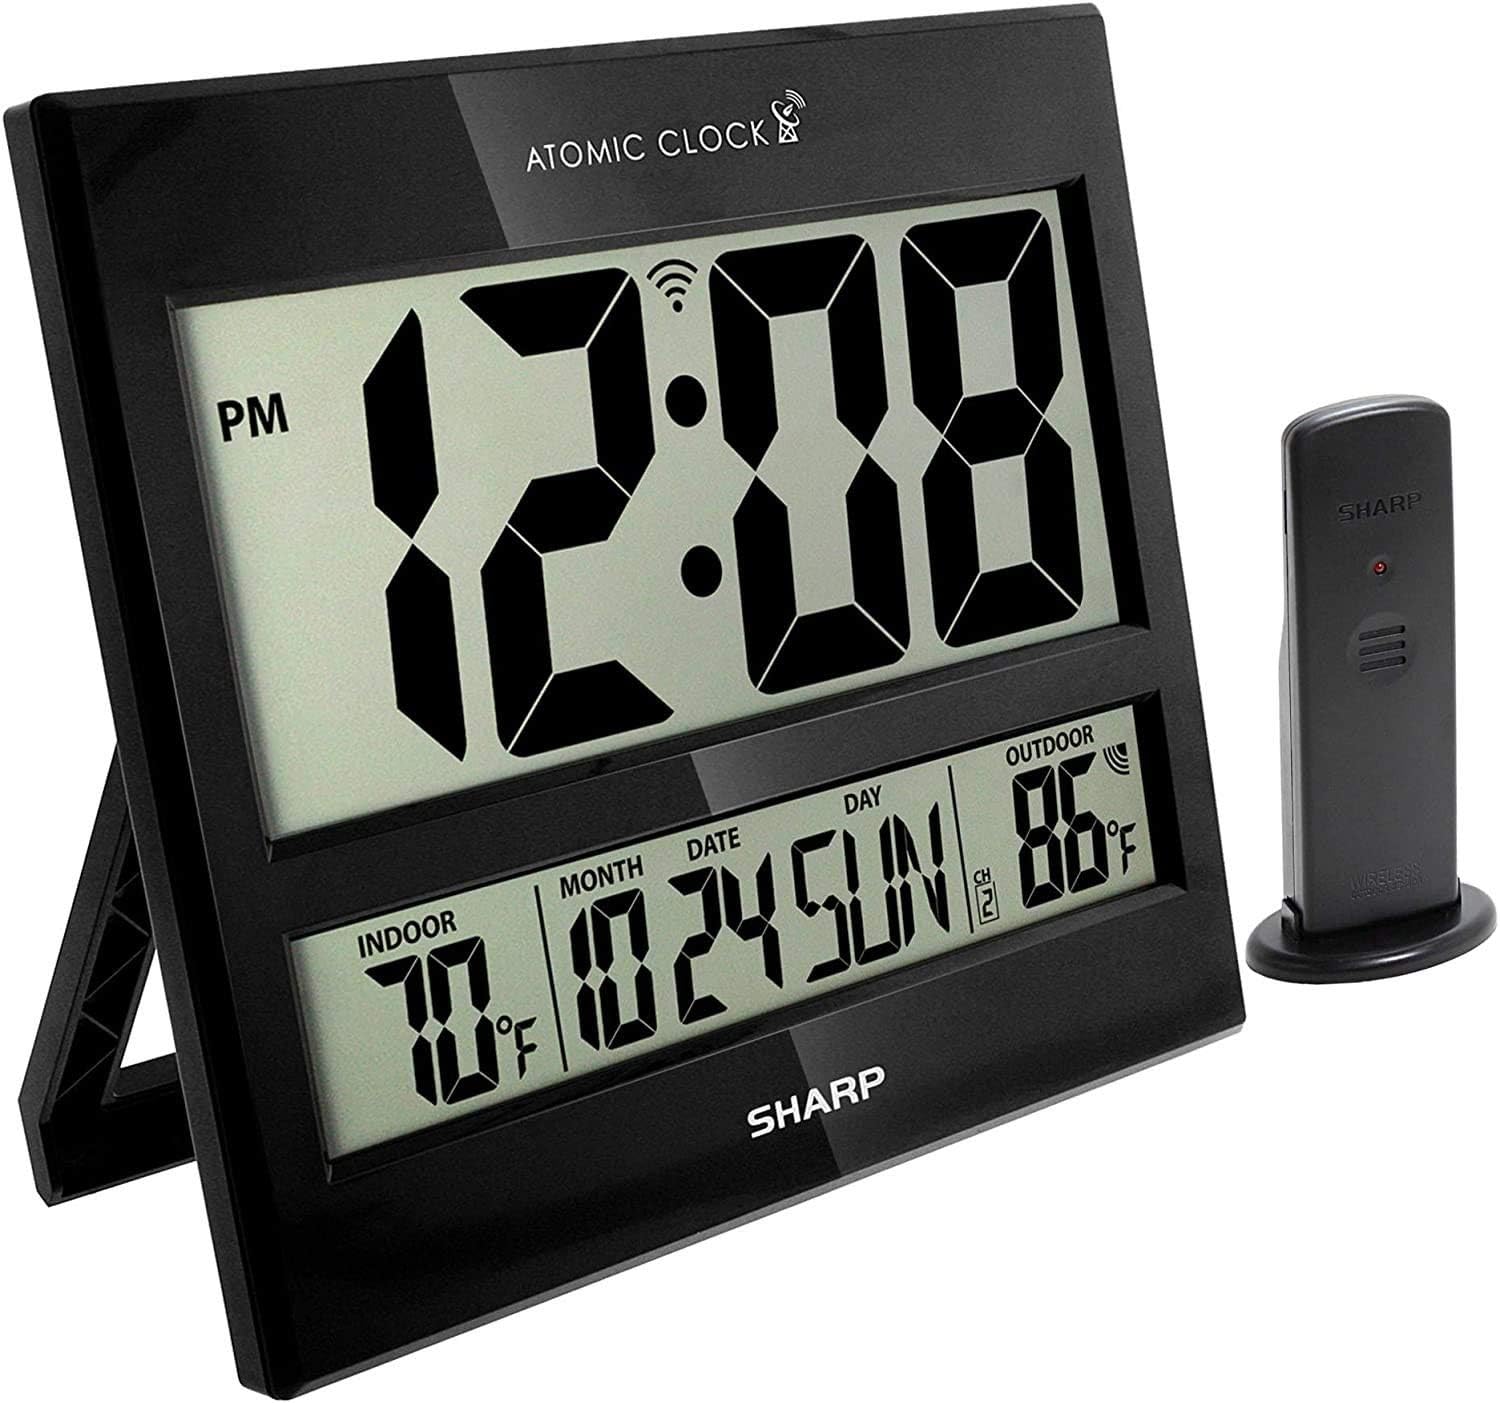
Image: The Sharp Atomic Clock main unit displaying time, indoor temperature, date, and outdoor temperature, alongside its wireless outdoor sensor.
Betrieb
Informationen anzeigen
The clock's large LCD screen displays the following information:
- Zeit: Current time in selected 12-hour or 24-hour format.
- PM-Indikator: Displays "PM" for afternoon hours in 12-hour format.
- Atomsignalindikator: Shows the status of the WWVB atomic time signal reception.
- Innentemperatur: Aktuelle Temperatur, gemessen von der Haupteinheit.
- Month/Date/Day: Aktuelle Kalenderinformationen.
- Außentemperatur: Current temperature measured by the wireless outdoor sensor.
- Außensensorkanal: Indicates the channel the outdoor sensor is transmitting on.
- Anzeige für niedrigen Batteriestand: An icon will appear when batteries are low and need replacement.
Tastenfunktionen (Rückseite)
| Taste | Funktion |
|---|---|
| KALENDER | Press and hold for 2 seconds to manually set calendar (Year, Month, Date, Language). Use UP/DOWN buttons to change values. |
| ZEIT | Press and hold for 2 seconds to manually set time (DST ON/OFF, Hour, Minute). Use UP/DOWN buttons to change values. |
| 12/24 | Schaltet zwischen 12-Stunden- und 24-Stunden-Zeitanzeige um. |
| KANAL | Press to switch between outdoor sensor channels (1, 2, 3). Press and hold for 2 seconds to pair with the outdoor sensor. |
| ° C / ° F | Schaltet zwischen Celsius- und Fahrenheit-Temperaturanzeige um. |
| WELLE | Initiates a manual search for the WWVB atomic time signal. |
| ZURÜCKSETZEN | Resets the clock to factory default settings. Requires a pointed object (e.g., paperclip). |
| UP / TIME ZONE | Increases values during manual setting. Press to cycle through time zones. |
| RUNTER | Decreases values during manual setting. |
Wartung
- Batteriewechsel: Replace batteries in both the main unit and outdoor sensor when the low battery indicator appears on the display. Always replace all batteries at the same time with new ones.
- Reinigung: Reinigen Sie Uhr und Sensor mit einem weichen, trockenen Tuch. Verwenden Sie keine Scheuermittel oder Lösungsmittel.
- Platzierung des Außensensors: Periodically check the outdoor sensor's location to ensure it remains protected from extreme weather conditions, direct sunlight, and moisture.
Fehlerbehebung
- Clock not syncing with atomic time:
- Ensure the clock is placed away from electronic interference (TVs, computers, microwaves).
- Try placing the clock near a window facing Fort Collins, Colorado (if applicable to your region).
- Press the "WAVE" button to initiate a manual signal search.
- Für die erste Synchronisierung können bis zu 24 Stunden einplanen.
- Outdoor temperature not displaying or incorrect:
- Check batteries in the outdoor sensor.
- Ensure the outdoor sensor is within the effective transmission range (typically up to 100 feet, line of sight).
- Drücken Sie die Taste „CHANNEL“ am Hauptgerät, um die Verbindung wiederherzustellen.
- Verify the outdoor sensor is placed in a location protected from direct sunlight and rain, which can affect readings.
- Das Display ist dunkel oder leer:
- Replace all batteries in the main unit with fresh ones.
- Achten Sie darauf, dass die Batterien mit der richtigen Polarität eingelegt werden.
- Falsche Uhrzeit oder falsches Datum:
- Vergewissern Sie sich, dass die richtige Zeitzone ausgewählt ist.
- Check if Daylight Saving Time (DST) setting is correct for your region.
- If atomic signal is not received, manually set the time and date using the "TIME" and "CALENDAR" buttons.
Technische Daten
| Besonderheit | Detail |
|---|---|
| Marke | Scharf |
| Modellnummer | 8541848315 |
| UPC | 049353998732 |
| Farbe | Gloss Black |
| Anzeigetyp | Digital LCD |
| Besonderheit | Atomic Time Synchronization (WWVB), Indoor/Outdoor Temperature |
| Technische Daten | 13 Zoll B x 1.5 Zoll H (Haupteinheit) |
| Stromquelle | Batteriebetrieben |
| Anzahl der benötigten Batterien | Main Unit: 2 AA; Outdoor Sensor: 2 AA |
| Material | Plastik |
| Montagetyp | Wandmontage / Tischständer |
| Verwendung im Innen- und Außenbereich | Innengerät (Haupteinheit), Außengerät (Sensor) |
Garantie und Support
Sharp products are manufactured to high-quality standards. For warranty information, technical support, or service inquiries, please refer to the contact information provided with your product packaging or visit the official Sharp webBewahren Sie Ihren Kaufbeleg als Kaufnachweis für Garantieansprüche auf.


