1. Einleitung
The KING KB ECO2S Garage Heater is designed to provide efficient and controlled heating for garages and similar large spaces. This unit features an integrated ECO2S electronic thermostat with remote control, offering energy-efficient 2-stage heating and an Eco mode that automatically adjusts wattage. It also includes fan-only and timer modes, along with an auto-memory feature to retain settings after power interruptions. Constructed with spiral steel elements and a high CFM fan, it ensures even air distribution and prolonged heater life. A universal wall/ceiling bracket is included for flexible installation.

Bild: Vorderseite view of the KING KB ECO2S Garage Heater, highlighting the control panel and heating elements.
2. Wichtige Sicherheitshinweise
WARNING: Read all instructions before installing or using this heater. Failure to follow these instructions may result in electric shock, fire, property damage, or personal injury.
- Always disconnect power before servicing or cleaning the heater.
- Dieses Heizgerät ist während des Betriebs heiß. Um Verbrennungen zu vermeiden, vermeiden Sie den Kontakt heißer Oberflächen mit bloßer Haut.
- Halten Sie brennbare Materialien wie Möbel, Kissen, Bettzeug, Papiere, Kleidung und Vorhänge mindestens 3 m von der Vorderseite des Heizgeräts und auch von den Seiten und der Rückseite fern.
- Nicht im Freien verwenden.
- Dieses Heizgerät ist nicht für die Verwendung in Badezimmern, Waschküchen und ähnlichen Innenräumen vorgesehen.
- Verlegen Sie das Kabel nicht unter Teppichen. Decken Sie das Kabel nicht mit Läufern oder ähnlichen Materialien ab. Verlegen Sie das Kabel nicht in Bereichen, in denen viel los ist und wo niemand darüber stolpern kann.
- Schließen Sie Heizgeräte immer direkt an eine Wandsteckdose an. Verwenden Sie sie niemals mit einem Verlängerungskabel oder einem verschiebbaren Stromanschluss (Steckdose/Steckerleiste).
- This heater is for 240V applications only. Ensure proper wiring and circuit breaker capacity.
- Die Installation sollte von einem qualifizierten Elektriker gemäß allen lokalen und nationalen Elektrovorschriften durchgeführt werden.
3. Packungsinhalt
The KING KB ECO2S Garage Heater package includes the following items:
- KING KB ECO2S Garagenheizgerät
- Universelle Wand-/Deckenhalterung
- Handfernbedienung
- Remote Control Wall Holder
- Installation Hardware (lag bolts, nuts, etc.)
- Heavy-duty pigtail (for electrical connection)
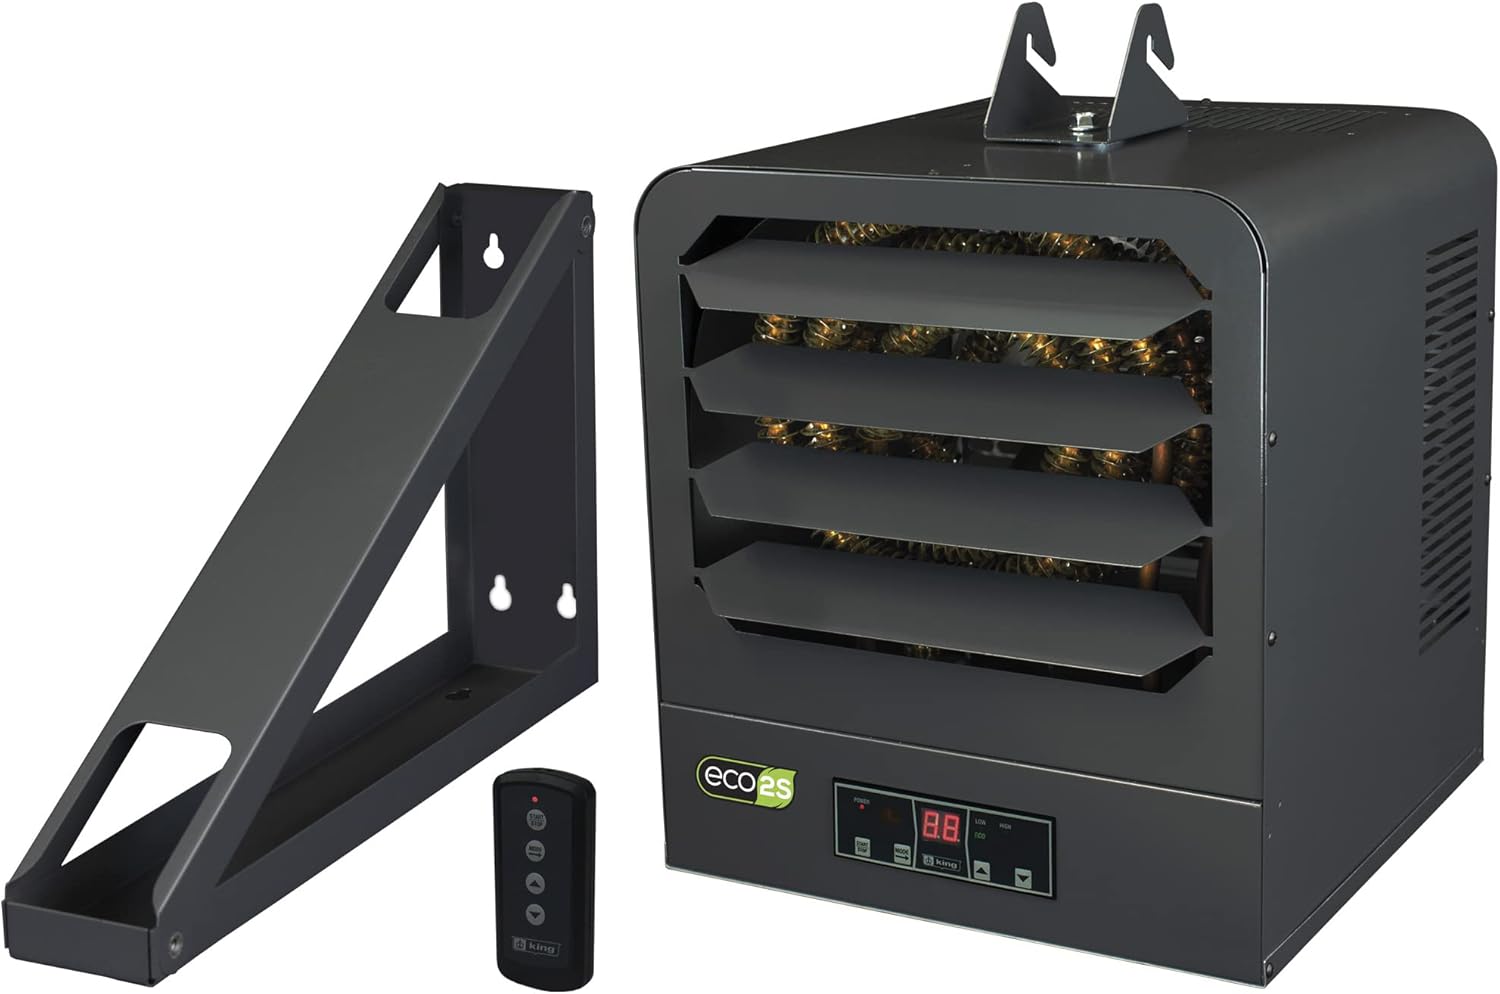
Image: KING KB ECO2S Garage Heater shown with its included mounting bracket and remote control.
4. Einrichtung und Installation
4.1 Montage des Heizgeräts
The universal bracket allows for wall or ceiling mounting. Ensure the mounting surface can support the heater's weight (approximately 48 pounds) and is structurally sound. Use the provided lag bolts to secure the bracket to framing members.
- Attach the bracket to the heater using the large knobs on the sides.
- Adjust the heater's angle using the smaller knobs on the bracket. The heater can be tilted to four different positions to direct heat as needed.

Image: Diagram illustrating recommended garage coverage based on heater wattage. The 15000W model heats up to 1,500 sq ft.
4.2 Elektrischer Anschluss
WARNING: Electrical installation must be performed by a licensed electrician in accordance with all local and national electrical codes.
- Vor Beginn jeglicher Verkabelungsarbeiten muss sichergestellt werden, dass die Stromzufuhr am Sicherungsautomaten unterbrochen ist.
- Remove the access panel on the heater by loosening the Phillips screw.
- Remove the knockout on the side of the heater where the wiring will enter.
- Install the provided grommet with integral strain relief into the knockout hole.
- Connect the heavy-duty pigtail wires to the terminal block inside the heater:
- Black wire to L1 lug.
- Red wire to L2 lug.
- Green wire to the grounding screw.
- Ensure all wires are securely tightened and that no insulation is under the terminals.
- Tighten the strain relief nut to secure the pigtail and prevent damage to the wiring.
- Close the access panel and secure it with the Phillips screw.
- This 15000W, 240V unit requires a minimum of 8 AWG copper wire and a 40 Amp Leistungsschalter.

Bild: Rückseite view of the heater with the wiring access panel open, showing the terminal block for electrical connections.
4.3 Thermostateinstellung
On the back of the heater, there is a toggle switch to select between the built-in thermostat and an external thermostat.
- Set the switch to "I" for the built-in thermostat (recommended for most users).
- Set the switch to "II" if you are using an external thermostat wired by an electrician.
- Incorrect setting of this switch will prevent normal operation.
4.4 Installationsvideo-Referenz
The following video demonstrates the wiring and mounting process for a similar garage heater. While the model shown is 6000W, the general installation principles apply to the KING KB ECO2S heater.
Video: Installation guide for a 6000W garage heater, demonstrating wiring and mounting steps. Principles are similar for the KING KB ECO2S heater.
5. Bedienungsanleitung
The heater features an intuitive control panel and a remote control for convenient operation.
5.1 Systemsteuerung
Upon plugging in the unit, it will beep, indicating power and correct voltage. The control panel features a digital display and several buttons:
- Netzschalter: Schaltet das Gerät EIN/AUS.
- Modus-Taste: Cycles through different heating modes:
- Niedrig: Operates at a lower wattage.
- Energiesparmodus: Automatically uses the lowest wattage needed to heat the room, optimizing energy efficiency.
- Nur Lüfter: Sorgt für Luftzirkulation ohne Heizung.
- Hoch: Operates at maximum wattage for rapid heating.
- Auf/Ab-Tasten: Stellen Sie die gewünschte Temperatur ein.
- Timer-Taste: Sets a timer for the heater to run for a predetermined length of time, after which it will automatically shut off.

Bild: Vorderseite view of the heater, showing the adjustable louvers for directing airflow.
5.2-Fernbedienung
The compact remote control provides full functionality from a distance, allowing you to adjust settings without directly accessing the unit.
- Netzschalter: Schaltet das Gerät EIN/AUS.
- Modus-Taste: Cycles through heating modes (Low, Eco, Fan Only, High).
- Temperatur erhöhen/senken: Regelt die gewünschte Temperatur.
- Timer-Taste: Stellt den Betriebstimer ein.
The remote control is a convenient feature, especially when the heater is mounted high or in a hard-to-reach location.
6. Wartung
WARNING: Always disconnect power at the main service panel before attempting any maintenance or cleaning.
- Reinigung: Reinigen Sie die Außenseite des Heizgeräts regelmäßig mit einem weichen, fusselfreien Tuch.amp Tuch. Keine Scheuer- oder Lösungsmittel verwenden.
- Staubentfernung: Use a vacuum cleaner with a brush attachment to remove dust from the grilles and heating elements. Ensure the heater is completely cool before cleaning.
- Inspektion: Regularly inspect the power cord and plug for any signs of damage. If damaged, do not use the heater and contact a qualified electrician for repair.
- Schmierung: The unit features a permanently lubricated motor and does not require additional lubrication.
7. Fehlerbehebung
| Problem | Mögliche Ursache | Lösung |
|---|---|---|
| Heizung schaltet sich nicht ein. | Das Gerät wird nicht mit Strom versorgt. Leistungsschalter ausgelöst. Thermostat switch set incorrectly. | Stromversorgung prüfen. Leistungsschalter zurücksetzen. Ensure thermostat switch on back is set to "I" for built-in thermostat. |
| Die Heizung erzeugt keine Wärme, aber der Ventilator läuft. | Die Temperatureinstellung ist zu niedrig. Heizung im Modus „Nur Lüfter“. | Increase desired temperature. Change mode to Low, Eco, or High. |
| Die Heizung schaltet sich häufig ein und aus. | Temperature setting too close to ambient temperature. Überhitzungsschutz aktiviert. | Temperatureinstellung anpassen. Ensure proper clearance around the heater. Clean dust from elements. |
| Fernbedienung funktioniert nicht. | Leere Batterien. Hindernis zwischen Fernbedienung und Heizgerät. | Ersetzen Sie die Batterien der Fernbedienung. Entfernen Sie sämtliche Hindernisse. |
8. Spezifikationen
| Besonderheit | Detail |
|---|---|
| Modellnummer | KB2415-1-B2-ECO |
| Marke | KÖNIG |
| Wastage | 15000 W |
| Bandtage | 240 Volt |
| AmpAlter | 62.5 Amps |
| Zimmertyp | Garage |
| Montagetyp | Wandhalterung / Deckenhalterung |
| Besondere Merkmale | Energy Efficient, Remote Control, 2-Stage Heating, Eco Mode, Timer, Fan Only Mode, Auto Memory, Built-In Fan Delay, Patented Smart Limit Protection |
| Artikelgewicht | 48 Pfund |
| Technische Daten | 25.5 x 19 x 21 Zoll |
| UPC | 093319220443 |
9. Garantie und Support
For warranty information, please refer to the documentation included with your product or visit the official KING website. For technical support, troubleshooting assistance, or to inquire about replacement parts, please contact KING customer service.
Kontaktinformationen finden sich üblicherweise auf der Website des Herstellers. webWebsite oder in der Produktverpackung.


