Einführung
This manual provides comprehensive instructions for the safe and proper installation, operation, and maintenance of your Mounting Dream Full Motion TV Wall Mount HM2296-1. This mount is designed to enhance your viewing experience by offering flexible positioning for your television. Please read this manual thoroughly before installation and retain it for future reference.
Sicherheitshinweise
WARNING: Failure to read and follow all instructions may result in personal injury, property damage, or voiding of your warranty. If you have any questions, please contact customer service.
- Ensure your TV's weight and VESA pattern are within the specified limits for this mount.
- This TV mount is designed for installation on wood studs or solid concrete walls only. DO NOT install onto drywall alone.
- Always use a stud finder to accurately locate wood studs.
- For concrete wall installations, concrete anchors are required and can be requested from customer service if not included.
- Tragen Sie während der Installation geeignete Schutzausrüstung, einschließlich Augenschutz.
- Für eine sichere Installation werden zwei Personen empfohlen, insbesondere beim Anheben des Fernsehers.
Packungsinhalt
Please verify that all components are present and undamaged before beginning installation. If any parts are missing or defective, contact customer service immediately.
- TV-Wandhalterung
- TV-Halterungen (2 Stück)
- Extension Bars (if applicable for larger VESA patterns)
- Mounting Hardware Kit (various screws, washers, spacers in pre-labeled bags)
- Montagevorlage
- Torpedo-Level
- Bedienungsanleitung
- Concrete Wall Anchors (available upon request)
Technische Daten
| Besonderheit | Spezifikation |
|---|---|
| Modellnummer | HM2296-1 |
| Kompatibilität mit TV-Größen | 42 - 75 Zoll |
| Gewichtskapazität | Bis zu 100 kg (45.5 Pfund) |
| VESA-Kompatibilität | 200x100mm to 600x400mm (e.g., 200x100, 200x200, 300x200, 300x300, 400x200, 400x300, 400x400, 500x300, 600x400) |
| Neigungseinstellung | +5° / -15° |
| Schwenkeinstellung | +/-45° (Max. angle depends on TV size) |
| Pegelanpassung | +/-4° |
| Verlängerung von der Wand | 2.5 Zoll (eingefahren) bis 16.6 Zoll (ausgefahren) |
| Wandtypkompatibilität | 12" or 16" Wood Studs, Solid Concrete Walls |
Setup und Installation
Before you begin, ensure you have all necessary tools (e.g., drill, stud finder, pencil, tape measure, screwdriver, socket wrench) and that your wall type is compatible.
1. Prüfungen vor der Installation
- TV-Kompatibilität prüfen: Check your TV's weight and VESA mounting hole pattern (horizontal x vertical distance in mm) to ensure it falls within the mount's specifications.
- Wandtyp identifizieren: Use a stud finder to locate the edges and center of wood studs. For concrete walls, ensure the wall is solid and capable of supporting the weight.
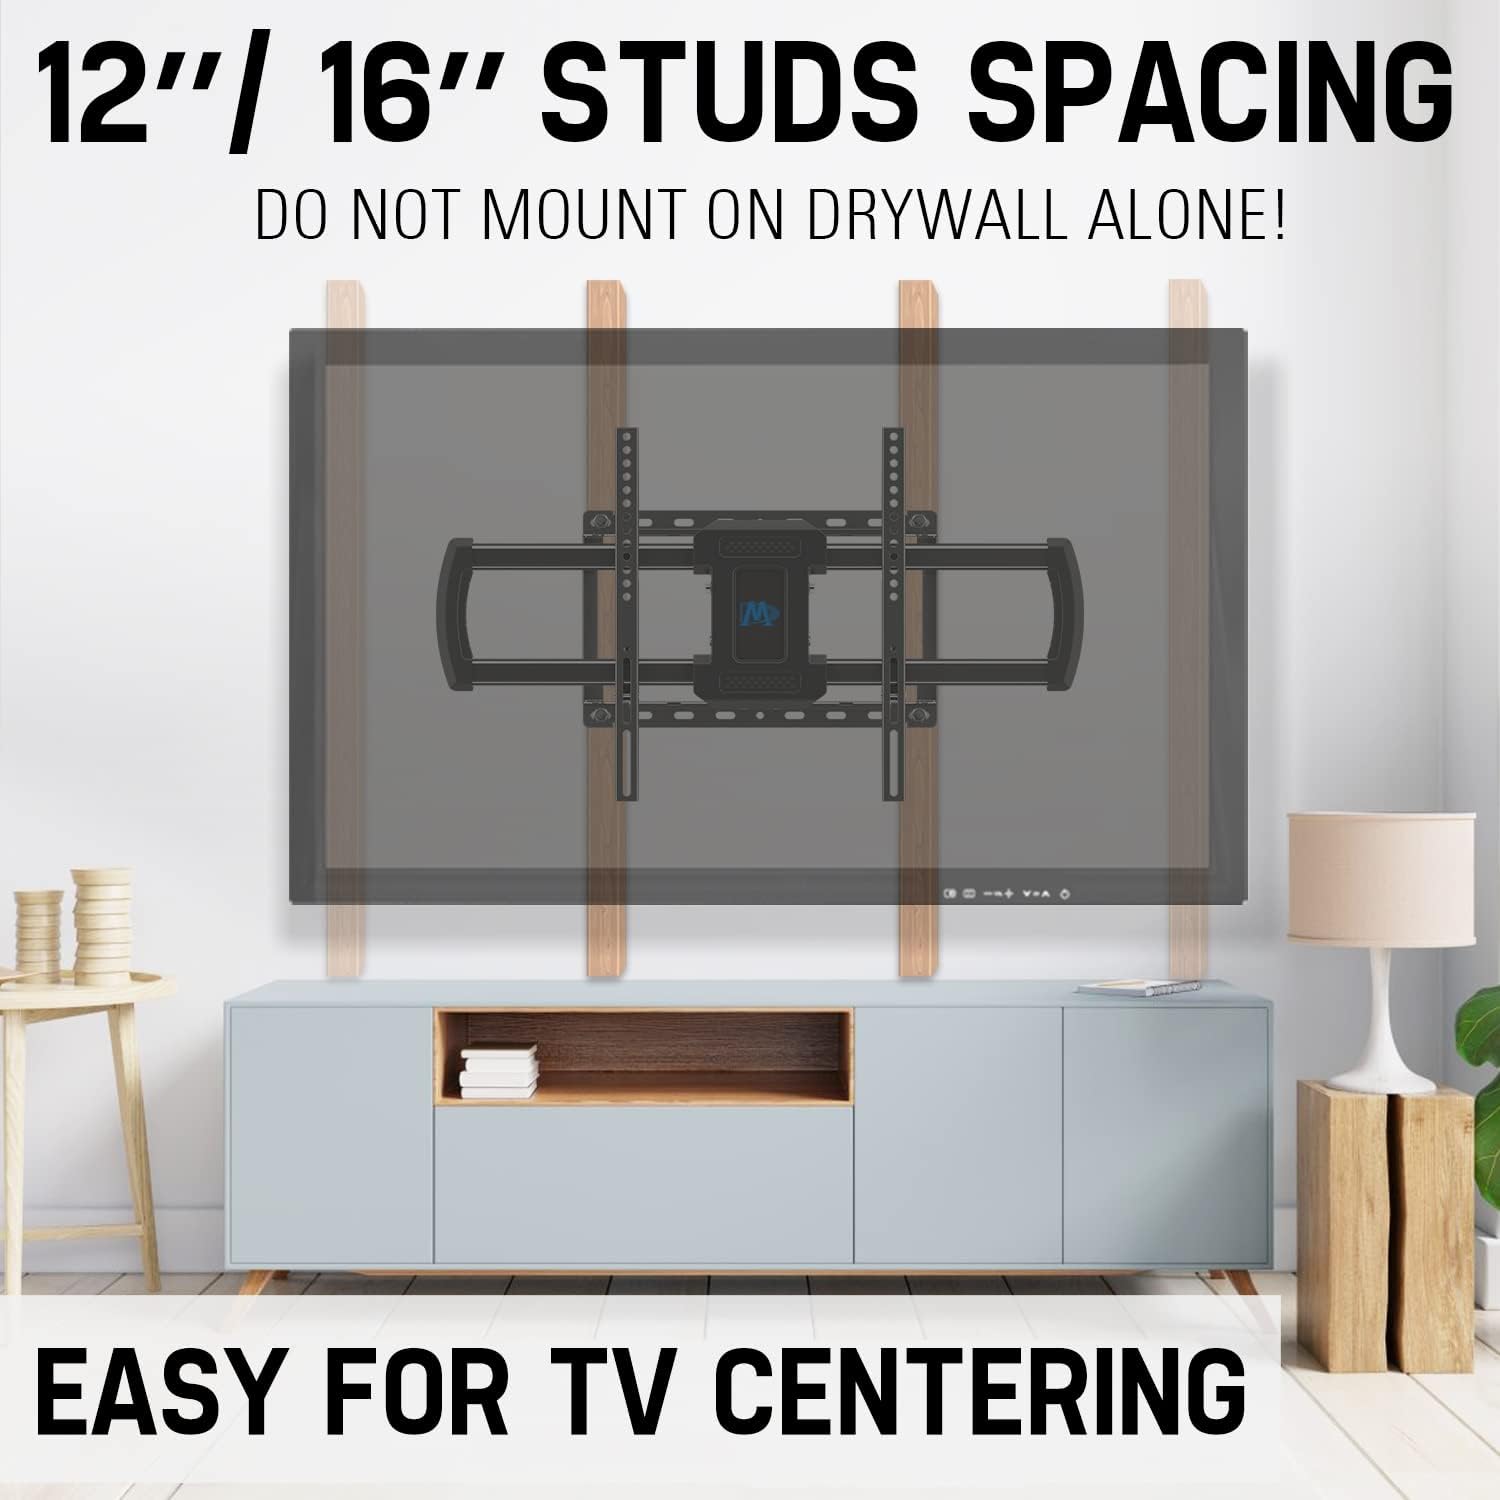
Image: Proper stud spacing for wall mounting. This mount is compatible with 12" or 16" wood studs. Do not mount on drywall alone.
2. Befestigen Sie die TV-Halterungen am Fernseher.
- Legen Sie Ihren Fernseher vorsichtig mit dem Bildschirm nach unten auf eine weiche, saubere Oberfläche, um Beschädigungen am Bildschirm zu vermeiden.
- Align the TV brackets with the VESA mounting holes on the back of your TV. Use the appropriate screws, washers, and spacers from the hardware kit to secure the brackets. Ensure they are tightened securely but do not overtighten.

Image: Step 1 - Attaching the TV brackets to the television.
3. Install Wall Plate
- Using the provided mounting template and a pencil, mark the desired drilling locations on your wall, ensuring they align with the center of your chosen wood studs or appropriate concrete locations. Use the included torpedo level to ensure accuracy.
- Drill pilot holes at the marked locations. The size of the drill bit will depend on your wall type and the lag bolts being used.
- Position the wall plate over the pilot holes and secure it to the wall using the lag bolts and washers. Tighten all bolts firmly.
Video: Official installation guide for the full motion TV wall mount HM2296-1, demonstrating the process from attaching brackets to securing the TV.
4. Assemble Extension Bars (if needed)
For larger VESA patterns, you may need to attach the extension bars to the TV brackets. Follow the instructions provided with the hardware kit for proper assembly.

Image: The robust 6-arm design of the wall mount, providing stability and flexibility.
5. Hang and Secure Television
- With assistance, carefully lift the TV and hook the TV brackets onto the wall plate.
- Once the TV is securely hung, use the safety screws or locking mechanisms to prevent accidental dislodgement.

Image: Step 3 - Hanging the TV onto the wall plate and securing it.
Bedienung der Montierung
Your full motion TV wall mount offers various adjustments for optimal viewing.
Neigung einstellen
The mount allows for a tilt range of +5° (up) to -15° (down) to reduce glare and achieve a comfortable viewing angle. Loosen the tilt adjustment knobs on the TV brackets, adjust to the desired angle, and then retighten the knobs.

Image: Adjusting the TV tilt for anti-glare viewing.
Schwenkmechanismus einstellen
The mount can swivel +/-45° left or right, depending on your TV size, allowing you to view your TV from different seating positions. Gently push or pull the TV to the desired swivel angle.

Image: Achieving a great view from any seat with the swivel feature.
Aus- und Einfahren
The mount can extend up to 16.6 inches from the wall and retract back to 2.5 inches. This feature allows you to pull the TV out for better viewing or push it back to save space. Gently pull or push the TV to extend or retract the arms.
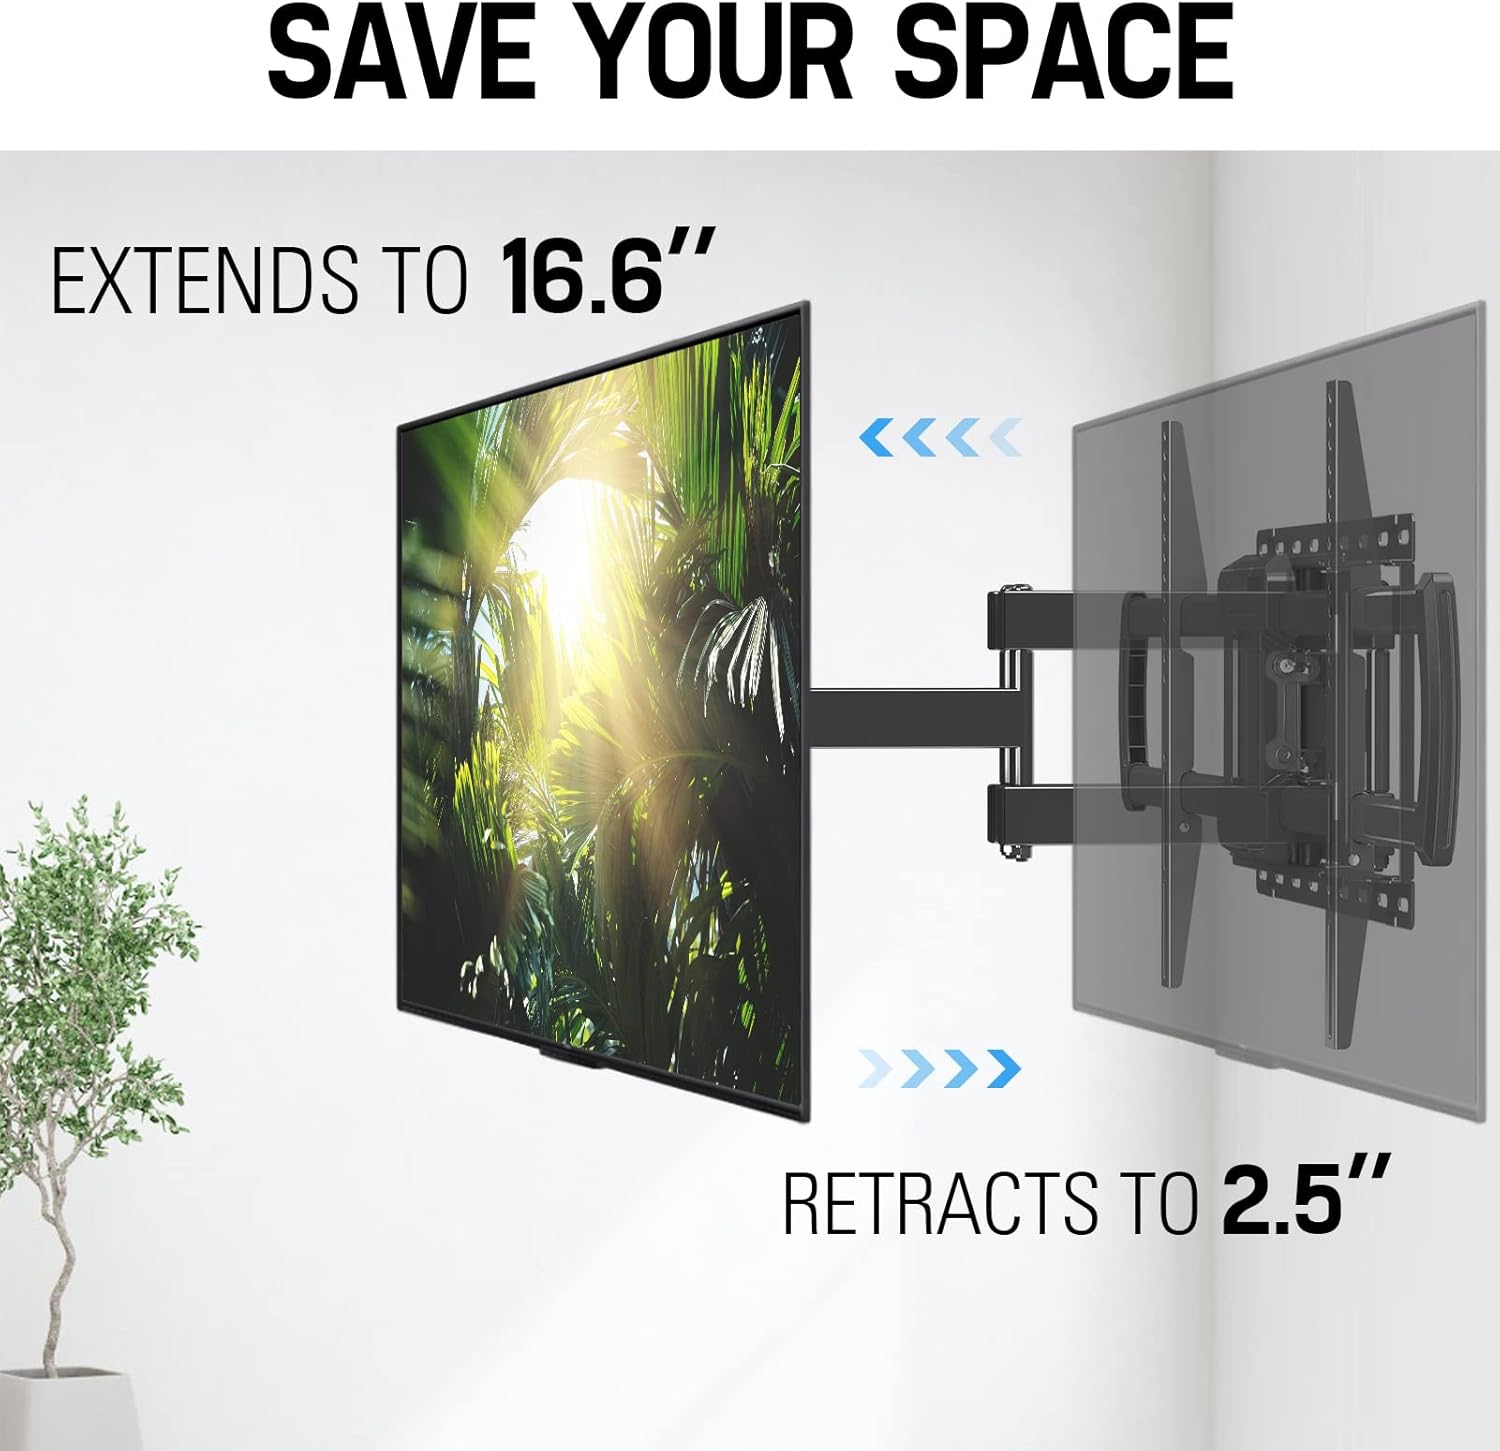
Image: Extending and retracting the TV mount to save space or optimize viewing-Distanz.
Pegelanpassung
You can adjust the TV level by +/-4° after installation to ensure a perfectly horizontal screen. Loosen the leveling screws, adjust the TV, and then retighten the screws.

Image: Achieving perfect TV leveling with the adjustable mechanism.
Wartung
Regelmäßige Wartung trägt zur Langlebigkeit und zum sicheren Betrieb Ihrer TV-Halterung bei.
- Regelmäßige Kontrollen: Every few months, check all screws and bolts to ensure they are securely tightened. Over time, vibrations or adjustments can cause them to loosen.
- Reinigung: Reinigen Sie die Halterung mit einem weichen, trockenen Tuch. Vermeiden Sie die Verwendung von Scheuermitteln oder Lösungsmitteln, die die Oberfläche beschädigen könnten.
- Schmierung: If the articulating arms become stiff, a small amount of silicone-based lubricant can be applied to the moving joints.
Fehlerbehebung
Sollten Sie auf Probleme stoßen, konsultieren Sie bitte die folgenden häufigen Probleme und Lösungen.
| Problem | Mögliche Lösung |
|---|---|
| TV appears to sag or is not level. | Ensure the TV weight does not exceed the mount's capacity. Verify all wall plate and TV bracket screws are securely tightened. Use the level adjustment feature to correct minor tilting. |
| Mount is difficult to move (swivel/extend). | Check for any overtightened bolts on the articulating arms. Some mounts have tension adjustment screws that can be loosened slightly. Apply a small amount of silicone lubricant to the moving joints. |
| Fehlende Teile oder beschädigte Komponenten. | Do not proceed with installation. Contact Mounting Dream customer service immediately for replacement parts. |
Garantie und Support
Mounting Dream is committed to providing high-quality products and excellent customer service. For any questions, concerns, or assistance with your TV mount, please contact our US-based customer service experts.
- Telefon: (626) 645-7128 (USA)
- Std: Monday - Friday, 10am - 6pm (Pacific Time)
- E-Mail: customerservice@hingear.com
If you require additional pieces or have specific installation questions, our team is available to help.


