1. Einleitung
This manual provides comprehensive instructions for the setup, operation, and maintenance of your TechniSat TECHNISTAR S5 HD+ digital satellite receiver. Please read this manual thoroughly before using the device to ensure proper functionality and to maximize your viewing experience. The TECHNISTAR S5 HD+ is designed for receiving digital satellite television in HDTV quality, offering features such as integrated HD+ decryption, PVRReady for recording, and Timeshift functionality.
2. Sicherheitshinweise
WARNUNG: To reduce the risk of electric shock, do not open the device casing. Alle Wartungsarbeiten sind von qualifiziertem Servicepersonal durchführen zu lassen.
- Stellen Sie sicher, dass das Gerät auf einer stabilen, ebenen Fläche steht.
- Setzen Sie das Gerät weder Regen noch Feuchtigkeit aus.
- Vermeiden Sie es, das Gerät in der Nähe von Wärmequellen wie Heizkörpern, Heizlüftern, Öfen oder anderen Geräten (einschließlich) aufzustellen. ampKonverter (Lüfter), die Wärme erzeugen.
- Verwenden Sie nur vom Hersteller angegebene Zusatzgeräte/Zubehör.
- Trennen Sie das Gerät während eines Gewitters oder bei längerer Nichtbenutzung vom Stromnetz.
- Halten Sie die Lüftungsöffnungen frei, um eine Überhitzung zu vermeiden.
3. Packungsinhalt
Überprüfen Sie, ob alle Artikel im Paket vorhanden sind:
- 1 x TechniSat TECHNISTAR S5 HD+ Receiver
- 1 x Fernbedienung
- 1 x Netzteil
- 1 x Benutzerhandbuch (dieses Dokument)
- 2 x AAA-Batterien (für die Fernbedienung)
4. Produktüberschreitungview
4.1 Frontplatte
The front panel of the TECHNISTAR S5 HD+ features essential controls and indicators.

Bild 4.1: Front view of the TechniSat TECHNISTAR S5 HD+ satellite receiver. It shows the display, power button, channel up/down buttons, and the HD+ logo.
- Anzeige: Zeigt die Kanalnummer oder die Uhrzeit an.
- Netzschalter: Turns the device on/off or to standby.
- Channel Buttons (V / ^): Navigates through channels.
- HD+ Logo: Indicates HD+ compatibility.
4.2 Rückseite und Anschlüsse
The rear panel provides all necessary ports for connecting the receiver to your television, satellite dish, and other devices.

Bild 4.2: Hinteren view of the TechniSat TECHNISTAR S5 HD+ satellite receiver, illustrating the various connection ports. These include Smartcard (Conax), CI+ slot, Ethernet, LNB (Sat-Eingang), USB, HDMI Out, A/V Out, S/PDIF Out, and Power input.
- Smartcard (Conax): Slot for Conax smartcards.
- CI+-Steckplatz: Common Interface Plus slot for CI+ modules (e.g., for HD+ or Sky).
- Ethernet: For network connection and UPnP streaming.
- LNB (Sat-Eingang): Input for the satellite dish cable (F-connector).
- USB: For connecting external storage devices (USB stick or hard drive) for PVRReady and Timeshift functions.
- HDMI-Ausgang: High-Definition Multimedia Interface output for connecting to your TV.
- A/V-Ausgang: Analog audio/video output (requires specific TechniSat adapter, optional).
- S/PDIF-Ausgang: Digital audio output (electrical).
- Leistung: Input for the external power supply unit.
5. Einrichtung
5.1 Anschließen des Empfängers
- Satellitenverbindung: Connect your satellite dish cable to the "LNB (Sat-Eingang)" port on the rear panel.
- TV-Anschluss: Connect the receiver to your TV using an HDMI cable. Insert one end into the "HDMI Out" port on the receiver and the other into an available HDMI input on your TV.
- Stromanschluss: Connect the power supply unit to the "Power" input on the receiver, then plug the power adapter into a wall outlet.
- Optionale Verbindungen:
- USB Speicher: For recording and Timeshift, connect a USB stick or external hard drive to the "USB" port.
- Netzwerk: For UPnP and other network features, connect an Ethernet cable to the "Ethernet" port.
- CI+ Modul: If you have a CI+ module (e.g., for HD+ or Sky), insert it into the "CI+ Slot".
5.2 First Installation (AutoInstall)
Upon first power-on, the receiver will guide you through an automatic installation process. This "AutoInstall" feature simplifies the initial setup, including channel search and basic settings.
- Schalten Sie Ihren Fernseher ein und wählen Sie den richtigen HDMI-Eingang.
- Power on the TECHNISTAR S5 HD+.
- Follow the on-screen instructions to select your language, country, and perform a channel scan. The receiver will automatically search for available satellite channels.
- The ISIPRO feature will assist with automatic station search and updates.

Bild 5.2: TechniSat Comfort Services, highlighting features like SFI (Electronic Program Guide), ISIPRO (Program List Manager), AutoInstall (Easy First Installation), Password-protected User Profiles, and ISI Mode (Simplified Menus with Large Font).
6. Bedienung des Empfängers
6.1 Grundfunktionen
Use the provided remote control to navigate menus and control the receiver.
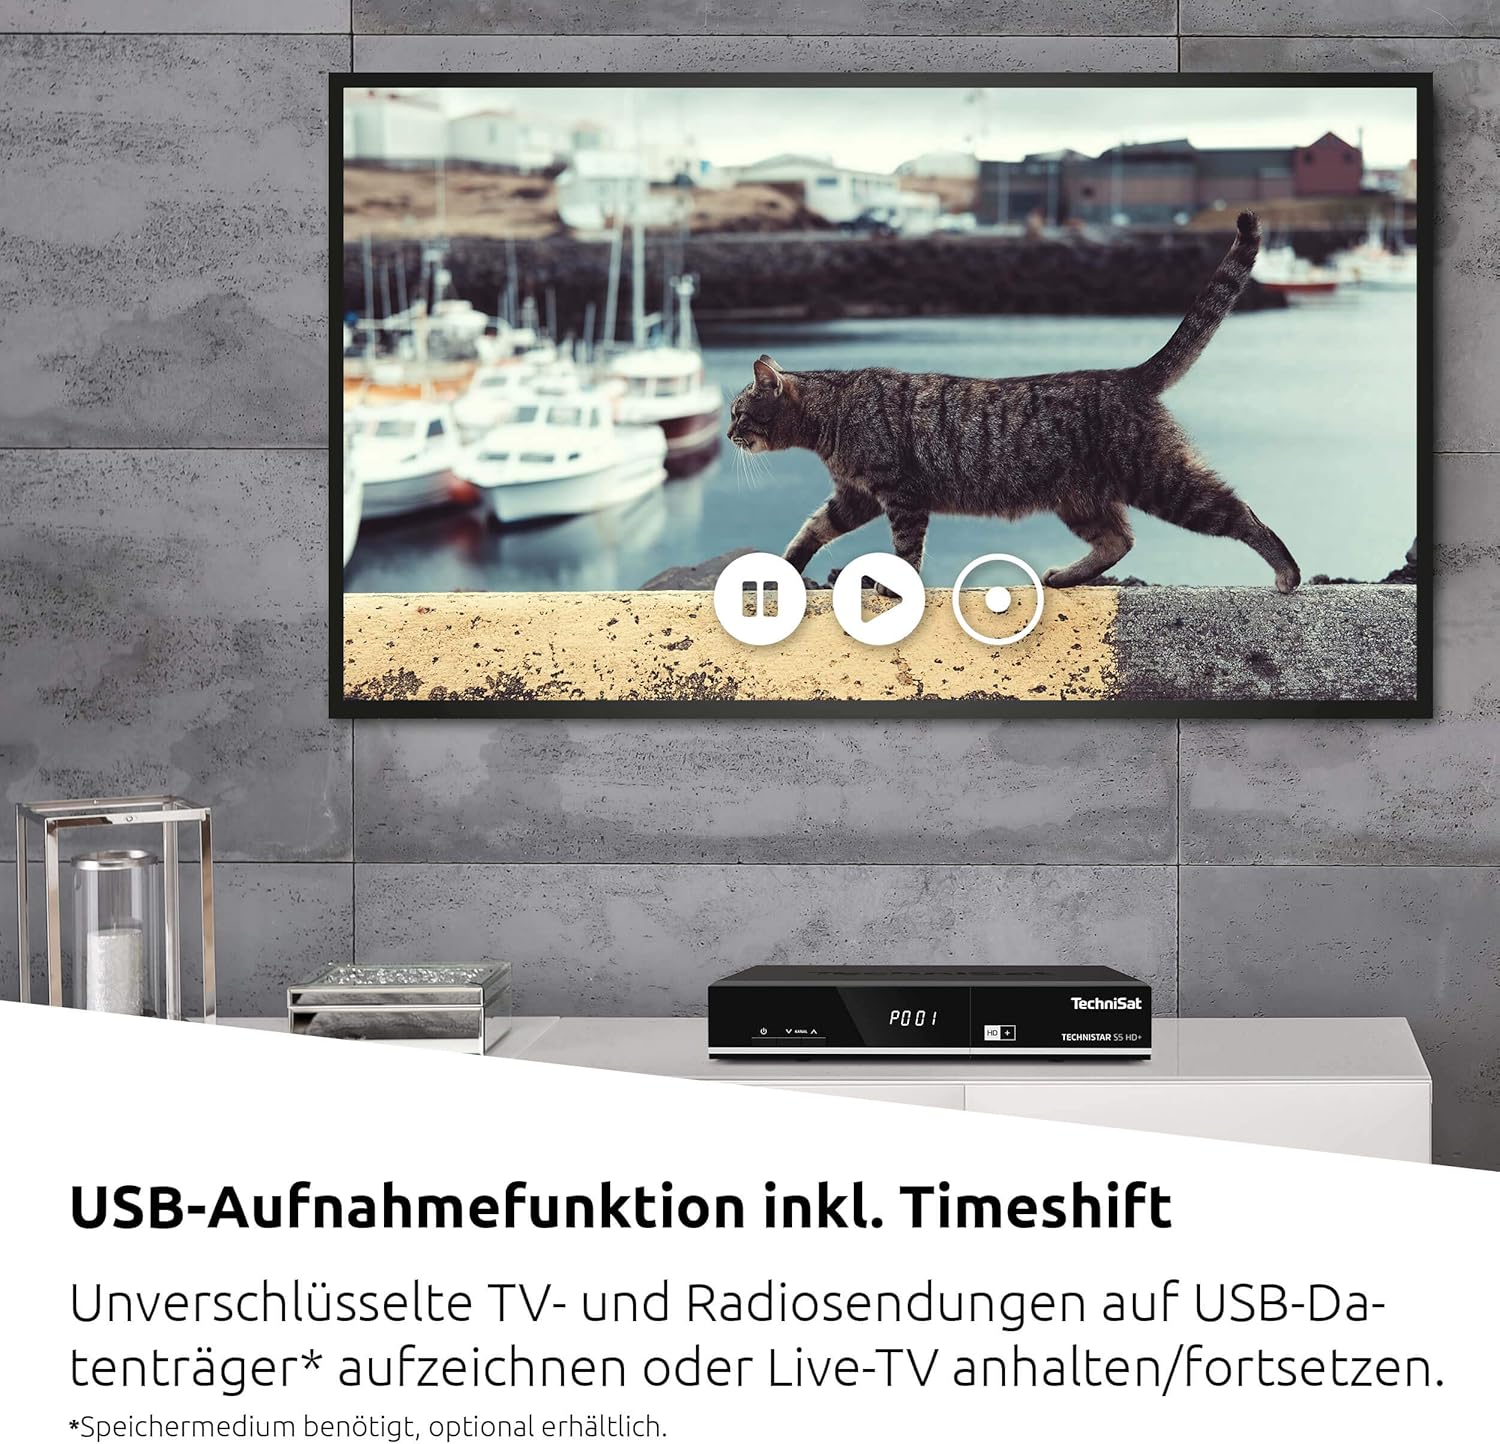
Bild 6.1: The TechniSat remote control alongside a smartphone displaying the TechniSat Connect app interface, demonstrating both traditional and modern control methods.
- Kanalauswahl: Use the number buttons or the CH+/CH- buttons to change channels.
- Lautstärkeregelung: Verwenden Sie die Tasten VOL+/VOL-.
- Menüführung: Use the directional arrows and OK button to navigate through the on-screen menus.
- SFI (Service Information): Access the electronic program guide (EPG) to view Programmpläne und Informationen.
- ISIPRO: This feature automatically manages and updates your channel list, ensuring you always have the latest channel lineup.
- ISI Mode: A simplified menu mode with larger fonts, useful for users who prefer a less complex interface or as a child safety feature.
6.2 Recording (PVRReady) and Timeshift
The TECHNISTAR S5 HD+ supports recording of unencrypted digital TV and radio programs to an external USB storage device (PVRReady). It also features Timeshift, allowing you to pause and resume live television.

Bild 6.2: A television screen displaying a paused live broadcast, demonstrating the Timeshift function. The on-screen controls for play, pause, and rewind are visible.
- Aufnehmen: Connect a USB storage device (formatted as FAT32 or NTFS). While watching a program, press the "Record" button on your remote control.
- Zeitverschiebung: Press the "Pause" button during live TV to temporarily pause the broadcast. Press "Play" to resume from where you left off.
- Wiedergabe: Access recorded programs through the receiver's menu.
6.3 HD+ Features
The TECHNISTAR S5 HD+ includes an integrated decryption system for HD+.
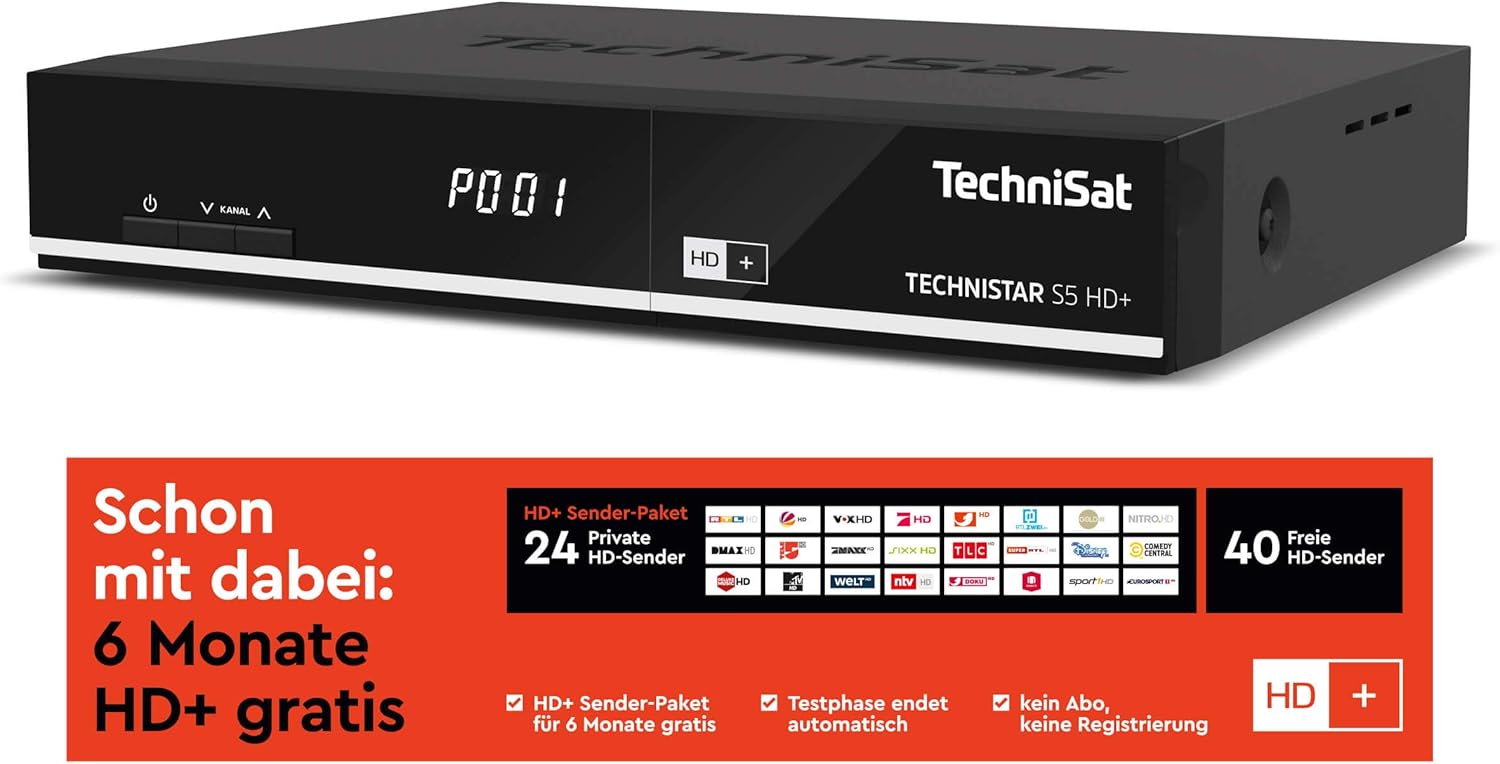
Bild 6.3: Information regarding the HD+ channel package, indicating 6 months of free HD+ access, 24 private HD channels, and 40 free HD channels. It also states that the test phase ends automatically with no registration required.
- The device comes with 6 months of free HD+ access for 23 HD quality channels.
- Additional pay-TV offers, such as Sky, can be accessed via the CI+ interface with a compatible CI+ module and subscription.
6.4 TechniSat Connect App
The TechniSat Connect app can be used as a universal remote control for your receiver, offering convenient control from your smartphone or tablet.
- Download the TechniSat Connect app from your device's app store.
- Ensure your smartphone/tablet and the receiver are connected to the same local network.
- Follow the app's instructions to pair it with your TECHNISTAR S5 HD+.
7. Wartung
- Reinigung: Vor der Reinigung den Netzstecker ziehen. Verwenden Sie ein weiches, trockenes Tuch, um das Gehäuse des Receivers zu reinigen. Verwenden Sie keine flüssigen oder Aerosol-Reinigungsmittel.
- Belüftung: Um eine Überhitzung zu vermeiden, stellen Sie sicher, dass die Lüftungsschlitze des Geräts nicht blockiert sind.
- Software-Updates: Überprüfen Sie regelmäßig den TechniSat website or the receiver's menu for available software updates to ensure optimal performance and access to new features.
8. Fehlerbehebung
If you encounter issues with your TECHNISTAR S5 HD+, refer to the following common solutions:
- Kein Bild/Ton:
- Check all cable connections (HDMI, LNB, power).
- Stellen Sie sicher, dass Ihr Fernseher auf den richtigen HDMI-Eingang eingestellt ist.
- Verify the receiver is powered on and not in standby mode.
- Kein Satellitensignal:
- Check the LNB cable connection.
- Stellen Sie sicher, dass Ihre Satellitenschüssel richtig ausgerichtet ist.
- Perform a new channel scan via the receiver's menu.
- Fernbedienung funktioniert nicht:
- Check and replace the batteries (2x AAA).
- Stellen Sie sicher, dass sich keine Hindernisse zwischen Fernbedienung und Empfänger befinden.
- Aufnahmeprobleme:
- Ensure the USB storage device is properly connected and has sufficient free space.
- Verify the USB device is formatted correctly (FAT32 or NTFS).
- Note that only unencrypted programs can be recorded.
For more detailed troubleshooting or persistent issues, please consult the full online manual on the TechniSat webWebsite oder wenden Sie sich an den Kundendienst.
9. Spezifikationen
| Marke | TechniSat |
| Modellnummer | 0000/4716 |
| Farbe | Neutral (Schwarz) |
| Konnektivitätstechnologie | Ethernet, HDMI, USB |
| Anzahl USB-Anschlüsse | 1 |
| Gesamtzahl der HDMI-Anschlüsse | 1 |
| Audioausgabemodus | Umgeben |
| Bandtage | 5 Volt |
| Frequenzbereich | 950 MHz - 2150 MHz |
| Artikelgewicht | 600 Gramm |
| Im Lieferumfang enthaltene Komponenten | Fernbedienung |
| Batterien | 2 AAA (enthalten) |
| Software-Updates garantiert bis | Informationen nicht verfügbar |
| Verfügbarkeit von Ersatzteilen | Informationen nicht verfügbar |
10. Garantie und Support
For detailed information regarding warranty terms, software updates, and spare parts availability, please refer to the official TechniSat website or contact TechniSat customer support directly. Keep your proof of purchase for warranty claims.
TechniSat Offiziell WebWebsite: www.technisat.com


