1. Einleitung
Vielen Dank für Ihren Einkauf.asing the SENCOR SWS 3000 W Weather Station. This device provides accurate indoor and outdoor temperature and humidity readings, along with time and date display. Please read this manual carefully before operating the device to ensure proper use and to maximize its lifespan.
2. Sicherheitshinweise
- Setzen Sie das Hauptgerät und den Sensor keinen extremen Temperaturen, direkter Sonneneinstrahlung oder Feuchtigkeit aus.
- Vermeiden Sie es, das Gerät fallen zu lassen oder starken Stößen auszusetzen.
- Versuchen Sie nicht, das Gerät selbst zu zerlegen oder zu reparieren. Überlassen Sie alle Wartungsarbeiten qualifiziertem Fachpersonal.
- Entsorgen Sie gebrauchte Batterien verantwortungsvoll gemäß den örtlichen Vorschriften.
- Bewahren Sie das Gerät außerhalb der Reichweite von Kindern auf.
3. Packungsinhalt
Bitte überprüfen Sie den Packungsinhalt, um sicherzustellen, dass alle Artikel vorhanden sind:
- SENCOR SWS 3000 W Main Unit (Weather Station)
- Drahtloser Außensensor
- Benutzerhandbuch (dieses Dokument)
4. Produktüberschreitungview

Figure 4.1: The SENCOR SWS 3000 W Weather Station main unit (left) and its accompanying wireless outdoor sensor (right).

Abbildung 4.2: Schräg view of the SENCOR SWS 3000 W main unit, showcasing verfügt über sein Display und seine Bedienknöpfe.
The SENCOR SWS 3000 W Weather Station consists of a main display unit and a wireless outdoor sensor. The main unit features a clear LCD display with white backlight, showing indoor and outdoor temperature, humidity, time, and date. The wireless sensor transmits outdoor data to the main unit.

Abbildung 4.3: Nahaufnahme view of the wireless outdoor sensor, which transmits temperature and humidity data to the main unit.

Abbildung 4.4: Rückseite view of the main unit, showing the battery compartment and the integrated stand for tabletop placement.
5. Einrichtung
5.1 Einlegen der Batterie
The SENCOR SWS 3000 W Weather Station is battery-powered. Ensure you have the correct battery types as specified in the specifications section.
- Haupteinheit: Open the battery compartment cover on the back of the main unit (refer to Figure 4.4). Insert the required AAA batteries, observing the correct polarity (+/-). Close the cover securely.
- Drahtloser Sensor: Open the battery compartment cover on the back of the wireless sensor (refer to Figure 4.3). Insert the required batteries (typically AAA), observing the correct polarity (+/-). Close the cover securely.
5.2 Platzierung der Sensoren
Proper placement of the wireless sensor is crucial for accurate outdoor readings.
- Place the sensor in a shaded area to avoid direct sunlight, which can cause inaccurate temperature readings.
- Ensure the sensor is protected from direct rain or snow.
- Position the sensor within the effective transmission range (up to 30 meters in open air) of the main unit. Walls and other obstacles can reduce this range.
- Vermeiden Sie es, den Sensor in der Nähe von großen Metallgegenständen oder elektrischen Geräten aufzustellen, da diese das Funksignal stören könnten.

Abbildung 5.1: Bspample placement of the main unit indoors and the wireless sensor outdoors for optimal performance.
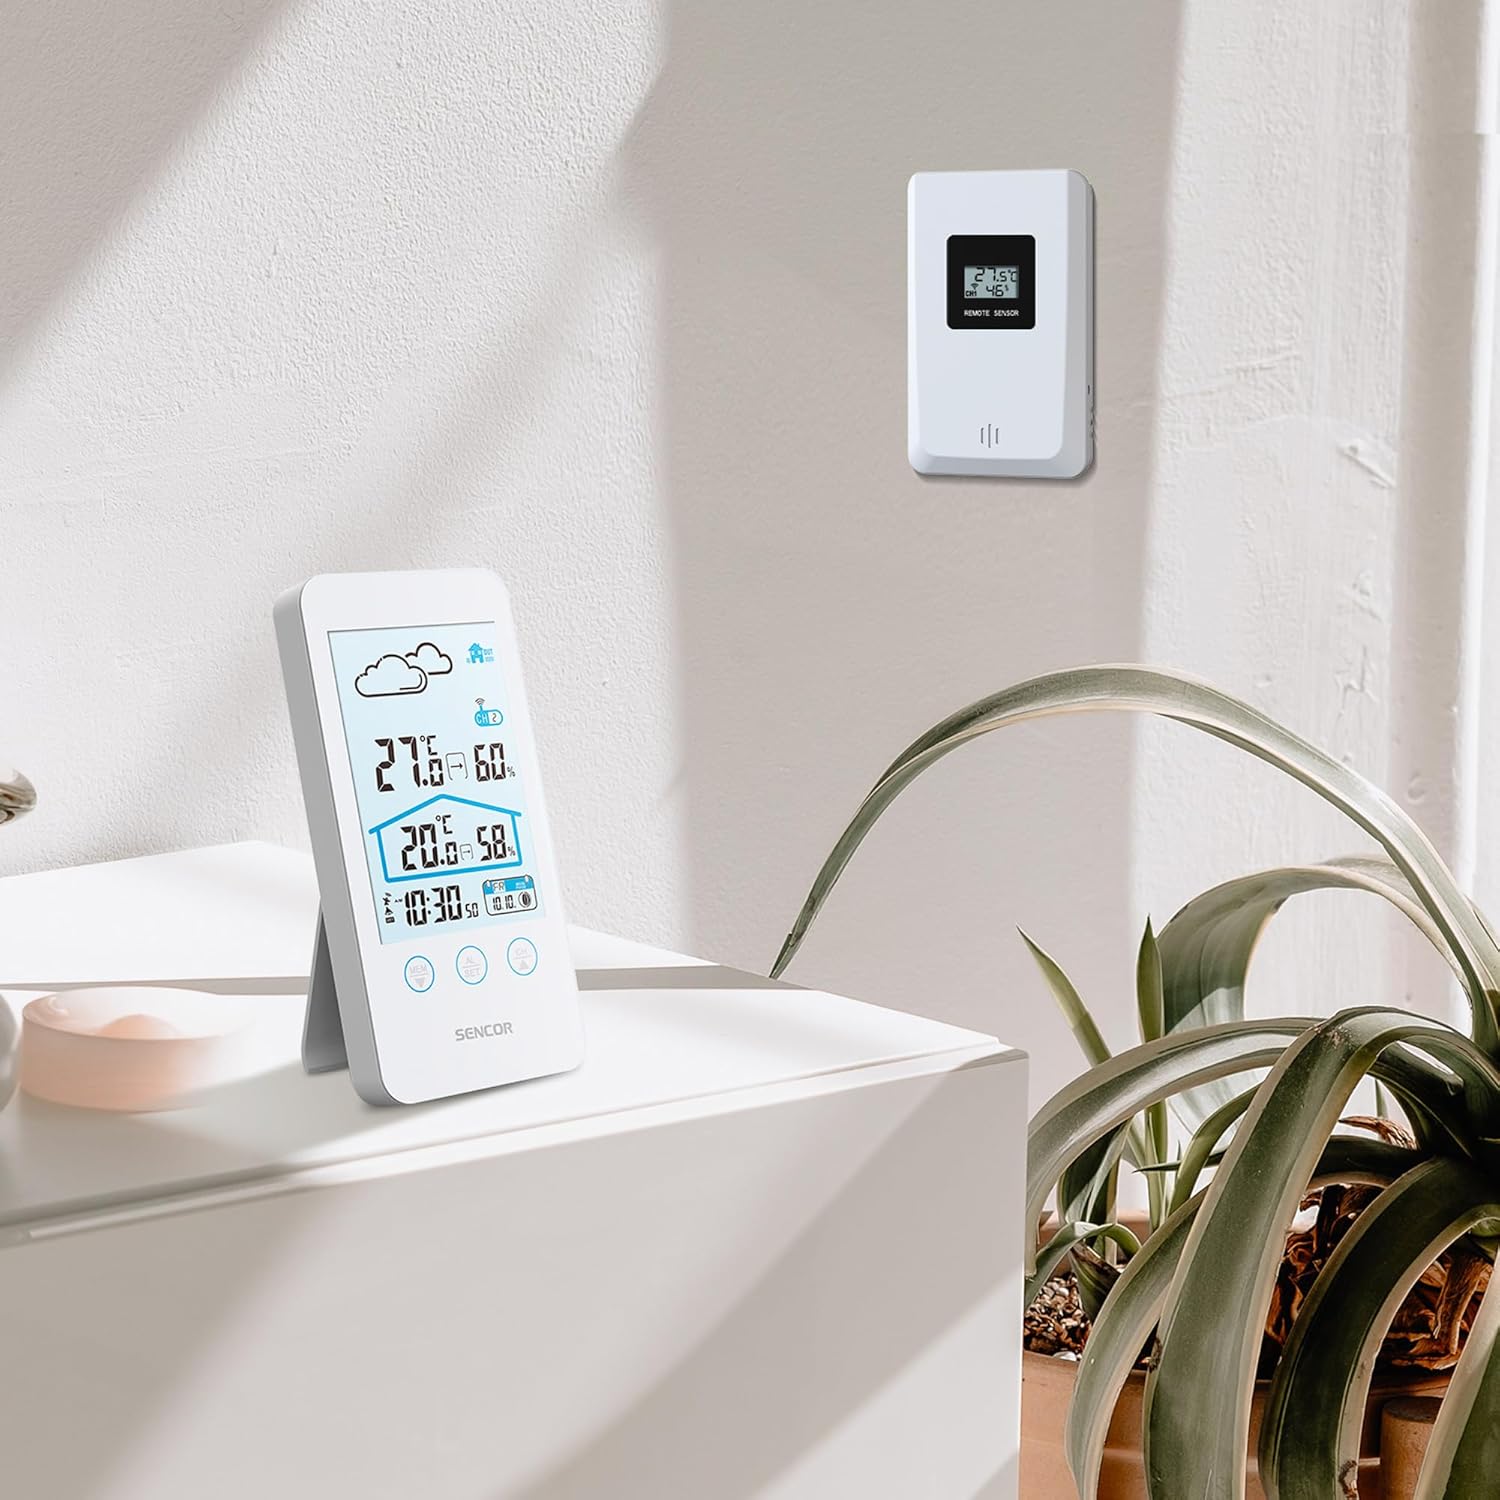
Figure 5.2: The main unit can be placed on a flat surface, while the sensor is mounted on a wall or suitable outdoor location.
5.3 Erstes Einschalten und Koppeln
After installing batteries in both units, the main unit will automatically search for the wireless sensor. This process may take a few minutes.
- Place the main unit and the sensor close to each other during the initial pairing process.
- Sobald die Verbindung hergestellt ist, werden die Außentemperatur und die Luftfeuchtigkeit auf dem Display des Hauptgeräts angezeigt.
- If the connection is not established, remove and reinsert the batteries from both units, then try again.
6. Bedienungsanleitung
6.1 Informationen anzeigen
The LCD display provides various information at a glance:
- Außentemperatur und Luftfeuchtigkeit: Gut sichtbar oben angebracht.
- Raumtemperatur und Luftfeuchtigkeit: Displayed below the outdoor readings.
- Zeit Datum: Located at the bottom of the display.
- Weather Forecast Icon: An icon indicating predicted weather conditions (e.g., sunny, cloudy, rainy).
- Kanalanzeige: Shows which sensor channel is currently displayed (if multiple sensors are used).
- Batterieanzeige: Alerts when batteries are low for either unit.

Abbildung 6.1: Ausführlich view of the SENCOR SWS 3000 W display, highlighting various information segments.
6.2 Uhrzeit und Datum einstellen
To set the time and date on your weather station:
- Press and hold the "AL/SET" button (usually located below the display) for a few seconds until the time digits start flashing.
- Use the "CH" or "MEM" buttons to adjust the flashing value (e.g., hour, minute).
- Press "AL/SET" again to confirm the setting and move to the next adjustable item (e.g., minute, year, month, day).
- Repeat until all settings are configured. Press "AL/SET" one last time to exit the setting mode.
6.3 Auswahl der Temperatureinheit (°C/°F)
So schalten Sie zwischen Celsius (°C) und Fahrenheit (°F) um:
- Locate the °C/°F button, usually on the back or side of the main unit, or sometimes integrated with another button (e.g., "MEM" or "CH" with a short press).
- Press this button to toggle between the two temperature units. The display will update accordingly.
6.4 Kanalauswahl (für mehrere Sensoren)
If you have multiple wireless sensors (up to 3 supported by SWS 3000 W), you can switch between their readings:
- Press the "CH" button (Channel) on the main unit.
- Each press will cycle through the available channels (CH1, CH2, CH3) or an auto-cycle mode.
- Ensure each sensor is set to a different channel using its internal switch (if available).
6.5 Memory Function (Min/Max Readings)
The weather station records the minimum and maximum temperature and humidity readings over a period.
- Press the "MEM" button (Memory) to view die maximal aufgezeichneten Werte.
- Press "MEM" again to view die minimal aufgezeichneten Werte.
- Drücken Sie ein drittes Mal auf „MEM“, um zu den aktuellen Messwerten zurückzukehren.
- To clear the recorded Min/Max values, press and hold the "MEM" button while viewsie.
7. Wartung
- Reinigung: Wischen Sie das Hauptgerät und den Sensor mit einem weichen, fusselfreien Tuch ab.amp Tuch. Keine Scheuer- oder Lösungsmittel verwenden.
- Batteriewechsel: Replace batteries when the low battery indicator appears on the display. Always replace all batteries in a unit at the same time.
- Lagerung: Bei längerer Lagerung des Geräts sollten alle Batterien entfernt werden, um ein Auslaufen zu verhindern. An einem kühlen, trockenen Ort aufbewahren.
8. Fehlerbehebung
| Problem | Mögliche Ursache | Lösung |
|---|---|---|
| Kein Display am Hauptgerät. | Die Batterien sind leer oder falsch eingelegt. | Prüfen Sie die Batteriepolarität und ersetzen Sie die Batterien gegebenenfalls durch neue. |
| Outdoor reading not displayed or flashing. | Sensor außerhalb des Messbereichs, schwache Sensorbatterie oder Störungen. | Move sensor closer to main unit. Replace sensor batteries. Relocate units away from interference sources. Re-pair units if necessary. |
| Ungenaue Temperatur-/Feuchtigkeitsmesswerte. | Sensor, der direkter Sonneneinstrahlung oder Feuchtigkeit ausgesetzt ist. | Verlegen Sie den Sensor an einen schattigen, geschützten Ort. |
| Uhrzeit/Datum falsch. | Not set correctly or batteries removed. | Follow instructions in Section 6.2 to set time and date. |
9. Spezifikationen
| Besonderheit | Detail |
|---|---|
| Modellnummer | SWS 3000 W |
| Marke | SENSOR |
| Abmessungen der Haupteinheit (L x B x H) | 80 x 161 x 23 mm |
| Gewicht der Haupteinheit | 165 g |
| Innentemperaturbereich | 0 °C bis 60 °C |
| Außentemperaturbereich | 0 °C bis 60 °C |
| Temperaturgenauigkeit | ±1 °C |
| Feuchtigkeitsbereich | 20 % bis 95 % relative Luftfeuchtigkeit |
| Drahtlose Frequenz | 433 MHz |
| Übermittlungsbereich | Bis zu 30 Meter (im Freien) |
| Stromversorgung (Haupteinheit) | AAA-Batterien (nicht im Lieferumfang enthalten) |
| Stromquelle (Sensor) | AAA-Batterien (nicht im Lieferumfang enthalten) |
| Besonderheit | Leichtbauweise |
| Farbe | Weiß |
Note: Specifications are subject to change without notice. Battery quantities are typical and should be confirmed with product packaging.
10. Garantie und Support
SENCOR products are designed and manufactured to the highest quality standards. For warranty information, please refer to the warranty card included with your product or visit the official SENCOR website. For technical support or service inquiries, please contact SENCOR customer service through their official channels.
Bewahren Sie Ihren Kaufbeleg als Kaufnachweis für Garantiezwecke auf.


