Einführung
Thank you for choosing the Rebel RB-1060 Cordless Air Compressor. This portable and versatile device is designed for convenient inflation of various items, including vehicle tires (cars, motorcycles, bicycles), sports balls, and swimming aids. Its compact design and powerful Li-ion battery make it an ideal tool for use at home or on the go. Please read this manual thoroughly before operation to ensure safe and efficient use of your compressor.

Image: The Rebel RB-1060 Cordless Air Compressor, showing its compact, handheld design with a battery attached at the base and a digital display on top.
Sicherheitshinweise
Beachten Sie beim Umgang mit Elektrogeräten stets die grundlegenden Sicherheitsvorkehrungen, um das Risiko von Bränden, Stromschlägen und Verletzungen zu verringern. Bewahren Sie diese Bedienungsanleitung zum späteren Nachschlagen auf.
- Lies alle Anweisungen: Familiarize yourself with the operation and limitations of the compressor.
- Halten Sie den Arbeitsbereich sauber: Überladene Bereiche laden zu Unfällen ein.
- Vermeiden Sie gefährliche Umgebungen: Verwenden Sie den Kompressor nicht in damp oder an feuchten Orten, oder setzen Sie es Regen aus.
- Kinder fernhalten: Erlauben Sie Kindern nicht, den Kompressor zu bedienen.
- Werkzeuge im Lager: When not in use, store the compressor in a dry, high, or locked-up place, out of reach of children.
- Verwenden Sie das richtige Werkzeug: Do not force the compressor or attachments to do a job for which they were not designed.
- Kleiden Sie sich angemessen: Tragen Sie keine weite Kleidung oder Schmuck. Enthalten Sie lange Haare.
- Pflegen Sie Werkzeuge sorgfältig: Keep the compressor clean for best and safest performance. Follow instructions for lubricating and changing accessories.
- Auf beschädigte Teile prüfen: Before further use, carefully check the compressor for any damaged parts.
- Do Not Over-Inflate: Always check the recommended pressure for the item you are inflating to avoid over-inflation and potential damage or injury.
- Batteriesicherheit: Use only the specified battery and charger. Do not expose the battery to extreme temperatures or disassemble it.
Packungsinhalt
Stellen Sie sicher, dass alle Artikel im Paket vorhanden sind:
- Rebel RB-1060 Cordless Air Compressor Unit
- Li-Ionen-Akku (20 V)
- AC Charger for Battery
- Bicycle Tire Adapter
- Sports Needle (for balls)
- universal-Adapter
- Bedienungsanleitung

Image: The flexible inflation hose with a quick-connect chuck, alongside various adapters including a sports needle and a universal adapter.
Produkt überview
Familiarize yourself with the main components and controls of your Rebel RB-1060 air compressor.
- Haupteinheit: The handheld body containing the motor and controls.
- Aufblasöffnung: Where the hose connects.
- LCD Anzeige: Shows current pressure, target pressure, and battery status.
- Bedientasten:
- Netzschalter: Zum Ein-/Ausschalten des Geräts.
- '+'-Schaltfläche: To increase target pressure.
- '-' Taste: To decrease target pressure.
- Batteriepack: Detachable 20V Li-ion battery.
- Aufblasschlauch: Flexible hose for connecting to items.
- Adapter: Bicycle tire adapter, sports needle, universal adapter.
- Adapter Storage: Integrated storage slots for adapters on the unit base.
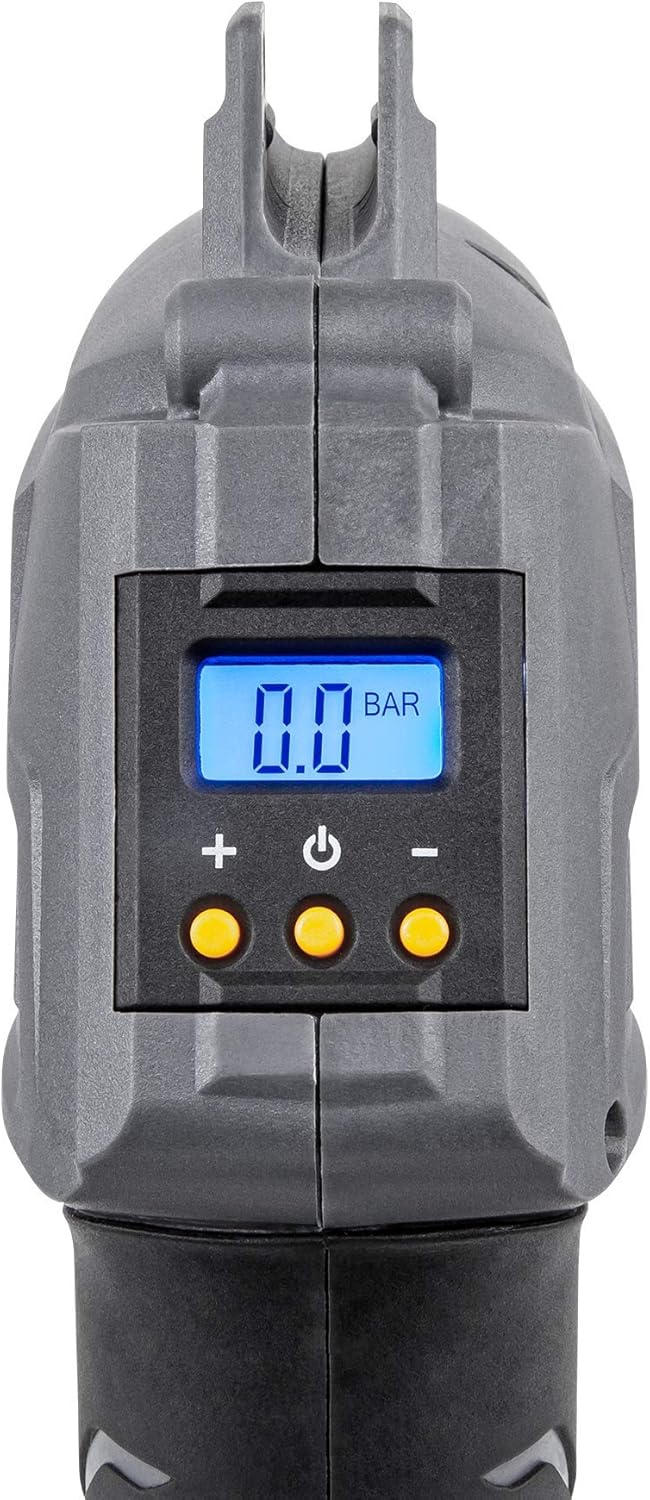
Bild: Eine Nahaufnahme view of the compressor's digital LCD display, showing "0.0 BAR" and the '+', power, and '-' control buttons below it.
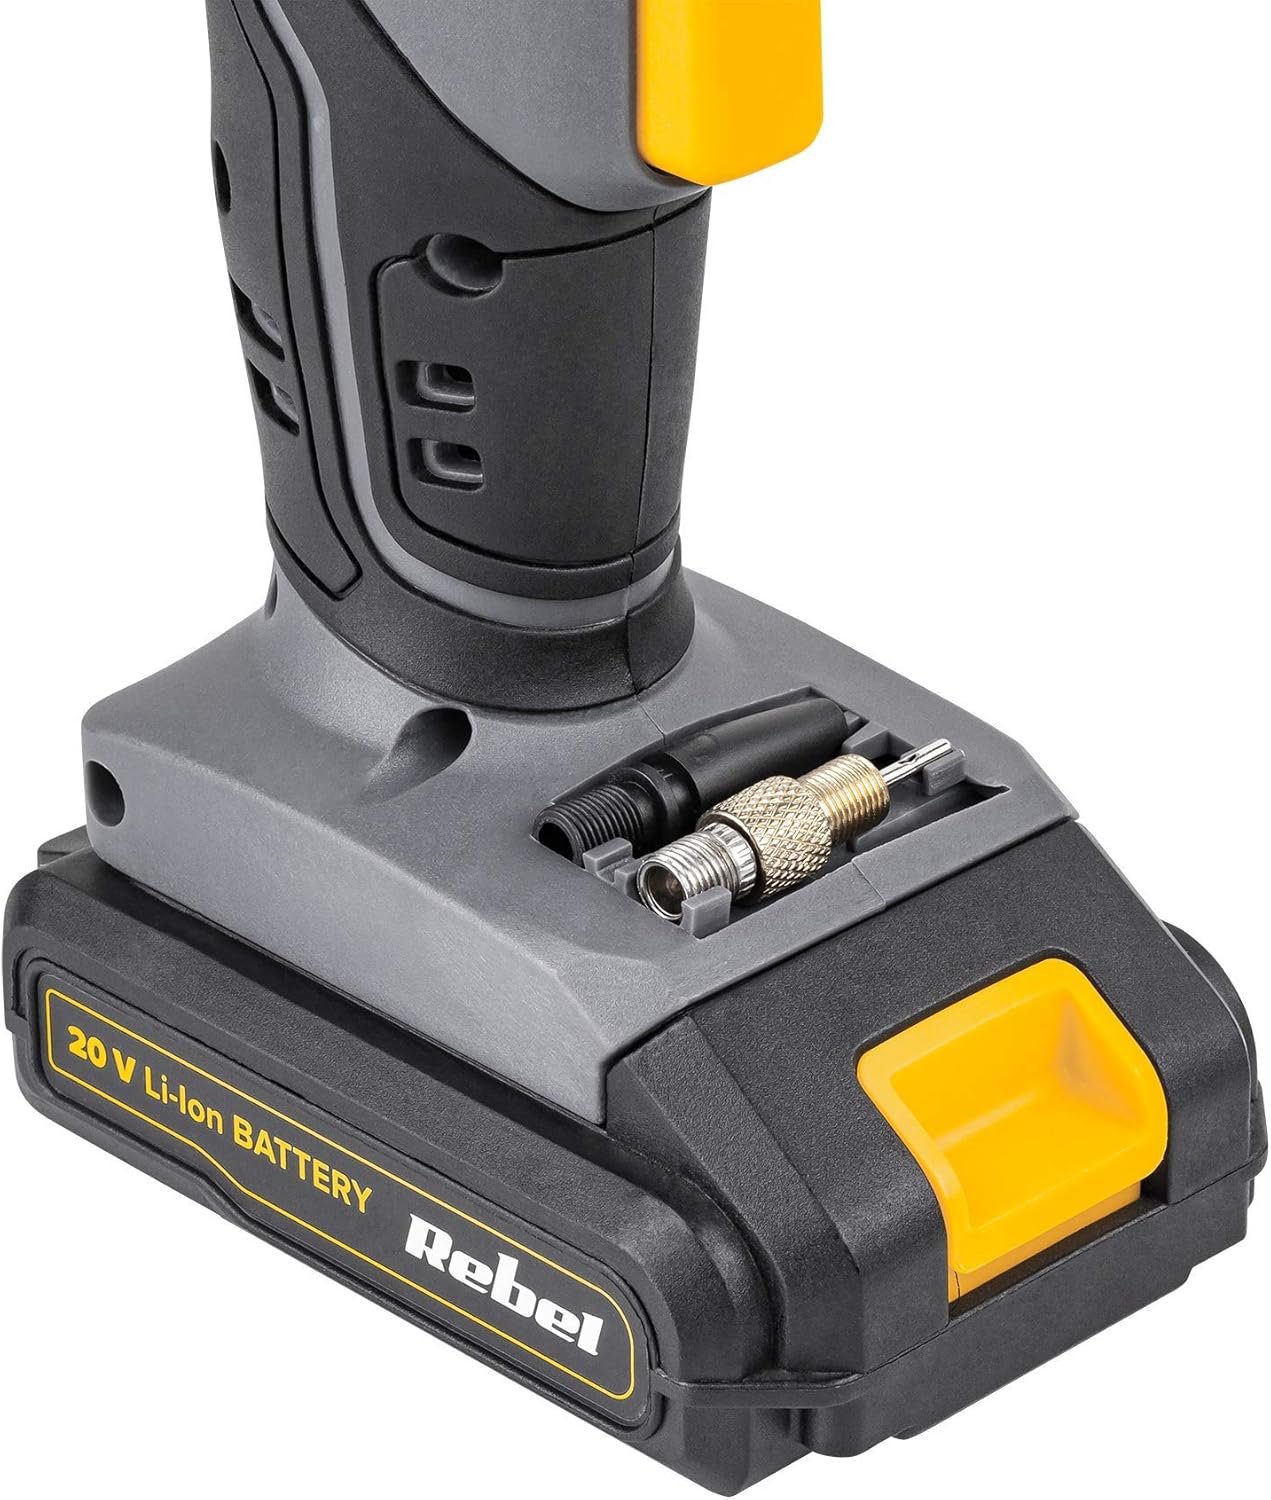
Bild: Eine detaillierte view of the base of the air compressor, showing integrated storage compartments for various inflation adapters.
Aufstellen
1. Laden des Akkus
Before first use, fully charge the Li-ion battery. Connect the AC charger to a power outlet and then to the battery pack. The charger indicator light will show the charging status (e.g., red for charging, green for fully charged). Charging time may vary.

Image: The Rebel 20V Li-ion battery pack placed on its dedicated AC charger, with an indicator light visible.
2. Anschließen der Batterie
Once charged, slide the battery pack onto the base of the compressor unit until it clicks securely into place.
3. Connecting the Inflation Hose and Adapters
Screw the inflation hose securely into the inflation port on the front of the compressor. Select the appropriate adapter for the item you wish to inflate and attach it to the end of the hose.
- For car/motorcycle tires: Use the standard Schrader valve connector on the hose.
- For bicycle tires: Use the bicycle tire adapter if needed (Presta valve).
- For sports balls: Use the sports needle.
- For swimming aids/inflatables: Use the universal adapter.
Bedienungsanleitung
1. Einschalten
Press the power button (usually the middle button) to turn on the compressor. The LCD display will illuminate and show the current pressure (if connected) or '0.0 BAR' (or PSI, depending on unit setting).
2. Einstellen des Zieldrucks
Use the '+' and '-' buttons to set your desired target pressure. Refer to the item's manufacturer recommendations for correct pressure levels. The display will show the target pressure as you adjust it.
3. Connecting to Item
Connect the appropriate adapter and hose to the item you wish to inflate. Ensure a secure connection to prevent air leakage.

Image: A person using the Rebel RB-1060 compressor to inflate a bicycle tire, demonstrating the practical application of the device.

Image: A person using the Rebel RB-1060 compressor to inflate a soccer ball, highlighting its use with sports equipment.
4. Anfangsinflation
Once the target pressure is set and the hose is connected, press the power button again to start the inflation process. The compressor will automatically stop when the target pressure is reached.
5. Monitoring Pressure
The LCD display will show the real-time pressure during inflation. You can monitor the progress and ensure the item is not over-inflated.
6. Ausschalten
After inflation, disconnect the hose from the item and then from the compressor. Press and hold the power button to turn off the unit. Remove the battery if storing for an extended period.
Wartung
- Reinigung: Wipe the compressor body with a soft, damp Mit einem Tuch abwischen. Keine scharfen Chemikalien oder Scheuermittel verwenden. Sicherstellen, dass kein Wasser in die internen Bauteile eindringt.
- Lagerung: Store the compressor and its accessories in a dry, clean place, away from direct sunlight and extreme temperatures.
- Batteriepflege: For optimal battery life, charge the battery fully before storage and recharge it every 3-6 months if not in regular use. Do not store the battery in a completely discharged state.
- Schlauch und Adapter: Inspect the inflation hose and adapters regularly for any signs of wear or damage. Replace if necessary to ensure proper sealing and performance.
Fehlerbehebung
| Problem | Mögliche Ursache | Lösung |
|---|---|---|
| Der Kompressor schaltet sich nicht ein. | Batterie nicht geladen oder nicht richtig angeschlossen. | Ensure battery is fully charged and securely attached to the unit. |
| Kompressor läuft, aber pumpt nicht auf. | Hose or adapter not securely connected; Leak in hose/adapter; Item valve blocked. | Check all connections for tightness. Inspect hose and adapters for damage. Ensure the item's valve is clear. |
| Ungenaue Druckanzeige. | Poor connection to item; Sensor malfunction. | Stellen Sie eine feste Verbindung sicher. Sollte das Problem weiterhin bestehen, wenden Sie sich bitte an den Kundendienst. |
| Der Kompressor schaltet sich vorzeitig ab. | Zieldruck erreicht; Überhitzung; Niedriger Batteriestand. | Check target pressure setting. Allow unit to cool down if hot. Recharge battery. |
Technische Daten
| Besonderheit | Detail |
|---|---|
| Modellnummer | RB-1060 |
| Marke | REBELL |
| Stromquelle | Batteriebetrieben (Li-Ionen) |
| Bandtage | 20V (Nominal, 21 Volts max) |
| Maximaler Druck | 7 bar |
| Akku-Typ | 1 Lithium-Ionen-Akku (im Lieferumfang enthalten) |
| Artikelgewicht | 1.7 Kilogramm |
| Verpackungsabmessungen | 26.6 x 24.7 x 8.6 cm |
| Schallpegel | 834 Decibels (Note: This value appears unusually high and may be a data error. Typical portable compressors operate between 70-90 dB.) |
| Kapazität | 15 Litres (Note: This likely refers to air displacement or volume handled, not a tank capacity as this is a direct inflator.) |
Garantie und Support
Informationen zur Garantie und technische Unterstützung finden Sie in der mit Ihrem Kauf gelieferten Dokumentation oder wenden Sie sich an den Händler, bei dem Sie das Produkt erworben haben. Bewahren Sie Ihren Kaufbeleg für eventuelle Garantieansprüche auf.


