Einführung
This manual provides detailed instructions for the installation, operation, and maintenance of your Fanimation Studio Collection LP8347BLGR Level Ceiling Fan with LED Light Kit. Please read this manual thoroughly before installation and use to ensure safe and efficient operation. Keep this manual for future reference.
The Level ceiling fan is designed to provide comfort and style to your indoor space. This 44-inch hugger fan features three blades, three speed settings, and an 18-watt dimmable LED light kit. Control is managed via an included wall control.
Hauptmerkmale:
- Matte greige finish with matching blades.
- Integrated 18-watt dimmable LED light kit with frosted glass shade.
- 44-inch fan size, ideal for small rooms.
- Hugger mount design for low-profile Installation.
- Three speed settings for customized airflow up to 4,530-CFM.
- Includes wall control for fan speed and light level adjustment.
- Reverse switch for seasonal direction change.
Sicherheitshinweise
WARNUNG: Um das Risiko von Bränden, Stromschlägen oder Verletzungen zu verringern, befolgen Sie stets diese grundlegenden Vorsichtsmaßnahmen:
- Lesen Sie alle Anweisungen sorgfältig durch, bevor Sie den Ventilator installieren und in Betrieb nehmen.
- All wiring must be in accordance with the National Electrical Code (NEC) and local electrical codes. If you are unfamiliar with wiring, consult a qualified electrician.
- Before beginning installation, disconnect power by turning off the circuit breakers to the fan's junction box.
- Stellen Sie sicher, dass der Aufstellungsort eine ungehinderte Drehung der Lüfterflügel ermöglicht und dass die Flügel mindestens 2.1 Meter (7 Fuß) über dem Boden angebracht sind.
- The outlet box and support structure must be securely mounted and capable of supporting a minimum of 35 lbs (15.9 kg). Use only UL/ETL listed outlet boxes marked "ACCEPTABLE FOR FAN SUPPORT."
- Betreiben Sie den Ventilator nicht mit einem beschädigten Netzkabel oder Stecker.
- Vermeiden Sie es, Finger oder Gegenstände in die Ventilatorflügel zu stecken, während der Ventilator in Betrieb ist.
- Do not use the fan with any solid-state speed control device other than the provided wall control.
- Always turn off the fan and wait for the blades to stop completely before cleaning or performing maintenance.
Packungsinhalt
Packen Sie Ihren Ventilator vorsichtig aus und überprüfen Sie den Inhalt. Folgende Teile sollten enthalten sein:
- Deckenventilator-Motorbaugruppe
- Lüfterblätter (3)
- LED Light Kit with Frosted Glass Shade
- Wandsteuereinheit
- Mounting Hardware Kit (screws, washers, wire nuts)
- Bedienungsanleitung

Figure 1: Fanimation Level Ceiling Fan with LED Light Kit. This image shows the complete fan assembly, including the motor housing, three blades, and the integrated LED light fixture.
Installation
This section outlines the general steps for installing your ceiling fan. It is highly recommended to have a qualified electrician perform the installation if you are not experienced with electrical wiring.
Erforderliche Werkzeuge:
- Kreuzschlitz-Schraubendreher
- Schlitzschraubendreher
- Abisolierzange
- Verstellbarer Schraubenschlüssel
- Trittleiter
- Isolierband
Installationsschritte:
- Strom ausschalten: Vor Beginn der Arbeiten muss sichergestellt werden, dass die Stromzufuhr am Sicherungskasten oder Leitungsschutzschalter unterbrochen ist, um einen Stromschlag zu vermeiden.
- Montieren Sie die Anschlussdose: Securely attach the UL/ETL listed outlet box (not included) to the ceiling joist, ensuring it can support the fan's weight.
- Montagehalterung installieren: Befestigen Sie die Montagehalterung des Ventilators mit den mitgelieferten Schrauben und Unterlegscheiben an der Anschlussdose.
- Verdrahten Sie den Lüfter: Connect the fan's electrical wires to the household wiring according to the wiring diagram provided in the full installation guide (refer to manufacturer's website for detailed diagrams). Ensure all connections are secure with wire nuts.
- Lüftereinheit anbringen: Carefully lift the fan motor assembly and attach it to the mounting bracket. This is a hugger-style fan, so it mounts directly to the ceiling.
- Lüfterflügel montieren: Securely attach the three fan blades to the motor housing using the provided screws. Ensure all screws are tightened.
- Beleuchtungsset installieren: Connect the wires for the LED light kit and attach the light kit assembly to the bottom of the fan motor. Secure the frosted glass shade.
- Wandsteuerung installieren: Follow the instructions provided with the wall control unit to install it in a standard wall switch box. Ensure proper wiring for fan speed and light control.
- Strom wiederherstellen: Sobald alle Verbindungen hergestellt und der Ventilator vollständig montiert ist, schalten Sie die Stromversorgung am Sicherungsautomaten wieder ein.
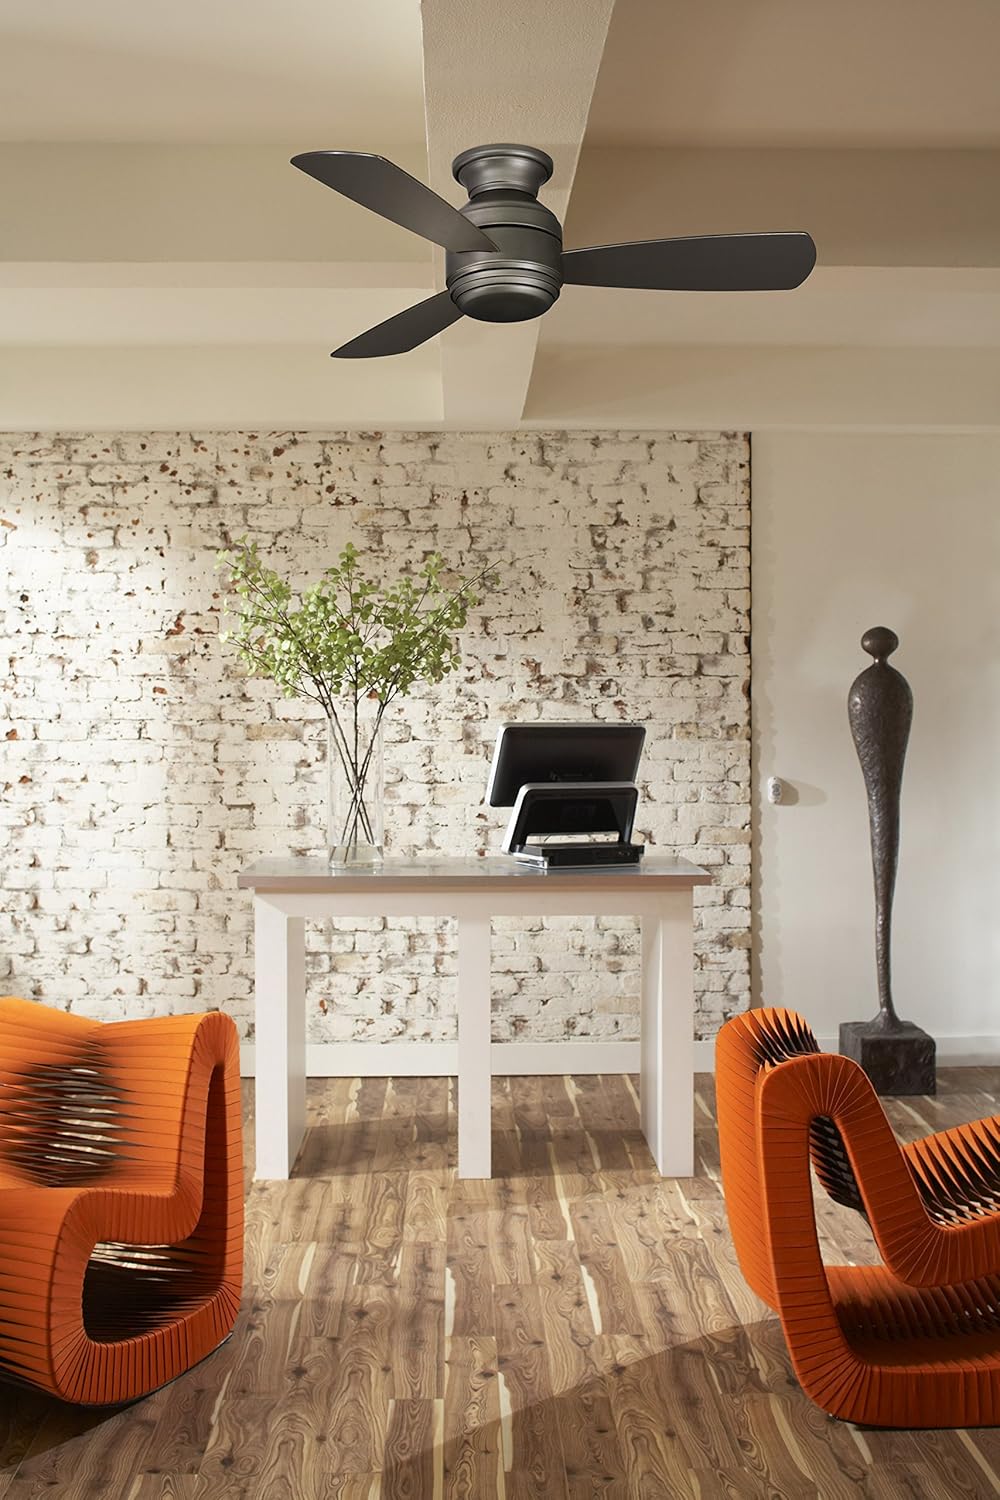
Figure 2: Fanimation Level Ceiling Fan installed in a living space. This image demonstrates the fan's appearance when mounted, showing its compact hugger design and how it integrates into a room's decor.
Betrieb
Your Fanimation Level Ceiling Fan is controlled by the included wall control unit. Familiarize yourself with its functions for optimal use.
Lüfterdrehzahlregelung:
- The wall control allows you to select from three fan speeds: Low, Medium, and High.
- Press the fan speed buttons to cycle through the desired airflow level.
Lichtsteuerung:
- The integrated LED light kit is dimmable.
- Use the light control button on the wall unit to turn the light on/off and to adjust its brightness. Typically, holding the button will dim or brighten the light.
Umkehrfunktion:
The fan features a reverse switch, usually located on the motor housing, which allows you to change the direction of blade rotation. This is useful for seasonal comfort:
- Sommerbetrieb: Die Flügel drehen sich gegen den Uhrzeigersinn und drücken die Luft nach unten, um einen kühlenden Luftzug zu erzeugen.
- Winterbetrieb: Die Flügel drehen sich im Uhrzeigersinn und saugen Luft nach oben, um die in der Nähe der Decke gefangene warme Luft zu zirkulieren.
- Schalten Sie den Ventilator immer aus und warten Sie, bis die Rotorblätter vollständig zum Stillstand gekommen sind, bevor Sie die Drehrichtung ändern.
Pflege und Wartung
Regular care and maintenance will help prolong the life and maintain the appearance of your ceiling fan.
Reinigung:
- Schalten Sie immer den Strom aus to the fan at the circuit breaker before cleaning.
- Verwenden Sie ein weiches,amp cloth to clean the fan blades and motor housing. Do not use abrasive cleaners or solvents, as these may damage the finish.
- Reinigen Sie die Lüfterflügel regelmäßig mit Staub, um Staubansammlungen zu vermeiden, die zu einem Wackeln führen können.
Glühbirnenwechsel:
- The fan comes with an integrated LED light kit. LEDs have a long lifespan and typically do not require frequent replacement.
- If the LED light module requires service, contact a qualified electrician or Fanimation customer support. Do not attempt to replace individual LED components.
Allgemeine Wartung:
- Periodically check all screws on the fan and mounting hardware to ensure they are tight.
- No lubrication is necessary for the fan motor.
Fehlerbehebung
Bevor Sie sich an den Kundendienst wenden, versuchen Sie bitte diese gängigen Schritte zur Fehlerbehebung:
| Problem | Mögliche Ursache | Lösung |
|---|---|---|
| Lüfter startet nicht. | No power to the fan; loose wire connections; faulty wall control. | Check circuit breaker. Ensure all wire connections are secure. Verify wall control is properly installed and functioning. |
| Licht funktioniert nicht. | Loose wire connection to light kit; faulty LED module; incorrect wall control setting. | Check light kit wiring. Ensure wall control is set to "on" and brightness is adjusted. If LED module is faulty, contact support. |
| Lüfter wackelt. | Lose Klingenschrauben; unausgewogene Klingen; lose Montagehalterung. | Tighten all blade screws. Check for bent blades. Ensure mounting bracket is securely fastened to the ceiling box. Use a balancing kit if necessary. |
| Lauter Betrieb. | Loose screws; motor hum; fan not properly seated. | Check and tighten all screws. Allow a 24-hour break-in period for new motors. Ensure fan is securely mounted. |
Technische Daten
| Attribut | Detail |
|---|---|
| Modellname | Ebene |
| Modellnummer | LP8347BLGR |
| Marke | Fanimation |
| Farbe | Matte Greige |
| Größe | 44 Zoll |
| Anzahl der Klingen | 3 |
| Klingenmaterial | Holz |
| Luftstromkapazität | 4,530 CFM (Kubikfuß pro Minute) |
| Wastage | 18 watts (LED Light Kit) |
| Bandtage | 120 Volt (Wechselstrom) |
| Kontrollmethode | Wandsteuerung |
| Technische Daten | 44 x 44 x 11.25 Zoll |
| Artikelgewicht | 15.72 Pfund |
| Verwendung im Innen- und Außenbereich | Innenbereich |
| UPC | 840506087675 |
Garantieinformationen
The Fanimation Studio Collection LP8347BLGR Level Ceiling Fan comes with a Eingeschränkte lebenslange GarantieDiese Garantie deckt Material- und Verarbeitungsfehler bei normalem Gebrauch und ordnungsgemäßer Wartung ab. Bitte bewahren Sie Ihren Kaufbeleg für Garantieansprüche auf.
For full details regarding warranty coverage, limitations, and how to make a claim, please refer to the official warranty statement included with your product packaging or visit the Fanimation official webWebsite.
Kundenservice
If you encounter any issues not covered in the troubleshooting section, or require further assistance with your Fanimation Level Ceiling Fan, please contact Fanimation customer support.
For the most up-to-date contact information, including phone numbers and online support resources, please visit the official Fanimation webWebsite:
When contacting support, please have your model number (LP8347BLGR) and proof of purchase readily available.


