1. Einleitung
This instruction manual provides essential information for the safe and efficient operation, setup, and maintenance of your Einhell TC-SM 216 Sliding Miter Saw. Please read this manual thoroughly before using the tool to ensure proper handling and to prevent injury or damage.
The Einhell TC-SM 216 sliding miter saw is designed for precise sawing and cutting tasks in home workshops and garages. Featuring a 1600 W motor, it uses a 216 mm diameter blade (30 mm bore). The saw includes a smooth sliding function for wide workpieces, a rotating table with quick-set detents for common angles, and a left-tilting saw head for miter cuts. It offers a cutting width of up to 305 mm at 90° and 210 mm at 45°. A visible integrated laser guides cuts. Workpiece supports and a clamping device secure longer materials. The high-quality tungsten carbide saw blade ensures clean cuts, and a spindle lock simplifies blade changes. A dust funnel and 36 mm extraction port, or the included dust bag, manage sawdust.
2. Allgemeine Sicherheitshinweise
WARNUNG:
Lesen Sie alle Sicherheitshinweise, Anweisungen, Abbildungen und technischen Daten, die diesem Elektrowerkzeug beiliegen. Die Nichtbeachtung der unten aufgeführten Anweisungen kann zu Stromschlag, Brand und/oder schweren Verletzungen führen.
2.1 Sicherheit am Arbeitsplatz
- Halten Sie den Arbeitsbereich sauber und gut beleuchtet. Unordnung oder dunkle Bereiche führen zu Unfällen.
- Arbeiten Sie mit Elektrowerkzeugen nicht in explosionsgefährdeten Bereichen, in denen sich brennbare Flüssigkeiten, Gase oder Staub befinden. Elektrowerkzeuge erzeugen Funken, die den Staub oder die Dämpfe entzünden können.
- Halten Sie Kinder und andere Personen während der Benutzung des Elektrowerkzeugs fern. Durch Ablenkung können Sie die Kontrolle verlieren.
2.2 Elektrische Sicherheit
- Der Stecker des Elektrowerkzeugs muss in die Steckdose passen. Der Stecker darf in keiner Weise verändert werden. Verwenden Sie keine Adapterstecker gemeinsam mit geerdeten Elektrowerkzeugen. Unveränderte Stecker und passende Steckdosen verringern das Risiko eines elektrischen Schlages.
- Vermeiden Sie Körperkontakt mit geerdeten Oberflächen wie Rohren, Heizkörpern, Herden und Kühlschränken. Es besteht ein erhöhtes Risiko eines Stromschlags, wenn Ihr Körper geerdet ist.
- Setzen Sie Elektrowerkzeuge nicht Regen oder Nässe aus. Das Eindringen von Wasser in ein Elektrowerkzeug erhöht das Risiko eines Stromschlags.
2.3 Persönliche Sicherheit
- Tragen Sie immer einen Augenschutz. Verwenden Sie eine Schutzbrille, eine Schutzbrille mit Seitenschutz oder ein Gesichtsschild.
- Wear hearing protection when operating the saw.
- Ziehen Sie sich angemessen an. Tragen Sie keine weite Kleidung oder Schmuck. Halten Sie Haare und Kleidung von beweglichen Teilen fern.
- Überstrecken Sie sich nicht. Sorgen Sie stets für einen sicheren Stand und halten Sie das Gleichgewicht.
- Always use a dust mask if operations create dust.
2.4 Miter Saw Specific Safety
- Sichern Sie das Werkstück stets mit der Klammeramping device. Do not hold the workpiece by hand.
- Ensure the blade is sharp and correctly installed.
- Never attempt to remove cut-off material while the blade is rotating.
- Lassen Sie die Klinge ihre volle Drehzahl erreichen, bevor Sie mit dem Schneiden beginnen.
- Do not operate the saw without all guards in place.
3. Komponenten und Funktionen
Familiarize yourself with the various parts and key features of your Einhell TC-SM 216 Miter Saw for safe and effective operation.

Abbildung 3.1: Gesamt view of the Einhell TC-SM 216 Sliding Miter Saw, showing its main components.

Abbildung 3.2: A user operating the miter saw, demonstrating a typical cutting scenario. Always wear appropriate safety gear.

Abbildung 3.3: Detaillierte view of the smooth sliding mechanism, essential for cutting wider materials.

Abbildung 3.4: The saw blade positioned over a workpiece, illustrating the cutting action.
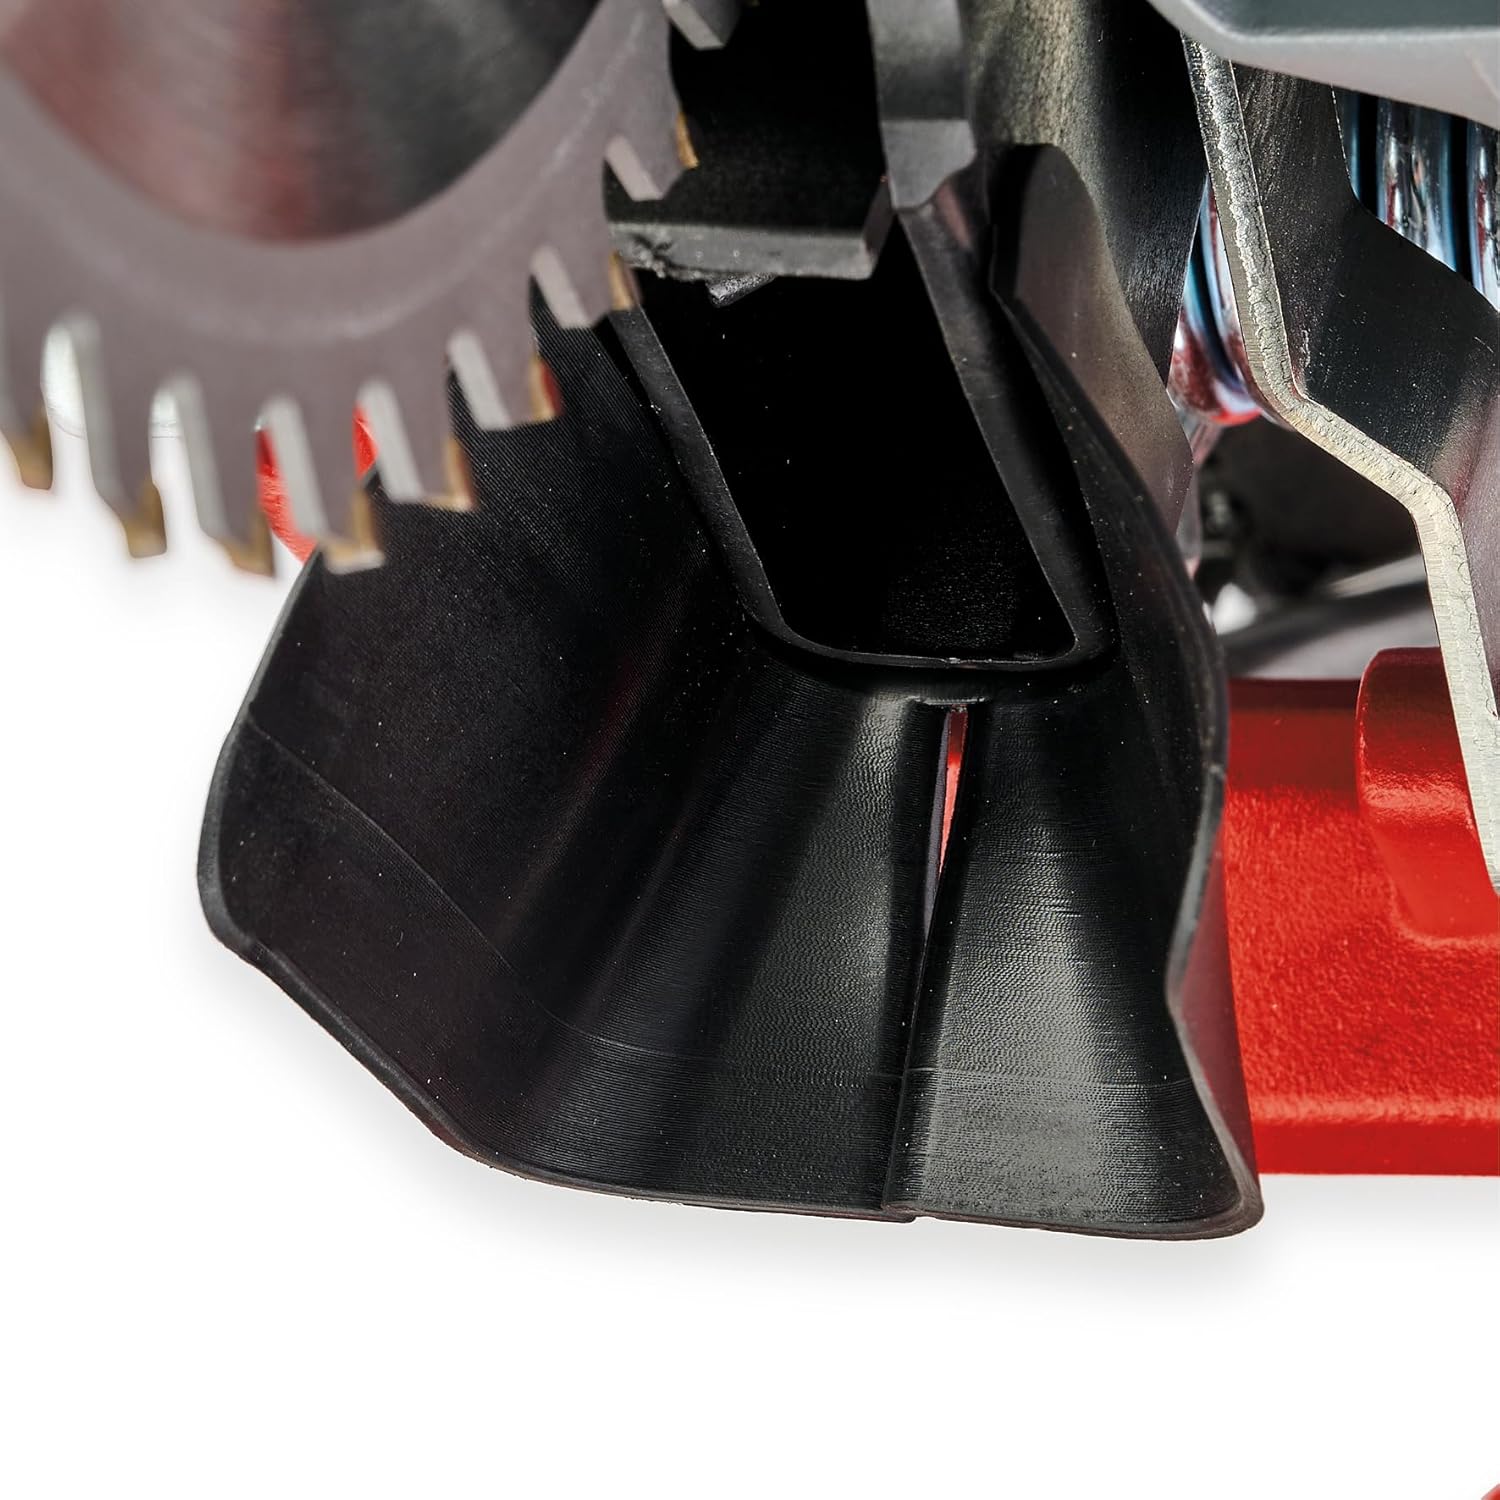
Abbildung 3.5: The integrated dust collection funnel, designed to capture sawdust during operation.

Abbildung 3.6: The miter angle scale on the rotating table, showing clear markings for precise angle adjustments.

Abbildung 3.7: The spindle lock button, used to secure the saw blade for safe and easy blade changes.
Hauptmerkmale vorbeiview:
 216 mm Saw Blade: Equipped with a high-quality 216 mm diameter tungsten carbide saw blade for precise and clean cuts.
 Max. 305 mm Cutting Width: The sliding function allows for a maximum cutting width of 305 mm, accommodating wide workpieces.
 Max. 65 mm Cutting Depth: Capable of cutting materials up to 65 mm deep at 90 degrees.
 Integrated Laser Guide: Projects a visible line for precise alignment of cuts.
 Dust Funnel: An efficient dust funnel behind the blade, along with a 36 mm extraction port, helps manage sawdust.
- Leistungsstarker Motor: 1600 W motor for efficient cutting.
- Rotating Table: Precise angle adjustment with quick-set detents for common miter angles.
- Tilting Saw Head: Saw head tilts to the left for accurate bevel cuts.
- Werkstückauflagen: Left and right extensions for supporting longer materials.
- ClampGerät: Secures workpieces during cutting operations.
- Einfacher Klingenwechsel: Spindle lock and easily accessible blade screw facilitate quick and safe blade replacement.
4. Einrichtung
4.1 Auspacken und Zusammenbau
- Entnehmen Sie vorsichtig alle Komponenten aus der Verpackung.
- Inspect the tool for any signs of damage. Do not operate a damaged tool.
- Ensure all included components are present: miter saw unit, tungsten carbide saw blade, dust bag, workpiece supports, and clampgerät.
- Mount the saw securely to a stable workbench using appropriate fasteners (not included).
- Attach the dust bag or connect a suitable dust extraction system to the 36 mm extraction port.
4.2 Adjusting Workpiece Supports and ClampGerät
Extend the workpiece supports on both sides to provide stable support for longer materials. Position the clamping device to firmly secure the workpiece against the fence and table before making any cuts.
4.3 Erste Klingenprüfung
Verify that the pre-installed saw blade is securely fastened and free from damage. Ensure the blade guard operates smoothly and retracts properly during operation.
5. Bedienungsanleitung
5.1 Making Straight Cross Cuts (90° Miter, 0° Bevel)
- Ensure the rotating table is locked at the 0° position.
- Legen Sie das Werkstück fest an den Zaun und fixieren Sie es mit der Klemme.ampgerät.
- Lower the saw head slightly to align the blade with your cut line, using the integrated laser guide for precision.
- Start the motor and allow the blade to reach full speed (5200 RPM).
- Slowly lower the saw head through the workpiece, maintaining a steady, controlled motion. For wider pieces, utilize the sliding function by pulling the saw head forward, lowering it, and pushing it back through the material.
- Once the cut is complete, release the trigger and allow the blade to stop rotating before raising the saw head.
5.2 Gehrungschnitte anfertigen
- Unlock the rotating table.
- Adjust the table to the desired miter angle (e.g., 45°). Use the quick-set detents for common angles.
- Lock the rotating table securely at the chosen angle.
- Proceed with the cut as described for straight cross cuts, ensuring the workpiece is properly supported and clampHrsg.
5.3 Schrägschnitte anfertigen
- Ensure the rotating table is locked at the 0° miter position.
- Unlock the saw head tilt mechanism.
- Tilt the saw head to the desired bevel angle (up to 45° to the left).
- Lock the saw head securely at the chosen angle.
- Proceed with the cut as described for straight cross cuts, ensuring the workpiece is properly supported and clampHrsg.
5.4 Verwendung des Laser-Guides
The integrated laser guide projects a line onto the workpiece, indicating the exact path of the saw blade. Activate the laser before positioning your workpiece to ensure accurate alignment with your marked cut line.
6. Wartung
6.1 Reinigung
- Vor der Reinigung muss die Säge immer vom Stromnetz getrennt werden.
- Regularly empty the dust bag or dust extraction system.
- Use a brush or compressed air to remove sawdust and debris from the motor housing, blade guard, and sliding mechanism.
- Keep the laser lens clean for optimal visibility.
6.2 Saw Blade Replacement
WARNUNG:
Ensure the saw is unplugged before attempting to change the blade.
- Press and hold the spindle lock button (refer to Figure 3.7 for location) to prevent the blade from rotating.
- Use the appropriate tool (e.g., wrench) to loosen the blade screw.
- Entfernen Sie die alte Klinge vorsichtig und achten Sie dabei auf ihre Drehrichtung.
- Install the new 216 mm (30 mm bore) tungsten carbide blade, ensuring the teeth are oriented correctly for cutting.
- Tighten the blade screw firmly while holding the spindle lock.
- Check that the blade guard moves freely after replacement.
6.3 Schmierung
Periodically apply a light lubricant to the sliding mechanism to ensure smooth operation.
7. Fehlerbehebung
| Problem | Mögliche Ursache | Lösung |
|---|---|---|
| Säge startet nicht | Keine Stromversorgung; Schalter defekt; Überlastschutz aktiviert | Check power connection; Contact service center; Allow motor to cool down |
| Schlechte Schneidleistung / Grobe Schnitte | Dull or damaged blade; Incorrect blade type for material; Blade installed incorrectly | Replace blade; Use appropriate blade; Reinstall blade correctly |
| Excessive sawdust accumulation | Dust bag full; Extraction port blocked; Ineffective dust collection system | Empty dust bag; Clear blockage; Ensure dust extraction system is properly connected and functioning |
| Laserführung nicht sichtbar oder ungenau | Laser lens dirty; Laser misaligned | Clean laser lens; Refer to service manual for laser adjustment (if applicable) or contact service |
| Sliding mechanism stiff | Lack of lubrication; Accumulation of dust/debris | Clean and lubricate sliding rails |
8. Spezifikationen
- Modell: TC-SM 216
- Leistungsaufnahme: 1600 Watt
- Bandtage: 240 V
- Leerlaufdrehzahl: 5200 U/min
- Sägeblattdurchmesser: 216 mm
- Saw Blade Bore: 30 mm
- Max. Cutting Width (90°): 305 mm
- Max. Cutting Width (45°): 210 mm
- Max. Schnitttiefe (90°): 65 mm
- Miter Angle Range: -45° bis +45°
- Abschrägungswinkelbereich: 0° to 45° (left)
- Produktabmessungen (L x B x H): 75.7 x 67.7 x 49.5 cm
- Gewicht: 12.5 kg
- Staubabsauganschluss: 36 mm
- Klingenmaterial: Hartmetall
- Empfohlener Untergrund: Wood, Metal, Plastic (with appropriate blade)
- Besondere Merkmale: Sliding function, Laser guide, Quick-set detents, Workpiece clamp, Workpiece supports
9. Garantie und Support
Einhell products are manufactured with quality and longevity in mind. This product comes with a limited warranty. For specific warranty terms and conditions, please refer to the documentation included with your purchase or visit the official Einhell webWebsite.
Additionally, Einhell offers extended product services. By registering your Einhell product online within 30 days of purchase, you can extend the warranty on your Einhell device to 3 years. This also applies to Einhell Power X-Change batteries, if applicable to your purchase.
For technical support, spare parts, or warranty claims, please contact Einhell customer service or visit their official webWebsite für detaillierte Kontaktinformationen.

Abbildung 9.1: Einhell 3-Year Warranty logo, indicating extended warranty upon online registration for eligible products.


