1. Einleitung
This manual provides essential information for the safe installation, operation, and maintenance of your EMOS A6003.0 LED Rotary Dimmer. Please read these instructions carefully before installation and retain them for future reference. This flush-mounted rotary dimmer is designed for controlling the brightness of compatible light sources.
2. Sicherheitshinweise
- Elektrische Gefahr: Die Installation muss von einem qualifizierten Elektriker gemäß allen lokalen und nationalen Elektrovorschriften durchgeführt werden.
- Stromabschaltung: Always disconnect power at the circuit breaker before installing, servicing, or removing the dimmer.
- Kompatibilität: This dimmer is designed for use only with dimmable light sources. Using non-dimmable light sources may cause damage to the dimmer or the light source.
- Nur zur Verwendung im Innenbereich: The dimmer has an IP20 protection class, making it suitable for indoor use in dry environments only. Do not expose to moisture or extreme temperatures.
- Belastungsgrenzen: Do not exceed the specified maximum load for the dimmer.
3. Packungsinhalt
Überprüfen Sie, ob alle Komponenten im Paket vorhanden sind:
- 1 x EMOS A6003.0 Rotary Dimmer
- Montagezubehör
- Bedienungsanleitung (englische Sprache)

Figure 3.1: EMOS A6003.0 Rotary Dimmer in its retail packaging.
4. Spezifikationen
| Besonderheit | Spezifikation |
|---|---|
| Modellnummer | A6003.0 |
| Eingangslautstärketage | 230 V, 50 Hz |
| Output (Halogen/Fluorescent) | 7-110 W/VA |
| Output (Dimmable LED) | 3-60 W/VA |
| Schutzklasse | IP20 (für Innenräume geeignet) |
| Kontrollmethode | Rotary Knob with Push Function |
| Abmessungen (B x H x T) | 80 x 80 x 59 mm (ca.) |
| Gewicht | 133 Gramm (ca.) |
| Einhaltung | CE |
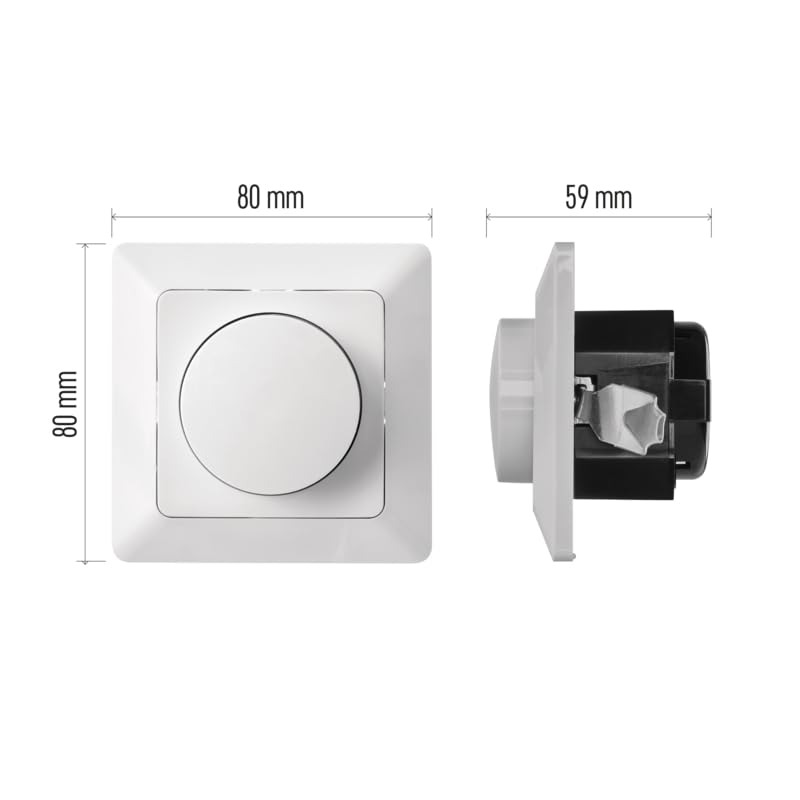
Figure 4.1: Approximate dimensions of the EMOS A6003.0 Dimmer.
5. Installation
Wichtig: Installation should only be carried out by a qualified electrician. Ensure the main power supply is switched off at the circuit breaker before commencing installation.
5.1 Schaltplan
The dimmer requires connection to the live (L) wire and the switched live (load) wire to the light fixture. Refer to the markings on the dimmer terminals for correct connection.

Abbildung 5.1: Rückseite view of the dimmer showing connection terminals. L1 is typically the incoming live, and the arrowed terminals are for the switched live to the load.
5.2 Montage
- Stellen Sie sicher, dass die Stromversorgung ausgeschaltet ist.
- Connect the wiring according to the diagram in Section 5.1.
- Carefully place the dimmer mechanism into a standard flush-mounted wall box.
- Secure the dimmer to the wall box using the provided mounting accessories.
- Attach the front plate and rotary knob.
- Stellen Sie die Stromversorgung am Leistungsschalter wieder her.

Abbildung 5.2: Vorderseite view of the EMOS A6003.0 Rotary Dimmer.
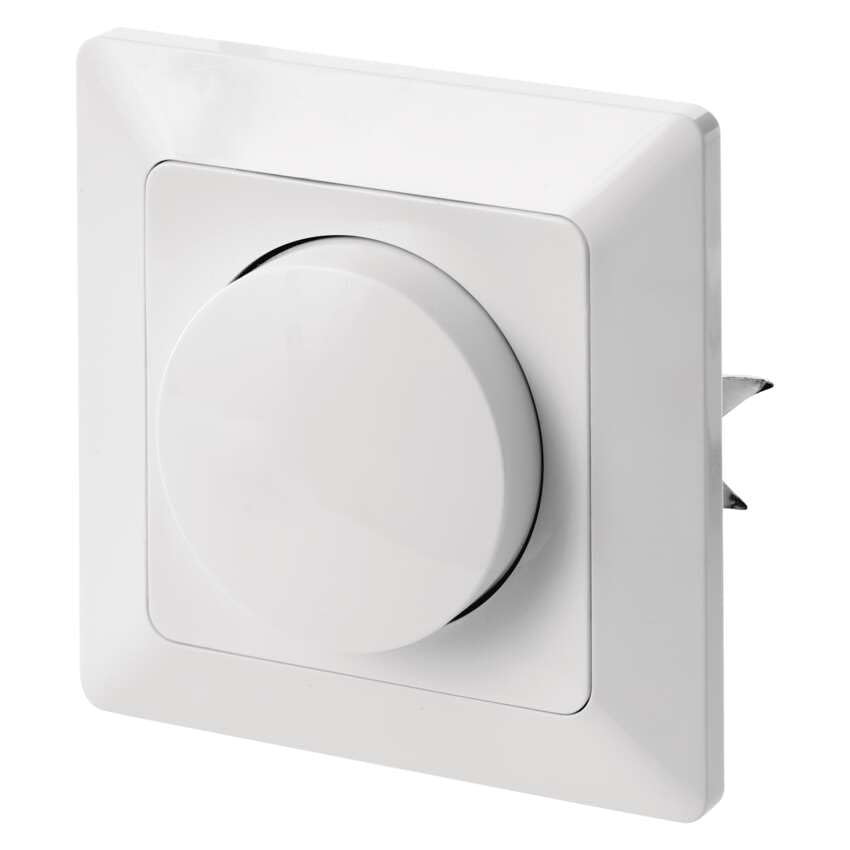
Abbildung 5.3: Seite view of the dimmer, illustrating its flush-mounted design.
6. Bedienung
The EMOS A6003.0 dimmer features a simple rotary knob for control.
- Ein-/Ausschalten: Press the rotary knob to switch the connected light source on or off.
- Dimmen: Rotate the knob clockwise to increase brightness and counter-clockwise to decrease brightness.
- Minimale Helligkeitseinstellung: Some dimmable LED bulbs may require adjustment of the dimmer's minimum brightness setting to prevent flickering or ensure stable operation at low levels. Consult the dimmer's internal adjustment screw if available and necessary, following the manufacturer's guidelines.
7. Wartung
The EMOS A6003.0 LED Rotary Dimmer requires minimal maintenance.
- Reinigung: To clean the dimmer, wipe the surface with a soft, dry cloth. Do not use abrasive cleaners, solvents, or excessive moisture, as these can damage the finish or internal components.
- Keine vom Benutzer zu wartenden Teile: There are no user-serviceable parts inside the dimmer. Do not attempt to open or repair the unit yourself.
8. Fehlerbehebung
If you encounter issues with your dimmer, refer to the following common problems and solutions:
| Problem | Mögliche Ursache | Lösung |
|---|---|---|
| Licht geht nicht an. | No power, incorrect wiring, faulty bulb, dimmer failure. | Check circuit breaker. Verify wiring connections. Test with a known working bulb. If problem persists, consult a qualified electrician. |
| Das Licht wird nicht dunkler und flackert nicht. | Non-dimmable bulb, incompatible bulb, load too low/high, minimum brightness not adjusted. | Ensure bulbs are explicitly marked as dimmable. Check if the total wattage of bulbs is within the dimmer's specified range (3-60W/VA for LED, 7-110W/VA for Halogen/Fluorescent). Adjust the dimmer's minimum brightness setting if applicable. |
| Der Dimmer fühlt sich warm an. | Normal operation, overloaded circuit. | A slight warmth during operation is normal. If the dimmer becomes excessively hot, immediately disconnect power and check the total load connected to ensure it does not exceed the dimmer's maximum capacity. |
9. Garantie und Support
For warranty information or technical support regarding your EMOS A6003.0 LED Rotary Dimmer, please refer to the warranty card included with your purchase or contact EMOS customer service directly. Contact details can typically be found on the EMOS official webauf der Website oder in Ihren Kaufunterlagen.


