Einführung
This manual provides essential instructions for the installation, operation, and maintenance of your Weiser Elements Satin Nickel Square Deadbolt Lock. Please read these instructions carefully before beginning installation to ensure proper function and security. This deadbolt is designed for exterior doors where keyed entry and security are required, featuring ANSI/BHMA Grade 3 certification and Weiser's SmartKey Technology.
Produkt überview
The Weiser Elements Satin Nickel Square Deadbolt Lock offers a blend of style and security. It is a single cylinder deadbolt, meaning it can be locked or unlocked using a key from the outside, and a turn piece from the inside. The satin nickel finish provides a clean, modern aesthetic.
Hauptmerkmale:
- Single Cylinder Deadbolt: Keyed entry from the exterior, turn piece operation from the interior.
- ANSI/BHMA Grade 3 Certified: Entspricht den Branchenstandards für Wohnsicherheit.
- SmartKey-Technologie: Allows you to re-key the lock yourself in seconds, enhancing security and convenience.
- Einfache Installation: Designed for quick installation with basic tools.
- Verstellbarer Verschluss: Fits standard door preparations.
- Langlebige Konstruktion: Made from metal with a brushed finish.
- Lifetime Mechanical and Finish Warranty: Provides long-term assurance of quality.
Was ist in der Box:

Abbildung 1: Inhalt der Produktverpackung.
- Außenriegel
- Interior Turnpiece
- Verstellbarer Riegel
- Schlagplatte
- Kragen
- Montageplatte
- Montagezubehör (Schrauben)
- 2 Weiser-Schlüssel
- SmartKey-Tool
- Installation Guide (separate document)
Setup und Installation
The Weiser Elements deadbolt is designed for easy installation, typically requiring only a screwdriver. For detailed, step-by-step instructions, please refer to the dedicated Installation Guide included in your product packaging. This section provides general requirements and an overview.
Door Specifications:
- Türstärke: 1-3/8" bis 1-3/4" (35 mm bis 44 mm)
- Riegelrückstellmaß: Adjustable for 2-3/8" (60mm) or 2-3/4" (70mm)
- Querbohrung: 2-1/8" (54 mm)
Installation abgeschlossenview:
- Prepare the door and frame according to the provided template in the Installation Guide.
- Install the latch into the door edge. Ensure the adjustable latch is set to the correct backset.
- Install the exterior deadbolt assembly.
- Install the interior turnpiece assembly, securing it with the provided screws.
- Test the deadbolt operation with both the key and the interior turnpiece.

Abbildung 2: Außenansicht view of the installed deadbolt.

Abbildung 3: Innenraum view of the turnpiece.
Bedienungsanleitung
Verriegeln des Riegels:
- Von außen: Insert the key into the keyway and turn it clockwise until the deadbolt extends fully into the door frame. Remove the key.
- Aus dem Inneren: Rotate the turn piece clockwise until the deadbolt extends fully into the door frame.
Entriegeln des Riegels:
- Von außen: Insert the key into the keyway and turn it counter-clockwise until the deadbolt retracts fully. Remove the key.
- Aus dem Inneren: Rotate the turn piece counter-clockwise until the deadbolt retracts fully.
Wartung
To ensure the longevity and smooth operation of your Weiser deadbolt, periodic maintenance is recommended:
- Reinigung: Reinigen Sie die Außenflächen mit einem weichen, fusselfreien Tuch.amp Mit einem Tuch abwischen. Vermeiden Sie scheuernde Reiniger oder Lösungsmittel, da diese die Oberfläche beschädigen können.
- Schmierung: If the key turns stiffly or the deadbolt mechanism feels rough, apply a small amount of graphite-based lubricant into the keyway and the latch mechanism. Do not use oil-based lubricants.
- Schrauben festziehen: Um Sicherheit und Stabilität zu gewährleisten, sollten Sie regelmäßig alle losen Befestigungsschrauben überprüfen und festziehen.
SmartKey Technology
Weiser's SmartKey Technology provides advanced security features and the convenience of re-keying your lock yourself in seconds. This is particularly useful if you lose a key, move into a new home, or wish to have multiple Weiser locks operate with a single key.
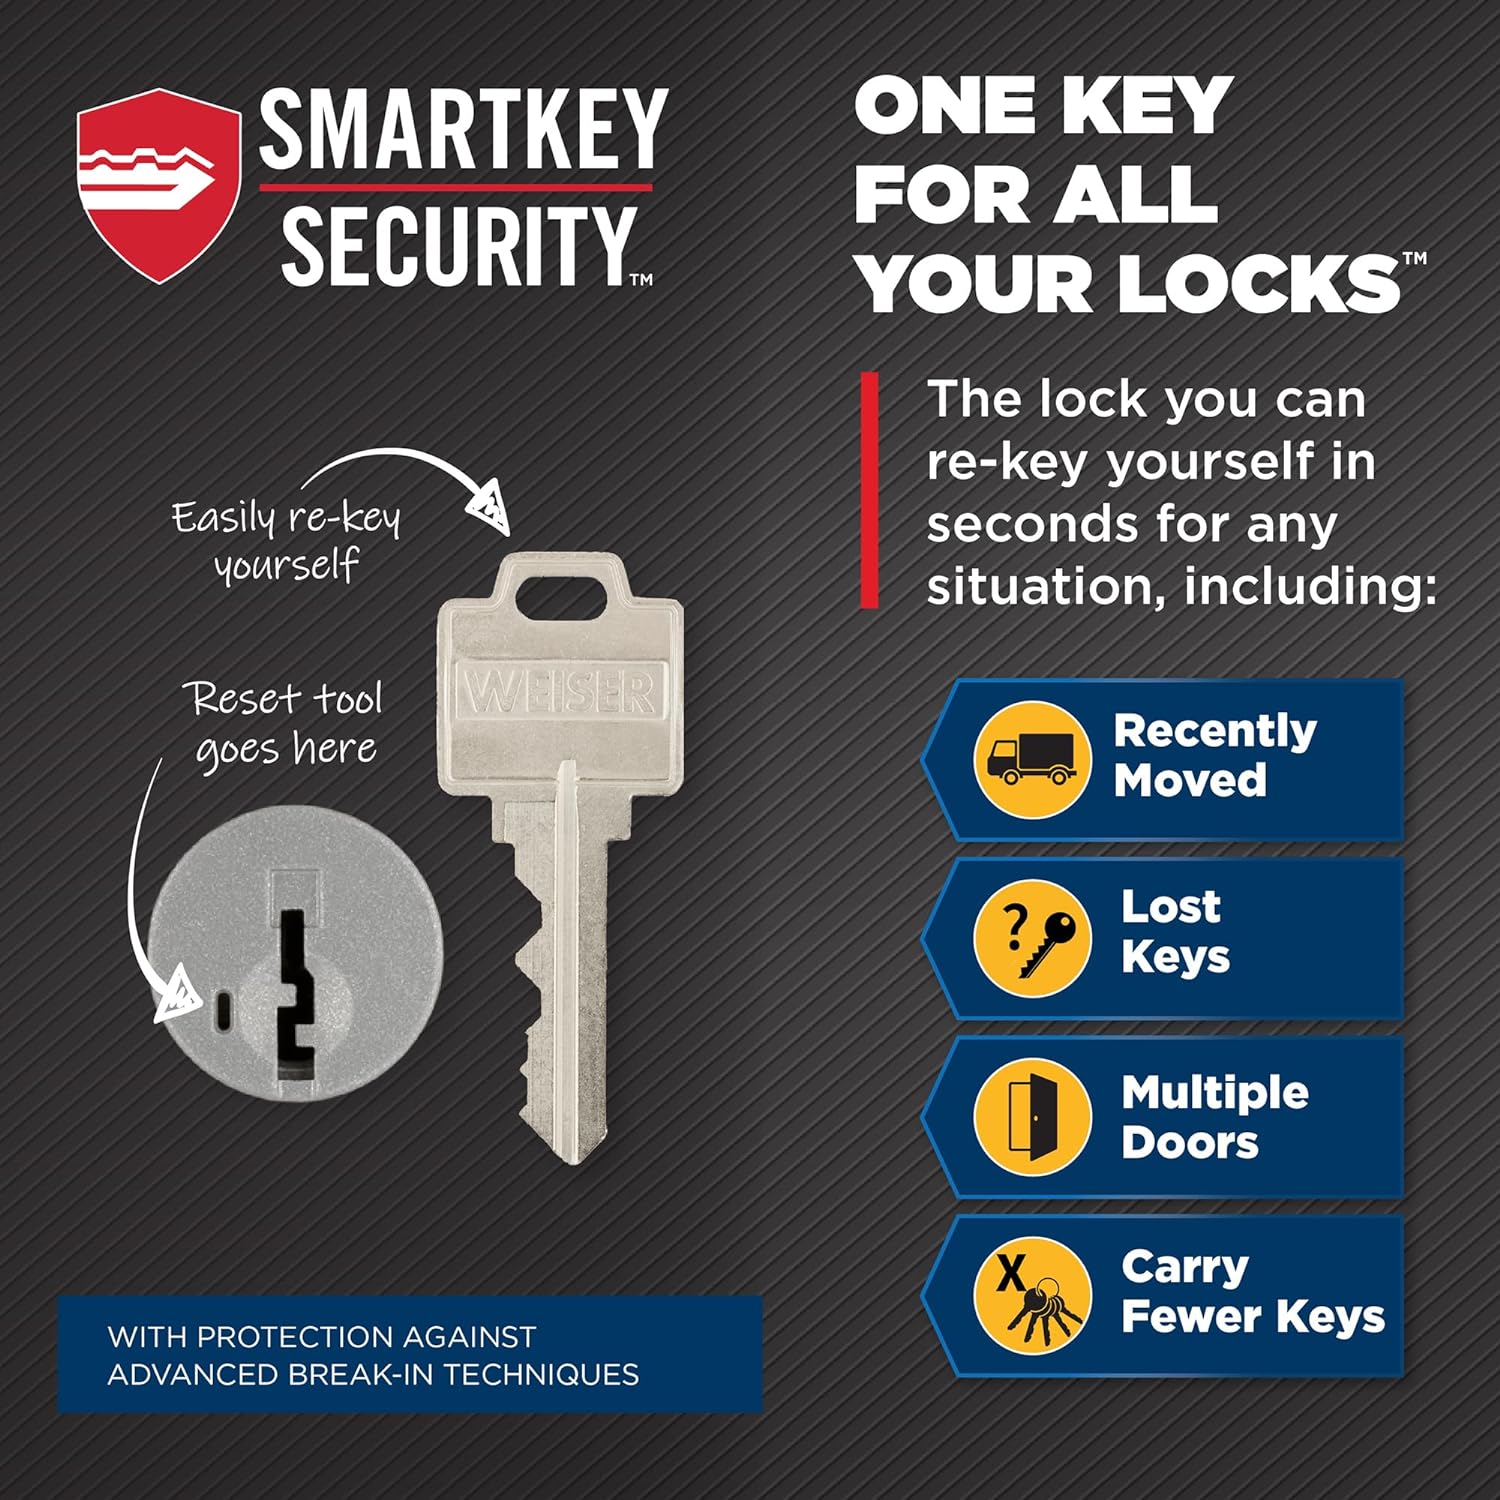
Figure 4: SmartKey Security features.
How to Re-key Your Lock:
- Setzen Sie Ihren Funktionsschlüssel ein und drehen Sie ihn um 90 Grad im Uhrzeigersinn.
- Insert the SmartKey tool fully into the small hole next to the keyway. Apply firm pressure and remove the SmartKey tool.
- Remove the functioning key.
- Insert your new key fully into the keyway and turn it 90 degrees counter-clockwise.
- Remove the new key. Your lock is now re-keyed to the new key.
SmartKey Demo Video:
Video 1: A demonstration of the Weiser SmartKey re-keying process.
Fehlerbehebung
If you encounter issues with your deadbolt, consider the following common solutions:
- Der Schlüssel lässt sich schwer einführen oder drehen: Check the key for damage or debris. Apply graphite lubricant to the keyway. Ensure the key is fully inserted before turning.
- Deadbolt does not extend or retract fully: Check for obstructions in the door frame strike plate. Ensure the mounting screws are not overtightened, which can bind the mechanism. Verify the latch backset is correctly set.
- Interior turn piece is loose: Tighten the interior mounting screws.
- Lock feels insecure: Ensure all screws are tightened and the deadbolt extends fully into the strike plate.
If problems persist, consult the full Installation Guide or contact Weiser customer support.
Technische Daten
| Besonderheit | Detail |
|---|---|
| Marke | Weiser |
| Modellnummer | 9GDC94710-062 |
| Technische Daten | 2.69 x 6.2 x 6.2 cm; 635.03 g |
| Farbe | Satin Nickel |
| Stil | Quadrat |
| Beenden | Gebürstet |
| Material | Metall |
| Muster | Riegel |
| Sperrtyp | Schlüsselschloss (Einzelzylinder) |
| Zertifizierungen | ANSI / BHMA Grade 3 |
| Besondere Merkmale | SmartKey Technology, Universal Fitment |
| Empfohlene Verwendung | Entry Door, Exterior Door, Garage Door |
Garantie und Support
Garantieinformationen:
This Weiser Elements deadbolt comes with a Lifetime Limited Mechanical and Finish Warranty. This warranty covers defects in material and workmanship for the lifetime of the original residential user. For full details regarding warranty coverage and claims, please refer to the warranty documentation included with your product or visit the official Weiser webWebsite.
Kundendienst:
For further assistance, technical support, or to inquire about replacement parts, please visit the official Weiser website or contact their customer service department. Contact information can typically be found on the product packaging or the Weiser webWebsite.


