1. Einleitung
This manual provides detailed instructions for the installation, operation, and maintenance of your SYLVANIA SMART+ WiFi LED Smart Light Bulb A19. This product offers dimmable soft white lighting and is designed for seamless integration with Amazon Alexa and Google Home voice assistants.

Image: Four SYLVANIA SMART+ WiFi LED Smart Light Bulbs, showcasing das Produktdesign.
2. Wichtige Sicherheitshinweise
- Nur zur Verwendung im Innenbereich: These LED light bulbs are designed for indoor use exclusively.
- Vermeiden Sie geschlossene Vorrichtungen: Do not use these bulbs in fully enclosed light fixtures. This can lead to overheating and reduced product lifespan.
- Dimmer: These bulbs are dimmable via the app or voice control with a smart speaker. They are nicht kompatibel with traditional wall dimmers. Do not install this device on a circuit with a dimmer switch.
- Vor der Installation ausschalten: Always ensure power is turned off at the switch before installing or removing the bulb.
- 2.4 GHz WiFi Network: A 2.4 GHz WiFi network is required for proper functionality and setup.
3. Packungsinhalt
Ihr Paket sollte die folgenden Artikel enthalten:
- 4 x SYLVANIA SMART+ WiFi LED Smart Light Bulbs (A19, Soft White)
4. Produktspezifikationen
| Marke | GEMEINSAMER VANCE |
| Modellnummer | 75672 |
| Lichtart | LED |
| Größe der Glühbirnenform | A19 |
| Lampensockel | E26 Mittel |
| Wastage | 9 Watt |
| Glühlampenäquivalent | 60 Watt |
| Helligkeit | 800 Lumen |
| Lichtfarbe | Soft White (2700 Kelvin) |
| Bandtage | 120 Volt |
| Kontrollmethode | Sprache, App |
| Durchschnittliches Leben | 15,000 Stunden |
| Technische Daten | 2.36 Zoll B x 4.41 Zoll H |
| Konnektivität | WLAN (nur 2.4 GHz) |

Image: Diagram illustrating the dimensions of the SYLVANIA SMART+ A19 bulb, with measurements for width and height.
5. Einrichtungsanweisungen
Follow these steps to set up your SYLVANIA SMART+ WiFi LED Smart Light Bulbs:
- Installieren Sie die Glühbirne: Screw the SYLVANIA SMART+ WiFi LED Smart Light Bulb into a standard E26 medium base socket. Ensure the power to the fixture is turned off before installation.
- Laden Sie die App herunter: Download the free SYLVANIA SMART+ WiFi App from your device's app store. You can find links to the app on the official LEDVANCE website or by searching "SYLVANIA SMART+ WiFi" in your app store.
- Ein Konto erstellen: Open the SYLVANIA SMART+ WiFi App and follow the on-screen prompts to create a new user account.
- Mit WLAN verbinden: Ensure your smartphone is connected to a 2.4 GHz WiFi network. The SYLVANIA SMART+ bulbs require a 2.4 GHz network for initial pairing and operation. (Note: 5 GHz networks are not supported.)
- Paaren Sie die Glühbirne:
- Turn on the light fixture. The bulb should begin flashing, indicating it is in pairing mode.
- In the SYLVANIA SMART+ WiFi App, select "Add Device" or the "+" icon.
- Follow the app's instructions to discover and connect your new bulb. This typically involves confirming the flashing light and entering your WiFi network password.
- Once successfully paired, the bulb will stop flashing and remain steadily lit.
- Integration mit Sprachassistenten (optional):
- Für Amazon Alexa: Open the Alexa app, go to "Skills & Games," search for "SYLVANIA SMART+ WiFi," enable the skill, and link your SYLVANIA account. Then, discover devices.
- Für Google Home: Open the Google Home app, tap "Add" > "Set up device" > "Works with Google," search for "SYLVANIA SMART+ WiFi," link your account, and assign rooms.
- For Siri Shortcuts: Use the SYLVANIA SMART+ WiFi App to create custom scenes and then add them as Siri Shortcuts.

Image: A graphic illustrating the three easy steps for setup: 1) Download the SYLVANIA SMART WiFi app, 2) Create an account and pair your light with your account, 3) Easily control your new bulb with voice or phone. A 2.4GHz WiFi network is required.
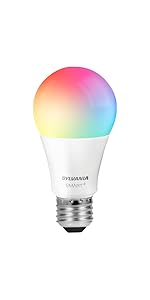
Image: A graphic showing simplified setup steps: download the app, create an account and pair, control lights from phone or smart speaker.
6. Bedienungsanleitung
6.1. App-Steuerung
The SYLVANIA SMART+ WiFi App provides full control over your smart bulbs:
- Ein-/Ausschalten: Tippen Sie in der App auf das Glühbirnensymbol, um den Strom ein- und auszuschalten.
- Dimmen: Mit dem Helligkeitsregler lässt sich die Lichtintensität von 1 % bis 100 % einstellen.
- Terminplanung: Set schedules for your lights to turn on/off or dim at specific times, such as morning routines or bedtime.
- Fernbedienung: Control your lights from anywhere with an internet connection, even when you are away from home.

Image: A screenshot of the SYLVANIA SMART+ WiFi app, showing controls for brightness and on/off functionality.
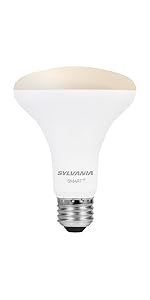
Image: People on a boat using a smartphone, demonstrating remote control capabilities of the smart bulbs to manage home lighting while away.
6.2. Sprachsteuerung
Once integrated with Amazon Alexa or Google Home, you can control your lights using simple voice commands:
- "Alexa, schalte das Licht im Wohnzimmer ein."
- „Hey Google, dimme das Schlafzimmerlicht auf 50 %.“
- "Alexa, set the kitchen light to soft white."
- "Hey Google, schalte alle Lichter aus."
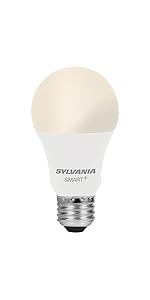
Image: A woman painting in a brightly lit room, with a speech bubble indicating a voice command: "Alexa, turn on the dining room!" This illustrates hands-free voice control.
7. Wartung
The SYLVANIA SMART+ WiFi LED Smart Light Bulbs require minimal maintenance:
- Reinigung: Vor der Reinigung sicherstellen, dass die Glühbirne abgekühlt und der Strom ausgeschaltet ist. Mit einem weichen, trockenen Tuch abwischen. Keine flüssigen oder scheuernden Reinigungsmittel verwenden.
- Firmware-Updates: Periodically check the SYLVANIA SMART+ WiFi App for available firmware updates to ensure optimal performance and security.
- Lagerung: Wenn Sie die Glühbirnen lagern, bewahren Sie sie an einem kühlen, trockenen Ort fern von direkter Sonneneinstrahlung und extremen Temperaturen auf.
8. Fehlerbehebung
| Problem | Mögliche Ursache | Lösung |
|---|---|---|
| Die Glühbirne geht nicht an. | No power to the fixture; bulb not screwed in properly; bulb failure. | Überprüfen Sie den Lichtschalter und den Sicherungsautomaten. Stellen Sie sicher, dass die Glühbirne fest in der Fassung eingeschraubt ist. Testen Sie die Glühbirne in einer anderen funktionierenden Leuchte. |
| Bulb does not connect to WiFi or app. | Incorrect WiFi network (5 GHz); weak WiFi signal; incorrect pairing steps; network congestion. |
|
| Bulb flickers or flashes unexpectedly. | Incompatible dimmer switch; unstable power supply; faulty bulb. |
|
| Sprachsteuerung funktioniert nicht. | Incorrect integration; device not discovered; voice assistant not connected to internet. |
|
9. Garantie und Support
Garantie: This SYLVANIA SMART+ WiFi LED Smart Light Bulb comes with a 2 Jahr eingeschränkte Garantie ab Kaufdatum. Diese Garantie deckt Material- und Verarbeitungsfehler bei normalem Gebrauch ab.
Unterstützung: For technical assistance, troubleshooting beyond this manual, or warranty claims, please visit the official LEDVANCE website or contact their customer support. Refer to the product packaging for specific contact details.
Besuchen Sie auch die LEDVANCE Store auf Amazon für zusätzliche Produktinformationen und Ressourcen.


