Einführung
This manual provides detailed instructions for the setup, operation, and maintenance of your ARRIS TBS Tango 2 PRO V3 FPV RC Radio Controller. Please read this manual thoroughly before using the device to ensure proper function and safety.
Produkt überview
The TBS Tango 2 PRO V3 is a compact and ergonomic FPV RC radio controller designed for precise control of drones. It features built-in TBS Crossfire technology for reliable long-range communication.
Hauptmerkmale:
- Full-size Hall sensor gimbals for accurate control.
- Integrated TBS Crossfire for robust radio link.
- Ergonomic and compact design with comfortable rubber grips.
- Built-in 5000mAh 1S LiPo battery with USB-C 2A charging.
- Speech audio output with audio jack and haptic vibration alerts.
- Open Source operating system (FreedomTX, a fork of OpenTX).
- Rocker dial and 3-button menu for navigation.
- High-resolution (128x96) black & white OLED screen with backlight.
- Digital rocker dial trim.
- Over 100 model memory with included SD-card.
- TBS Cloud compatible.

Abbildung 1: Vorderseite view of the ARRIS TBS Tango 2 PRO V3 FPV RC Radio Controller. This image shows the gimbals, OLED screen, and navigation buttons.
Komponenten und Bedienelemente
Familiarize yourself with the various parts of your radio controller:
- Kardanringe: Control sticks for pitch, roll, yaw, and throttle.
- OLED-Bildschirm: Displays system information, menus, and model data.
- Navigationstasten: "EXIT", "MENU", "PAGE" buttons for menu interaction.
- Rocker Dial: Used for scrolling through menu options and adjusting values.
- Antenne: Foldable antenna for radio signal transmission.
- USB-C-Anschluss: Zum Laden und für die Datenverbindung.
- Audiobuchse: For connecting headphones for speech audio output.
- Rubber Grips: Provide comfortable handling.
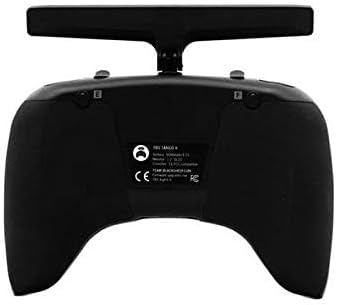
Abbildung 2: Draufsicht view of the controller, highlighting the foldable antenna and screen.
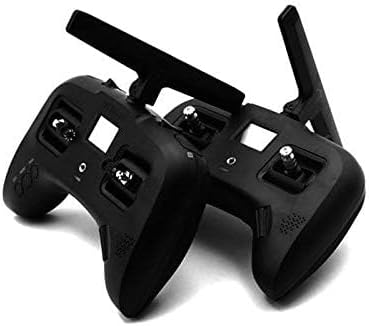
Abbildung 3: Unten view showing the USB-C charging port and audio jack.
Aufstellen
1. Erstes Aufladen
- Connect the included USB-C cable to the USB-C port on the bottom of the controller.
- Verbinden Sie das andere Ende des USB-C-Kabels mit einem kompatiblen USB-Netzteil (nicht im Lieferumfang enthalten).
- The built-in 5000mAh 1S LiPo battery will begin charging. A full charge typically takes approximately 2.5 hours using a 2A charger.
- The OLED screen will indicate charging status.
2. Ein-/Ausschalten
- To power on: Press and hold the power button (usually located near the screen) until the OLED screen illuminates.
- To power off: Press and hold the power button until the shutdown sequence is initiated on the screen, then release.
3. Antenna Deployment
The antenna is foldable for transport. To deploy, gently pull the antenna upwards and rotate it into the upright position. To fold, apply a small amount of force to bend it inward and down.
Betrieb
1. Navigation and Menu System
The controller uses a rocker dial and three buttons ("EXIT", "MENU", "PAGE") for navigating the FreedomTX operating system.
- Rocker Dial: Drehen Sie das Symbol, um durch die Menüoptionen zu blättern. Drücken Sie, um eine Option auszuwählen oder eine Einstellung zu bestätigen.
- MENU-Taste: Accesses the main menu or enters sub-menus.
- SEITE-Schaltfläche: Cycles through different pages or screens within a menu.
- EXIT-Taste: Kehrt zum vorherigen Bildschirm zurück oder verlässt das aktuelle Menü.

Figure 4: Detail of the EXIT, MENU, and PAGE buttons for system navigation.
2. Gimbal Usage
The Hall sensor gimbals provide precise control. Move the sticks smoothly to control your FPV drone's flight characteristics (throttle, yaw, pitch, roll).

Figure 5: Close-up of a Hall sensor gimbal, illustrating the precision control mechanism.
3. Model Memory and SD Card
The controller supports over 100 model memories, stored on the included SD card. Use the menu system to select, create, or modify model profiles.
Wartung
- Reinigung: Use a soft, dry cloth to clean the exterior of the controller. Avoid using harsh chemicals or abrasive materials.
- Lagerung: Store the controller in a cool, dry place away from direct sunlight and extreme temperatures. Ensure the antenna is folded for protection during storage and transport.
- Batteriepflege: For optimal battery life, avoid fully discharging the battery frequently. Charge the battery regularly, even if not in use for extended periods.
- Firmware-Updates: Periodically check the official TBS website for firmware updates for the FreedomTX operating system. Follow the provided instructions carefully for any update procedures.
Fehlerbehebung
| Problem | Mögliche Ursache | Lösung |
|---|---|---|
| Der Controller lässt sich nicht einschalten. | Niedriger oder leerer Akku. | Charge the controller using the USB-C port. Ensure the charging cable and adapter are functional. |
| Gimbals not responding or inaccurate. | Kalibrierung erforderlich; physisches Hindernis. | Access the calibration menu in FreedomTX and follow the on-screen instructions. Check for any debris around the gimbals. |
| No signal to drone. | Drone not bound; antenna not deployed; range issue. | Ensure the drone is properly bound to the controller. Verify the antenna is fully deployed. Check for obstacles or interference. |
| Der Bildschirm ist leer oder reagiert nicht. | Software issue; power issue. | Attempt a hard reset (refer to specific FreedomTX documentation if available). Ensure battery is charged. |
Technische Daten
- Marke: ARRIS
- Modellname: TBS Tango 2 Pro V3
- Artikelmodellnummer: TBS Tango 2 Pro V3
- Konnektivitätstechnologie: RF
- Controller-Typ: Tastensteuerung
- Kompatible Geräte: Drohne
- Batterie: 1 Lithium Polymer battery required (built-in 5000mAh 1S LiPo)
- Laden: USB-C 2A (approx. 2.5 hours for full charge)
- Bildschirm: High resolution (128x96) black & white OLED with backlight
- Kardanringe: Full size Hall sensor
- Betriebssystem: FreedomTX (temporary fork of OpenTX)
- Modellspeicher: 100+ models with included SD-card
- Audioausgang: Speech audio output with audio jack
- Benachrichtigungen: Haptic vibration alert
- Artikelgewicht: 1.3 Pfund
- Paketabmessungen: 8.07 x 6.18 x 3.35 Zoll
- Vom Hersteller empfohlenes Alter: Ab 10 Jahren
Garantie und Support
For warranty information and technical support, please refer to the official documentation provided with your purchase or visit the ARRIS official webBewahren Sie Ihren Kaufbeleg für eventuelle Garantieansprüche auf.
Note: Some users have reported varied experiences with third-party support channels. For the most accurate and reliable assistance, always consult official brand resources.


