Einführung
Thank you for choosing the Xgody 3-Channel Dash Cam. This manual provides detailed instructions for the installation, operation, and maintenance of your new dash camera. Please read this manual thoroughly before using the product to ensure proper function and to maximize your user experience. Keep this manual for future reference.
Produkt überview und was ist in der Box?
The Xgody 3-Channel Dash Cam is designed to record video from the front, inside, and rear of your vehicle simultaneously, providing comprehensive coverage. It features high-definition recording, infrared night vision, G-sensor for emergency locking, loop recording, and parking monitoring.
Packungsinhalt:
- Xgody Dash Cam Unit
- Hinteren View Camera (6M cable)
- Autoladegerät
- USB-Datenkabel
- Bedienungsanleitung
- 64 GB SD-Karte
- Kleber Aufkleber
- Karten-Pin
- Screws (for rear camera installation)
- 3M Glue Stick Card Line
- Brecheisen (zur Kabelführung)

Figure 1: Xgody Dash Cam and Included Accessories
Hauptmerkmale
Three-Channel Recording
The dash cam simultaneously records video from three perspectives: front (1080p), inside (720p), and rear (720p). For clearer internal and external footage, the front and cabin dual-lens cameras can operate independently at 1080p+1080p.

Figure 2: Three-Channel Recording Overview
Infrarot-Nachtsichtgerät
The inside-facing camera is equipped with 4 IR LED lights and an F/2.0 aperture. This technology automatically increases exposure in low-light or dark conditions, ensuring clear video footage of the vehicle's interior. The operating temperature range is -31°F to 167°F (-35°C to 75°C).

Figure 3: Infrared Night Vision in Operation
Loop-Aufnahme
Continuous loop recording automatically overwrites the oldest unlocked video files when the memory card is full. This ensures that recording never stops due to a full card, providing uninterrupted surveillance.

Abbildung 4: Loop-Aufnahmefunktion
G-Sensor (Notverriegelung)
The built-in G-sensor detects sudden shocks or collisions. When such an event occurs, the dash camera automatically locks the current video footage, wodurch verhindert wird, dass es durch die Loop-Aufnahme überschrieben wird. Dies gewährleistet den Erhalt wichtiger Beweismittel.
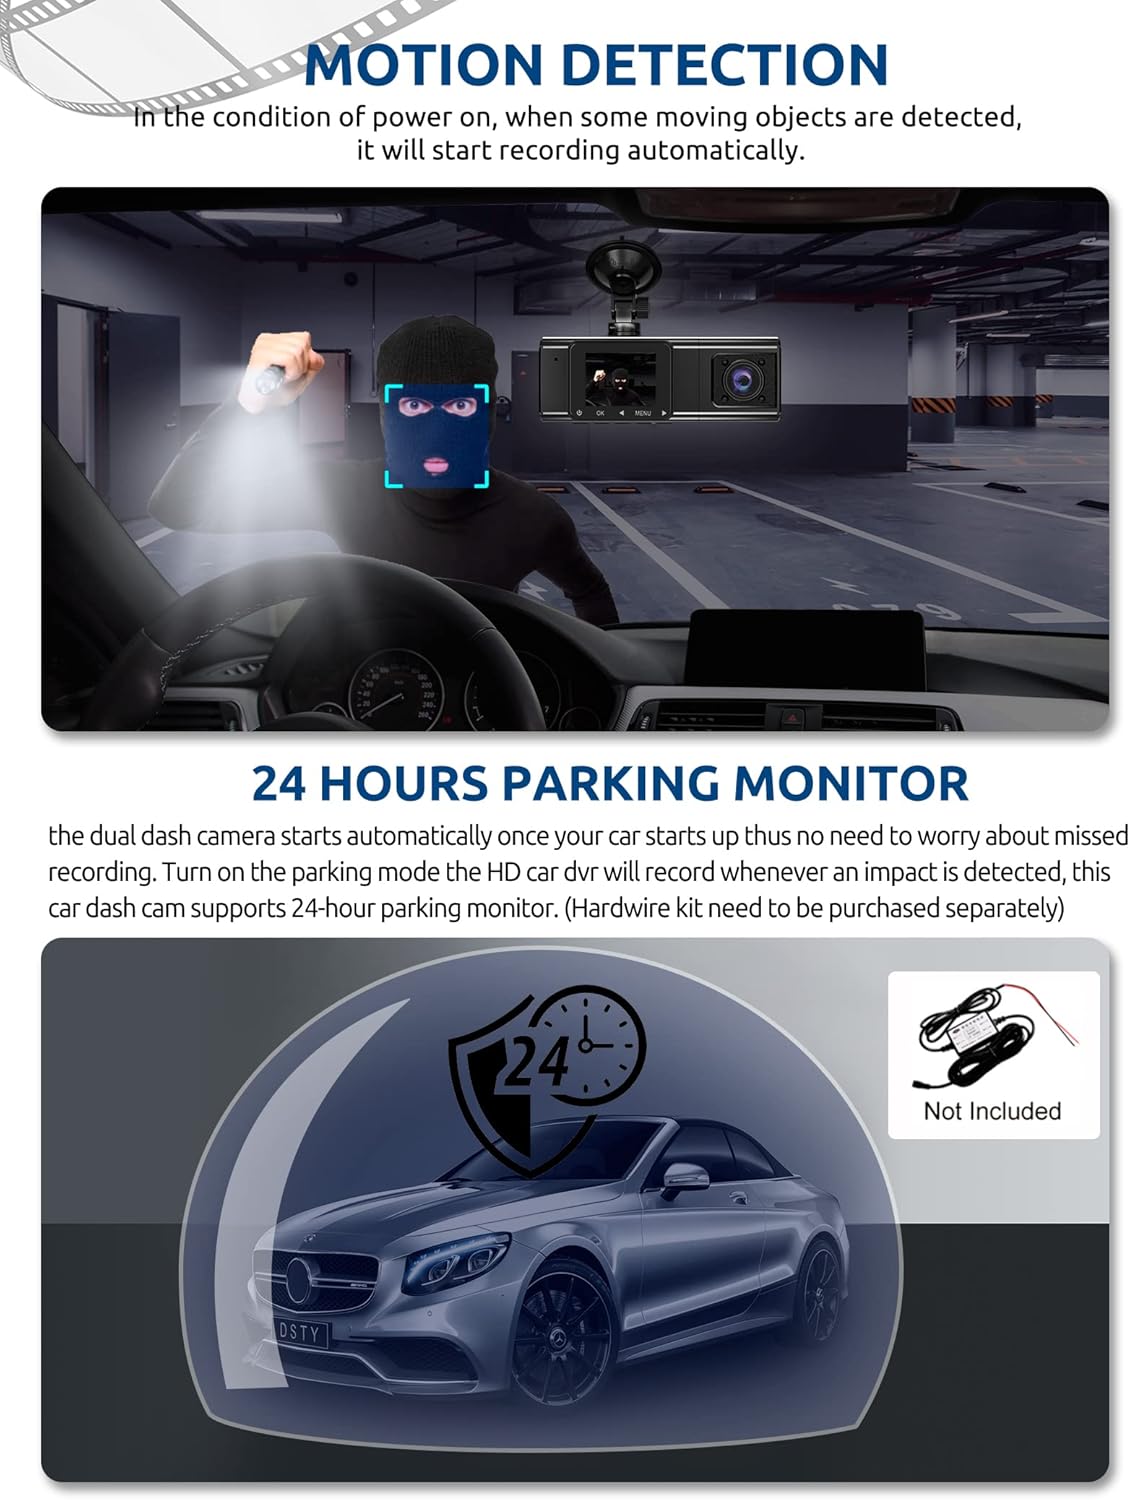
Figure 5: G-Sensor Activating During an Impact
Motion Detection & 24-Hour Parking Mode
In motion detection mode, the video recorder begins recording automatically when it detects movement in front of the camera. For continuous 24-hour surveillance, even when the car is off, the dash cam can be connected to the car battery via a hardwire kit (not included). This enables parking mode, which records when an impact is detected.

Figure 6: Motion Detection and Parking Monitoring
Installationsanweisungen
1. Insert the SD Card
- Suchen Sie den SD-Kartensteckplatz an der Seite der Dashcam.
- Legen Sie die mitgelieferte 64-GB-SD-Karte so ein, dass die goldenen Kontakte zur Rückseite der Kamera zeigen, bis sie hörbar einrastet.
- Stellen Sie sicher, dass die Karte vollständig eingesteckt ist.
2. Montieren Sie die Dashcam.
- Reinigen Sie den Bereich der Windschutzscheibe, an dem Sie die Dashcam anbringen möchten.
- Bringen Sie die Saugnapfhalterung an der Dashcam an.
- Drücken Sie den Saugnapf fest gegen die Windschutzscheibe und verriegeln Sie ihn. Positionieren Sie die Kamera so, dass eine klare Sicht gewährleistet ist. view die vor Ihnen liegende Straße nicht zu beeinträchtigen, ohne Ihre Sicht beim Fahren einzuschränken.
3. Installieren Sie die Rückkamera
- Schließen Sie das Kabel der Rückfahrkamera an die Haupteinheit der Dashcam an.
- Route the cable neatly along the vehicle's headliner and trim to the rear of the car. Use the provided crowbar to tuck the cable under panels.
- Mount the rear camera on the rear windshield using the adhesive sticker or screws, ensuring it has a clear view der Straße dahinter.
4. Stromanschluss
- Stecken Sie das Autoladegerät in die Zigarettenanzünderbuchse Ihres Fahrzeugs.
- Verbinden Sie das andere Ende des Autoladekabels mit dem Stromeingang der Dashcam.
- Die Dashcam schaltet sich normalerweise automatisch ein, wenn das Fahrzeug gestartet wird, und schaltet sich aus, wenn das Fahrzeug ausgeschaltet wird.
Bedienungsanleitung
Ein-/Ausschalten
- Automatisch: The dash cam powers on and starts recording automatically when connected to power and the vehicle ignition is on. It powers off automatically when the ignition is turned off.
- Manual: Press and hold the power button for a few seconds to manually turn the device on or off.
Aufnahmemodi
- Normale Aufnahme: The default mode, continuously recording video in segments.
- Notfallaufzeichnung (G-Sensor): Automatically activated upon impact, locking the current video file.
- Aufnahme mit Bewegungserkennung: Records when motion is detected while the vehicle is parked (requires activation in settings).
- Parküberwachung: Records when an impact is detected while the vehicle is parked (requires hardwire kit and activation in settings).
Menünavigation
- Über die Schaltfläche „MENÜ“ gelangen Sie zu den Einstellungen.
- Use the 'UP' and 'DOWN' arrow buttons to navigate through menu options.
- Drücken Sie die Taste „OK“, um die Auswahl zu bestätigen.
- Common settings include video resolution, loop recording duration, G-sensor sensitivity, parking mode, date/time, and language.
ViewFootage
- Auf dem Gerät: Wechseln Sie über das Menü in den Wiedergabemodus. view recorded videos directly on the dash cam screen.
- Auf dem Computer: Remove the SD card from the dash cam and insert it into a computer's card reader. The video files can then be accessed and played using standard media player software.
Wartung
SD-Karte formatieren
It is recommended to format the SD card regularly (e.g., once a month) to ensure optimal performance and prevent data corruption. This can typically be done through the dash cam's menu settings. Formatting will erase all data on the card, so back up any important files zuerst.
Linsenreinigung
Periodically clean the lenses of the front, inside, and rear cameras with a soft, lint-free cloth. Avoid using abrasive cleaners that could scratch the lens surface. Clean lenses ensure clear video quality.
Firmware-Aktualisierungen
Check the official Xgody website periodically for any available firmware updates. Updates can improve performance, add new features, or fix bugs. Follow the instructions provided with the firmware update carefully.
Fehlerbehebung
| Problem | Mögliche Ursache | Lösung |
|---|---|---|
| Die Dashcam lässt sich nicht einschalten. | Keine Stromversorgung; defektes Autoladegerät; lose Verbindung. | Prüfen Sie den Anschluss des Autoladegeräts; stellen Sie sicher, dass die Zigarettenanzünderbuchse im Fahrzeug funktionsfähig ist; versuchen Sie gegebenenfalls eine andere Stromquelle. |
| Die Aufnahme stoppt oder files sind beschädigt. | SD-Karte voll; SD-Kartenfehler; inkompatible SD-Karte. | Format the SD card regularly; use a high-speed (Class 10 or U3) SD card; replace the SD card if issues persist. |
| Screen is unresponsive or distorted. | Extreme temperatures; software glitch. | Allow the device to return to normal operating temperature; perform a factory reset (refer to manual for specific steps); ensure the device is not exposed to direct sunlight for extended periods in hot climates. |
| Die Videoqualität ist schlecht. | Verschmutzte Linse; Schutzfolie noch auf der Linse; falsche Auflösungseinstellung. | Clean camera lenses; remove any protective film; check video resolution settings in the menu. |
| Der G-Sensor ist zu empfindlich/nicht empfindlich genug. | Die Empfindlichkeitseinstellung des G-Sensors ist zu hoch/zu niedrig. | Adjust G-sensor sensitivity in the dash cam's settings menu. |
Technische Daten
| Besonderheit | Spezifikation |
|---|---|
| Technische Daten | 4.25 x 1.77 x 1.57 Zoll |
| Artikelgewicht | 1.26 Pfund |
| Konnektivitätstechnologie | USB, Kabellos |
| Auflösung der Videoaufnahme | 1080p (Front), 720p (Inside), 720p (Rear) |
| Bildschirmgröße | 1.5 Zoll |
| Flash-Speichertyp | SD |
| Betriebstemperatur | -31°F bis 167°F (-35°C bis 75°C) |
| Im Lieferumfang enthaltene Komponenten | Speicherkarte (64 GB) |
| Farbe | Schwarz |
Garantie und Support
Xgody provides 18 months of service for this product. If you have any questions or require assistance regarding your Xgody Dash Cam, please contact our customer support. We aim to respond with helpful advice within 24 hours.
For support, please refer to the contact information provided in the packaging or on the official Xgody webWebsite.