1. Einleitung
This manual provides essential information for the safe and efficient operation of your Reloop RP-7000 MK2 Direct Drive High Torque Turntable. Please read these instructions thoroughly before using the product to ensure proper setup, optimal performance, and longevity of your equipment. Keep this manual for future reference.
2. Sicherheitshinweise
- Stromversorgung: Schließen Sie das Gerät nur an eine Wechselstromsteckdose mit der angegebenen Spannung an.tage. Stellen Sie sicher, dass das Netzkabel nicht beschädigt oder eingeklemmt ist.
- Feuchtigkeit: Do not expose the unit to rain, moisture, or excessive humidity. Avoid placing liquid-filled objects on the turntable.
- Belüftung: Sorgen Sie für ausreichende Belüftung rund um das Gerät. Blockieren Sie keine Belüftungsöffnungen.
- Platzierung: Place the turntable on a stable, level surface away from direct sunlight, heat sources, and strong magnetic fields.
- Reinigung: Disconnect the power before cleaning. Use a soft, dry cloth. Avoid liquid cleaners or solvents.
- Wartung: Führen Sie keine Reparaturen am Gerät selbst durch. Überlassen Sie alle Wartungsarbeiten qualifiziertem Fachpersonal.
3. Packungsinhalt
Bitte prüfen Sie, ob alle unten aufgeführten Artikel in Ihrem Paket enthalten sind. Sollten Artikel fehlen oder beschädigt sein, kontaktieren Sie bitte umgehend Ihren Händler.
- Reloop RP-7000 MK2 Direct Drive High Torque Turntable (x2)
- Staubschutzhülle (x2)
- Digital Turntable Stylus Scale
- Record Care Solution
- Stromkabel
- RCA-Kabel
- Erdungskabel
- Slipmat
- Gegengewicht
- Headshell with Cartridge (pre-mounted or separate, depending on region/bundle)

Abbildung 1: Überview of the Reloop RP-7000 MK2 turntable bundle components.
4. Einrichtung
4.1 Auspacken und Aufstellen
- Alle Komponenten vorsichtig aus der Verpackung entnehmen. Die Verpackung für den späteren Transport aufbewahren.
- Place the turntable on a flat, stable, and vibration-free surface. Ensure there is enough space for the dust cover to open fully.
- Attach the dust cover by aligning its hinges with the slots on the turntable's rear.

Abbildung 2: Turntable with the dust cover in place.
4.2 Plattenteller- und Slipmat-Installation
- Carefully place the platter onto the center spindle. Ensure it sits flush.
- Lege die Slipmat auf die Platte.
4.3 Tonarm- und Tonabnehmerkonfiguration
- If not pre-mounted, attach the headshell with the cartridge to the tonearm. Secure it by turning the locking ring.
- Screw the counterweight onto the rear of the tonearm.
- Tonarm ausbalancieren: Lassen Sie den Tonarm clamp. Adjust the counterweight until the tonearm is perfectly balanced and floats horizontally.
- Tracking Force einstellen: Return the tonearm to its rest and clamp it. Rotate the numbered ring on the counterweight to '0' without moving the counterweight itself. Then, rotate the entire counterweight to the recommended tracking force for your cartridge (typically 2-4 grams for DJ cartridges).
- Anti-Skate-Einstellung: Adjust the anti-skate dial to match the tracking force setting.
4.4 Using the Digital Stylus Scale
The included digital stylus scale allows for precise measurement of your cartridge's tracking force, ensuring optimal sound quality and minimizing record wear.
- Place the stylus scale on the platter.
- Schalten Sie die Waage mit dem Einschaltknopf ein.
- Carefully lower the stylus onto the designated measuring point on the scale.
- Read the tracking force displayed. Adjust the tonearm's counterweight as needed until the desired force is achieved.

Abbildung 3: Digital Stylus Scale for precise tracking force measurement.
4.5 Anschlüsse
- Audioausgang: Connect the RCA cables from the turntable's audio output to the PHONO input of your mixer or amplifier. If your mixer/amplifier does not have a PHONO input, you will need an external phono preampschwerer.
- Erdungskabel: Connect the ground wire from the turntable to the ground terminal on your mixer or ampVerstärker zur Reduzierung von Brummgeräuschen.
- Leistung: Connect the power cable to the turntable and then to a suitable AC power outlet.
5. Bedienungsanleitung
5.1 Grundlegende Wiedergabe
- Lege eine Schallplatte auf die Slipmat.
- Wählen Sie die gewünschte Geschwindigkeit (33, 45 oder 78 U/min) mithilfe der Geschwindigkeitswahltasten.
- Drücken Sie die START/STOP Taste zum Starten der Plattentellerrotation.
- Carefully lift the tonearm using the cueing lever and position the stylus over the desired groove on the record.
- Lower the cueing lever to gently place the stylus onto the record.
- To stop playback, lift the tonearm using the cueing lever, return it to the tonearm rest, and press the START/STOP Taste.
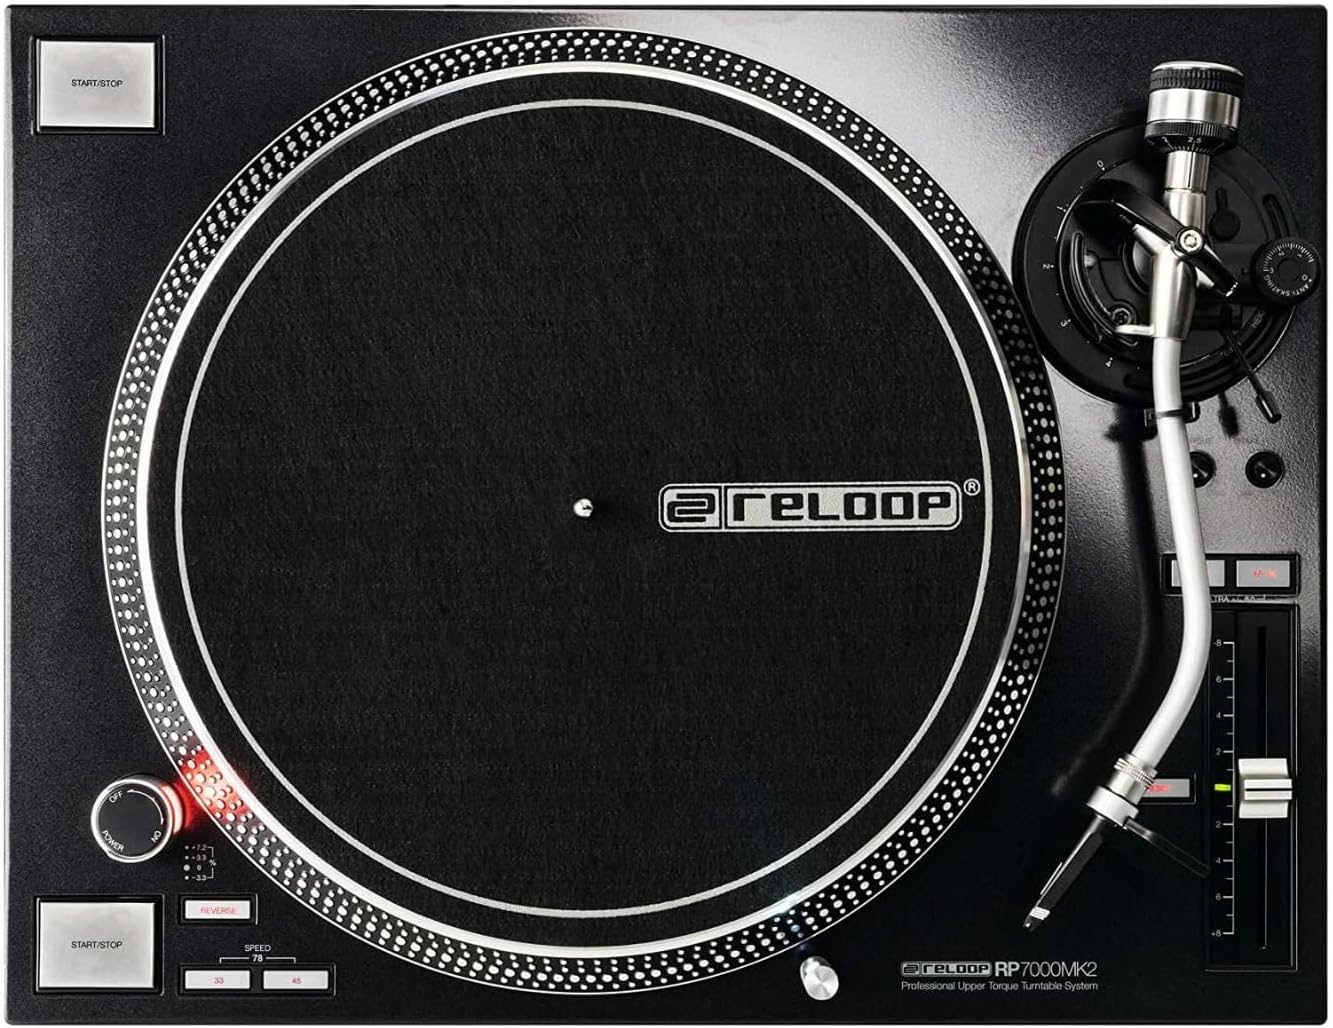
Abbildung 4: Turntable platter and control layout.
5.2 Tonhöhensteuerung
The pitch fader allows you to adjust the playback speed (BPM) of the record. Move the fader up or down to increase or decrease the pitch. The pitch range can be selected using the range buttons (e.g., +/- 8%, 16%, 50%).
5.3 Umkehrfunktion
The RP-7000 MK2 features a reverse playback function. Press the UMKEHREN button to change the direction of platter rotation. Press it again to return to normal playback.
6. Wartung
6.1 Reinigung des Plattenspielers
- Trennen Sie vor der Reinigung immer die Stromversorgung.
- Use a soft, dry, lint-free cloth to wipe the surface of the turntable and dust cover.
- Vermeiden Sie die Verwendung von Scheuermitteln, Lösungsmitteln oder chemischen Sprays, da diese die Oberfläche beschädigen können.
6.2 Stiftpflege
- Gently brush the stylus from back to front using a soft stylus brush to remove dust and debris.
- Vermeiden Sie es, den Stift mit den Fingern zu berühren.
6.3 Aktenpflege
The included record care solution helps maintain the quality of your vinyl records and prolong their lifespan.
- Apply a small amount of record care solution to a clean, soft, lint-free cloth or a dedicated record cleaning brush.
- Gently wipe the record surface in a circular motion, following the grooves.
- Allow the record to dry completely before playing.
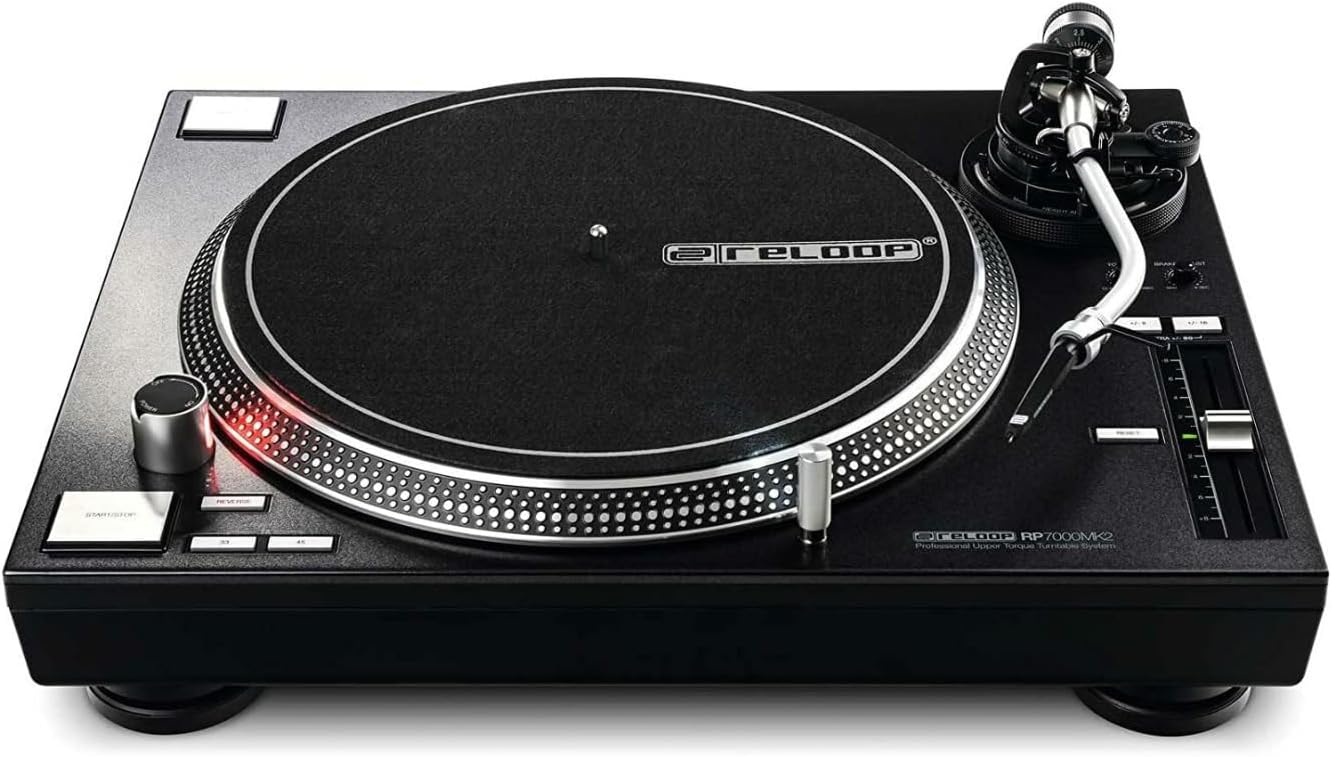
Abbildung 5: Record Care Solution for maintaining vinyl quality.
7. Fehlerbehebung
| Problem | Mögliche Ursache | Lösung |
|---|---|---|
| Kein Strom | Stromkabel nicht angeschlossen; Steckdose nicht aktiv | Überprüfen Sie die Stromkabelverbindung; testen Sie die Steckdose mit einem anderen Gerät. |
| Kein Ton oder geringe Lautstärke | RCA cables incorrect; no PHONO input; amplifier/mixer settings | Ensure RCA cables are connected to PHONO input; check amplifier/mixer input selection and volume |
| Brummendes Geräusch | Erdungskabel nicht angeschlossen; Störungen | Connect ground wire; move turntable away from other electronic devices |
| Aussetzer oder verzerrter Ton | Incorrect tracking force; dirty stylus/record; damaged stylus | Adjust tracking force using stylus scale; clean stylus and record; replace stylus if damaged |
| Teller dreht sich nicht | START/STOP button not pressed; motor issue | Press START/STOP; if problem persists, contact support |
8. Spezifikationen
| Besonderheit | Detail |
|---|---|
| Modellname | RP-7000 MK2 |
| Marke | Reloop |
| Motortyp | Direct Drive DC Motor |
| Besonderheit | Hohes Drehmoment |
| Technische Daten | 27.9 x 20 x 18.6 Zoll |
| Material | Metall |
| Farbe | Schwarz |
| Kompatible Geräte | Speaker, Headphone, Personal Computer, MP3 Player, Laptop |
| Signalformat | Digitales |
9. Garantie und Support
Reloop products are designed for reliability and performance. For warranty information, please refer to the warranty card included with your product or visit the official Reloop website. For technical support or service inquiries, please contact your authorized Reloop dealer or distributor.
Hersteller: Reloop
Datum der Erstveröffentlichung: 8. Juli 2022