1. Einleitung
This manual provides comprehensive instructions for the installation, operation, and maintenance of your Rampage ZUKO Metal Panel Gaming Case. Please read this manual carefully before using the product to ensure proper functionality and to prevent damage.
Das Rampage ZUKO is a gaming computer case designed for optimal performance and aesthetics. It features a robust metal panel construction, a tempered glass side panel, and comes equipped with a pre-installed 600W 80 Plus Bronze certified power supply and four LED fans for efficient cooling and visual appeal.
2. Sicherheitshinweise
- Always disconnect the power supply from the wall outlet before performing any installation, maintenance, or cleaning procedures.
- Handle internal components with care to avoid electrostatic discharge (ESD) damage. Consider using an anti-static wrist strap.
- Do not open the power supply unit (PSU) as it contains high voltage Komponenten.
- Sorgen Sie für ausreichende Belüftung rund um das Gehäuse, um eine Überhitzung zu vermeiden.
- Halten Sie das Produkt von Wasser, Feuchtigkeit und extremen Temperaturen fern.
- Avoid placing heavy objects on the case.
3. Packungsinhalt
Überprüfen Sie, ob alle Artikel im Paket vorhanden sind:
- Rampage ZUKO Gaming Case with pre-installed 600W 80 Plus Bronze PSU
- 4 x Pre-installed LED Fans (3 front, 1 rear)
- Zubehörbox (mit Schrauben, Kabelbindern und anderen Kleinteilen)
- Benutzerhandbuch (dieses Dokument)
4. Produktüberschreitungview
Familiarize yourself with the key features and components of your Rampage ZUKO case.
4.1 Extern View

Das Rampage ZUKO case features a sleek design with a metal front panel and a tempered glass side panel, allowing for a clear view of internal components and LED lighting.
4.2 Frontplatte

The front panel incorporates a mesh design for optimal airflow, behind which three LED fans are mounted. The top I/O panel provides convenient access to essential ports and controls.
4.3 Oberes I/O-Panel

The top I/O panel includes:
- Netzschalter
- Reset-Taste
- LED Control Button (for fan lighting)
- Kopfhöreranschluss
- Mikrofonbuchse
- 2 x USB 2.0-Anschlüsse
- 1 x USB 3.0-Anschluss
4.4 Rückseite

The rear panel features a pre-installed exhaust LED fan, multiple expansion slots for add-in cards, and the cutout for the integrated power supply unit.
4.5 Interne Aufteilung
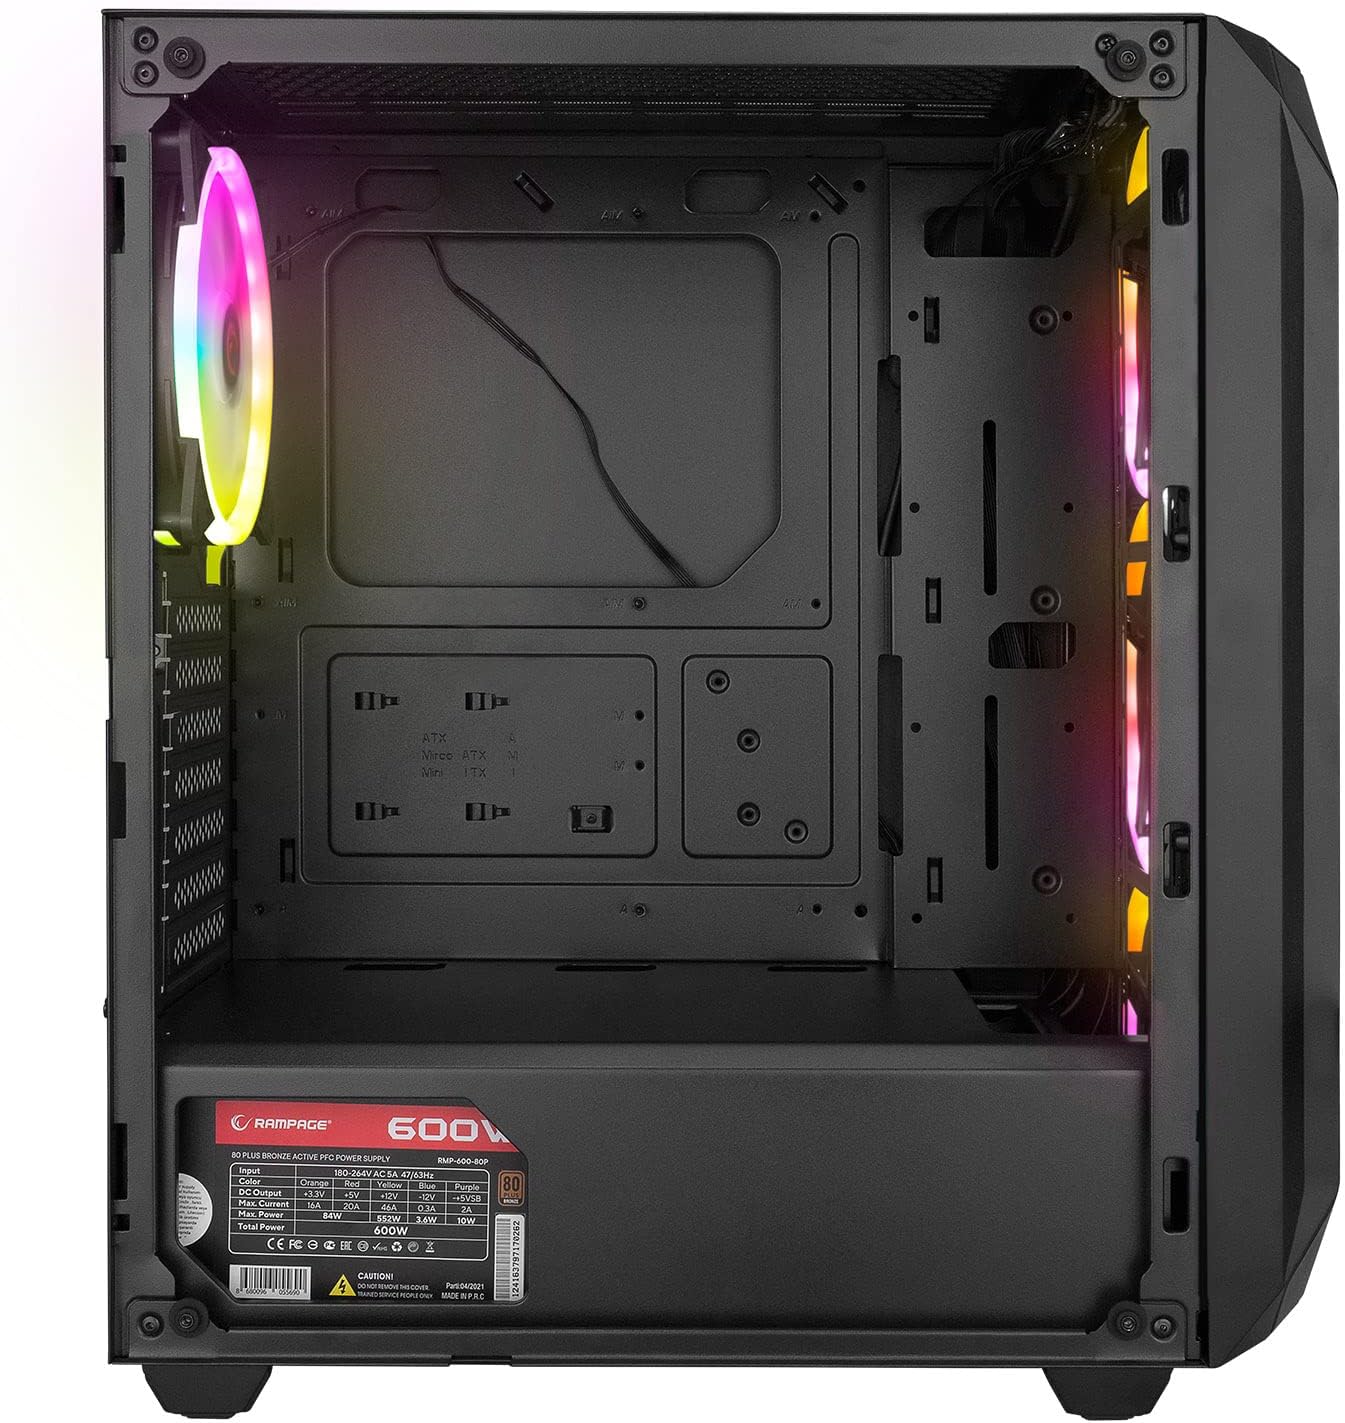
Der Innenraum bietet ample space for standard ATX, Micro-ATX, and Mini-ITX motherboards, graphics cards, and storage drives. A dedicated shroud covers the power supply, aiding in a clean build and improved airflow.
4.6 Netzteil (PSU)
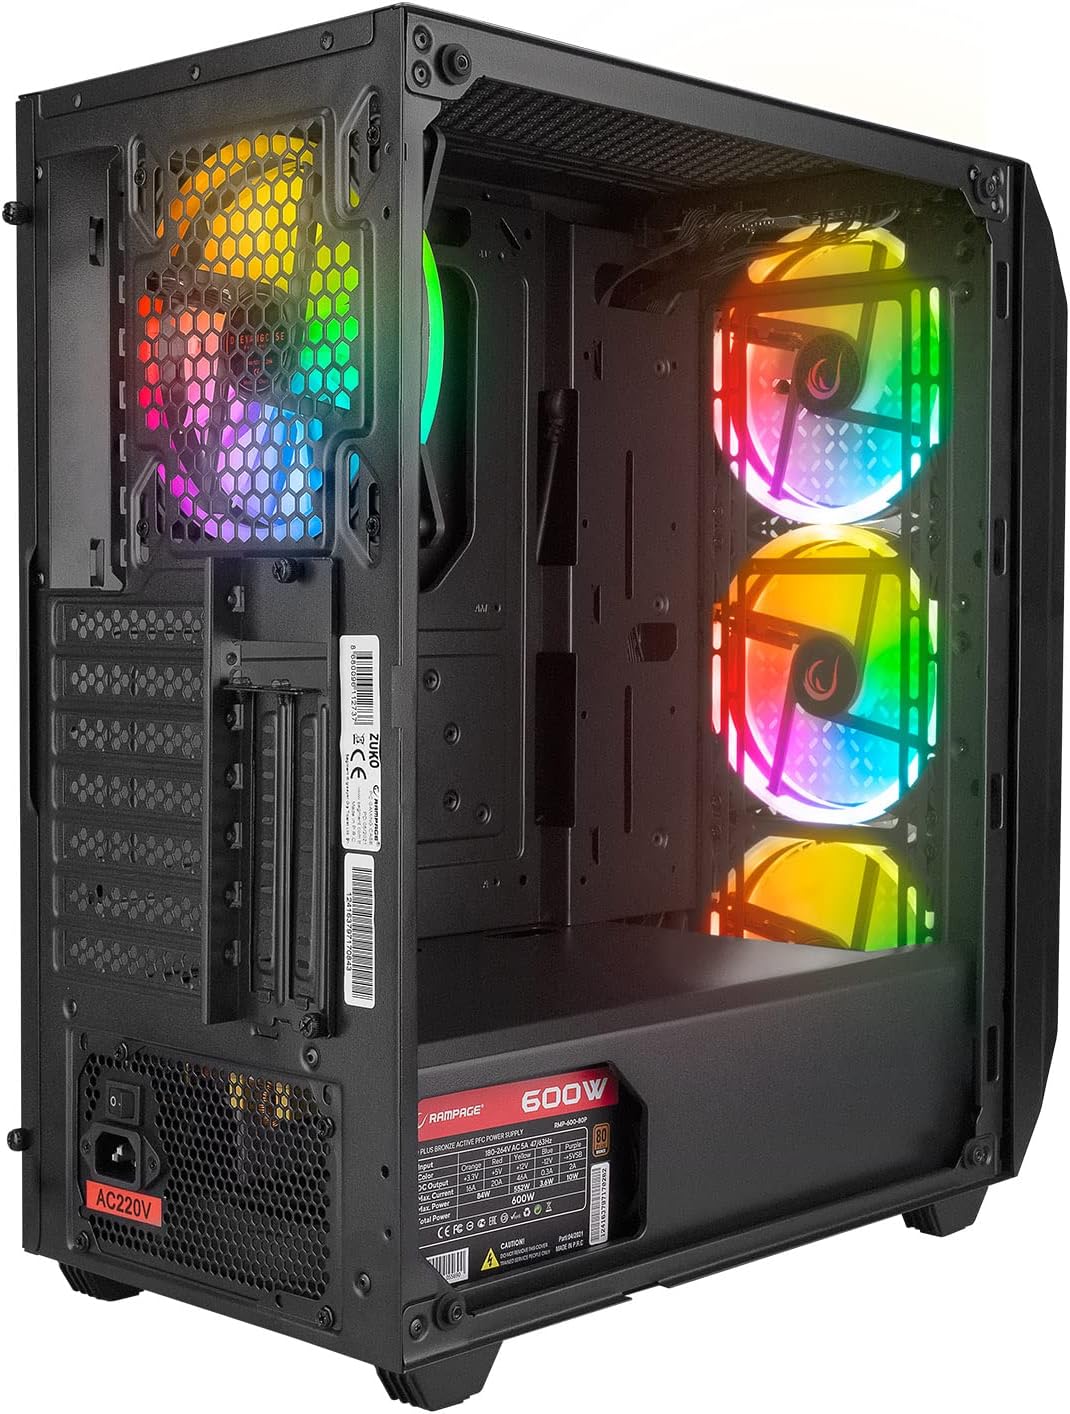
The case comes with a pre-installed 600W 80 Plus Bronze certified power supply, providing reliable and efficient power to your components.
5. Einrichtung und Installation
Follow these steps to install your computer components into the Rampage ZUKO case.
5.1 Vorbereitung des Falls
- Stellen Sie das Gehäuse auf eine ebene, stabile Oberfläche.
- Remove the tempered glass side panel by unscrewing the four thumb screws and carefully lifting it away. Place it on a soft, non-abrasive surface to prevent scratches.
- Remove the right-side metal panel by unscrewing the two thumb screws at the rear and sliding it backward.
5.2 Motherboard-Installation
- Install the I/O shield (if not pre-installed on your motherboard) into the cutout at the rear of the case.
- Richten Sie Ihr Mainboard an den Abstandshaltern im Gehäuse aus. Stellen Sie sicher, dass die Abstandshalter zum Formfaktor Ihres Mainboards passen (ATX, Micro-ATX, Mini-ITX).
- Befestigen Sie das Motherboard mit den mitgelieferten Schrauben.
5.3 Installation des Speicherlaufwerks
- Locate the 2.5" SSD/HDD mounting points behind the motherboard tray or in the PSU shroud area.
- Locate the 3.5" HDD drive cage (usually under the PSU shroud).
- Mount your storage drives using the appropriate screws.
5.4 Installation der Grafikkarte und der Erweiterungskarte
- Entfernen Sie die erforderlichen Erweiterungssteckplatzabdeckungen von der Rückseite des Gehäuses.
- Insert your graphics card or other expansion cards into the corresponding PCIe slots on your motherboard.
- Befestigen Sie die Karten mit Schrauben.
5.5 Kabelmanagement
Utilize the cable routing holes and tie-down points behind the motherboard tray to manage cables. This improves airflow and aesthetics.
5.6 Connecting Front Panel Cables
Connect the front panel cables (Power SW, Reset SW, HDD LED, Power LED, USB 2.0, USB 3.0, HD Audio, and LED control button cable) to the corresponding headers on your motherboard. Refer to your motherboard manual for exact pin layouts.
6. Bedienungsanleitung
6.1 Einschalten
- Ensure all components are correctly installed and all necessary power cables are connected.
- Connect the power cord to the PSU and then to a wall outlet.
- Schalten Sie den Netzschalter am Netzteil in die Position „EIN“.
- Press the Power Button on the top I/O panel of the case.
6.2 LED Fan Control
Das Rampage ZUKO case includes pre-installed LED fans. Use the dedicated LED Control Button on the top I/O panel to cycle through available lighting modes or turn the LEDs on/off. Please note that some models may feature fixed LED colors or limited lighting patterns, as reported by some users. The functionality of the LED button depends on the specific fan controller integrated with the fans.
7. Wartung
Regelmäßige Wartung trägt dazu bei, eine optimale Leistung und Langlebigkeit Ihres Computergehäuses zu gewährleisten.
7.1 Reinigung von Staubfiltern
The case is equipped with dust filters (e.g., on the top and under the PSU). Periodically remove and clean these filters to prevent dust buildup, which can restrict airflow and lead to overheating. Clean them with compressed air or by rinsing with water and allowing them to dry completely before reinstallation.
7.2 Allgemeine Reinigung
Wischen Sie die Außenseite des Gehäuses mit einem weichen, fusselfreien Tuch ab.amp cloth. Avoid using harsh chemicals or abrasive materials that could damage the finish or tempered glass. For internal cleaning, use compressed air to remove dust from components and fans.
8. Fehlerbehebung
In diesem Abschnitt werden häufig auftretende Probleme behandelt.
8.1 Kein Strom
- Stellen Sie sicher, dass das Netzkabel sowohl mit dem Netzteil als auch mit der Steckdose fest verbunden ist.
- Verify that the PSU's power switch is in the 'ON' position.
- Check all internal power connections, especially the 24-pin motherboard power and 8-pin CPU power cables.
- Confirm that the front panel Power SW cable is correctly connected to the motherboard header.
8.2 Fans Not Spinning / LEDs Not Working
- Check that the fan power cables are securely connected to the motherboard or fan controller.
- Ensure the LED control cable from the front panel is connected to the appropriate header (if applicable) or the fan controller.
- As noted in Section 6.2, some models may have fixed LED colors or limited functionality, meaning the LED button might not change colors but only cycle through patterns or turn them on/off.
8.3 Überhitzungsprobleme
- Ensure all case fans are spinning correctly and oriented for proper airflow (front fans intake, rear fan exhaust).
- Clean any dust buildup from the dust filters and internal components.
- Verify that there is adequate space around the case for air circulation.
9. Spezifikationen
| Besonderheit | Spezifikation |
|---|---|
| Marke | RampAlter |
| Modell | ZUKO |
| Gehäusetyp | Gaming Mid-Tower |
| Material | Metall, gehärtetes Glas |
| Farbe | Schwarz |
| Abmessungen (Paket) | 50 x 47.4 x 27.4 cm |
| Produktgewicht | 8.5 Kilogramm |
| Pre-installed PSU | 600W 80 Plus Bronze |
| Vorinstallierte Lüfter | 4 x LED Fans (3 Front, 1 Rear) |
| Motherboard-Unterstützung | ATX, Mikro-ATX, Mini-ITX |
| Front I / O Ports | 2 x USB 2.0, 1 x USB 3.0, HD Audio (Headphone/Mic), Power, Reset, LED Control |
| Kühlmethode | Luft |
| Empfohlene Verwendung | Spiele |
10. Garantie und Support
For warranty information and technical support, please refer to the warranty card included with your product or visit the official RampAlter webBewahren Sie Ihren Kaufbeleg für Garantieansprüche auf.


