1. Produktüberschreitungview
This manual provides essential information for the installation, operation, and maintenance of your HPEVA Starter Solenoid, model 762-1261-211-51. This 12V, 100A, 4-terminal solenoid is designed as a replacement part for various lawn mower tractors.
Zu den Hauptmerkmalen gehören:
- Premium Qualität: Manufactured to strict quality standards for reliable operation and long service life.
- Langlebige Konstruktion: Designed to protect against dust and water jets, offering dust-proof and waterproof performance.
- Korrosionsbeständigkeit: Built with anti-rust and anti-corrosion properties for extended durability.

Abbildung 1: Vorderseite view of the HPEVA Starter Solenoid, showing the main terminals and mounting bracket.
2. Spezifikationen
| Parameter | Wert |
|---|---|
| Modellnummer | 762-1261-211-51 |
| Bandtage | 12 V Gleichstrom |
| Aktuelle Bewertung | 100 A |
| Klemmen | 4 Terminals (2x 1/4" threaded top, 2x spade connected) |
| Artikelgewicht | 7 Unzen |
| Verpackungsabmessungen | 3.19 x 3.07 x 2.52 Zoll |

Abbildung 2: Draufsicht view of the solenoid, highlighting the two large threaded terminals and two smaller spade terminals.
3. Kompatibilität
This starter solenoid is designed to be compatible with a range of lawn mower tractors. Please verify the part numbers and visual appearance against your original component before installation.
Kompatibel mit:
- MTD Lawn Mower Tractors
- Trombetta 862-1241-211-12
- Handwerker 532192507
- Husqvarna (specific models may vary, verify part number)
Replaces part numbers:
- 762-1261-211-50
- 762126121150
- 762-1261-211-51
- 762126121151
- M012305-000
- C50019-010
4. Sicherheitshinweise
Always prioritize safety when working with electrical components and machinery. Failure to follow safety precautions can result in serious injury or damage to equipment.
- Stromversorgung trennen: Before beginning any installation or maintenance, always disconnect the battery cables from your lawn mower or tractor. Disconnect the negative (-) terminal first, then the positive (+) terminal.
- Schutzausrüstung tragen: Verwenden Sie geeignete persönliche Schutzausrüstung, einschließlich Schutzbrille und Handschuhen.
- Kurzschlüsse vermeiden: Be careful not to short-circuit battery terminals or other electrical components with tools.
- Richtiges Werkzeug: Use insulated tools where possible and ensure all tools are in good condition.
- Belüftung: Work in a well-ventilated area, especially when dealing with batteries.
5. Installationsanleitung
This section outlines the general steps for replacing a starter solenoid. Specific procedures may vary depending on your lawn mower or tractor model. Refer to your equipment's service manual for detailed instructions.
Benötigtes Werkzeug:
- Wrench set (typically 1/2 inch, 9/16 inch, or 13mm)
- Wire brush (for cleaning terminals)
- Battery terminal cleaner/protector (optional)
Installationsschritte:
- Bereiten Sie sich auf Ihre Sicherheit vor: Ensure the lawn mower is turned off, the parking brake is engaged, and the ignition key is removed. Disconnect the negative (-) battery cable first, then the positive (+) battery cable.
- Locate the Old Solenoid: The starter solenoid is typically mounted near the battery or starter motor. It will have thick battery cables connected to its large terminals and smaller wires connected to its spade terminals.
- Kabel trennen: Carefully note or photograph the wiring connections to the old solenoid. Disconnect all wires from the old solenoid.
- Altes Magnetventil ausbauen: Unbolt or unmount the old solenoid from its position.
- Prepare New Solenoid: Inspect the new HPEVA solenoid for any damage. Ensure all terminals are clean and free of debris.
- Mount New Solenoid: Secure the new solenoid in the same location as the old one using the appropriate bolts.
- Kabel anschließen: Reconnect the wires to the new solenoid according to your notes or photographs. Ensure all connections are tight and secure. The two large threaded terminals are for the main battery and starter cables. The two smaller spade terminals are for the ignition switch and ground/neutral safety switch.
- Batterie wieder anschließen: Schließen Sie zuerst das Pluskabel (+) der Batterie wieder an, dann das Minuskabel (-) der Batterie.
- Testbetrieb: Attempt to start the lawn mower to verify proper installation and function.

Abbildung 3: Seite view of the solenoid, showing the mounting bracket and terminal configuration.
6. Bedienung
The starter solenoid acts as an electromagnetic switch that allows a small current from the ignition switch to control a much larger current flow from the battery to the starter motor. When you turn the ignition key to the 'start' position, a low-amperage current flows to the solenoid's control terminals. This energizes an electromagnet inside the solenoid, which then pulls a plunger, closing a high-amperage circuit. This closed circuit allows the full battery current to flow directly to the starter motor, engaging it to crank the engine.
Nach der Freigabeasing the ignition key, the control circuit to the solenoid is de-energized, causing the plunger to retract and open the high-amperage circuit, thus disengaging the starter motor.
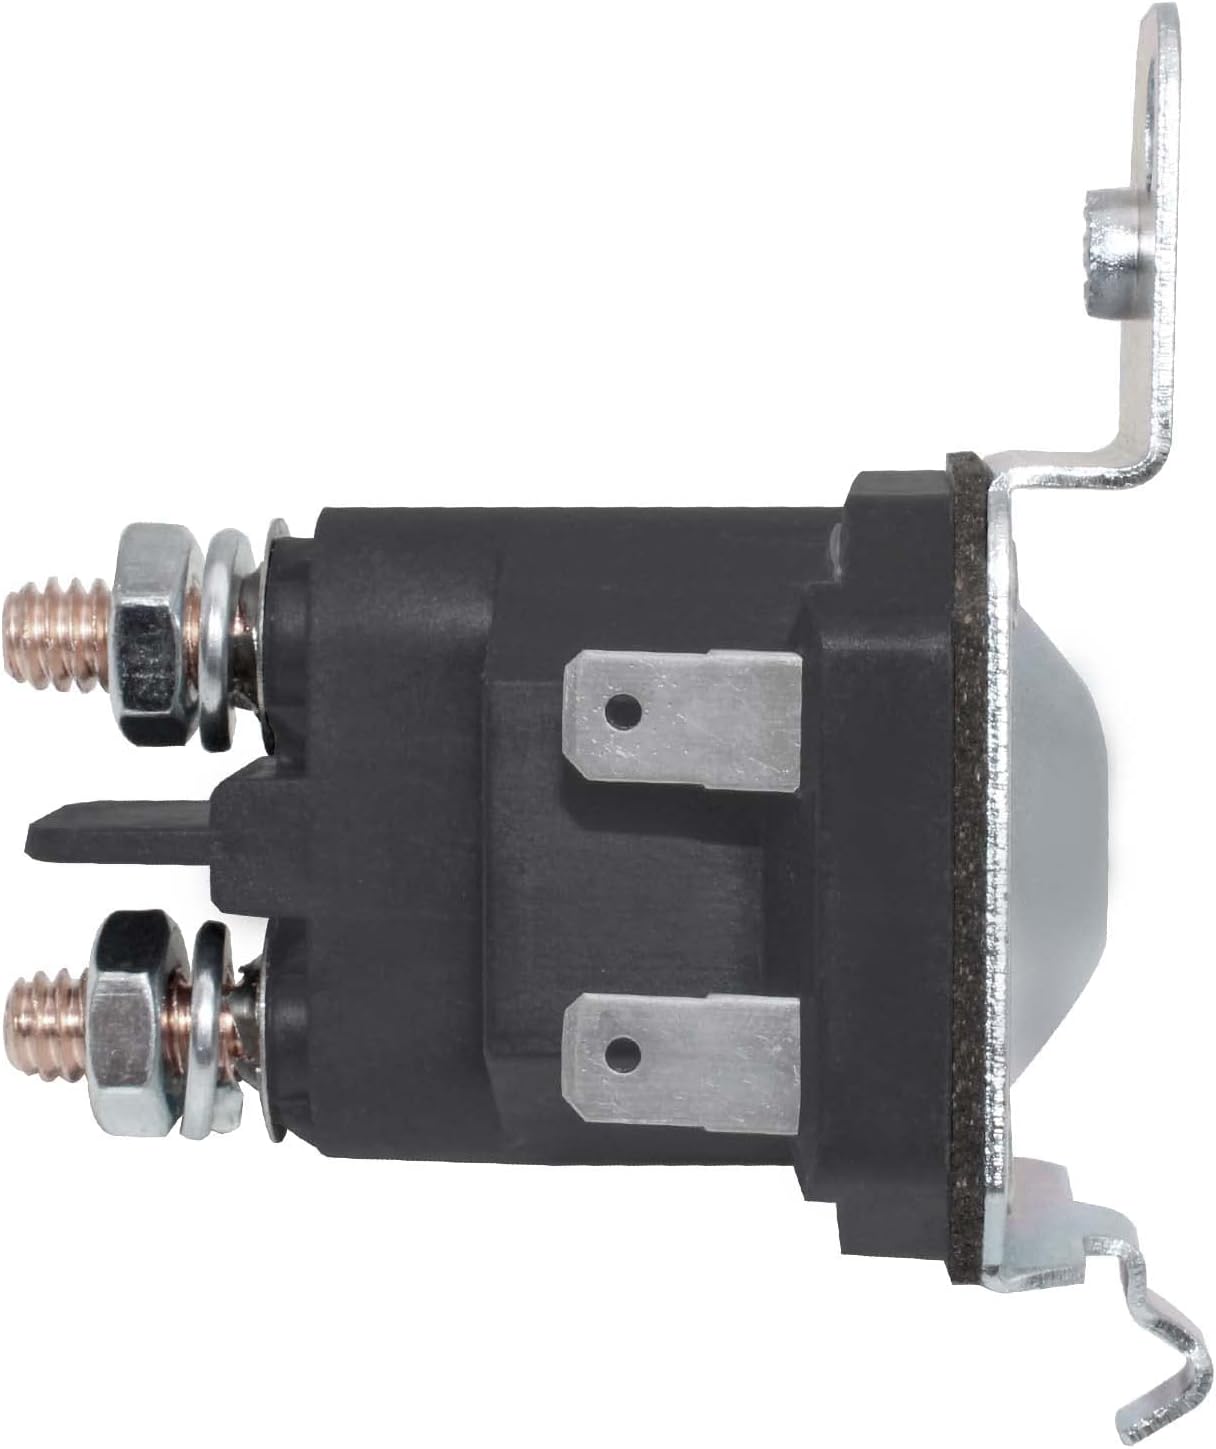
Abbildung 4: Rückseite view of the solenoid, showing the 'DC 12V' label and mounting points.
7. Wartungstipps
To ensure the longevity and reliable performance of your starter solenoid, consider the following maintenance tips:
- Halten Sie die Anschlüsse sauber: Periodically inspect and clean the battery and solenoid terminals to prevent corrosion, which can impede electrical flow. Use a wire brush and a battery terminal cleaner if necessary.
- Verbindungen prüfen: Ensure all electrical connections to the solenoid are tight and secure. Loose connections can cause intermittent starting issues or generate excessive heat.
- Verkabelung prüfen: Check the wiring connected to the solenoid for any signs of fraying, cracking, or heat damage. Replace damaged wires promptly.
- Umweltschutz: While the solenoid is designed to be dust-proof and waterproof, avoid exposing it to excessive moisture or harsh chemicals.
8. Fehlerbehebung
If your lawn mower is experiencing starting issues, the starter solenoid may be a contributing factor. Here are some common symptoms and troubleshooting steps:
Symptom: Engine does not crank, but lights and accessories work.
- Mögliche Ursache: Faulty solenoid, loose connections, or dead battery.
- Fehlerbehebung:
- Überprüfen Sie die Batterieladungtage.
- Inspect all connections to the solenoid for tightness and corrosion.
- Listen for a click from the solenoid when turning the key. If no click, the solenoid may be faulty or not receiving power from the ignition switch.
- (Fortschrittlich) Briefly jump the two large terminals on the solenoid with a screwdriver (exercise extreme caution and ensure the mower is in neutral with parking brake engaged). If the starter motor engages, the solenoid or its control circuit is likely at fault.
Symptom: Solenoid clicks, but engine does not crank or cranks slowly.
- Mögliche Ursache: Weak battery, corroded battery cables, or faulty starter motor.
- Fehlerbehebung:
- Testbatterie voltage unter Last.
- Clean battery terminals and cable ends.
- Check for continuity and resistance in battery cables.
- If the solenoid clicks strongly but the starter doesn't engage, the starter motor itself might be faulty.
If you are unsure about any troubleshooting steps, it is recommended to consult a qualified technician.
9. Garantie und Support
For information regarding product warranty, returns, or technical support, please refer to the retailer or manufacturer's official webBewahren Sie Ihren Kaufbeleg als Kaufnachweis auf.
This product is a replacement part. Always ensure it is the correct product for your specific application by carefully checking all pictures and part numbers in the listing before purchase.