Einführung
The Closer Pets Microchip Activated Cat Door is designed to provide secure and convenient access for your feline companions while preventing entry by uninvited animals. This advanced cat door utilizes your cat's unique microchip or a separately available Cat Mate I.D. disc to control entry, accommodating up to 30 cats. Its robust construction and intuitive locking mechanism offer peace of mind and flexibility for pet owners.
Sicherheitshinweise
- Ensure proper installation to prevent injury to pets or damage to the door.
- Keep small children away from the cat door during operation and installation.
- While designed to restrict entry, no cat door can guarantee 100% prevention of all unwanted animals, especially larger wildlife like raccoons. For enhanced security, particularly during nocturnal hours, utilize the manual locked mode or the "in only" setting.
- Do not attempt to modify the cat door, as this may void the warranty and compromise its functionality.
- Verwenden Sie ausschließlich den angegebenen Batterietyp und achten Sie bei der Installation auf die richtige Polarität.
Packungsinhalt
Bitte prüfen Sie vor Beginn der Installation, ob alle Komponenten vorhanden sind:
- Closer Pets Microchip Activated Cat Door unit (front and back sections)
- Befestigungsschrauben
- Installationsvorlage
- Benutzerhandbuch (dieses Dokument)
Note: Cat Mate I.D. discs and wall adapter kits for glass or metal doors are sold separately.
Produkt überview
The Closer Pets Microchip Activated Cat Door is constructed from super-tough polymer, ensuring durability. It features a clear flap for visibility and a rotary 4-way lock for manual control.

Abbildung 1: Front view of the Closer Pets Microchip Activated Cat Door. This image displays the main unit in its gray color, highlighting the clear flap and the control knob at the bottom.
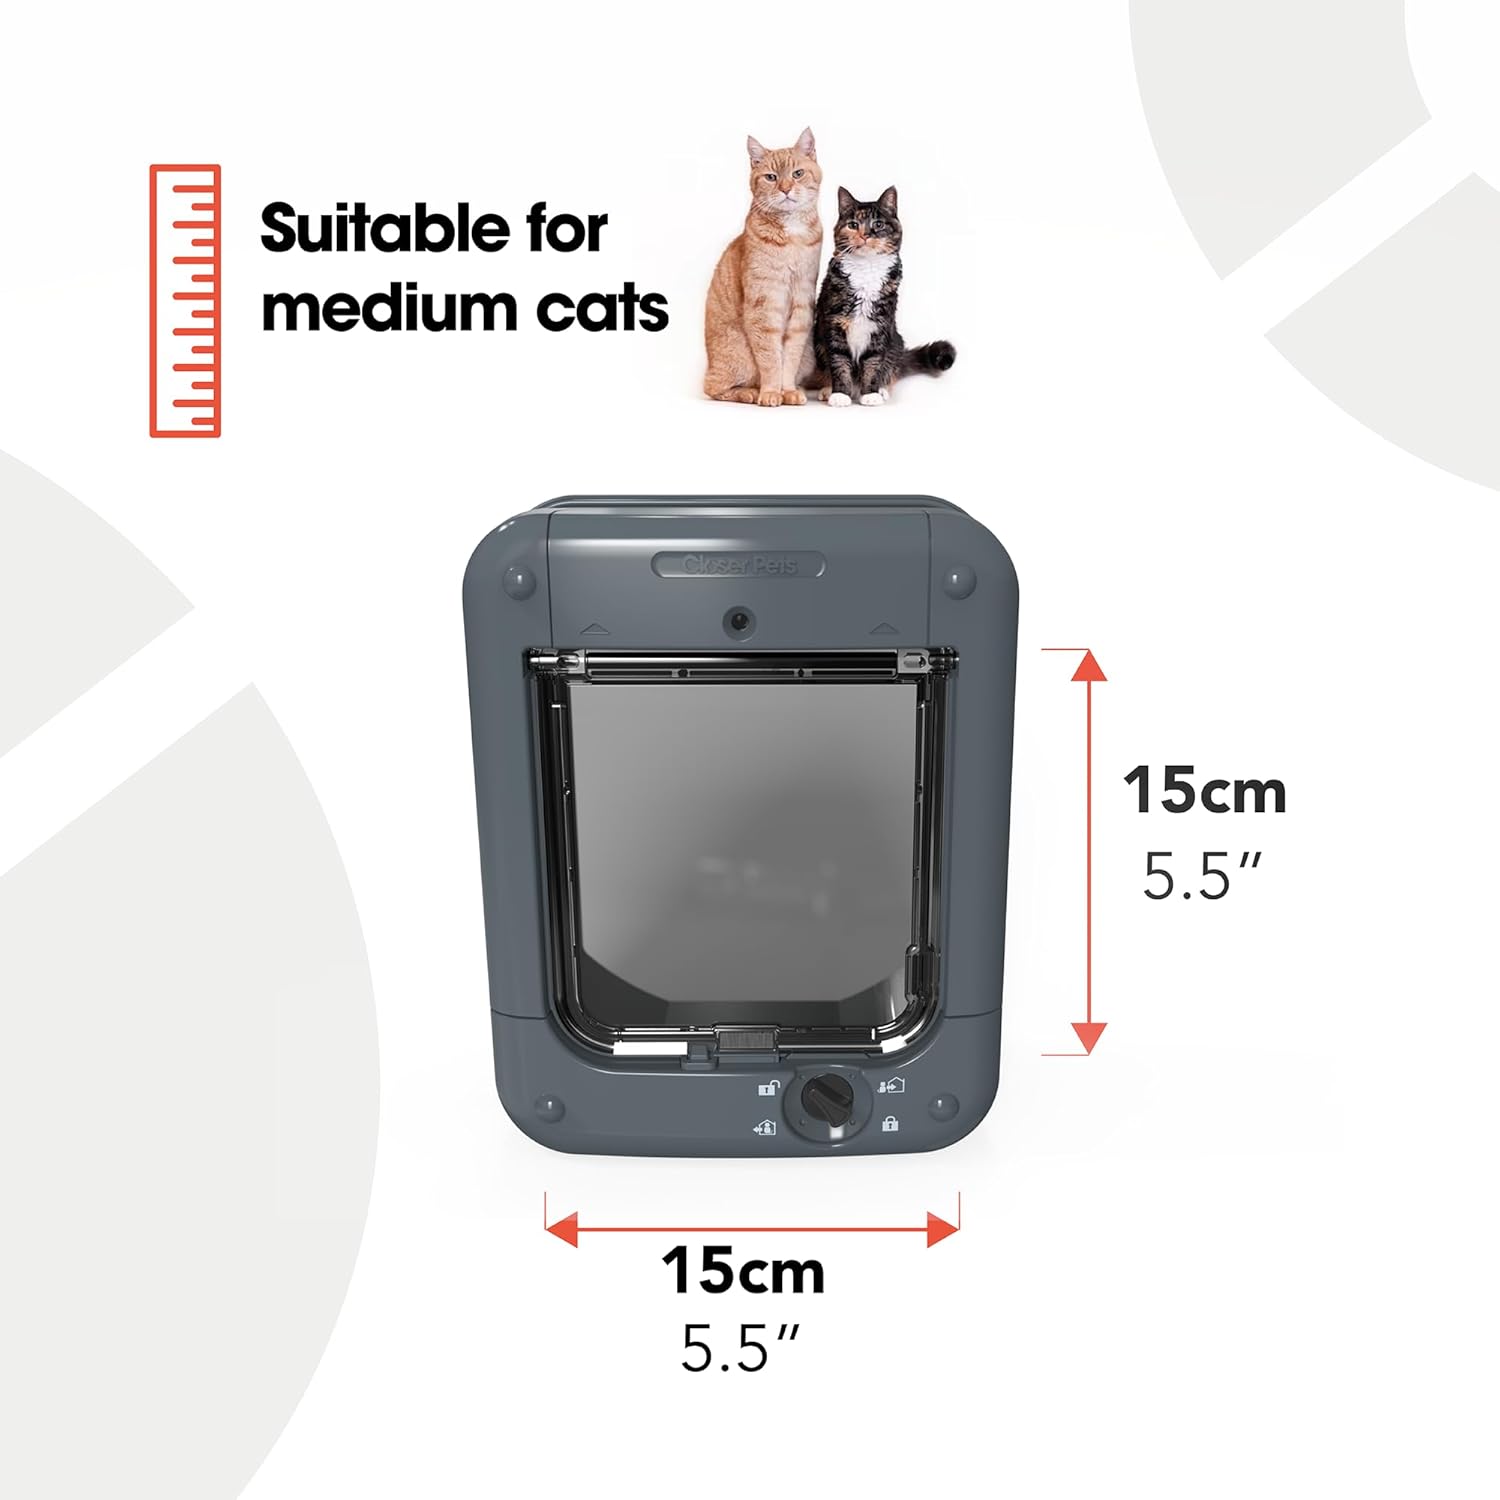
Abbildung 2: Zurück view of the Closer Pets Microchip Activated Cat Door. This image shows the rear section of the cat door, which connects to the front section through the door or wall opening.

Abbildung 3: Detaillierte view of the 4-way rotary lock. This image highlights the manual control knob and the icons indicating the four lock settings: Unlocked, In Only, Out Only, and Locked.
Setup und Installation
Vor der Installation:
- Read all instructions carefully before beginning.
- Ensure you have the necessary tools: pencil, drill, jigsaw, screwdriver, measuring tape.
- Verify the door or wall thickness. The unit self-lines to 85mm (3 3/8 inches). For thicker installations or glass/metal, a separate adapter kit may be required.
- Install 4 x AA batteries (not included) into the battery compartment. Ensure correct polarity.
Installationsschritte:
- Bereiten Sie die Eröffnung vor: Use the provided template to mark the cut-out area on your door or wall. The recommended cut-out size is 6 7/8 inches (width) by 7 3/4 inches (height). Carefully cut the opening using a jigsaw.
- Insert the Cat Door: Place the front section of the cat door into the prepared opening from one side.
- Attach the Rear Section: From the opposite side, align and attach the rear section of the cat door to the front section. Ensure they fit snugly together.
- Sichern Sie die Einheit: Use the provided screws to secure both sections of the cat door firmly to the door or wall. Do not overtighten.
- Funktion prüfen: Once installed, manually operate the flap to ensure it swings freely and the 4-way lock functions correctly.
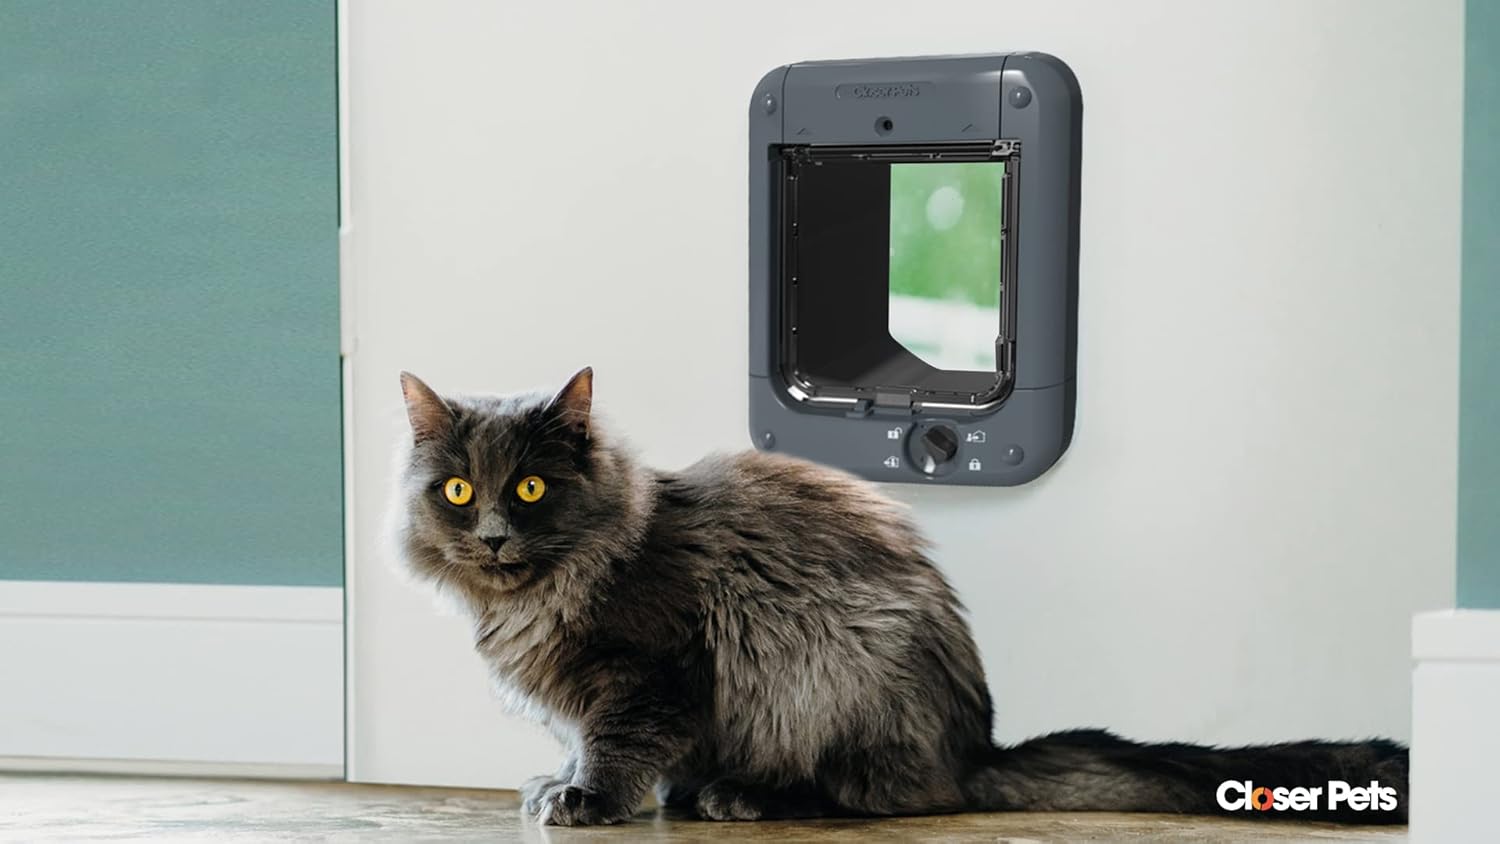
Abbildung 4: Diagram illustrating the overall and cut-out dimensions of the cat door. The overall size is approximately 7 3/4 inches wide by 9 11/16 inches high. The cut-out size is 6 7/8 inches wide by 7 3/4 inches high.
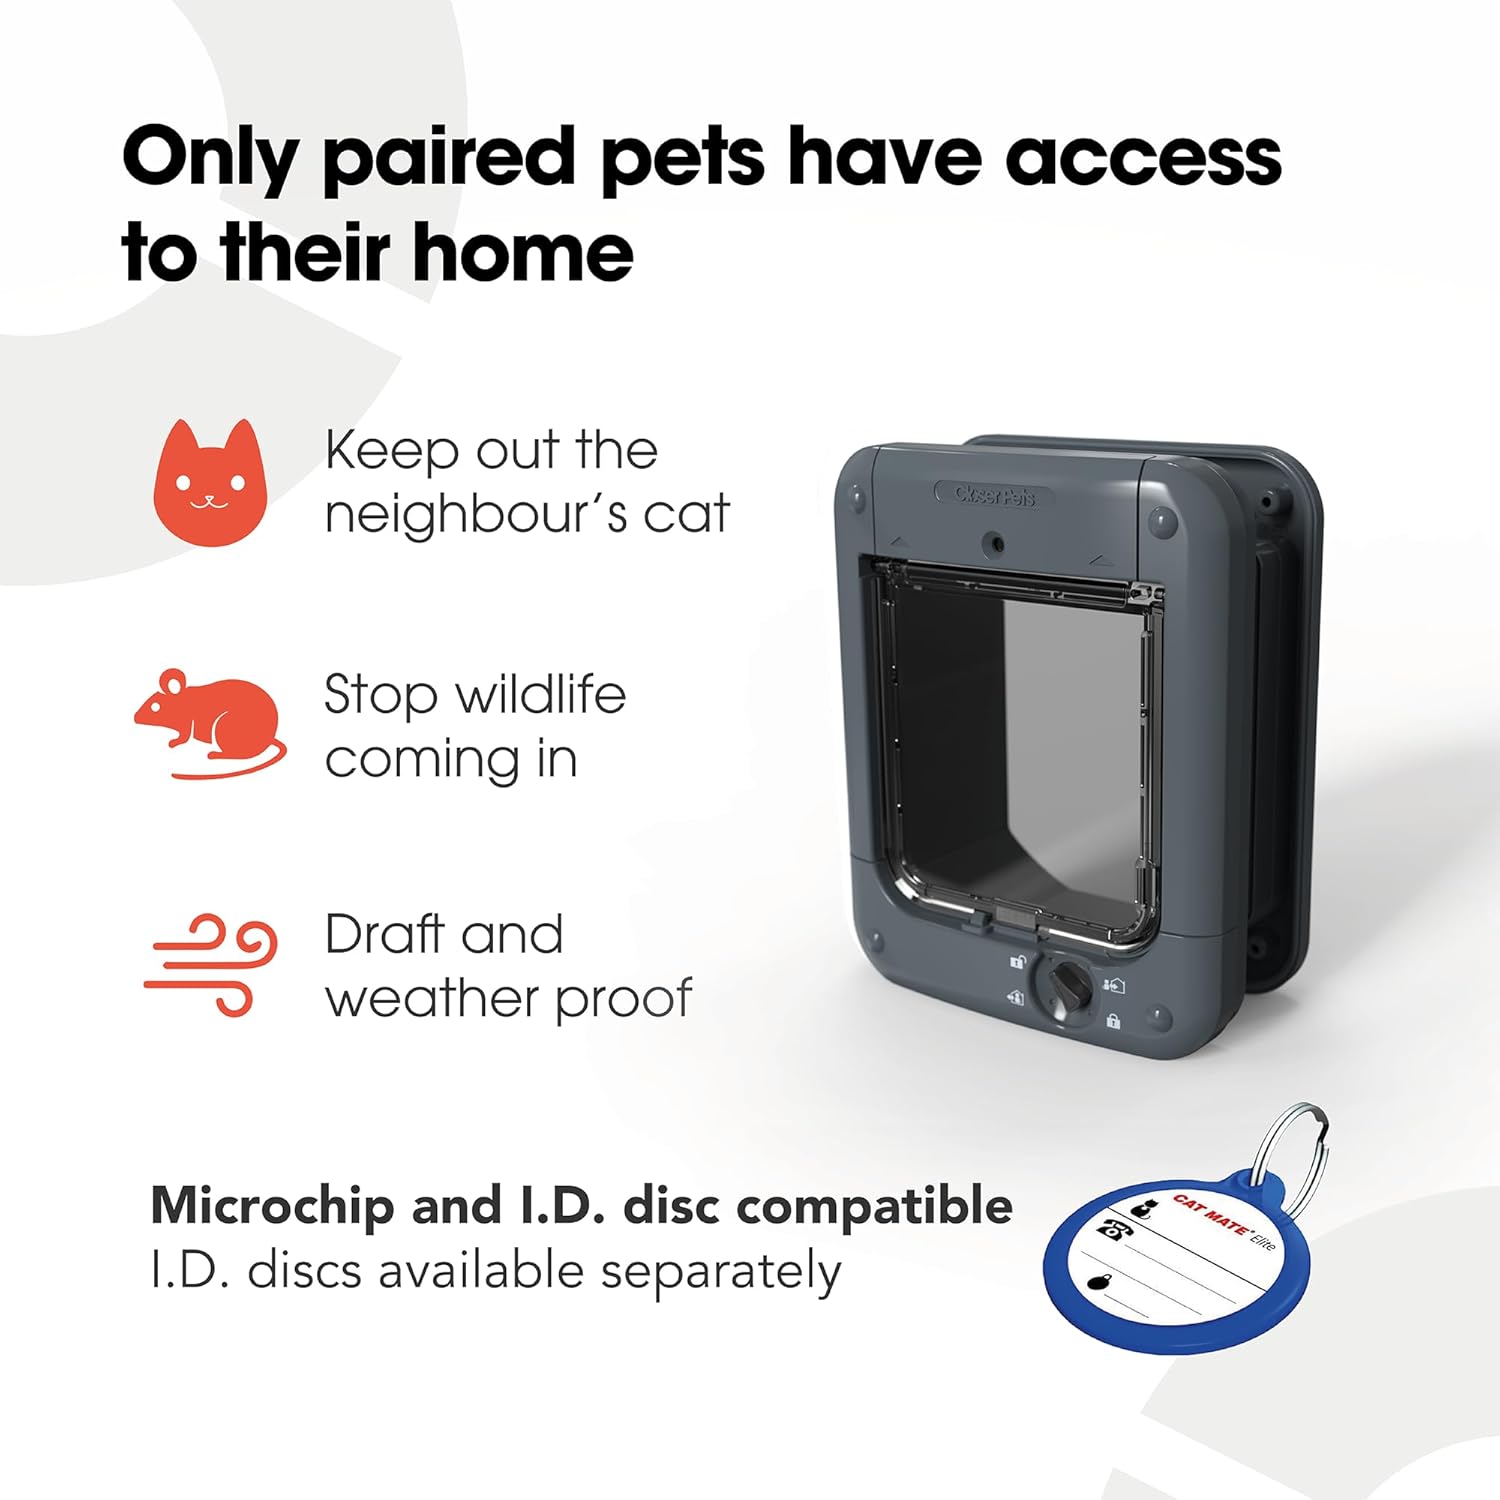
Abbildung 5: Ein Example of the cat door installed in a standard interior door, with a cat sitting nearby. This demonstrates the typical appearance of the installed unit.
Bedienungsanleitung
Programming Microchips:
The cat door can store up to 30 unique microchip IDs. It is compatible with most common US microchips, including 15-digit ISO, AVIDXX, and AVID Encrypted.
- Programmiermodus aufrufen: Locate the 'P' (Program) button, usually near the top of the unit. Press and hold the 'P' button until the indicator light begins to flash.
- Register Microchip: Gently guide your cat's head through the cat door opening. The unit will scan the microchip. Once successfully registered, the indicator light will stop flashing and remain solid for a few seconds, then turn off.
- Repeat for Multiple Cats: Repeat step 2 for each cat you wish to grant access. The unit will automatically save each new microchip.
- Programmiermodus verlassen: The unit will automatically exit programming mode after a period of inactivity or once all microchips are registered.

Abbildung 6: Nahaufnahme view of the 'P' (Program) button, used to initiate the microchip registration process.
4-Way Rotary Lock Settings:
The rotary knob at the bottom of the cat door allows you to manually control your pet's access. Rotate the knob to select one of the four settings:
- Unlocked (Open): Allows free entry and exit for all pets.
- Nur in: Allows pets to enter but not exit. This setting is useful for keeping pets indoors at night or during specific times.
- Nur im Handel erhältlich: Allows pets to exit but not enter. This setting is useful for ensuring all pets are outside.
- Gesperrt: Prevents both entry and exit.

Abbildung 7: Visual representation of the four manual lock settings: Unlocked, In Only, Out Only, and Locked, controlled by the rotary knob.
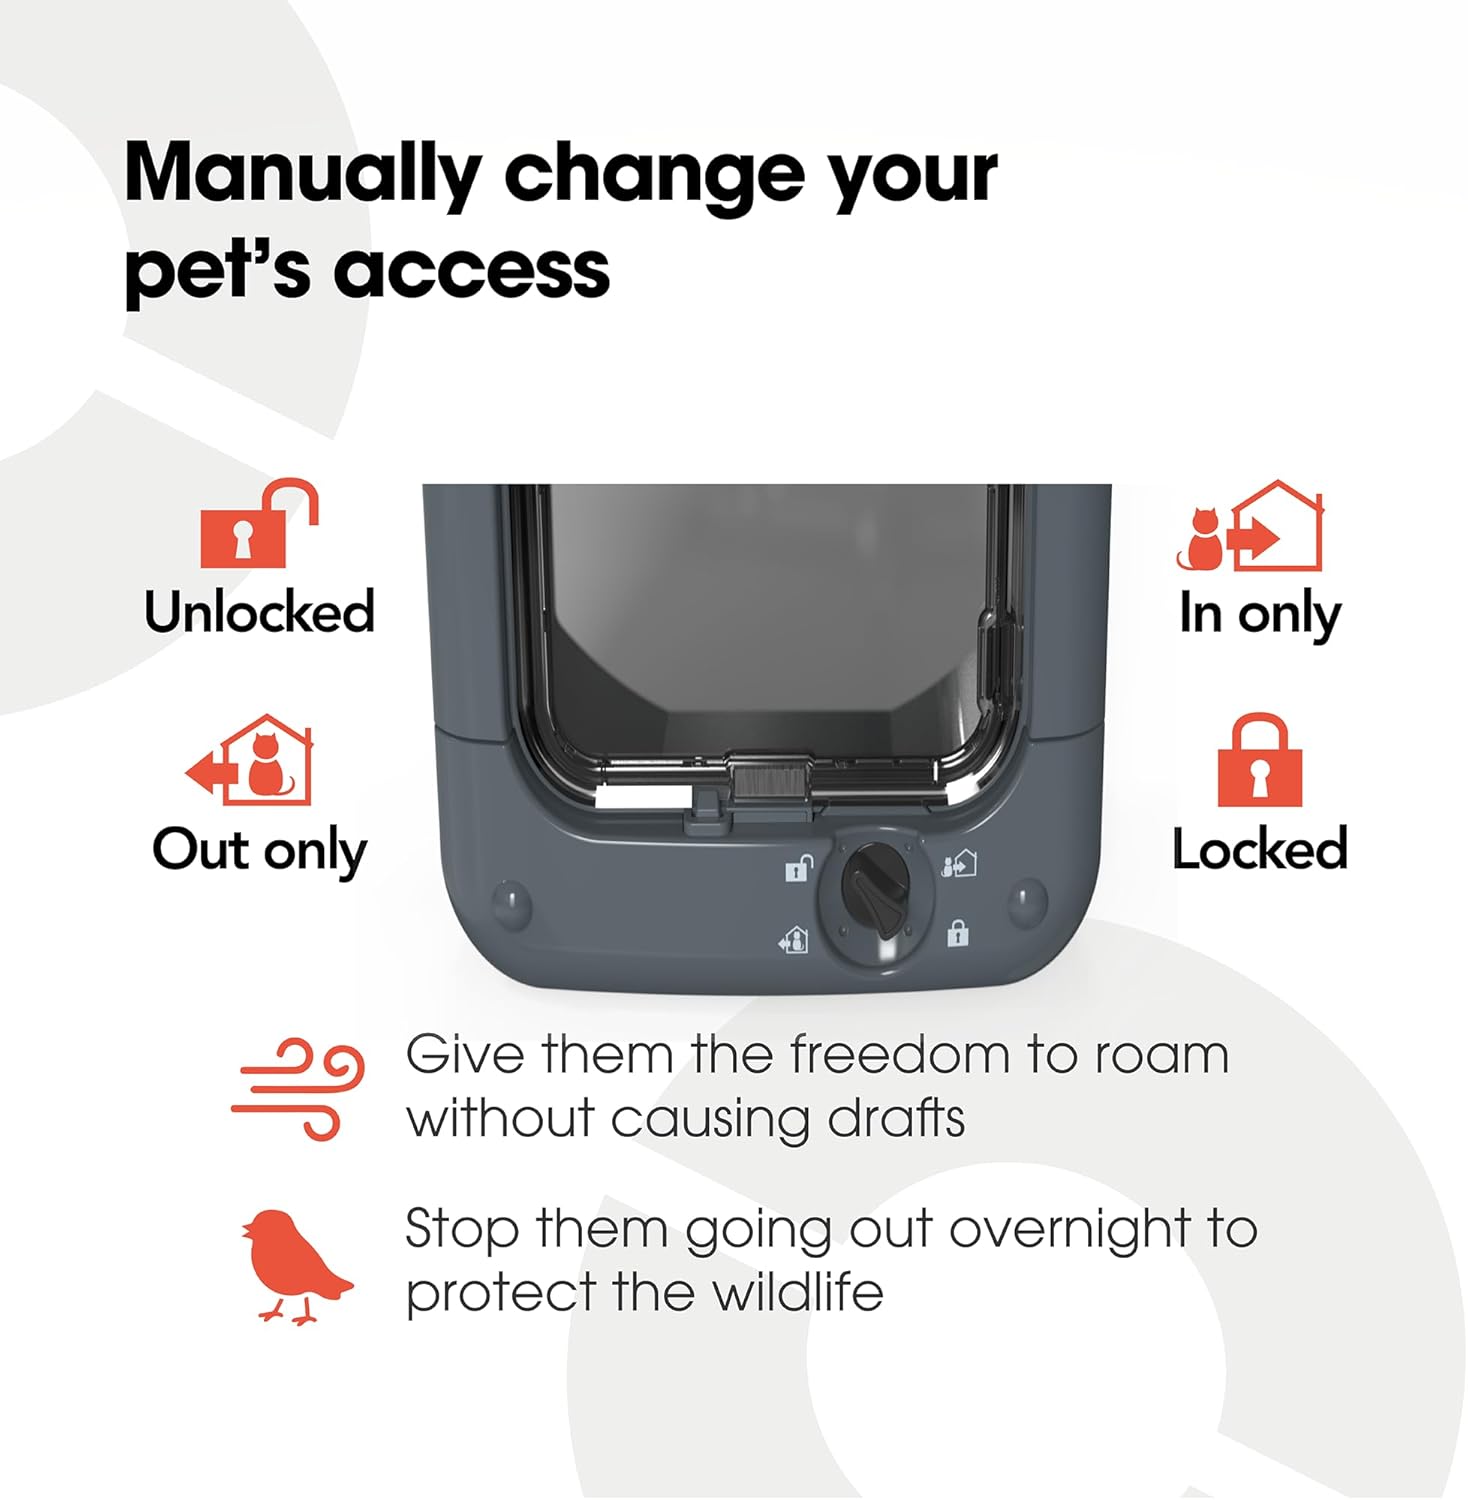
Abbildung 8: This image highlights key benefits of the microchip cat door, such as preventing entry by unprogrammed animals (neighbor's cats, wildlife) and its draft and weatherproof design.
Wartung
Reinigung:
Clean the cat door regularly with a damp cloth and mild detergent. Avoid abrasive cleaners or solvents, as these may damage the plastic components or the electronic reader.
Batteriewechsel:
The cat door requires 4 x AA batteries. When the batteries are low, an indicator light (if present) will illuminate or flash. To replace the batteries:
- Locate the battery compartment, typically on the top or side of the interior unit.
- Öffnen Sie die Fachabdeckung.
- Entfernen Sie die alten Batterien und entsorgen Sie diese ordnungsgemäß.
- Insert new 4 x AA batteries, ensuring correct polarity (+/-).
- Schließen Sie den Batteriefachdeckel fest.
Fehlerbehebung
| Problem | Mögliche Ursache | Lösung |
|---|---|---|
| Cat door not opening for programmed pet. |
|
|
| Unerwünschte Tiere dringen ein. |
|
|
| Flap not swinging freely. |
|
|
Technische Daten
| Besonderheit | Detail |
|---|---|
| Modellnummer | CP360G |
| Marke | Nähere Haustiere |
| Farbe | Grau |
| Material | Polypropylen (PP) |
| Gesamtabmessungen (B x H) | 7 3/4 Zoll x 9 11/16 Zoll (ca. 19.7 cm x 24.6 cm) |
| Cut-out Dimensions (W x H) | 6 7/8 Zoll x 7 3/4 Zoll (ca. 17.5 cm x 19.7 cm) |
| Selbstauskleidende Dicke | Up to 85mm (3 3/8 inches) |
| Microchip Compatibility | 15-digit ISO, AVIDXX, AVID Encrypted |
| Maximum Registered Cats | 30 |
| Stromquelle | 4 x AA-Batterien (nicht im Lieferumfang enthalten) |
| Artikelgewicht | 2.11 Pfund (ca. 0.96 kg) |
| UPC | 035368901089 |
Garantie und Support
Informationen zu Garantie und Kundendienst finden Sie auf der offiziellen Website von Closer Pets. webBesuchen Sie die Website oder kontaktieren Sie direkt den Kundendienst. Bewahren Sie Ihren Kaufbeleg für eventuelle Garantieansprüche auf.
Hersteller: Pet Mate Ltd
Closer Pets Store on Amazon: Visit the Closer Pets Store


