1. Einführung und Endeview
This manual provides comprehensive instructions for the safe and efficient setup, operation, maintenance, and troubleshooting of your VEVOR 75mm (3 inch) Button Maker Machine. This device is designed for creating personalized badges and pins with ease.
The button maker is constructed from durable steel and aluminum alloy, ensuring a long service life and a high success rate in badge production. Its ergonomic design aims to simplify the badge-making process.
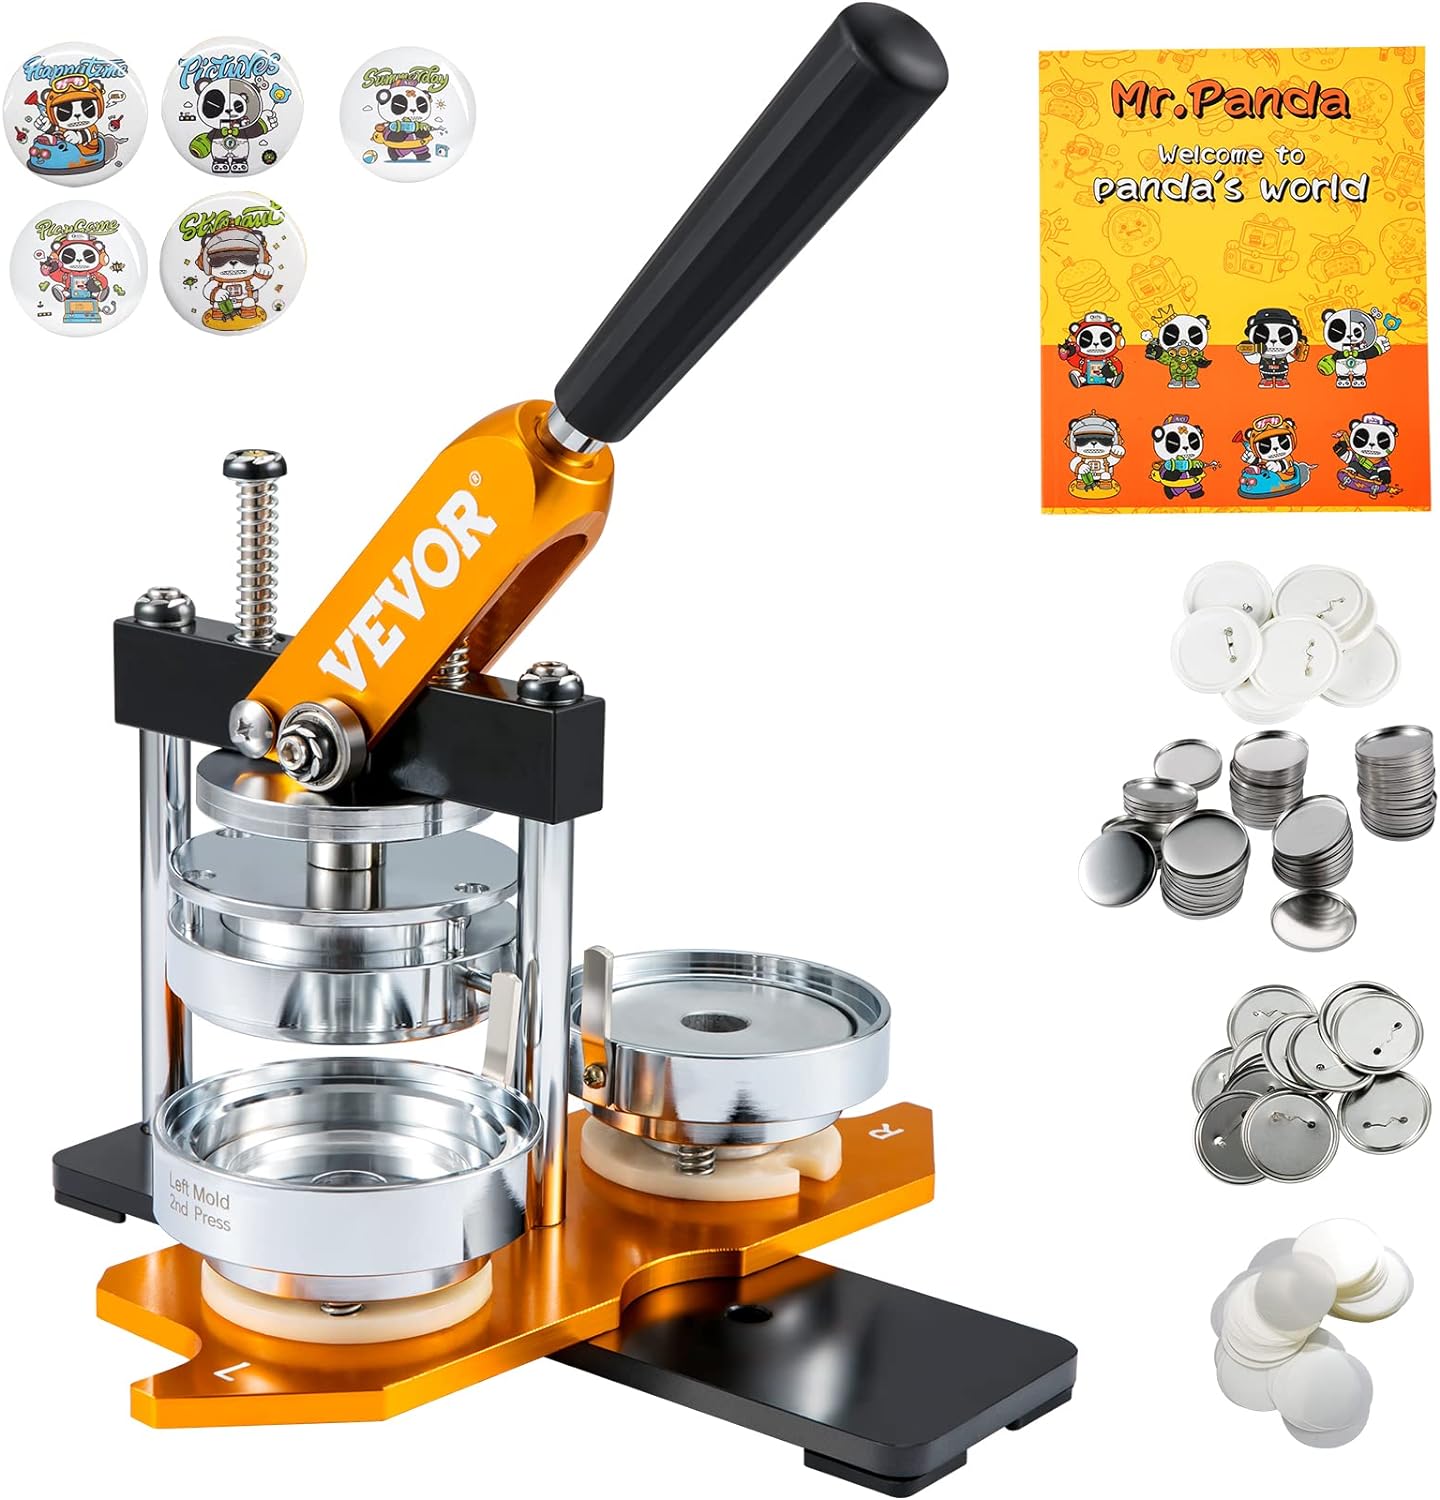
Figure 1: VEVOR 75mm Button Maker Machine with included supplies.
2. Packungsinhalt
The VEVOR 75mm Button Maker Machine kit includes the following components:
- 1 x Button Maker Machine
- 1 x 75 mm Button Molds (pre-installed)
- 1 x Circle Paper Cutter
- 50 x 75 mm Iron Bottom Parts
- 50 x 75 mm Plastic Bottom Parts
- 100 x 75 mm Tin Up Covers
- 50 x 75 mm Blank Papers
- 100 x 75 mm Transparent Films
- 2 x Sechskantschlüssel
- 2 x Unterlegscheiben
- 1 x Bedienungsanleitung (evtl. nicht in deutscher Sprache).
- 1 x "Mr. Panda Magic Book" with panda patterns
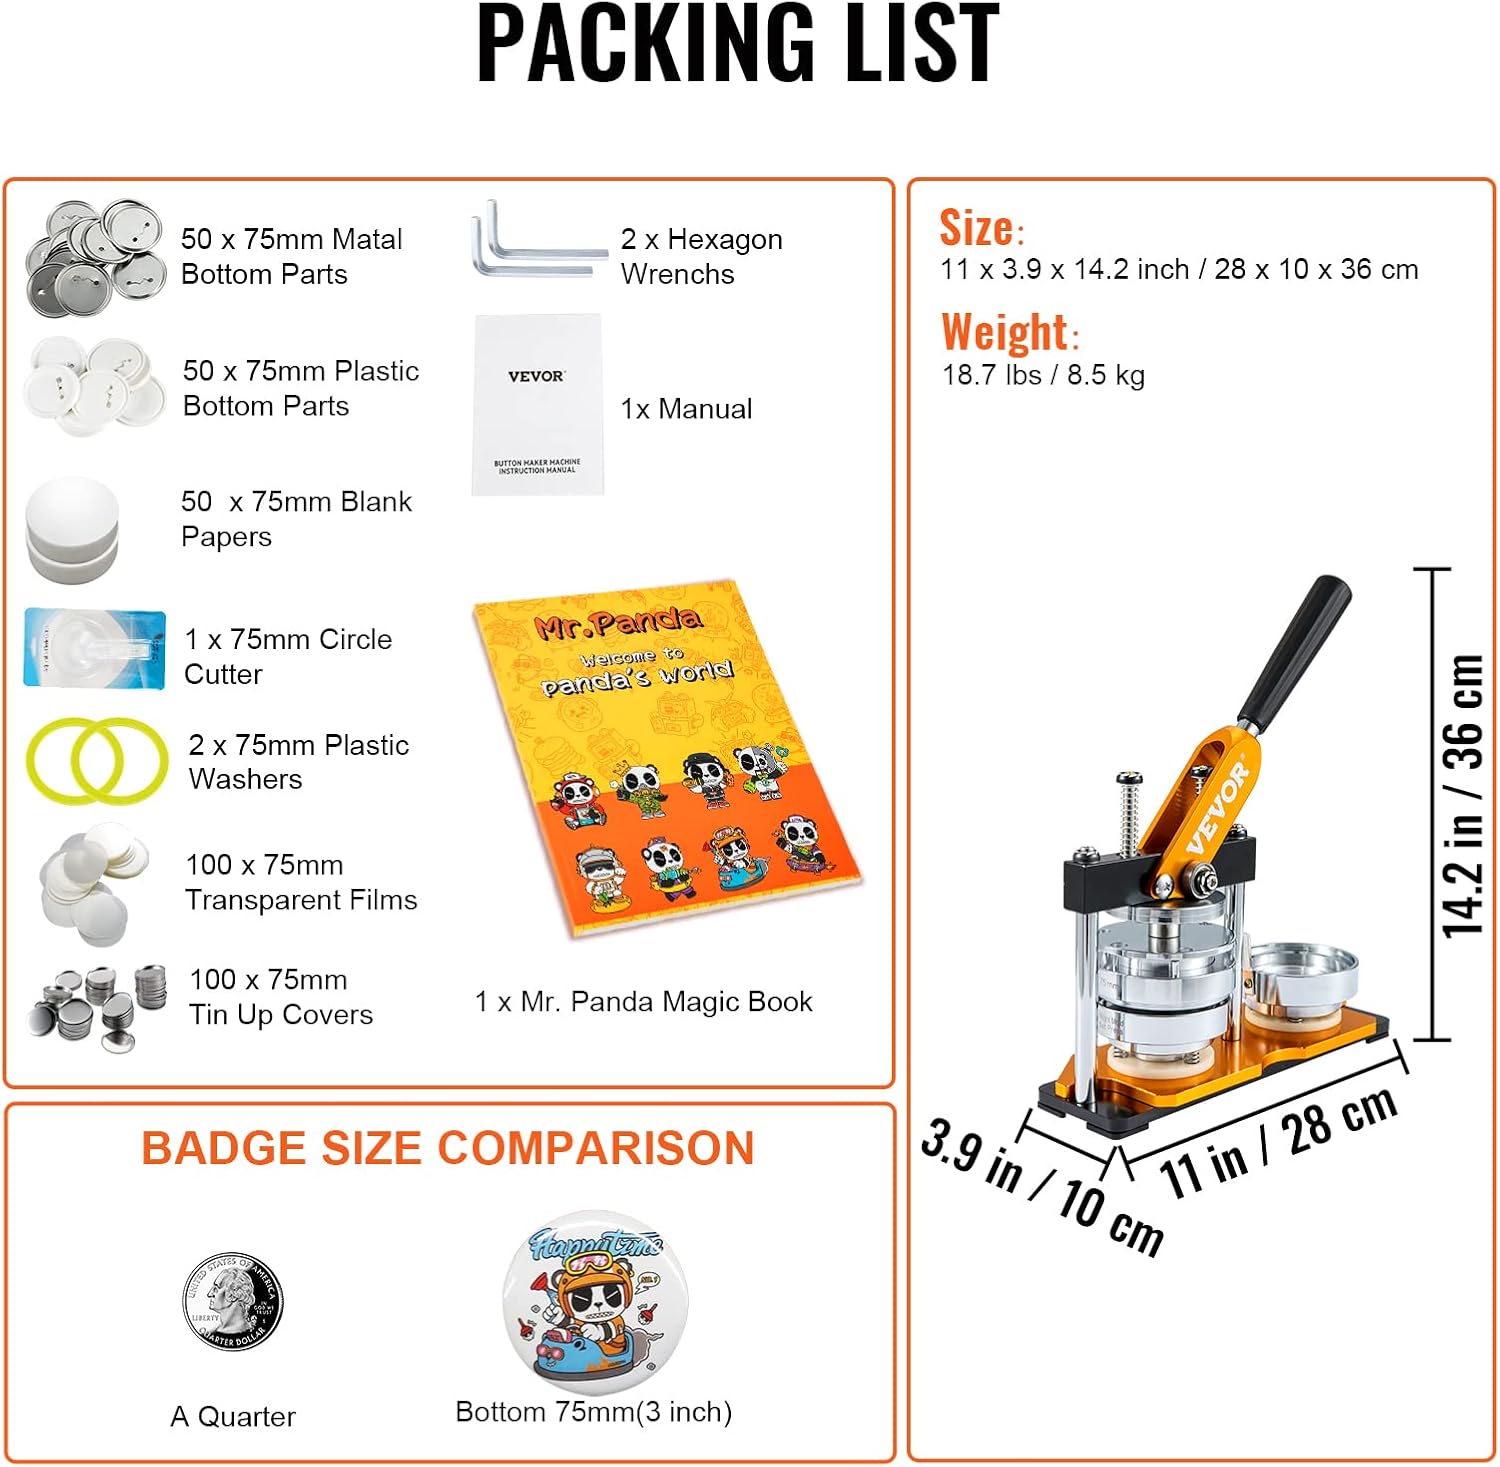
Figure 2: Visual representation of the complete package contents.
3. Aufbau und Montage
The VEVOR Button Maker Machine is designed for easy setup, often ready to use directly from the box. Minimal assembly is required, primarily for the handle and ensuring mold security.
3.1 Griffmontage
Attach the ergonomic handle to the machine's lever mechanism. Ensure it is securely fastened for comfortable and efficient operation.
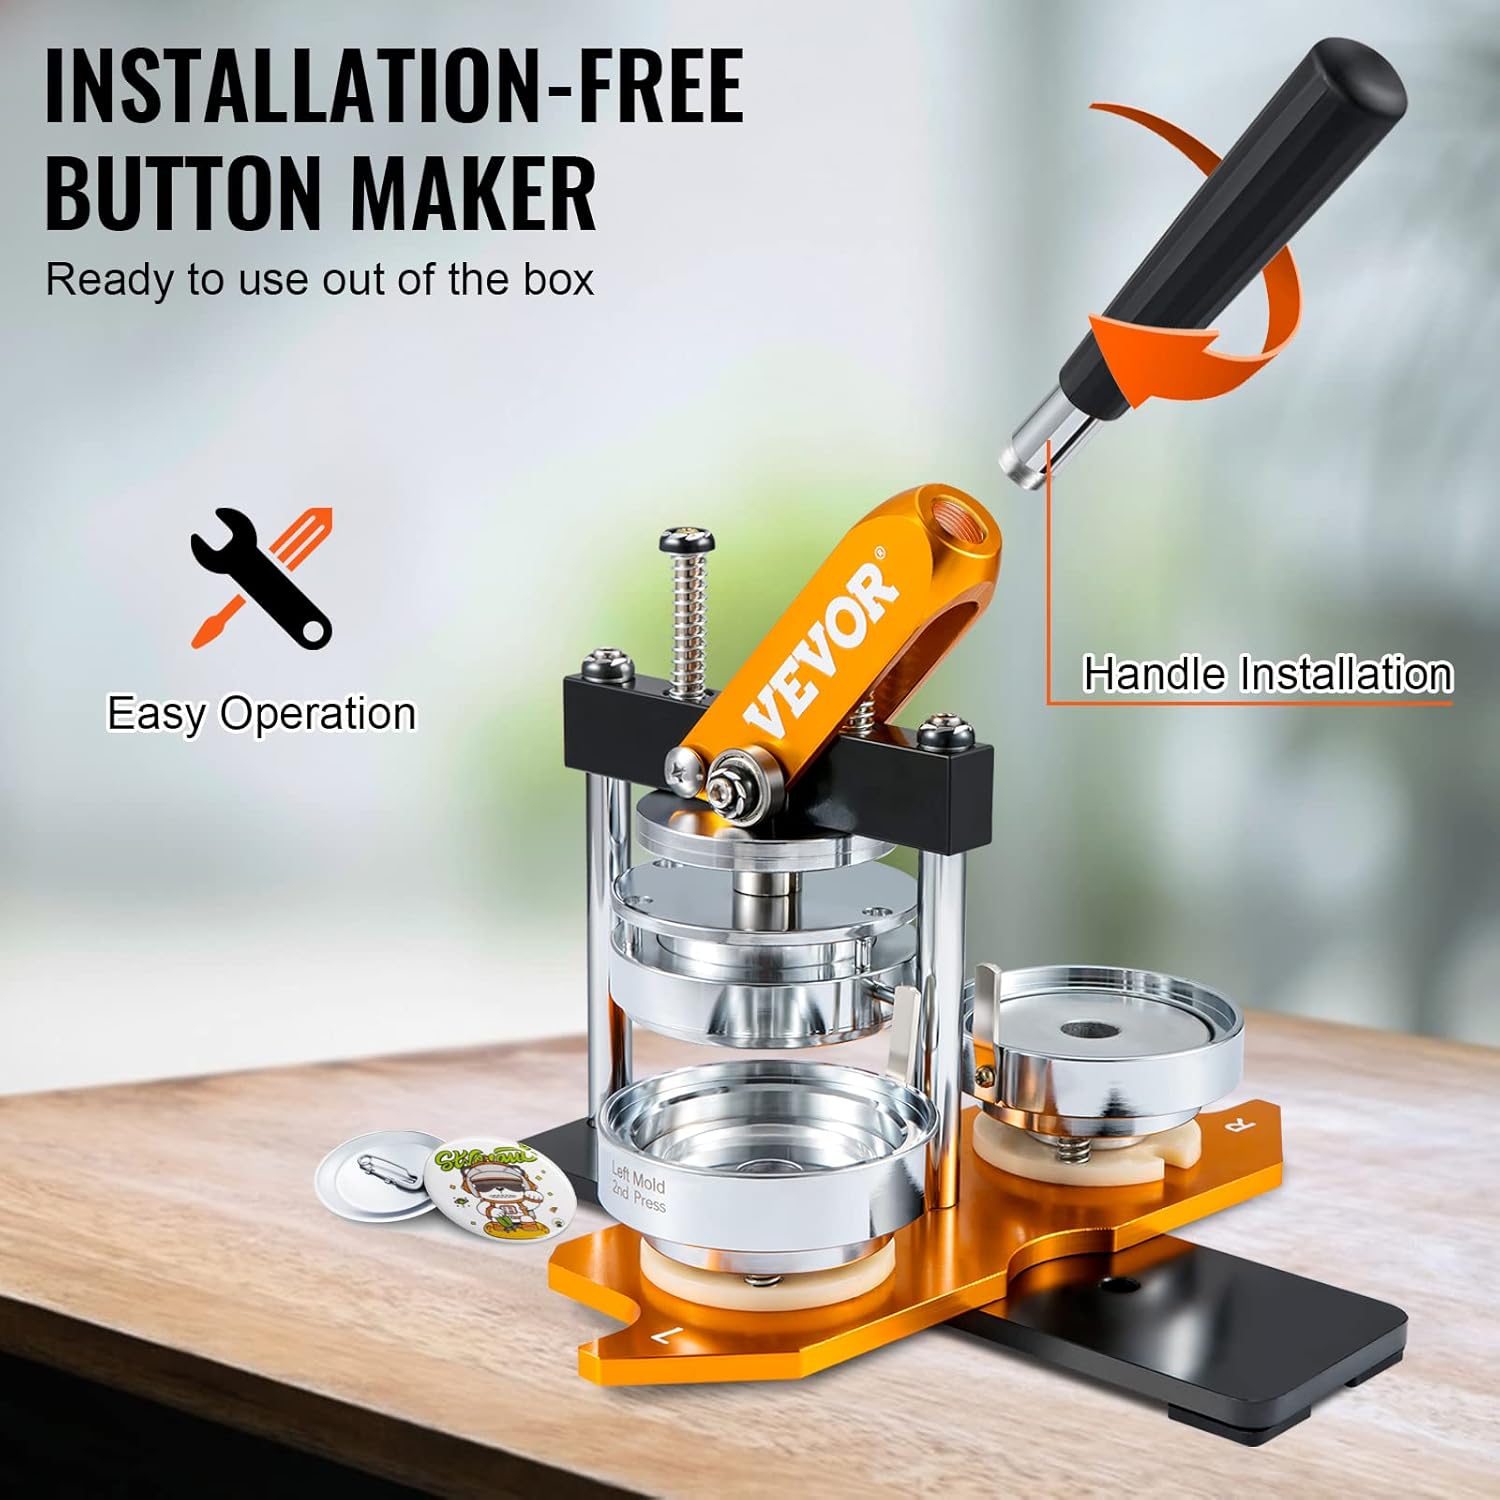
Figure 3: Handle installation for immediate use.
3.2 Mold Preparation
The 75mm button molds are typically pre-installed. Verify that the molds are securely in place before operation. If you need to change molds (e.g., for different sizes, though this kit is 75mm), refer to the troubleshooting section for guidance on mold removal and installation.
Video 1: Guide on making a button badge and changing the mold.
4. Bedienungsanleitung
Follow these steps to create a 75mm button badge:
- Materialien vorbereiten: Ensure you have a metal top cover, your printed design (paper), a transparent film, and a plastic back part (or metal back part with washer).
- Place Top Components: In the left mold slot, place the metal top cover. Then, place your printed paper design on top of the metal cover, followed by the transparent film.
- Erster Druck: Align the upper and lower dies. Press the handle down firmly to crimp the top components together.
- Place Back Part: In the right mold slot, place the plastic back part. (Note: If using a metal back part, ensure the plastic washer is placed in the left mold slot before the metal top cover).
- Zweites Drücken: Align the upper and lower dies. Press the handle down firmly again to secure the back part to the crimped top components.
- Retrieve Badge: Lift the handle and slide the mold back to retrieve your completed button badge.
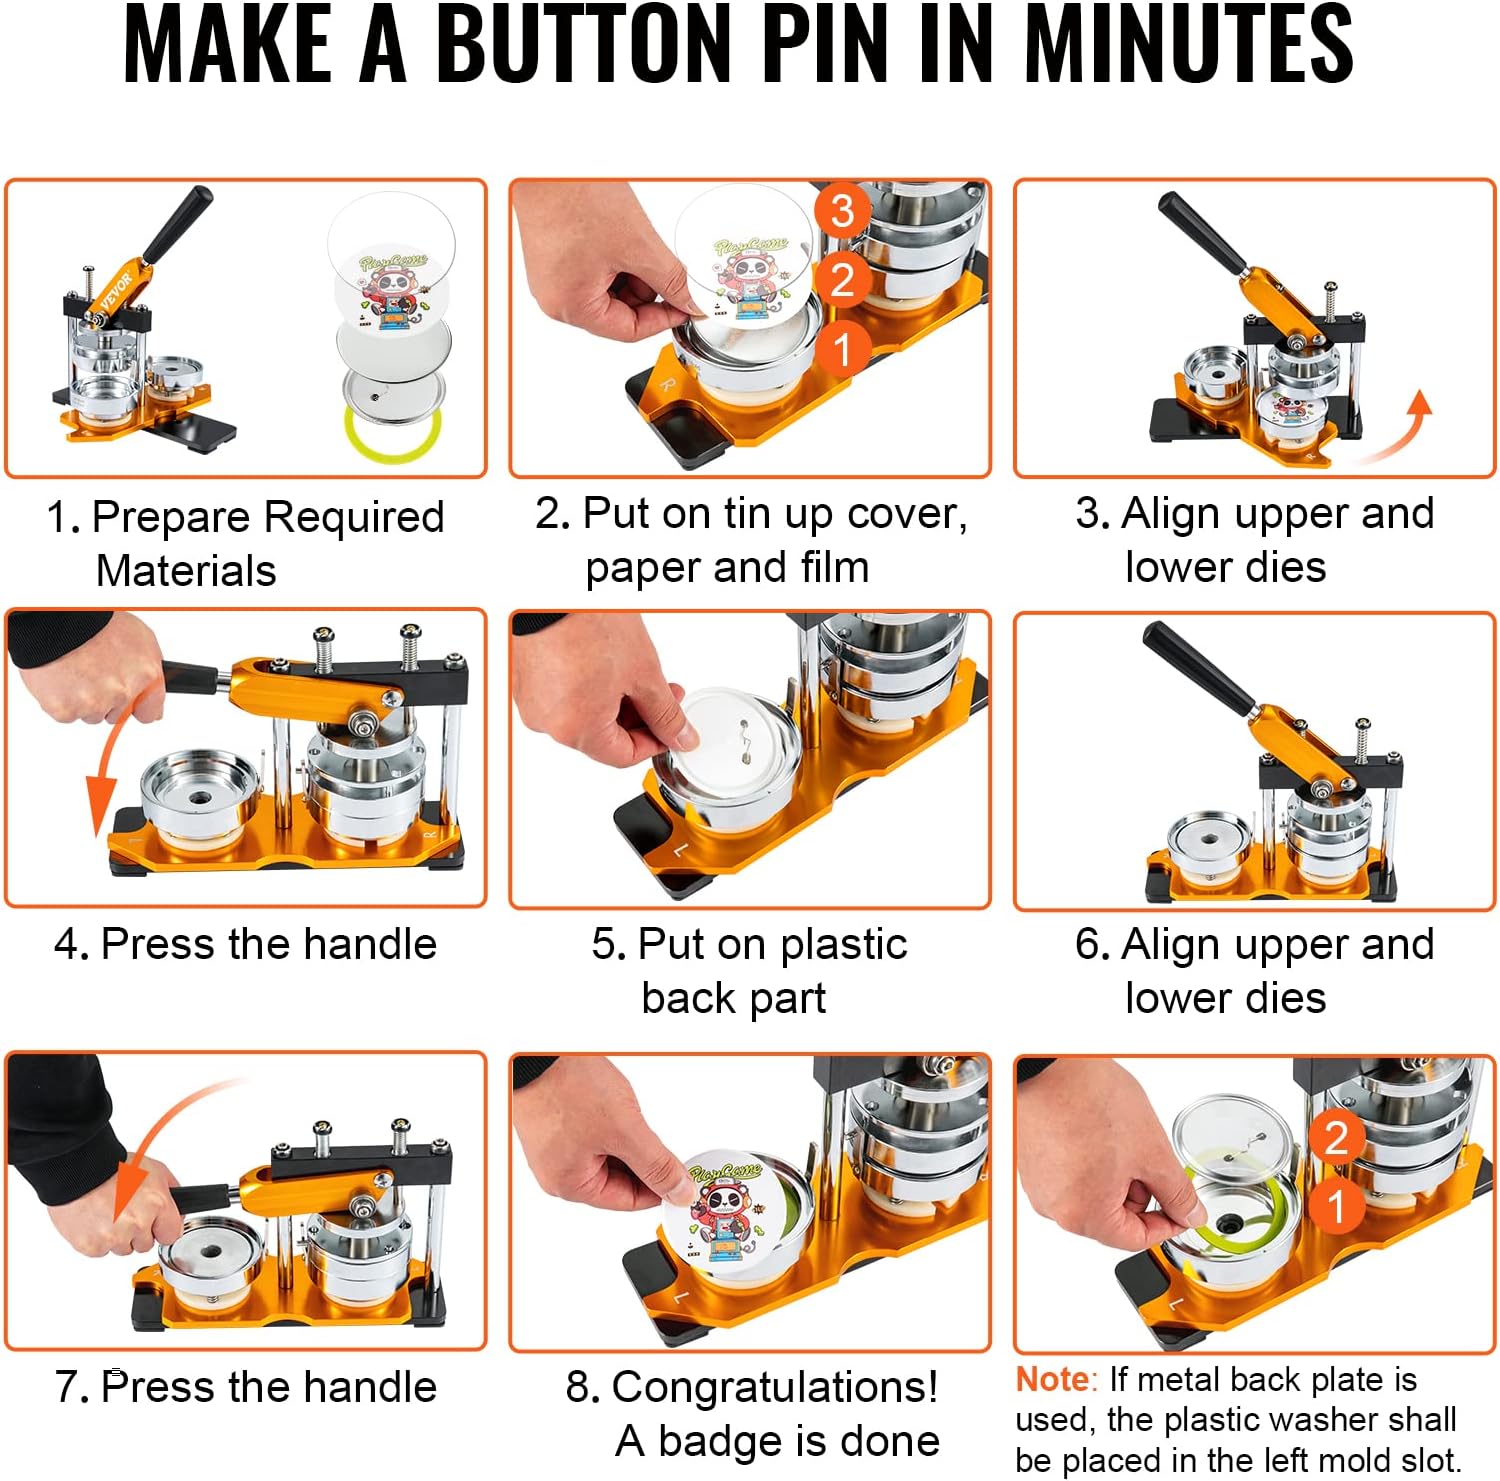
Figure 4: Visual step-by-step instructions for making a button pin.
Video 2: Demonstration of how to use the Button Maker Machine.
5. Wartung
Um die Langlebigkeit und optimale Leistung Ihrer VEVOR Buttonmaschine zu gewährleisten, wird eine regelmäßige Wartung empfohlen:
- Reinigung: Keep the machine clean from dust and debris. Use a soft, dry cloth to wipe down surfaces.
- Schmierung: Periodically apply a small amount of lubricating oil to moving parts, such as the press mechanism and mold slides, to ensure smooth operation.
- Lagerung: Store the machine in a dry, clean environment when not in use to prevent rust or damage.
6. Fehlerbehebung
If you encounter issues while using your button maker, refer to the common problems and solutions below:
6.1 Loose Badge or Distorted Edges
If the edges of your badge are distorted or the badge feels loose after pressing, the screw on the mold might be loose. To fix this:
- Remove the pins securing the lower mold.
- Take out the lower mold.
- Tighten the screws on the mold clockwise using the provided Hexagon Wrench.
- Reinstall the lower mold and insert the pins.
6.2 Mold Not Passing Properly
If the mold does not slide smoothly along its track, ensure that all pins are correctly removed or inserted as required for the specific operation (e.g., mold change or operation).
Video 3: Troubleshooting guide for button maker machine issues.
7. Spezifikationen
| Besonderheit | Spezifikation |
|---|---|
| Marke | VEVOR |
| Modellname | JS-75-GD-01 |
| Material | Steel, Aluminum Alloy |
| Artikelgewicht | 16 Pfund |
| Technische Daten | 11 Zoll L x 3.9 Zoll B |
| Artikelmodellnummer | 3 inch 75mm Button Badge Maker |
| UPC | 840281559428 |
8. Garantie und Support
For warranty information or technical support, please refer to the documentation included with your purchase or contact VEVOR customer service directly. Keep your purchase receipt for any warranty claims.


