1. Einleitung
This manual provides essential information for setting up, operating, and maintaining your TRIGKEY S5 5850U Mini PC. Please read it thoroughly before using the device to ensure optimal performance and longevity.
Video: TRIGKEY 5850U Mini PC OverviewDieses Video bietet einen allgemeinen Überblickview of the TRIGKEY S5 5850U Mini PC's features and design.
2. Produktüberschreitungview
The TRIGKEY S5 5850U Mini PC is a compact desktop computer designed for various applications, including office work, multimedia, and light gaming. It features an AMD Ryzen 7 Pro 5850U processor, DDR4 RAM, and M.2 NVMe SSD storage.
2.1 Hauptmerkmale
- Prozessor: AMD Ryzen™ 7 Pro 5850U (8 Cores, 16 Threads, up to 4.4GHz)
- Grafik: Integrated AMD Radeon™ Graphics (2000MHz)
- Erinnerung: 16GB DDR4 RAM (expandable up to 64GB via SO-DIMM slots)
- Lagerung: 500 GB M.2 2280 NVMe SSD (erweiterbar auf bis zu 2 TB)
- Betriebssystem: Windows 11 Pro
- Konnektivität: Wi-Fi 6 (802.11ax), Bluetooth 5.2, Gigabit-Ethernet
- Ausgabe anzeigen: Triple display support via DP, HDMI, and Type-C (4K@60Hz)
- Abmessungen: 126 mm x 113 mm x 42 mm (4.96 x 4.45 x 1.57 Zoll)
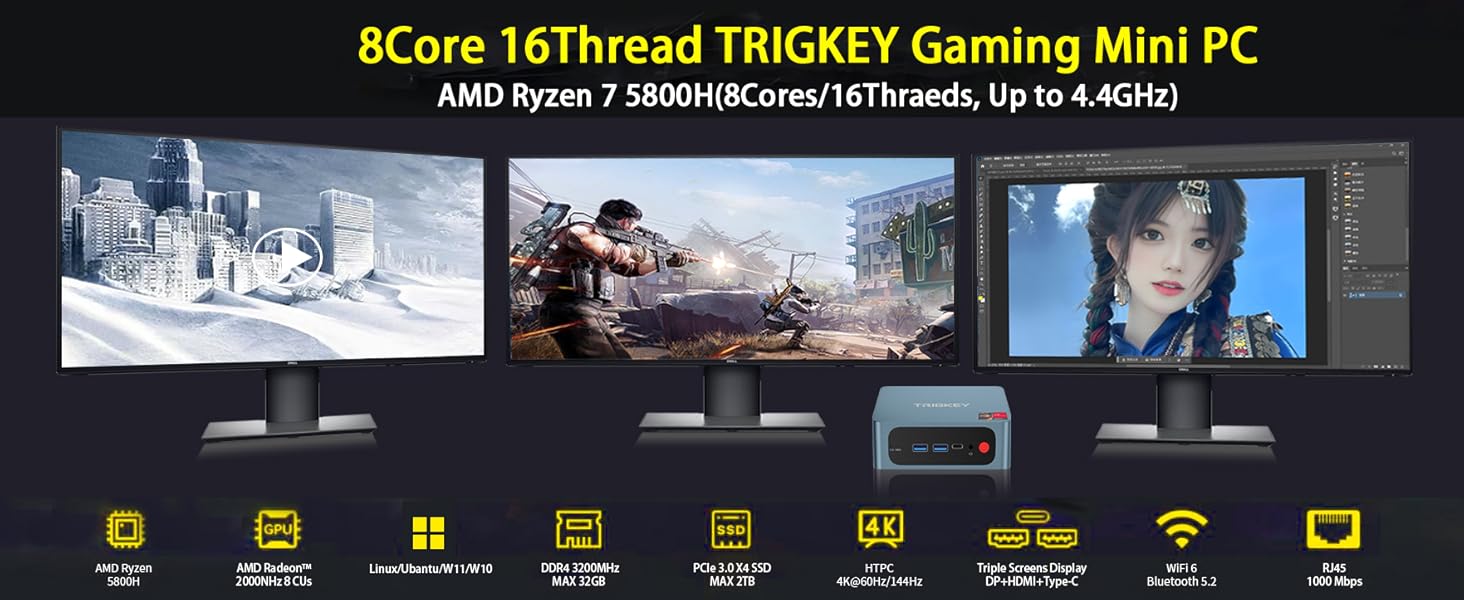
Image: The TRIGKEY S5 Mini PC connected to three external monitors, demonstrating its multi-screen display capability for various tasks like office work, design, and gaming.
2.2 Anschlüsse und Schnittstellen

Bild: Detailliert view of the TRIGKEY S5 Mini PC's front and rear ports. Front ports include RTC Key, USB 3.2 Gen 2, Type-C, Earphone jack, and Power button. Rear ports include LAN (1000M), USB 2.0, USB 3.2 Gen 2, DP 1.4, HDMI (4K HD), and DC power adapter input.
- Vordere Anschlüsse:
- 1x CLR CMOS (RTC Key)
- 2x USB 3.2 Gen 2
- 1x Type-C (Data & Video)
- 1x Earphone Jack (HP&MIC)
- 1x Einschaltknopf
- Anschlüsse auf der Rückseite:
- 1x LAN (1000M)
- 2x USB 3.2 Gen 2
- 1x USB 2.0
- 1x DisplayPort 1.4
- 1x HDMI (4K HD)
- 1x Gleichstromeingang
3. Einrichtung
3.1 Erstes Einschalten
- Connect the power adapter to the DC input port on the rear of the Mini PC.
- Schließen Sie Ihren Monitor an die HDMI-, DisplayPort- oder USB-C-Videoausgänge an.
- Schließen Sie Ihre Tastatur und Maus an die verfügbaren USB-Anschlüsse an.
- Press the power button on the front of the Mini PC. The device will boot up and display the operating system.
3.2 BIOS Configuration
To access the BIOS settings, power on the computer and repeatedly press the 'Delete' key during startup. This allows you to configure boot options, system settings, and other advanced features.
Video: How to Update the BIOS System. This video demonstrates how to enter the BIOS, navigate through settings, and save changes. It is useful for configuring boot order or other system parameters.
4. Hardware Installation and Upgrades
The TRIGKEY S5 Mini PC supports storage and memory upgrades. Always power off and unplug the device before performing any internal hardware changes.
4.1 Installing a 2.5-inch HDD/SSD
The Mini PC includes a bracket for installing a 2.5-inch SATA HDD or SSD.
- Unscrew the bottom plate of the Mini PC.
- Carefully detach the bottom plate, which includes the HDD/SSD mounting bracket.
- Mount your 2.5-inch SATA drive onto the bracket using the provided screws.
- Connect the SATA data and power cable from the Mini PC to your newly installed drive.
- Reattach the bottom plate and secure it with screws.
Video: How to Install HDD. This video demonstrates the step-by-step process of installing a 2.5-inch HDD into the TRIGKEY Mini PC.
4.2 Upgrading M.2 NVMe SSD
The Mini PC comes with a pre-installed M.2 2280 NVMe SSD and supports expansion up to 2TB. An additional M.2 2242 SATA slot is also available.
- Unscrew the bottom plate of the Mini PC.
- Suchen Sie den M.2-Steckplatz auf der Hauptplatine.
- Carefully insert the new M.2 NVMe SSD into the slot at an angle and secure it with the retaining screw.
- Reattach the bottom plate and secure it with screws.

Bild: Eine Nahaufnahme view of an M.2 NVMe SSD installed within the Mini PC, highlighting its compact form factor and direct connection to the motherboard.
4.3 RAM-Upgrade
The Mini PC has two SO-DIMM DDR4 slots, supporting dual-channel memory and expandable up to 64GB (e.g., 2x 32GB modules).
- Unscrew the bottom plate of the Mini PC.
- Suchen Sie die SO-DIMM-Steckplätze auf dem Motherboard.
- Gently push the retaining clips outwards to release the existing RAM module (if any).
- Insert the new DDR4 SO-DIMM module(s) into the slot(s) at an angle and push down until the clips snap into place.
- Reattach the bottom plate and secure it with screws.

Image: Two DDR4 SO-DIMM RAM modules, illustrating the type of memory compatible with the Mini PC for upgrades.
5. Bedienungsanleitung
5.1 Grundlegende Bedienung
- Ein-/Ausschalten: Drücken Sie den roten Netzschalter an der Vorderseite.
- Neustart: Nutzen Sie die Neustartoption des Betriebssystems.
- Schlafmodus: Use the operating system's sleep option.
5.2 Multi-Screen-Display
The Mini PC supports connecting up to three displays simultaneously using the HDMI, DisplayPort, and Type-C outputs. This allows for extended desktop environments, enhancing productivity or entertainment.
- Connect your monitors to the available video output ports (HDMI, DP, Type-C).
- Power on the Mini PC and monitors.
- Once Windows 11 Pro loads, right-click on the desktop and select 'Display settings' to configure your multi-monitor setup (e.g., extend, duplicate).

Image: The TRIGKEY S5 Mini PC powering a triple-monitor setup, showcasing its capability for multi-screen display in an office environment.
6. Spezifikationen
| Besonderheit | Spezifikation |
|---|---|
| Marke | TRIGKEY |
| Modellnummer | AMD Ryzen R7 Pro S5 5850U 16G+500G |
| Betriebssystem | Windows 11 Pro |
| CPU Modell | AMD Ryzen 7 Pro 5850U (8 Cores, 16 Threads) |
| CPU-Geschwindigkeit | 3.2 GHz (Basistakt), 4.4 GHz (Maximaltakt im Turbomodus) |
| Grafik-Coprozessor | AMD Radeon Grafik (integriert) |
| RAM-Speicher installiert | 16 GB DDR4 |
| Maximale Größe des RAM-Speichers | 64 GB |
| Speichergeschwindigkeit | 3200 MHz |
| Verfügbare Speichersteckplätze | 2 (SO-DIMM) |
| Speicherkapazität | 500 GB M.2 NVMe SSD |
| Festplattenschnittstelle | Solid State (M.2 NVMe, M.2 SATA) |
| Wireless-Technologie | Wi-Fi 6 (802.11ax), Bluetooth 5.2 |
| Videoausgang | HDMI, DisplayPort, Type-C |
| Maximale Bildschirmauflösung | 3840x2160 (4K) |
| Anzahl USB-Anschlüsse | 4 (3x USB 3.2 Gen 2, 1x USB 2.0) |
| LAN | 1000M Gigabit Ethernet |
| Artikelabmessungen | 126 x 113 x 42 mm (4.96 x 4.45 x 1.57 Zoll) |
| Kühlmethode | Luftkühlung |
7. Wartung
7.1 Reinigung
- Reinigen Sie die Außenseite des Mini-PCs regelmäßig mit einem weichen, trockenen Tuch.
- Verwenden Sie Druckluft, um Staub von Lüftungsgittern und -öffnungen zu entfernen und so einen optimalen Luftstrom zu gewährleisten.
- Stellen Sie vor der Reinigung sicher, dass das Gerät ausgeschaltet und vom Stromnetz getrennt ist.
7.2 Wärmemanagement
To prevent overheating and ensure stable performance, especially during prolonged use or demanding tasks:
- Stellen Sie den Mini-PC an einem gut belüfteten Ort auf.
- Vermeiden Sie es, die Lüftungsschlitze zu blockieren.
- Consider using a cooling pad if operating in high ambient temperatures or under heavy load.
8. Fehlerbehebung
If you encounter issues with your TRIGKEY Mini PC, please refer to the following general troubleshooting steps:
- Kein Strom: Stellen Sie sicher, dass das Netzteil sowohl mit dem Mini-PC als auch mit einer funktionierenden Steckdose fest verbunden ist.
- Kein Bildschirm: Verify that the monitor cables are correctly connected and the monitor is powered on and set to the correct input source. Try a different cable or port.
- Periphere Verbindungen nicht erkannt: Check the connection of your keyboard, mouse, or other peripherals. Try connecting them to a different USB port.
- Systemverlangsamung: Close unnecessary applications, check for background processes, or consider upgrading RAM/SSD if performance issues persist.
- Betriebssystemprobleme: Use Windows troubleshooting tools or consider reinstalling the operating system if severe software problems occur.
For more complex issues, please contact TRIGKEY customer support.
9. Garantie und Support
TRIGKEY is committed to providing excellent customer service and product support.
- Schnelle Antwort: Anfragen werden innerhalb von 24 Stunden beantwortet.
- Rückgaberecht: 30-tägiges Rückgaberecht ohne Angabe von Gründen.
- Ersatz: 12-month replacement available for eligible products.
- Technische Unterstützung: Lifetime after-sales service and technical support.
For support, please visit the official TRIGKEY webBesuchen Sie die Website oder kontaktieren Sie deren Kundendienstkanäle.


