1. Einleitung
Thank you for choosing the WORKPRO Portable Tire Inflator W125218A. This device is designed for convenient and efficient inflation of tires for cars, motorcycles, bicycles, and various sports balls. It features a digital display, auto shut-off, multiple inflation modes, an LED light, and a power bank function. Please read this manual thoroughly before use to ensure safe and optimal operation.

Image: The WORKPRO Portable Tire Inflator is suitable for a wide range of applications, including car tires, motorcycle tires, bicycle tires, swimming rings, and various sports balls.
2. Sicherheitshinweise
Beachten Sie stets die folgenden Sicherheitsvorkehrungen, um Verletzungen oder Schäden am Gerät zu vermeiden:
- Lassen Sie den Aufblaser während des Betriebs nicht unbeaufsichtigt.
- Um ein Überpumpen des aufzublasenden Gegenstands zu vermeiden, muss der korrekte Druck eingestellt werden, da dies zum Platzen und zu schweren Verletzungen führen kann.
- The inflation hose and nozzle may become hot during prolonged use. Allow them to cool before handling.
- Bewahren Sie das Gerät außerhalb der Reichweite von Kindern und Haustieren auf.
- Das Aufblasgerät darf nicht bei Nässe oder in der Nähe von brennbaren Flüssigkeiten oder Gasen betrieben werden.
- Verwenden Sie ausschließlich das mitgelieferte Zubehör und die Adapter.
- If the device overheats, allow it to cool down before resuming operation.
- Wear appropriate eye and hearing protection during use.
3. Packungsinhalt
Überprüfen Sie, ob alle Artikel im Paket vorhanden sind:
- WORKPRO Portable Tire Inflator
- Aufblasschlauch
- Nadelventiladapter (für Kugeln)
- Presta-Ventiladapter (für einige Fahrräder)
- Wide Nozzle Adapter (for inflatables)
- USB-Ladekabel
- Aufbewahrungstasche

Image: The WORKPRO Portable Tire Inflator shown with its included accessories: inflation hose, various nozzle adapters, USB charging cable, and a storage bag.
4. Produktüberschreitungview
Familiarize yourself with the components of your tire inflator:
- Digitaler Bildschirm: Zeigt den aktuellen Druck, den Zieldruck, den Batteriestand und den gewählten Modus an.
- Bedientasten: Power, Mode selection, Pressure adjustment (+/-).
- Aufblasöffnung: Dort, wo der Aufblasschlauch angeschlossen wird.
- LED-Licht: Zur Beleuchtung bei schwachen Lichtverhältnissen.
- USB-C-Ladeanschluss: Zum Aufladen des Geräts.
- USB-A-Ausgangsanschluss: Dient als Powerbank.

Bild: Eine detaillierte view of the inflator's digital display, showing pressure readings, battery indicator, and the three-color LED indicators for pressure status (red, yellow, green).
5. Einrichtung
5.1 Erstaufladung
Before first use, fully charge the tire inflator. The device is powered by three 2500mAh rechargeable batteries.
- Connect the provided USB charging cable to the USB-C charging port on the inflator.
- Verbinden Sie das andere Ende des USB-Kabels mit einem geeigneten USB-Netzteil (nicht im Lieferumfang enthalten) oder einem USB-Anschluss mit Stromversorgung.
- The battery indicator on the digital display will show charging progress. A full charge typically takes 3 to 5 hours.
- Sobald das Gerät vollständig aufgeladen ist, trennen Sie das Ladekabel.

Image: The inflator connected to a car tire, highlighting its 7500 mAh battery capacity, capable of inflating multiple car tires on a single charge.
6. Bedienungsanleitung
6.1 Ein-/Ausschalten
- To power on, press and hold the power button (usually the 'O' button) for a few seconds.
- Zum Ausschalten die Ein-/Aus-Taste erneut gedrückt halten. Das Gerät schaltet sich nach einer gewissen Zeit der Inaktivität auch automatisch aus.
6.2 Auswahl des Inflationsmodus
The inflator offers 4 smart preset modes and 1 manual mode:
- Press the 'M' (Mode) button to cycle through the available modes: Car, Motorcycle, Bicycle, Ball, and Manual.
- Each preset mode has a default pressure value (e.g., Car: 36 PSI, Motorcycle: 35 PSI, Bicycle: 45 PSI, Ball: 8 PSI, Manual: 60 PSI).
- In any mode, you can adjust the target pressure using the '+' and '-' buttons. The maximum adjustable pressure is 150 PSI.
- To change pressure units (PSI, BAR, KPA), press the 'M' button and '+' button simultaneously.

Image: The inflator's screen showing the selection of different inflation modes (Car, Motorcycle, Bicycle, Ball, Manual) with their respective default PSI values.
6.3 Connecting to the Item for Inflation
- Den Aufblasschlauch fest in die Aufblasöffnung oben am Gerät schrauben.
- For car, motorcycle, or bicycle (Schrader valve) tires, attach the other end of the hose directly to the tire valve stem. Ensure a tight connection to prevent air leakage.
- For Presta valves (some bicycles), balls, or other inflatables, attach the appropriate adapter to the inflation hose before connecting to the item.
- Once connected, the digital display will show the current pressure of the item.
6.4 Beginn und Ende der Inflation
- After setting the desired pressure and connecting the hose, press the power button (usually the 'O' button) to start inflation.
- The inflator will automatically stop when the preset target pressure is reached. This is the auto shut-off feature.
- Um das Aufblasen jederzeit manuell zu stoppen, drücken Sie den Ein-/Ausschalter erneut.
- After inflation, carefully disconnect the hose from the item and then from the inflator. Be aware that the hose may be hot.

Image: The inflator in use, demonstrating its fast inflation capability for a 195/60R16 car tire, indicating inflation from 25-35 PSI in under 1 minute and 0-35 PSI in under 5 minutes.
6.5 Pressure Indicator Lights
The device features three-color LED indicators for real-time pressure status:
- Grünes Licht: Pressure is between 90% and 110% of the preset value.
- Gelbes Licht: Pressure is below 90% of the preset value.
- Rotlicht: Pressure exceeds 110% of the preset value.
6.6-LED-Taschenlampenfunktion
The built-in LED light can be used for illumination:
- Press the dedicated light button (if available, or a combination of buttons as per device markings) to turn on the flashlight.
- Cycle through different modes: steady light, flashing light, and SOS emergency mode.
- Drücken Sie die Taste erneut, um das Licht auszuschalten.
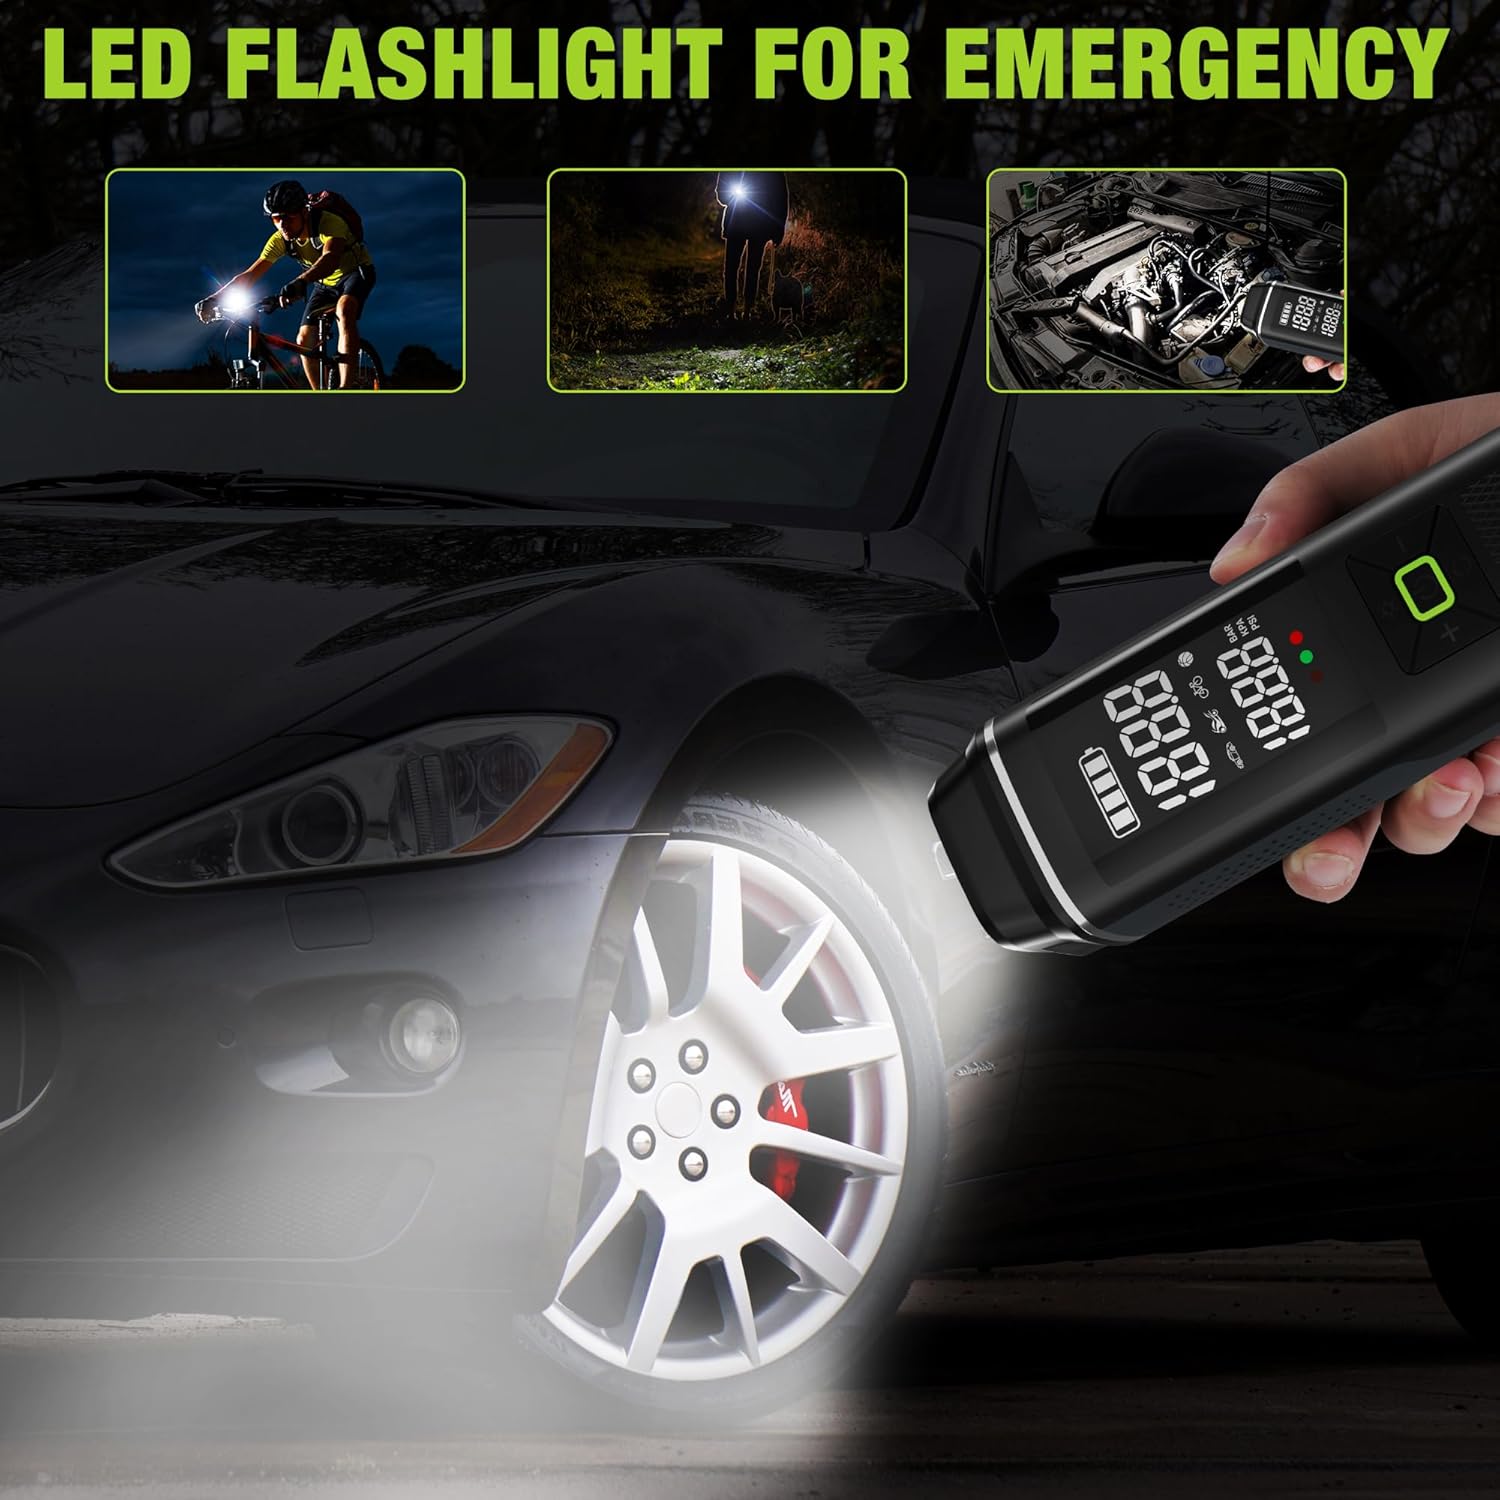
Image: The inflator's LED flashlight function demonstrated for night cycling, general illumination, and under-hood car inspection.
6.7 Tragbare Powerbank-Funktion
The inflator can also serve as a power bank to charge electronic devices:
- Stellen Sie sicher, dass das Aufblasgerät eingeschaltet ist.
- Connect your electronic device (e.g., smartphone) to the USB-A output port using a compatible charging cable (not included).
- Das Aufblasgerät beginnt nun mit dem Aufladen Ihres Geräts.
- Disconnect your device when charging is complete or when the inflator's battery is low.

Image: The inflator being used to charge a smartphone via its USB output port, illustrating its portable power bank capability.
7. Wartung
- Reinigung: Wischen Sie das Gerät mit einem weichen, damp cloth. Do not use harsh chemicals or abrasive cleaners. Ensure the device is off and disconnected from any power source before cleaning.
- Lagerung: Bewahren Sie den Aufblaser und sein Zubehör in der mitgelieferten Aufbewahrungstasche an einem kühlen, trockenen Ort, fern von direkter Sonneneinstrahlung und extremen Temperaturen auf.
- Batteriepflege: Um die Akkulaufzeit zu verlängern, vermeiden Sie häufiges vollständiges Entladen des Akkus. Laden Sie das Gerät regelmäßig auf, wenn es längere Zeit nicht benutzt wird (z. B. alle 3–6 Monate).
8. Fehlerbehebung
| Problem | Mögliche Ursache | Lösung |
|---|---|---|
| Der Kompressor lässt sich nicht einschalten. | Schwache Batterie. | Laden Sie das Gerät vollständig auf. |
| Slow inflation or weak airflow. | Low battery; hose not securely connected; item too large for continuous inflation. | Ensure battery is fully charged. Check hose connections for leaks. For large items, inflate in stages, allowing the device to cool. |
| Das Gerät überhitzt während des Gebrauchs. | Längerer Dauerbetrieb. | Stop operation and allow the device to cool down for at least 10-15 minutes before resuming. Avoid continuous use for more than 5 minutes. |
| Air leaks from connection. | Hose not tightened properly; worn adapter. | Ensure the inflation hose and adapters are screwed on very tightly. Replace worn adapters if necessary. |
| Ungenaue Druckanzeige. | Wackelkontakt; Sensorproblem. | Ensure the connection to the tire valve is secure. If the issue persists, contact customer support. |
9. Spezifikationen
| Modellname | Reifenfüller |
| Modellnummer | W125218A |
| Marke | ARBEITSPRO |
| Bandtage | 12 Volt |
| Stromquelle | Kabelgebunden (zum Laden), batteriebetrieben (für den Betrieb) |
| Batteriekapazität | 3 x 2500 mAh (insgesamt 7500 mAh) |
| Maximaler Druck | 150 PSI |
| Ladezeit | 3-5 Stunden |
| Continuous Inflation Time | Over 30 minutes (on full charge) |
| Material | Kunststoff, Aluminium |
| Artikelgewicht | 930 g |
| UPC | 820909686958 |
10. Garantie und Support
For warranty information, technical support, or service inquiries, please contact WORKPRO customer service. Refer to the product packaging or the official WORKPRO webWebsite für Kontaktdaten.
Bitte bewahren Sie Ihren Kaufbeleg für Garantieansprüche auf.


