1. Einführung und Endeview
The OMTech 150W CO2 Laser Engraver is a high-performance machine designed for precise cutting and engraving across a wide range of materials, including wood, glass, and acrylic. This model features an autofocus system for simplified setup, a large 40"x63" work area with both honeycomb and aluminum blade beds, and convenient three-way pass-through doors to accommodate larger projects. It is equipped with a durable 150W Yongli A8s laser tube, offering extended operational life. Integrated air assist ensures a cleaner work environment and protects critical components. The system comes complete with LightBurn software and a water chiller, enhancing its capabilities and ensuring consistent performance.

Figure 1: OMTech 150W CO2 Laser Engraver with accompanying water chiller and examples of laser-cut materials.
2. Sicherheitshinweise
Operating a laser engraver requires strict adherence to safety protocols to prevent injury and equipment damage. This device is a Laser Class 2 product with 0.827 mW output power. Always prioritize safety during setup, operation, and maintenance.
- Augenschutz: Never look directly into the laser beam. The widened viewing window is made from flame retardant material for safe observation, but additional certified laser safety glasses are recommended.
- Belüftung: Ensure adequate ventilation to remove smoke and fumes generated during operation. The built-in air assist helps, but an external exhaust system is crucial.
- Brandschutz: Halten Sie einen Feuerlöscher in der Nähe bereit. Lassen Sie die Maschine während des Betriebs nicht unbeaufsichtigt, insbesondere nicht bei Arbeiten mit brennbaren Materialien.
- Materialverträglichkeit: Only engrave or cut materials approved for CO2 lasers. Avoid materials that produce toxic fumes or are highly reflective.
- Elektrische Sicherheit: Stellen Sie sicher, dass die Maschine ordnungsgemäß geerdet ist. Bedienen Sie die Maschine nicht mit nassen Händen oder in feuchter Umgebung.amp Umgebungen.
- Not-Halt: Machen Sie sich mit dem Standort und der Bedienung des Not-Aus-Knopfes vertraut.
3. Einrichtung
Careful setup is essential for optimal performance and safety. Follow these steps to prepare your laser engraver for use:
- Auspacken und Aufstellen: Carefully unpack all components. Place the laser engraver on a stable, level surface in a well-ventilated area, away from flammable materials.
- Water Chiller Connection: Connect the included water chiller to the laser tube. Ensure the chiller is filled with distilled water or a recommended coolant. The water chiller is crucial for maintaining the laser tube's temperature and extending its lifespan.
- Luftunterstützungsanschluss: Connect the air assist system. This system helps to clear smoke and debris from the cutting area, protecting the laser lens and mirrors.
- Exhaust System Setup: Install the exhaust fan and ducting to vent fumes outdoors. Proper ventilation is critical for safety.
- Stromanschluss: Connect the machine to a grounded power outlet. Ensure the power supply meets the machine's requirements.
- Softwareinstallation: Install the LightBurn software on your computer. LightBurn is compatible with Windows, Linux, and macOS.
- Workbed Adjustment: The machine features adjustable workbeds (honeycomb and aluminum blade beds) with a 40"x63" work area. Adjust the bed height as needed for your material.

Figure 2: The OMTech CW-5200 industrial water chiller, essential for cooling the laser tube.
4. Bedienungsanleitung
Operating the OMTech laser engraver involves preparing your design, setting parameters, and initiating the laser process. The autofocus feature simplifies focal distance adjustment.
- Entwurfsvorbereitung: Create or import your design using LightBurn software. The software allows for precise control over engraving and cutting paths.
- Materialplatzierung: Place your material securely on the workbed. Utilize the three-way pass-through doors for larger or longer items that exceed the standard work area.
- Autofokus: Use the autofocus function to automatically set the correct focal distance for your material. This eliminates manual adjustments and guesswork, ensuring optimal engraving and cutting results.
- Parametereinstellungen: In LightBurn, set the appropriate power, speed, and other parameters for your material and desired outcome.
- Initiate Process: Send the job to the laser engraver and start the process. Monitor the operation through the flame-retardant viewing Fenster.
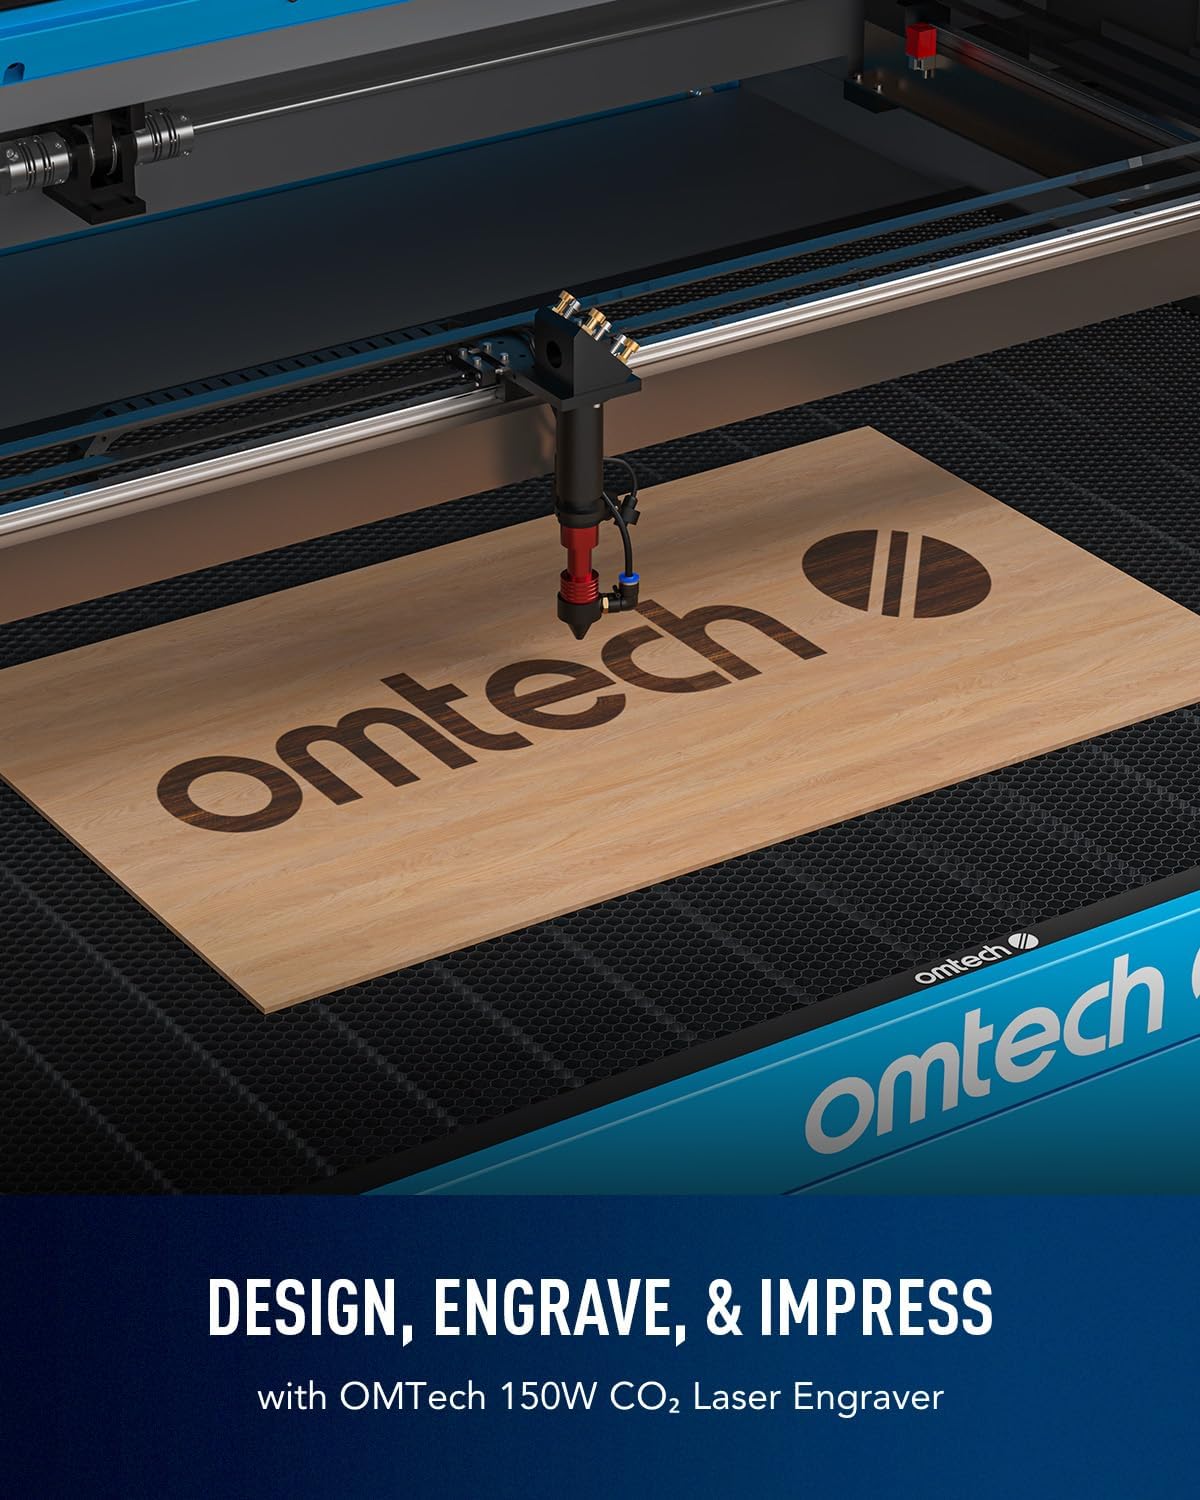
Figure 3: The laser engraver in action, demonstrating the engraving process on a wooden surface.

Figure 4: The automatic focusing mechanism of the laser head, simplifying setup.
Demonstration Video: Laser Engraving and Cutting on Acrylic Mirror
Video 1: This video demonstrates the process of laser engraving and cutting on acrylic mirror. It covers preparing the material, setting up the design in LightBurn, adjusting laser parameters, and cleaning the finished product. The video highlights how to achieve detailed engravings and clean cuts on reflective acrylic, including techniques for handling the material's unique properties.
5. Wartung
Regular maintenance ensures the longevity and consistent performance of your laser engraver. Pay particular attention to the laser tube, lenses, and mirrors.
- Laserröhre: The Yongli A8s tube has a lifespan of up to 7,000 hours. Consistent use at lower settings can extend its life. Monitor its performance and replace when necessary.
- Wasserkühler: Regularly check the water level and quality in the chiller. Replace the water or coolant as recommended by the chiller manufacturer to prevent overheating and damage to the laser tube.
- Linsen und Spiegel: The built-in air assist helps protect laser lenses and reflective mirrors from smoke and dust. However, periodic manual cleaning of these optical components with appropriate cleaning solutions and lint-free wipes is essential to maintain beam quality and power.
- Arbeitsbett: Keep the honeycomb and aluminum blade beds clean from debris and residue to ensure proper material placement and consistent results.
- Schienen und Riemen: Inspect and clean the guide rails and drive belts regularly. Lubricate moving parts as specified in the detailed product manual to ensure smooth motion.
6. Fehlerbehebung
This section addresses common issues you might encounter during operation. For more complex problems, refer to the full product manual or contact customer support.
- Keine Laserleistung: Check power connections, ensure the water chiller is running, verify laser tube integrity, and confirm software settings (power, output enabled).
- Mangelhafte Gravur-/Schnittqualität: Verify focal distance (use autofocus), clean lenses and mirrors, check laser power and speed settings in LightBurn, and ensure material is flat and secure.
- Maschine reagiert nicht: Check USB/Ethernet cable connections, restart LightBurn and the machine, and ensure emergency stop button is not engaged.
- Übermäßiger Rauch/Dämpfe: Ensure air assist is active and functioning, check exhaust fan and ducting for blockages, and verify proper ventilation of the workspace.
- Autofocus Malfunction: Check for obstructions around the laser head, ensure the workbed is clear, and verify sensor cleanliness.
7. Spezifikationen
Detailed technical specifications for the OMTech 150W CO2 Laser Engraver:
| Besonderheit | Spezifikation |
|---|---|
| Laserleistung | 150W (Yongli A8s Tube) |
| Laserklasse | Klasse 2 (0.827 mW Ausgangsleistung) |
| Arbeitsbereich | 40" x 63" (1016 mm x 1600 mm) |
| Workbed Type | Honeycomb and Aluminum Blade Beds |
| Max. Gravurgeschwindigkeit | 600 mm/s |
| Datenübermittlung | USB Cable, Ethernet Cable, USB Flash Drive, Offline |
| Durchgangstüren | Three-Way (Front/Back: 66.9"x1.9", Side: 42.1"x0.7") |
| Autofokus | Ja |
| Luftunterstützung | Eingebaut |
| ViewFenster | Flammhemmendes Material |
| Maschinenabmessungen | 86.6" x 60.6" x 37" |
| Maschinengewicht | 816 Pfund. |
Figure 5: Key specifications of the OMTech 150W CO2 Laser Engraver.
8. Garantie und Support
OMTech products typically come with a manufacturer's warranty covering defects in materials and workmanship. For specific warranty details, including duration and coverage, please refer to the warranty card included with your product or visit the official OMTech website. For technical support, troubleshooting assistance, or to inquire about replacement parts, please contact OMTech customer service directly. You can find contact information and additional resources on the OMTech Store auf Amazon.


