1. Einleitung
Thank you for choosing the Mesqool CR1024 Projection Alarm Clock. This device combines a digital alarm clock with a time projector, displaying time on your wall or ceiling. It also features temperature and humidity monitoring, dual alarms, a night light, and USB charging ports. This manual will guide you through the setup, operation, and maintenance of your new alarm clock.
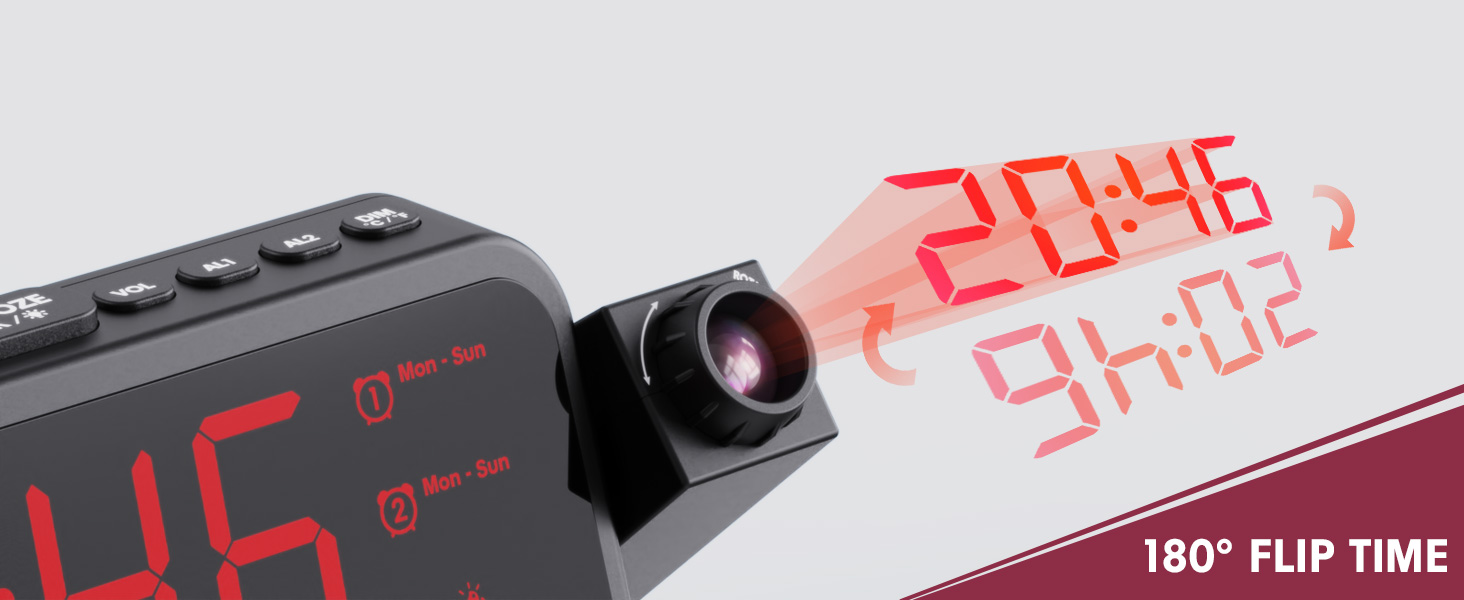
Image 1.1: Mesqool CR1024 Projection Alarm Clock with a smartphone connected for charging.
Hauptmerkmale:
- 180° Swivel Projection with Adjustable Focus
- Large LED Display with Time, Date, Day, Temperature, and Humidity
- Dual Alarms with Weekday/Weekend/7-Day/One-time Modes
- 9-Minute Snooze Function
- Integrated Soft LED Night Light with Adjustable Brightness
- 7-Level Adjustable Alarm Volume
- 5-stufiger Display-Dimmer
- Memory Function (requires 2x AAA batteries, not included)
- Dual USB Charging Ports (Type-C and USB-A)
2. Einrichtung
2.1 Stromanschluss
- Schließen Sie das mitgelieferte Netzteil an den DC IN-Anschluss auf der Rückseite des Weckers an.
- Stecken Sie den Netzadapter in eine normale Steckdose. Das Display der Uhr leuchtet auf.
- Für Notstromversorgung während eines Ausfallstages, insert two AAA batteries (not included) into the battery compartment. This will preserve time and alarm settings.
2.2 Erste Zeit- und Datumseinstellung
- Halten Sie die ZEITEINSTELLUNG Taste, um in den Zeiteinstellungsmodus zu wechseln.
- Verwenden Sie die + or - Tasten zum Einstellen der Stunde. Drücken ZEITEINSTELLUNG zur Bestätigung.
- Wiederholen Sie den Vorgang, um Minute, Jahr, Monat und Tag einzustellen.
- Drücken ZEITEINSTELLUNG erneut, um den Einstellungsmodus zu verlassen.
2.3 12/24-Stunden-Format und Sommerzeit
- Um zwischen dem 12-Stunden- und dem 24-Stunden-Zeitformat zu wechseln, drücken Sie die 12/24 Uhr Taste.
- Um die Sommerzeit (DST) zu aktivieren oder zu deaktivieren, drücken Sie die Taste Sommerzeit button. An indicator will appear on the display when DST is active.

Image 2.1: The clock displaying time in both 12-hour and 24-hour formats.
3. Bedienungsanleitung
3.1 Alarme einstellen
Die Uhr unterstützt zwei unabhängige Alarme (AL1 und AL2).
- Halten Sie die AL1 or AL2 Taste, um in den Alarmeinstellungsmodus zu wechseln.
- Verwenden Sie die + or - buttons to adjust the alarm hour. Press the respective alarm button (AL1 or AL2) bestätigen.
- Wiederholen Sie den Vorgang, um die Alarmminute einzustellen.
- After setting the minute, use + or - to select the alarm mode: Mon-Sun, Mon-Fri, Sat-Sun, or One-time.
- Press the alarm button again to confirm and exit.
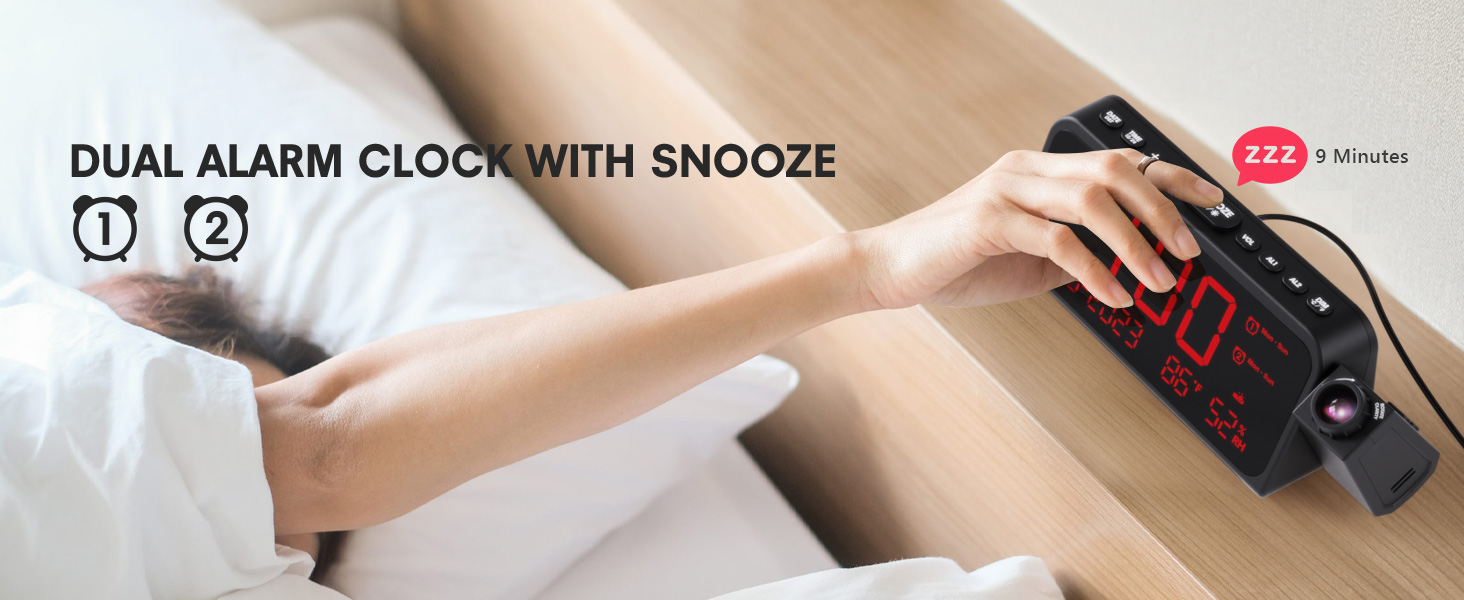
Image 3.1: The clock displaying dual alarm settings and snooze functionality.
3.2 Schlummerfunktion
Wenn ein Alarm ertönt, drücken Sie die große Taste. Schlummern/OK/* Taste zum Aktivieren der Schlummerfunktion. Der Alarm pausiert für 9 Minuten und ertönt dann erneut.
3.3 Lautstärkeregelung für Alarme
Drücken Sie die VOL button to cycle through 7 levels of alarm volume. Adjust to your preferred loudness.

Image 3.2: Visual representation of the 4 alarm modes and 7 adjustable volume levels.
3.4 Projektionseinstellungen
- Projektion EIN/AUS: Drücken Sie die PROJECTION Taste zum Ein- und Ausschalten der Projektion.
- Projektionshelligkeit: Drücken Sie wiederholt die PROJECTION button to cycle through 5 brightness levels (Dim, Low, Medium, High, Full).
- Projection Orientation: The projector arm can swivel 180 degrees. Rotate the arm to direct the time display to your desired surface (wall or ceiling).
- Fokuseinstellung: Verwenden Sie den Fokusring am Objektiv des Projektors, um das projizierte Bild zu schärfen.
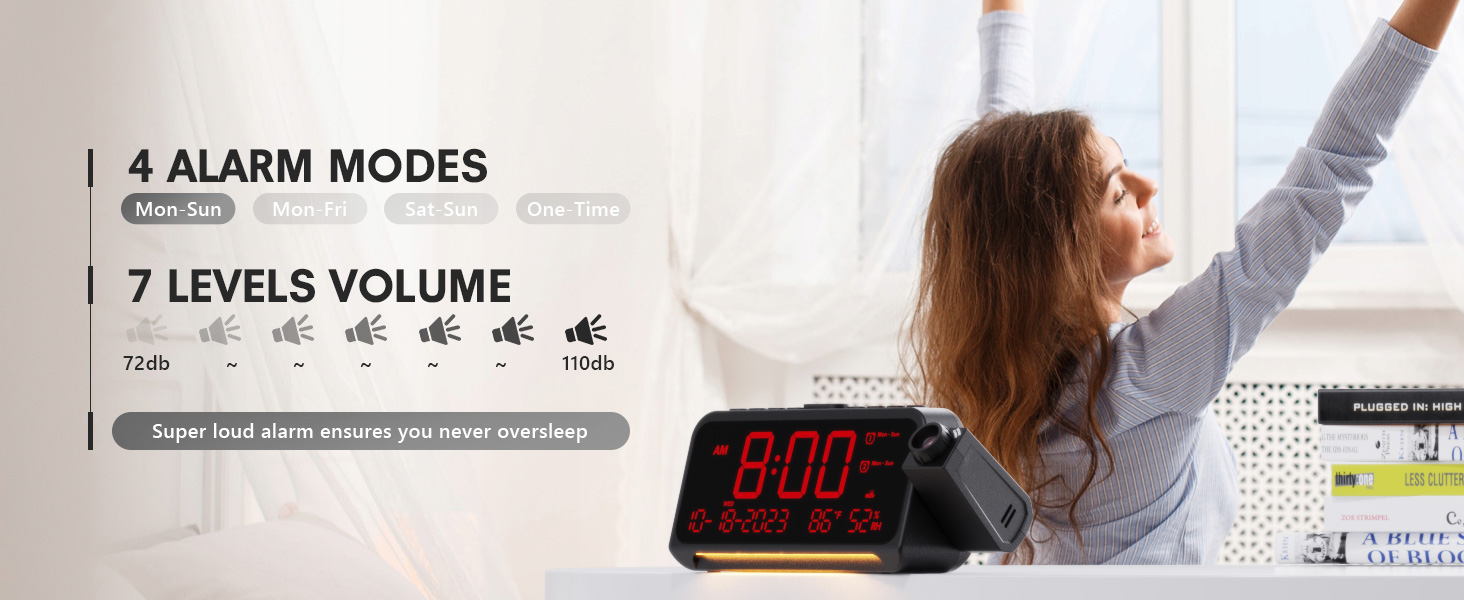
Abbildung 3.3: Detailansicht view of the projection features, including distance, time flip, rotation, focus, and brightness levels.
3.5 Display-Dimmer
Drücken Sie die DIMMER button to adjust the brightness of the main LED display. There are 5 levels of brightness to choose from, allowing you to customize it for comfort, especially at night.
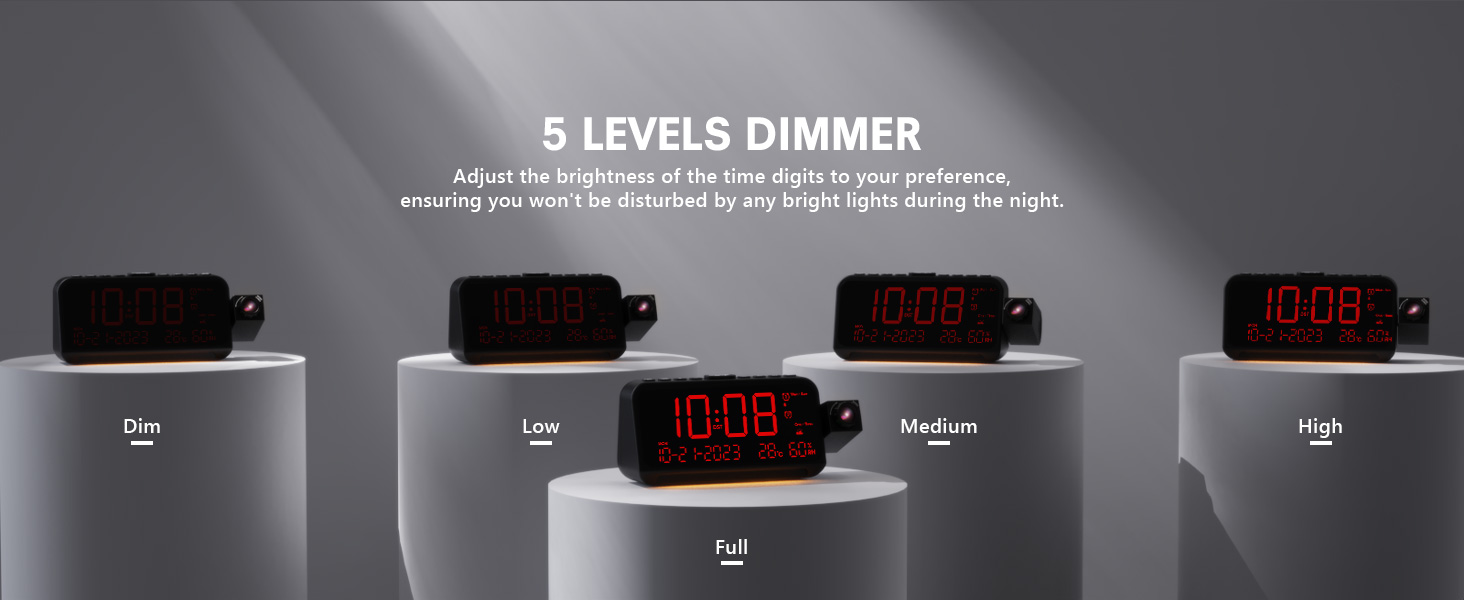
Image 3.4: The clock demonstrating its 5-level adjustable display dimmer.
3.6 Nachtlicht
The clock features a soft LED night light located at the bottom. Press the LICHT button to cycle through Off, Medium, and Full brightness settings for the night light.
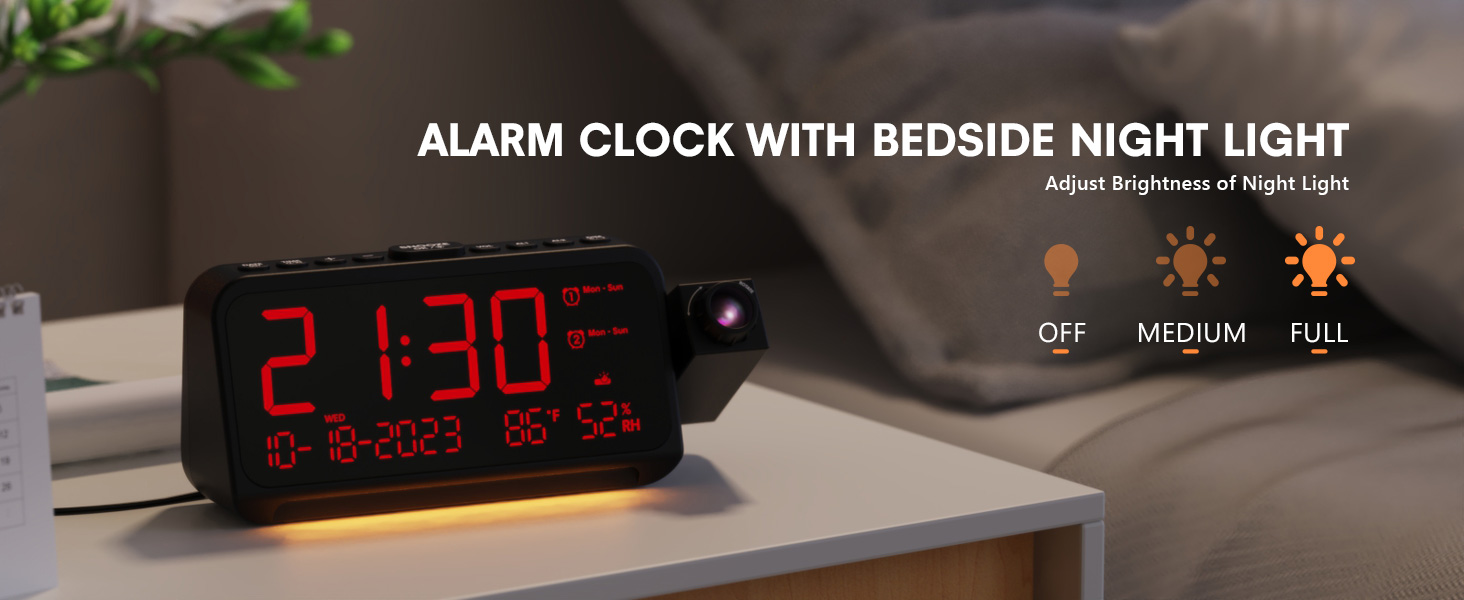
Image 3.5: The clock with its integrated night light, showing different brightness options.
3.7 USB-Ladeanschlüsse
The clock is equipped with a Type-C and a standard USB-A charging port on the back. You can use these ports to charge your mobile devices while the clock is powered.

Image 3.6: The back of the clock showing the Type-C and USB-A charging ports in use.
4. Wartung
To ensure the longevity and optimal performance of your Mesqool CR1024 Projection Alarm Clock, follow these maintenance guidelines:
- Reinigung: Wipe the clock's surface with a soft, dry cloth. Avoid using abrasive cleaners, solvents, or chemical sprays, as these can damage the finish or electronic components.
- Umfeld: Platzieren Sie die Uhr an einem trockenen Ort, fern von direkter Sonneneinstrahlung, extremen Temperaturen und hoher Luftfeuchtigkeit.
- Belüftung: Stellen Sie sicher, dass die Lüftungsöffnungen nicht blockiert sind, um eine Überhitzung zu verhindern.
- Batteriewechsel: If using AAA batteries for backup, replace them annually or when the low battery indicator appears to ensure settings are retained during power outages.
5. Fehlerbehebung
If you encounter issues with your Mesqool CR1024 Projection Alarm Clock, please refer to the following common problems and solutions:
| Problem | Mögliche Ursache | Lösung |
|---|---|---|
| Die Projektion ist verschwommen oder undeutlich. | Incorrect focus or projection distance. | Adjust the focus ring on the projector lens. Ensure the clock is within the optimal projection distance (4.92-9.84 ft). |
| Der Alarm ertönt nicht oder ist zu leise. | Alarm not activated or volume set too low. | Ensure the alarm is enabled (AL1/AL2 indicator on display). Press the VOL Taste zum Erhöhen der Alarmlautstärke. |
| Das Display ist entweder zu hell oder zu dunkel. | Display dimmer setting is not optimal. | Drücken Sie die DIMMER Taste zum Durchschalten der 5 Helligkeitsstufen. |
| Zeit/Einstellungen werden nach Stromausfall zurückgesetzttage. | Es sind keine Ersatzbatterien vorhanden oder die Batterien sind leer. | Install two fresh AAA batteries (not included) in the battery compartment for memory backup. |
| Cannot change time format from 24-hour to 12-hour. | Incorrect button press or temporary glitch. | Drücken Sie die 12/24 Uhr button. If the issue persists, try unplugging the clock for a few minutes and then reconnecting power. |
6. Spezifikationen
| Besonderheit | Detail |
|---|---|
| Marke | Mesqool |
| Modellnummer | CR1024 |
| Anzeigetyp | Digitale LED |
| Stromquelle | Kabelgebundene Elektrik |
| Batterie-Backup | 2x AAA-Batterien (nicht im Lieferumfang enthalten) |
| Technische Daten | 7.87"W x 3.4"H (7.87x2.36x3.43 inch) |
| Artikelgewicht | 12 Unzen (0.34 Kilogramm) |
| Material | Acrylnitril-Butadien-Styrol (ABS) |
| Besondere Merkmale | Projection, Dual Alarms, Snooze, Night Light, Temperature, Humidity, Calendar, DST, USB Charging |

Image 6.1: Dimensions of the Mesqool CR1024 Projection Alarm Clock.
7. Garantie und Support
7.1 Garantieinformationen
This Mesqool CR1024 Projection Alarm Clock comes with a 24 Monate Garantie from the date of purchase. Mesqool also provides lifetime support for this product. Please retain your proof of purchase for warranty claims.
7.2 Kundendienst
For any questions, technical assistance, or warranty inquiries, please contact Mesqool customer support through the retailer where you purchased the product or refer to the official Mesqool webWebsite für Kontaktinformationen.


