1. Einleitung
The OTOFIX D1 Max is a new generation, high-end diagnostic scan tool designed for comprehensive vehicle diagnostics and maintenance. It combines powerful hardware with advanced software capabilities to provide efficient and accurate solutions for automotive professionals and enthusiasts. This manual provides detailed instructions on setting up, operating, maintaining, and troubleshooting your OTOFIX D1 Max scanner.

Image 1.1: OTOFIX D1 Max Scanner highlighting key features like 40+ HOT Services, 3X Faster AutoScan 2.0, All System Diagnostics, Guided Functions, Blu. Wireless VCI, Wide Coverage, CAN-FD & DoIP, 2015+ Renault SGW, and 2 Years Update.
2. Produktüberschreitungview
The OTOFIX D1 Max is engineered for superior performance and user experience. It features a robust design and advanced functionalities to meet the demands of modern vehicle diagnostics.
2.1 Hauptmerkmale
- ECU Coding & Offline ECU Programming: Advanced capabilities for vehicle personalization and module replacement.
- Mehr als 40 Servicefunktionen: Comprehensive maintenance solutions including Oil Reset, TPMS Reset, Injector Coding, Suspension, and Throttle Matching.
- Aktiver Test (bidirektionale Steuerung): Perform component tests by sending commands to vehicle modules.
- OE-level Full-System Diagnostics: Access all available vehicle systems for reading/clearing codes, live data, and ECU information.
- Breites Fahrzeugspektrum: Supports over 80 brands and 10,000+ vehicle models (1996-2025).
- Erweiterte Protokolle: Supports DoIP & CAN FD for faster data transfer and diagnostics.
- Sicherer Gateway-Zugang: Compatible with FCA (2018+) and Renault (2015+) SGW-equipped vehicles.
- Auto VIN 2.0: Faster and more accurate automatic vehicle identification.
- WLAN-Drucken: Wirelessly print diagnostic reports.
- 2-Years Free Software Updates: Ensures continuous functionality and compatibility.
2.2 Hardwarespezifikationen
| Komponente | Spezifikation |
|---|---|
| Betriebssystem | Android 11.0 |
| Prozessor | Qualcomm CPU (4-Core, 1.8GHz) |
| Erinnerung | 4 GB RAM + 128 GB Speicher |
| Bildschirmgröße | 10.4 Zoll |
| Bildschirmauflösung | 2000*1200 |
| Batteriekapazität | 7250mAh Lithium-Ionen |
| Kameras | Front: 5MP; Rear: 8MP |
| Lower Computer (VCI) | V1 |
| Maße | 10.8 x 7.1 x 0.7 Zoll |
| Artikelgewicht | 9.79 Pfund |

Image 2.1: Visual representation of OTOFIX D1 Max hardware specifications including Android 11.0, 4-Core CPU, 10.4" screen, 4+128G memory, 7250mAh battery, and 5MP/8MP cameras.
3. Einrichtung
3.1 Auspacken und erste Inspektion
Upon receiving your OTOFIX D1 Max, carefully open the packaging and inspect all components for any signs of damage. Ensure all items listed in the package contents are present.
3.2 Packungsinhalt
The OTOFIX D1 Max package typically includes the following items:
- 1x OTOFIX D1 MAX Diagnostic Tool (Tablet)
- 1x OTOFIX V1 (Vehicle Communication Interface)
- 1x USB-C Kabel
- 1x AC/DC Power Adapter (12V)
- 1x Tragetasche
- 1x Packing List
- 1x Kurzanleitung
- 1x Weiches Tuch
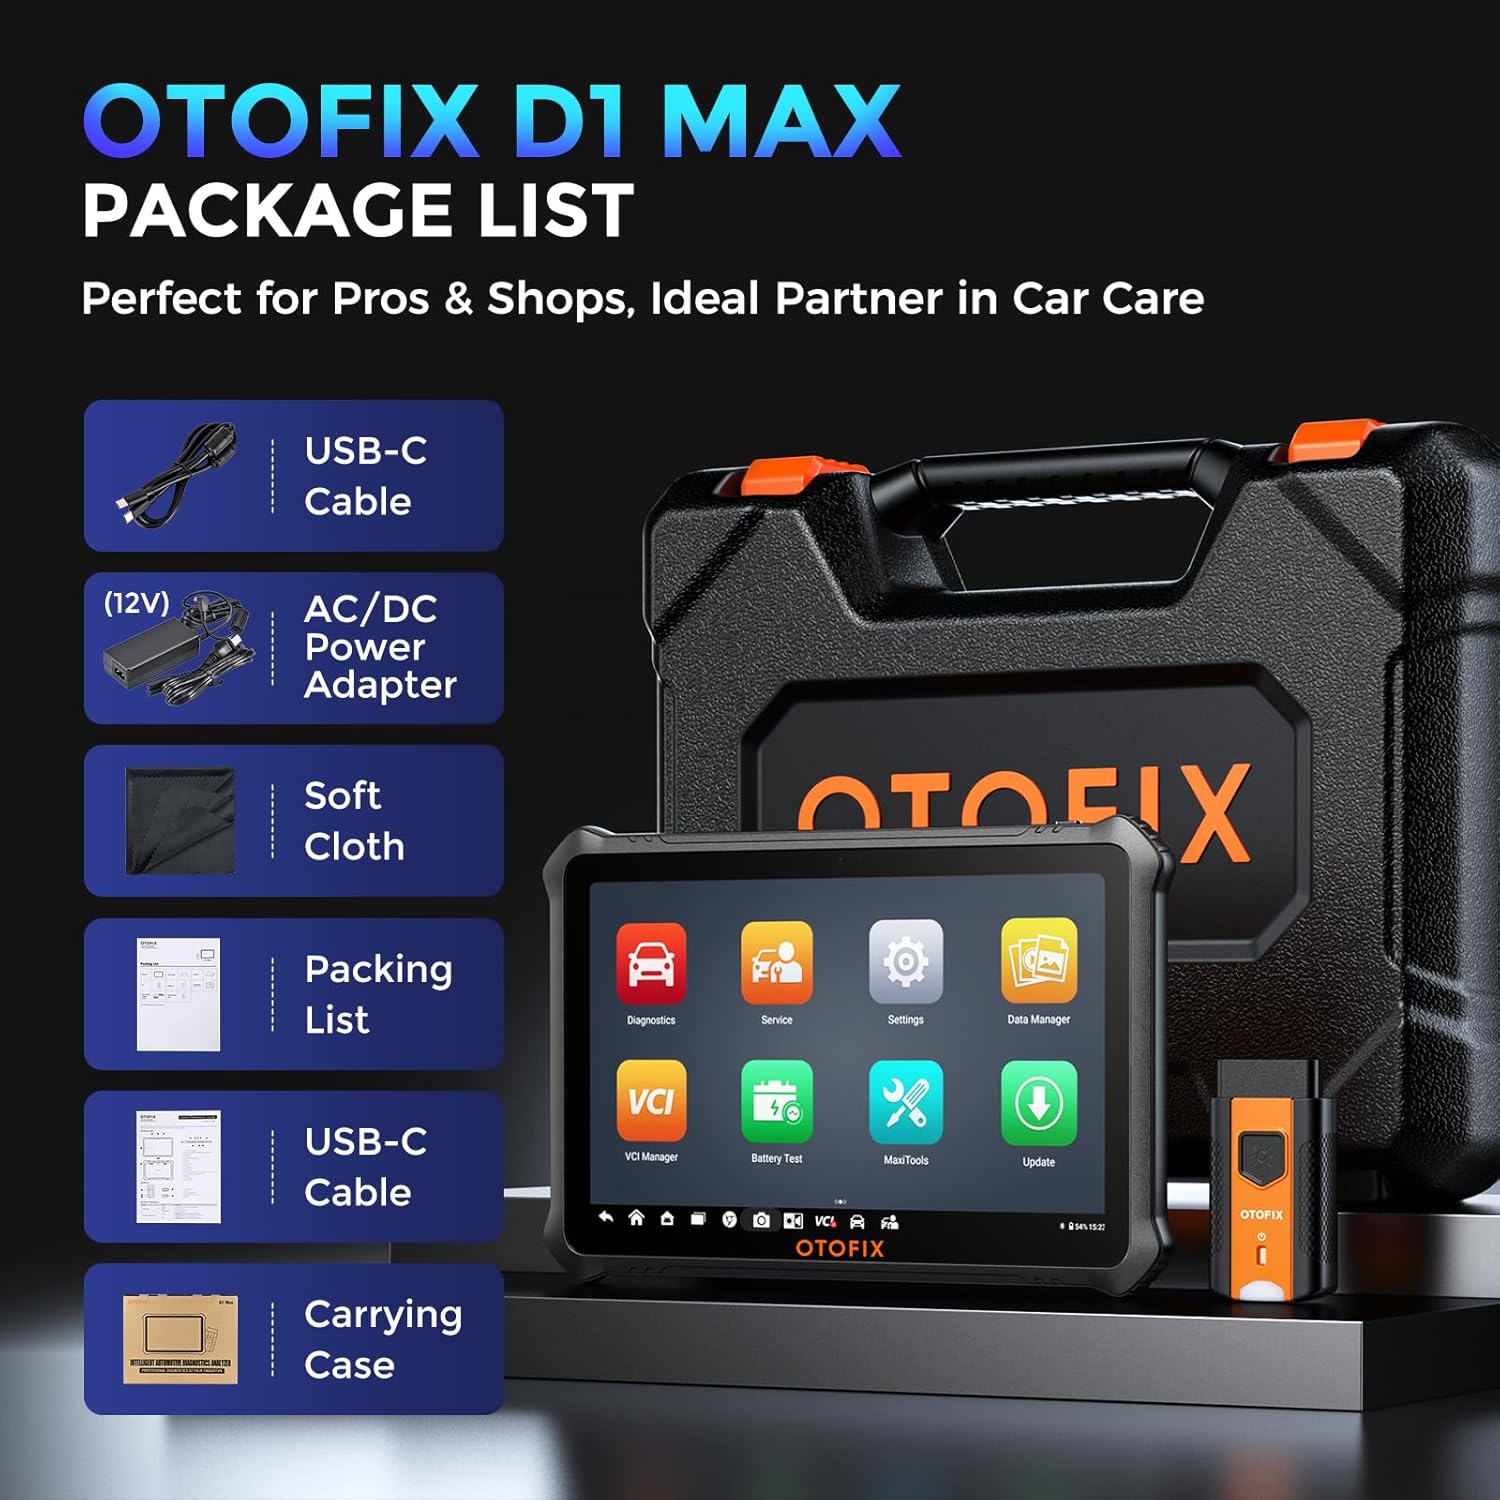
Image 3.1: Contents of the OTOFIX D1 Max package, including the tablet, VCI, cables, power adapter, carrying case, and documentation.
3.3 Einschalten und Erstkonfiguration
- Connect the AC/DC Power Adapter to the OTOFIX D1 Max tablet and a power outlet to ensure the device is charged.
- Press and hold the Power button until the OTOFIX logo appears on the screen.
- Follow the on-screen prompts to complete the initial setup, including language selection, Wi-Fi connection, and time zone settings.
- Register your device and activate the software updates as prompted. A stable internet connection is required for this step.
4. Bedienung
4.1 Anschluss an ein Fahrzeug
- Suchen Sie den OBDII-Anschluss des Fahrzeugs, der sich üblicherweise unter dem Armaturenbrett auf der Fahrerseite befindet.
- Plug the OTOFIX V1 (VCI) into the vehicle's OBDII port. The VCI's indicator light should illuminate.
- On the OTOFIX D1 Max tablet, ensure Bluetooth is enabled and the VCI is paired. The VCI Manager application can be used to manage the connection.
- Drehen Sie die Zündung des Fahrzeugs in die Position EIN (Motor aus).
4.2 OE-Level-Systemdiagnose
The OTOFIX D1 Max can access all available vehicle systems to perform comprehensive diagnostics.
- Codes lesen: Diagnosefehlercodes (DTCs) von allen Steuergeräten abrufen.
- Codes löschen: Nach Abschluss der Reparaturen sollten die Fehlercodes (DTCs) gelöscht werden.
- Lebensdaten: View Echtzeit-Datenströme von verschiedenen Sensoren und Komponenten.
- Standbilddaten: Erfassen Sie eine Momentaufnahme des Fahrzeugzustands zum Zeitpunkt des Auftretens eines Fehlercodes (DTC).
- ECU-Informationen: Retrieve detailed information about the Electronic Control Unit.

Image 4.1: Illustration of OE-level all system diagnostics, showing the scanner connected to a car and accessing various systems like Engine, ABS, EPB, and BMS.
4.3 ECU Coding & Advanced Functions
This function allows for advanced vehicle customization and module adaptation.
- Online-Programmierung: Automatically retrieves coding values from the server for quick and precise operations. Compatible with brands like Volkswagen, Audi, Skoda, Peugeot, Citroen, DS, Porsche, BMW, Mini, Nissan, Infiniti, Nissan GT-R, Renault.
- Offline-Codierung: Allows manual input of coding values, suitable for experts and a wider range of car builds. Compatible with Ford, Ford AU, Ford EU, Subaru, Land Rover, Jaguar, Peugeot, Citroen, DS, Volkswagen, Volkswagen Brazil, Audi, Skoda, Volkswagen CV.
- Offline ECU Programming: Replace or update ECU software, program new blank ECUs, and fix software-controlled issues. Compatible with Ford, Ford AU, Ford EU, Land Rover, Jaguar, Opel, Vauxhall.
- Personalisierung: Customize vehicle settings such as disabling auto start-stop, activating daytime running lights, and other comfort functions.
- VAG-gesteuerte Funktionen: Provides step-by-step procedures for complex diagnostics on Volkswagen, Audi, Skoda, and VW vehicles, skipping channel numbers and security codes.

Abbildung 4.2: Detailansicht view of ECU Programming & Coding capabilities, including open/close functions, module matching, personalization, parameter reset, and fixing complex issues.
5. Servicefunktionen
The OTOFIX D1 Max offers over 40 maintenance and service functions to address common vehicle issues.
- Ölrücksetzung: Nach einem Ölwechsel muss das Öllebensdauersystem zurückgesetzt werden.
- TPMS-Reset: Reifendruckkontrollsystem zurücksetzen.
- SAS-Reset: Kalibrieren Sie den Lenkwinkelsensor.
- EPB-Reset: Nach dem Austausch der Bremsbeläge der elektronischen Parkbremse müssen diese zurückgesetzt werden.
- Drosselklappenanpassung: Drosselklappenstellung neu anlernen.
- BMS-Reset: Registrieren Sie die neue Batterie nach dem Austausch.
- ABS-Blutung: Um einen festen Bremsdruck zu gewährleisten, muss das ABS-Bremssystem entlüftet werden.
- Suspension: Stellen Sie den Fahrzeughöhensensor für die Federungskalibrierung ein.
- Clutch Learning: Perform clutch adaptation.

Bild 5.1: Überview of 40+ service functions, including Oil Reset, SAS Reset, EPB Reset, Injector Coding, Throttle, BMS Reset, and Clutch Learning.
6. Bidirektionale Steuerung (Aktiver Test)
The bi-directional control feature allows the scanner to send commands to vehicle modules to perform specific tests, narrowing down diagnostic scope and quickly pinpointing problems.
- Activate components like windows, headlights, wipers, sunroof, radiator fans, fuel pump, A/C clutch, etc.
- Test the functionality of various actuators without disassembling the vehicle.

Image 6.1: Demonstration of bi-directional control, showing the scanner sending commands to vehicle components like lights, fuel pump, A/C clutch, and window wipers.
7. Wartung
Proper maintenance ensures the longevity and optimal performance of your OTOFIX D1 Max scanner.
- Software-Updates: Regularly update the software to ensure compatibility with new vehicle models and access to the latest features. The device includes 2 years of free updates.
- Reinigung: Verwenden Sie ein weiches,amp Verwenden Sie ein Tuch, um den Bildschirm und das Gehäuse des Tablets zu reinigen. Vermeiden Sie scheuernde Reinigungsmittel oder Lösungsmittel.
- Lagerung: Bewahren Sie das Gerät bei Nichtgebrauch in der Tragetasche an einem kühlen, trockenen Ort auf. Vermeiden Sie extreme Temperaturen.
- Batteriepflege: Um die Batterieleistung zu erhalten, laden Sie den Akku regelmäßig auf, auch wenn das Gerät nicht häufig benutzt wird.
- VCI-Pflege: Keep the VCI clean and free from debris. Ensure the OBDII connector pins are not bent or damaged.

Image 7.1: Information regarding the included 2 years of free software updates, emphasizing cost savings.
8. Fehlerbehebung
This section provides solutions to common issues you might encounter with your OTOFIX D1 Max scanner.
8.1 Häufige Probleme und Lösungen
- Gerät lässt sich nicht einschalten: Stellen Sie sicher, dass der Akku geladen ist. Schließen Sie das Netzteil an und versuchen Sie es erneut. Sollte das Problem weiterhin bestehen, wenden Sie sich bitte an den Support.
- VCI-Verbindung nicht möglich: Check if the VCI is securely plugged into the vehicle's OBDII port. Ensure Bluetooth is enabled on the tablet and the VCI is paired. Restart both the tablet and the VCI.
- Unable to communicate with vehicle: Verify the vehicle's ignition is ON. Check the OBDII port for power. Ensure the vehicle model and year are correctly selected in the software. Try a different vehicle to rule out vehicle-specific issues.
- Software friert ein/langsame Leistung: Close unnecessary applications. Clear cache if available in settings. Ensure sufficient storage space. Perform a software update if available.
- Diagnosefunktion funktioniert nicht: Ensure the vehicle supports the specific function. Some advanced functions may require specific vehicle conditions or procedures. Refer to the on-screen guided functions or vehicle service manual.
8.2 Kontaktaufnahme mit dem Support
If you encounter issues that cannot be resolved using the troubleshooting steps above, please contact OTOFIX customer support. Provide detailed information about the problem, including any error messages, vehicle details, and steps taken to troubleshoot.
E-Mail: otofixaftersales-amz@outlook.com
Support is available Monday-Friday 9:00 AM - 6:00 PM EST, with 24/7 support available via email.
9. Spezifikationen
Detailed technical specifications for the OTOFIX D1 Max scanner.
| Attribut | Wert |
|---|---|
| Marke | OTOFIX |
| Modell | OTOFIX D1 MAX Scanner |
| Betriebssystem | Android 11.0 |
| Prozessor | 4 Kerne, 1.8 GHz |
| Erinnerung | 4 GB RAM, 128 GB Speicher |
| Bildschirmgröße | 10.4 Zoll |
| Bildschirmauflösung | 2000 x 1200 |
| Batterie | 7250 mAh Lithium-Ionen-Akku (im Lieferumfang enthalten) |
| Kameras | Front: 5MP; Rear: 8MP |
| Konnektivität | WLAN, Bluetooth |
| Unterstützte Protokolle | DoIP, CAN FD, J2534 (with VCI) |
| Abmessungen (L x B x H) | 10.8 x 7.1 x 0.7 Zoll |
| Artikelgewicht | 9.79 Pfund |
| Herstellerteilenummer | OTOFIX D1 MAX Scanner |
| UPC | 850051166305 |
10. Garantie und Support
OTOFIX provides comprehensive support and warranty for the D1 Max scanner.
- Garantie: 1-year quality undertaking.
- Software-Updates: 2 years of free software updates included.
- Technische Unterstützung: Technischer Support ist lebenslang verfügbar.
- Rückgaberecht: Hassle-free return policy within 30 days.
- Kundendienst: 24/7 support via email.
For any inquiries or support needs, please contact OTOFIX at otofixaftersales-amz@outlook.com.


