Einführung
Vielen Dank für Ihren Einkauf.asing the Swan Nordic 40cm Tripod Pedestal Fan. This manual provides important information regarding the assembly, operation, maintenance, and safety of your new fan. Please read these instructions carefully before use and retain them for future reference.

Bild: Vorderseite view of the Swan Nordic 40cm Tripod Pedestal Fan, showcasing its grey finish and wooden tripod legs.
Wichtige Sicherheitshinweise
Um das Risiko von Bränden, Stromschlägen oder Verletzungen zu verringern, befolgen Sie stets diese grundlegenden Sicherheitsvorkehrungen:
- Stellen Sie sicher, dass die LautstärketagDie auf dem Typenschild angegebene Spannung entspricht der Spannung Ihrer Netzversorgung.tage.
- Do not operate any fan with a damaged cord or plug. If the supply cord is damaged, it must be replaced by the manufacturer, its service agent, or similarly qualified persons to avoid a hazard.
- Ziehen Sie den Stecker des Ventilators aus der Steckdose, wenn er nicht benutzt wird, vor der Reinigung oder vor dem Umstellen.
- Den Ventilator, den Stecker oder das Kabel dürfen nicht in Wasser oder andere Flüssigkeiten getaucht werden.
- Kinder dürfen nicht mit dem Ventilator spielen. Bei der Benutzung von Elektrogeräten durch oder in der Nähe von Kindern ist stets eine enge Aufsicht erforderlich.
- Vermeiden Sie den Kontakt mit beweglichen Teilen.
- Betreiben Sie den Ventilator nicht in der Nähe von explosiven und/oder brennbaren Dämpfen.
- Stellen Sie den Ventilator auf eine stabile, ebene Fläche, damit er nicht umkippt.
- Führen Sie bei laufendem Ventilator keine Finger oder andere Gegenstände durch das Gitter ein.
Packungsinhalt
Bitte überprüfen Sie den Inhalt des Pakets. Sollten Artikel fehlen oder beschädigt sein, wenden Sie sich bitte an Ihren Händler.
- Fan Head Assembly (including motor, blades, and grilles)
- Hauptpol
- Tripod Leg Assembly (3 wooden legs and connecting bracket)
- Fixing Screws and Washers
- Bedienungsanleitung
Montage und Einrichtung
Befolgen Sie diese Schritte, um Ihren Standventilator zusammenzubauen:
- Attach Tripod Legs: Carefully attach the three wooden tripod legs to the main pole's connecting bracket using the provided screws and washers. Ensure they are securely tightened to form a stable base.
- Insert Main Pole: Insert the main pole into the assembled tripod base. Secure it with any provided locking mechanisms or screws.
- Lüfterkopf montieren: Place the fan head assembly onto the top of the main pole. Ensure it clicks into place or is secured with the designated screw/knob.
- Positionierung: Place the assembled fan on a firm, level surface. Ensure there is adequate space around the fan for proper air circulation and to prevent obstruction of the grilles.

Image: The Swan Nordic 40cm Tripod Pedestal Fan positioned in a modern living space, demonstrating its stable tripod base.
Bedienungsanleitung
This section details how to use your fan.
Einschalten und Drehzahlregelung
- An die Stromversorgung anschließen: Stecken Sie das Netzkabel des Ventilators in eine geeignete Steckdose.
- Geschwindigkeit auswählen: Locate the rotary switch on the motor housing at the back of the fan head. Turn the switch to select your desired speed setting:
- "O": Aus
- "ICH"Niedrige Geschwindigkeit
- "II": Mittlere Geschwindigkeit
- "III": Hohe Geschwindigkeit
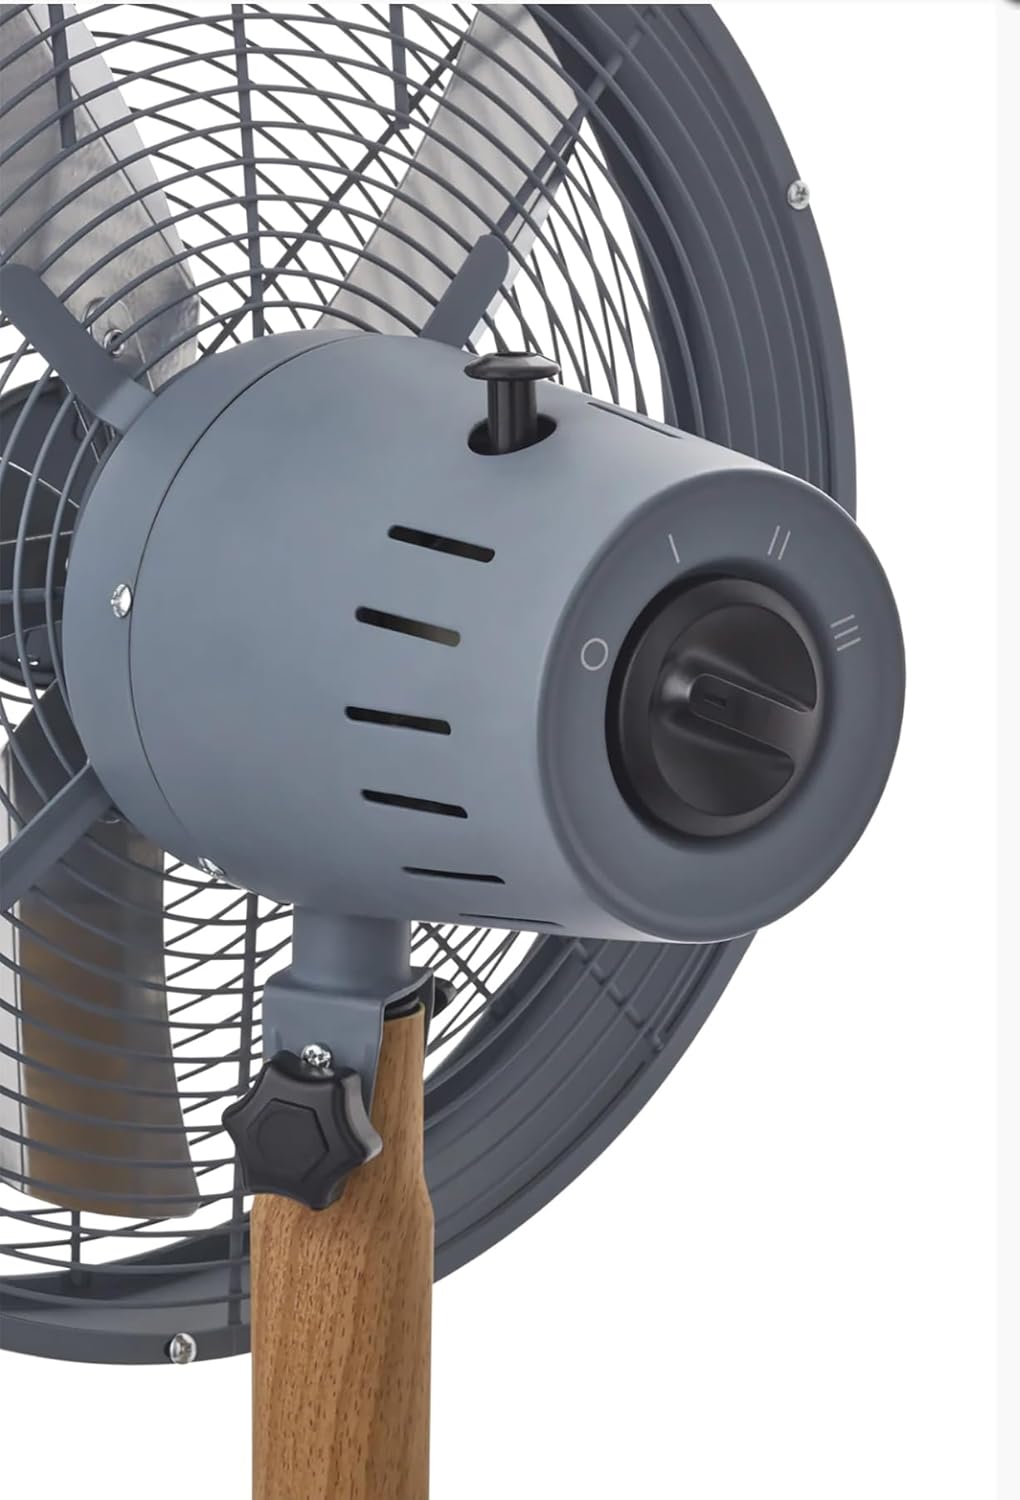
Bild: Eine detaillierte view of the fan's control panel, showing the rotary switch for speed selection and the oscillation pull-pin.
Oszillationsfunktion
The fan features an oscillation function to distribute air over a wider area.
- Um die Schwingung zu starten: Push down the oscillation pin located on top of the motor housing.
- Um die Schwingung zu stoppen: Pull up the oscillation pin. The fan will then blow air in a fixed direction.
Anpassen des Neigungswinkels
The fan head can be tilted to direct airflow upwards or downwards.
- So passen Sie an: Loosen the tilt adjustment knob located on the side of the fan head support. Adjust the fan head to the desired angle, then securely tighten the knob to fix its position.
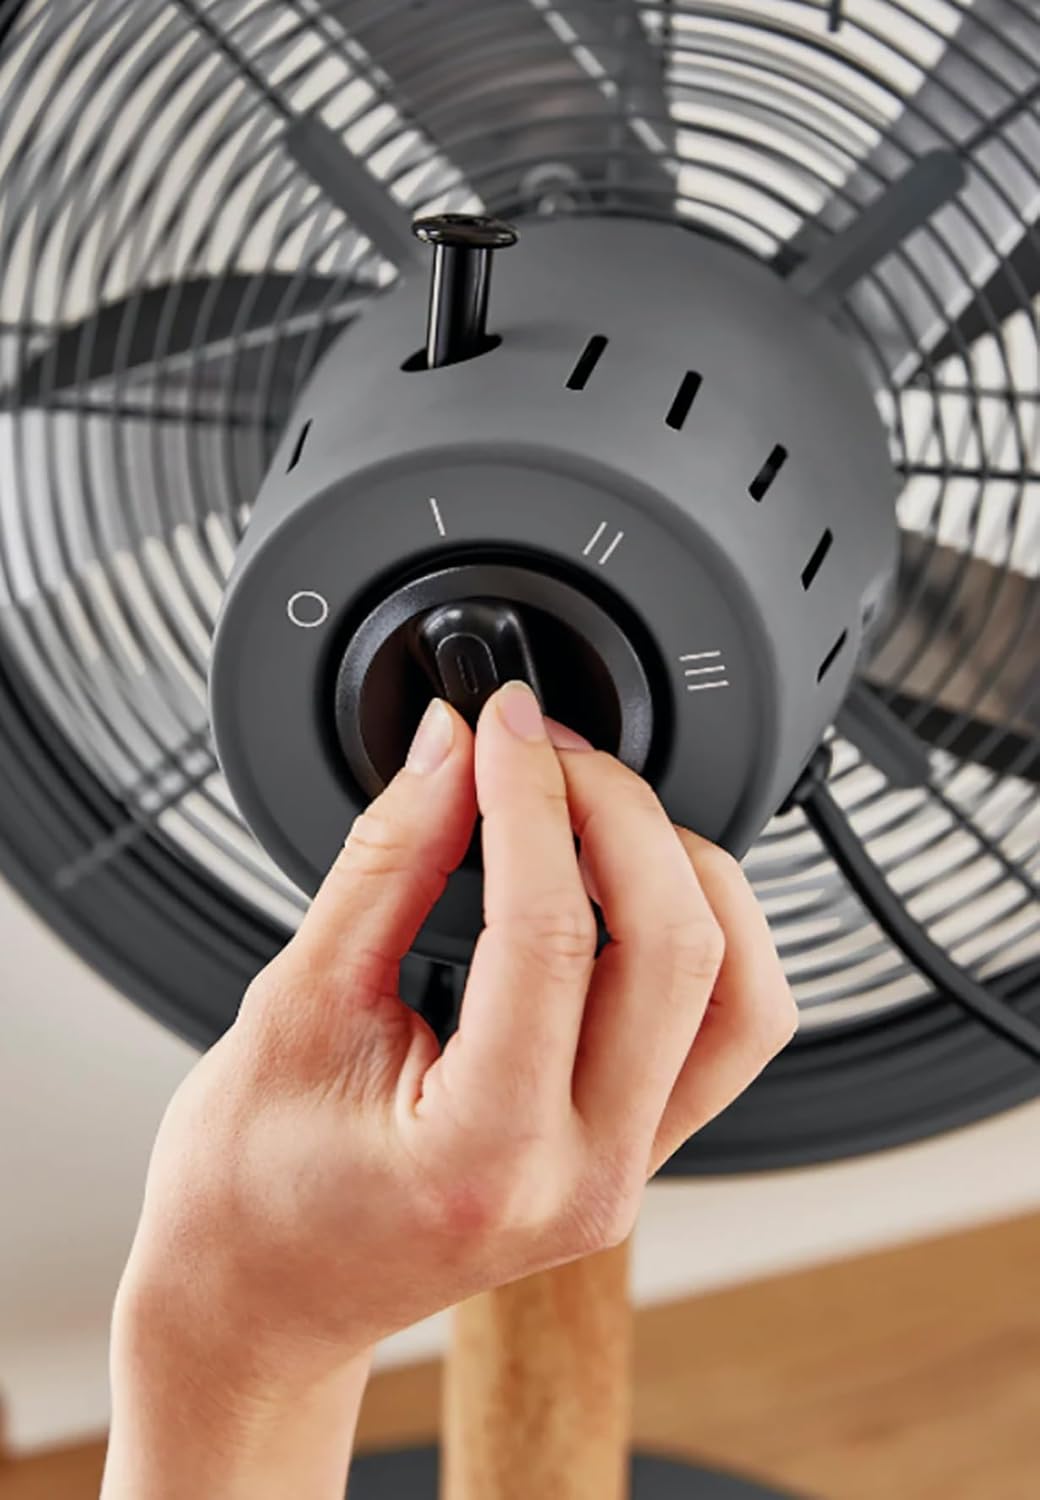
Image: A hand demonstrating the operation of the rotary switch to select fan speed.
Wartung und Reinigung
Regelmäßige Reinigung und Wartung gewährleisten eine optimale Leistung und verlängern die Lebensdauer Ihres Ventilators.
- Den Ventilator immer vom Stromnetz trennen. Vor der Reinigung vom Stromnetz trennen.
- Außenreinigung: Verwenden Sie ein weiches,amp Verwenden Sie ein Tuch, um die Außenflächen des Ventilators abzuwischen. Verwenden Sie keine Scheuermittel oder Lösungsmittel.
- Grillrost und Lamellen: Dust can accumulate on the grilles and blades. Use a vacuum cleaner with a brush attachment or a soft, dry cloth to remove dust. For thorough cleaning, the front grille may be removed by unscrewing the retaining clips/screws (refer to assembly instructions in reverse). Ensure all parts are dry before reassembling and operating.
- Lagerung: Bei längerer Nichtbenutzung sollte der Ventilator an einem kühlen, trockenen Ort, vorzugsweise in seiner Originalverpackung, aufbewahrt werden.
Fehlerbehebung
Sollten Sie Probleme mit Ihrem Lüfter haben, beachten Sie bitte die folgenden häufig auftretenden Probleme und Lösungen:
| Problem | Mögliche Ursache | Lösung |
|---|---|---|
| Der Ventilator schaltet sich nicht ein. | Keine Stromversorgung. Der Ventilator ist nicht angeschlossen. Speed switch is OFF. | Überprüfen Sie die Steckdose. Stellen Sie sicher, dass der Stecker vollständig eingesteckt ist. Turn the speed switch to I, II, or III. |
| Schwacher Luftstrom. | Niedrige Geschwindigkeitseinstellung. Die Gitter oder Klingen sind verschmutzt. | Erhöhen Sie die Geschwindigkeitseinstellung. Clean the grilles and blades as per maintenance instructions. |
| Lüfter ist laut. | Lose Teile. Der Ventilator steht nicht auf einer ebenen Fläche. | Check all screws and connections are tight. Stellen Sie den Ventilator auf eine stabile, ebene Fläche. |
| Oszillation funktioniert nicht. | Oscillation pin not engaged. | Push down the oscillation pin firmly. |
Wenn das Problem nach dem Ausprobieren dieser Lösungen weiterhin besteht, wenden Sie sich bitte an den Kundensupport.
Technische Daten
- Marke: Schwan
- Modell: Nordic 40cm Tripod Pedestal Fan
- Leistung / Wattage: 50 Watt
- Bandtage: 220 Volt (Wechselstrom)
- Anzahl der Geschwindigkeiten: 3
- Material: Metal (housing), Wood (tripod legs)
- Artikelgewicht: 5.5 kg
- Produktabmessungen: Approximately 50D x 50W centimetres
- Besondere Merkmale: Adjustable tilting head, Oscillation function, High quality metal housing, Tripod legs, Rotary switch.
Garantie und Support
Specific warranty details are typically provided with your purchase documentation or can be found on the manufacturer's official webBitte bewahren Sie Ihren Kaufbeleg für eventuelle Garantieansprüche auf.
For technical support, spare parts, or service, please contact Swan customer service through their official channels. Contact information can usually be found on the product packaging or the brand's webWebsite.