1. Einleitung
This manual provides detailed instructions for the setup, operation, and maintenance of your Pisichen 16-inch 1920x1200P Touch Panel Portable Monitor. Please read this manual thoroughly before using the product to ensure proper functionality and to prevent damage.

Image 1.1: The Pisichen 16-inch Portable Monitor, showcasing its vibrant display and slim design.
2. Sicherheitshinweise
- Setzen Sie den Monitor weder Regen noch Feuchtigkeit aus, um Stromschläge oder Brandgefahren zu vermeiden.
- Öffnen Sie den Monitor nicht.asing. Alle Wartungsarbeiten sind qualifiziertem Personal zu überlassen.
- Vermeiden Sie es, den Monitor direktem Sonnenlicht oder in der Nähe von Wärmequellen auszusetzen.
- Use only the power adapter and cables provided or approved by the manufacturer.
- Reinigen Sie den Bildschirm mit einem weichen, fusselfreien Tuch. Verwenden Sie keine flüssigen Reiniger oder Aerosolsprays direkt auf dem Bildschirm.
3. Packungsinhalt
Bitte prüfen Sie das Paket auf folgende Artikel:
- Pisichen 16-inch Portable Monitor
- Netzteil
- USB-A-auf-USB-C-Kabel
- HDMI zu HDMI Kabel
- USB-C-auf-USB-C-Kabel
- Benutzerhandbuch (dieses Dokument)

Image 3.1: All items included in the product package, ready for immediate use.
4. Produktüberschreitungview
The monitor features multiple ports for versatile connectivity and control buttons for easy navigation of settings.
4.1. Anschlüsse und Tasten
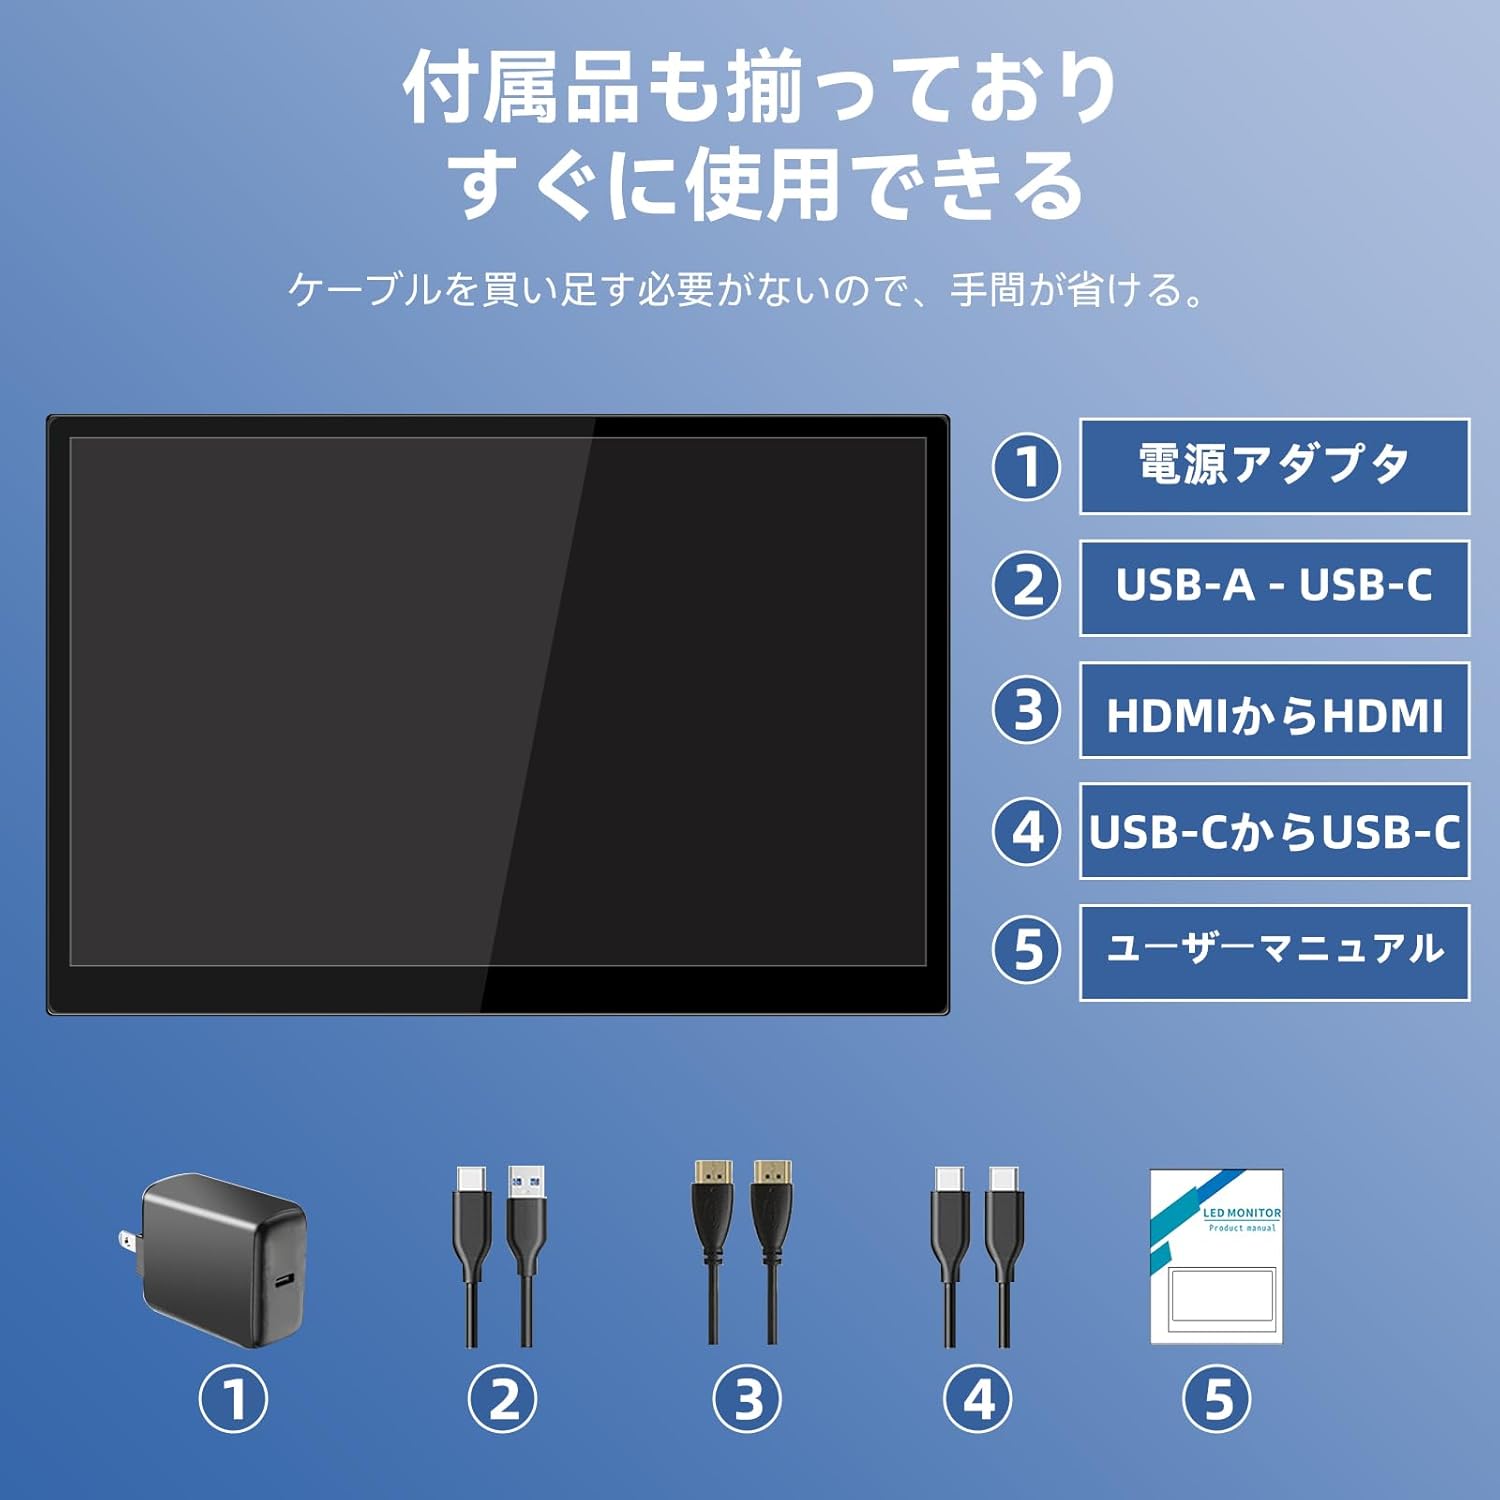
Abbildung 4.1: Detailansicht view of the monitor's interfaces, including audio port, USB-C ports, HDMI port, brightness controls, menu/OK button, volume/down button, and USB-A port.
- 3.5-mm-Audioanschluss: Zum Anschluss von Kopfhörern oder externen Lautsprechern.
- USB-C Port 1 (Full-function): Unterstützt die Übertragung von Strom-, Video- und Berührungssignalen.
- USB-C Port 2 (Full-function): Unterstützt die Übertragung von Strom-, Video- und Berührungssignalen.
- HDMI-Anschluss: For video signal input from devices.
- Brightness Up / Power Button: Short press to increase brightness, long press to power on/off.
- Menu / OK Button: Press to open OSD menu, press again to confirm selection.
- Volume Down / Back Button: Short press to decrease volume, long press to go back in OSD menu.
- USB-A Port (OTG): Zum Anschluss einer Maus oder Tastatur.
5. Einrichtung
Befolgen Sie diese Schritte, um Ihren tragbaren Monitor mit verschiedenen Geräten zu verbinden.
5.1. Single Cable Connection (USB-C)
For devices with a full-function USB-C port (supporting DisplayPort Alternate Mode and power delivery), a single USB-C to USB-C cable can transmit video, audio, touch signals, and power.
- Connect one end of the USB-C to USB-C cable to a full-function USB-C port on your device (e.g., laptop, smartphone).
- Connect the other end to either USB-C Port 1 or USB-C Port 2 on the monitor.
- The monitor should automatically power on and display the content. Touch functionality will also be active.
5.2. Dual Cable Connection (HDMI + USB-C for Power/Touch)
For devices with an HDMI output, or if your USB-C port does not support power delivery, you will need two cables.
- Connect one end of the HDMI to HDMI cable to your device's HDMI output.
- Connect the other end to the HDMI Port on the monitor.
- Connect the power adapter to one of the monitor's USB-C ports (Port 1 or Port 2) for power.
- For touch functionality, connect the USB-A end of the USB-A to USB-C cable to your device's USB-A port, and the USB-C end to the other available USB-C port on the monitor.

Image 5.1: Illustration of different connection methods: single USB-C cable for power, video, and touch, and dual cable setup using HDMI for video and USB-C for power and touch.
6. Bedienungsanleitung
6.1. Ein-/Ausschalten
Long press the Brightness Up / Power Button (5) for approximately 3 seconds to power the monitor on or off.
6.2. Bildschirmmenü (OSD)
Press the Menu / OK Button (6) to access the OSD menu. Use the Brightness Up / Power Button (5) and Volume Down / Back Button (7) to navigate through options. Press the Menu / OK Button (6) to confirm selections. Long press the Volume Down / Back Button (7) to exit the menu.
6.3. Touch-Funktionalität
The monitor supports 10-point capacitive multi-touch. Ensure a USB connection (via full-function USB-C or USB-A to USB-C cable) is established for touch input to work. The touch screen allows for intuitive interaction, including swiping, writing, and annotating.
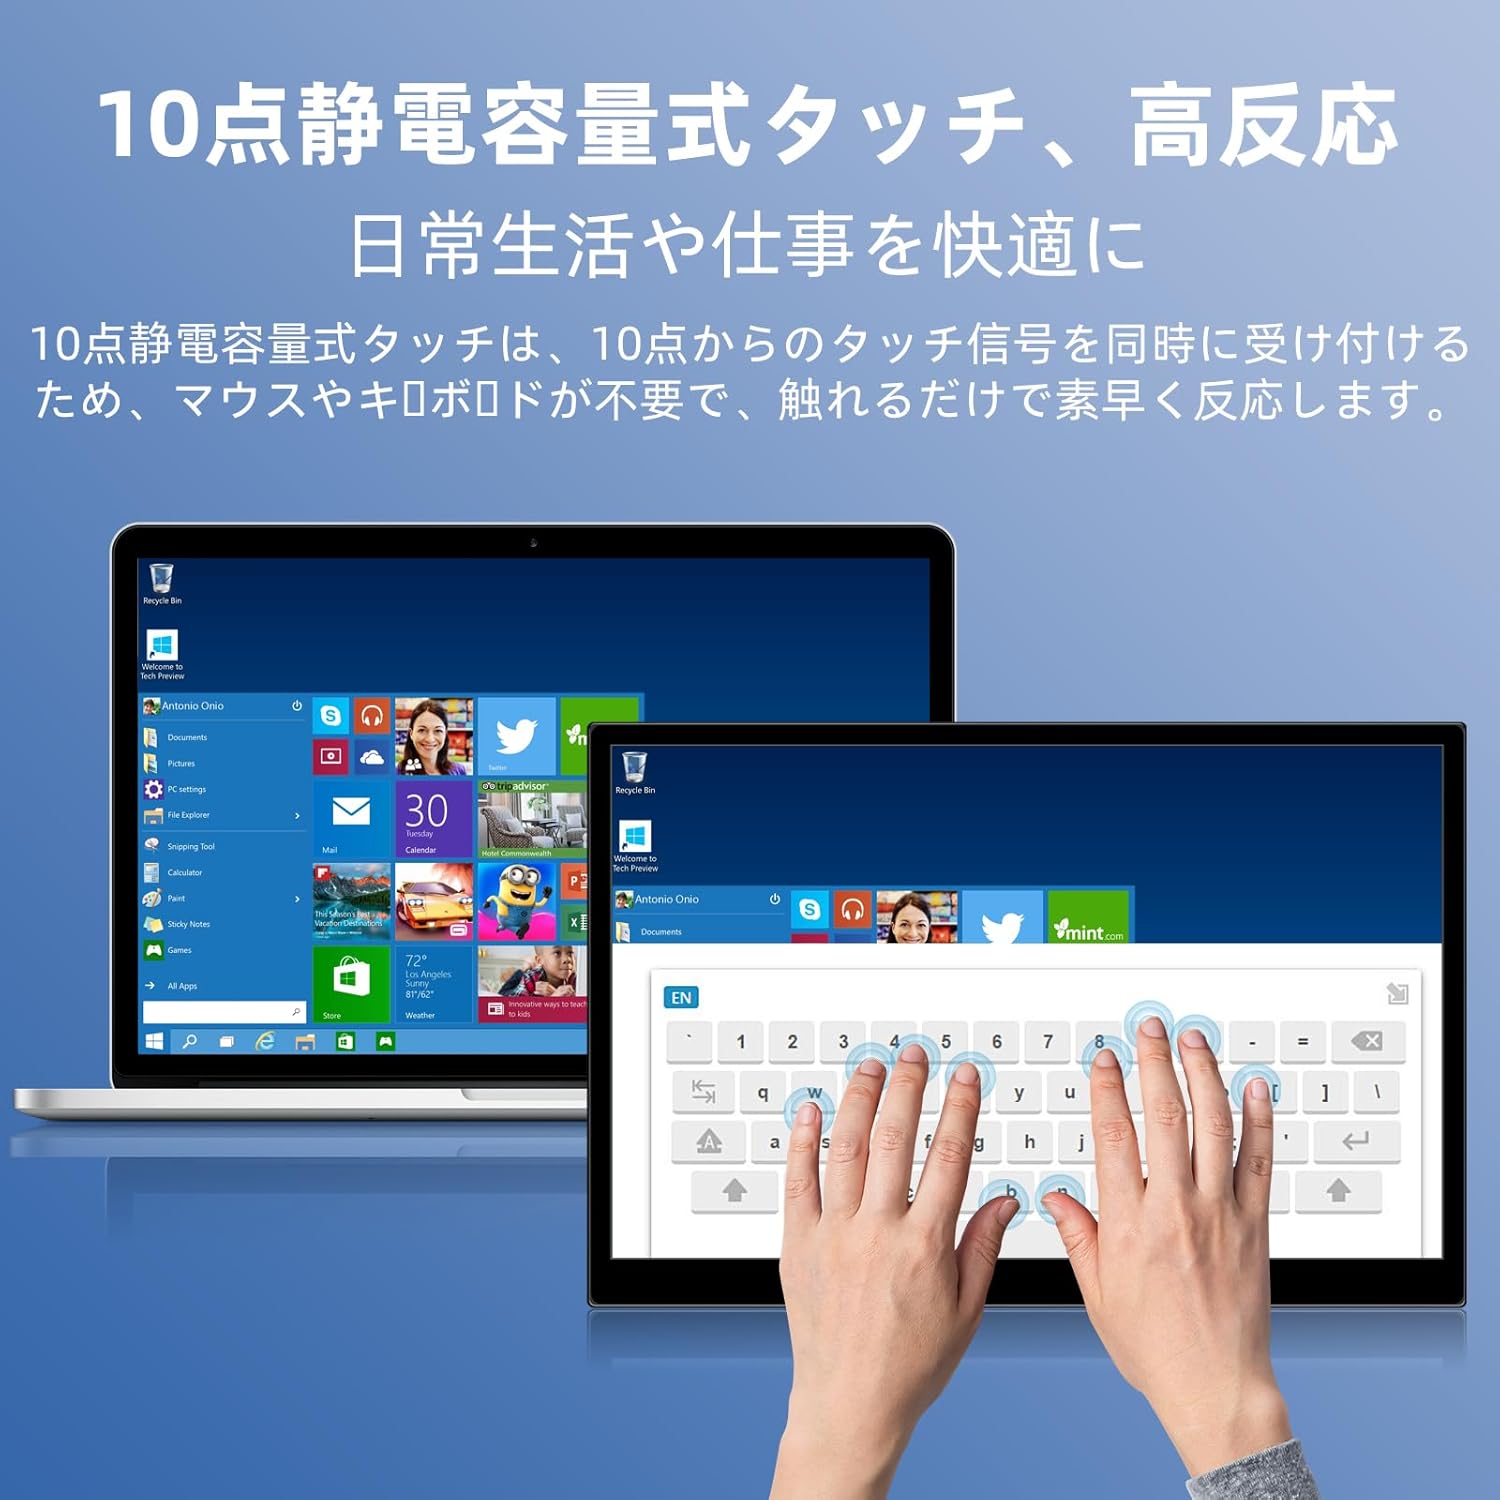
Image 6.1: A user demonstrating the responsive 10-point capacitive touch functionality on the portable monitor, enabling smooth interaction with on-screen content.
6.4. Anzeigemodi
Der Monitor unterstützt verschiedene Anzeigemodi, wenn er an einen Computer angeschlossen ist:
- Duplikat-Modus: Spiegelt den Inhalt Ihres Hauptbildschirms wider.
- Erweiterungsmodus: Erweitert Ihren Desktop und bietet so mehr Bildschirmfläche für Multitasking.
- Zweiter Bildschirmmodus: Verwendet ausschließlich den tragbaren Monitor als Anzeigegerät.
6.5. Bildschirmausrichtung
The monitor supports both landscape and portrait orientations. You can adjust the display settings on your connected device (e.g., Windows Display Settings, macOS Display Preferences) to change the orientation as needed for different tasks like document viewing or design work.
6.6. HDR Technology
The monitor features HDR (High Dynamic Range) mode, which provides deeper and more realistic colors for an enhanced visual experience. This setting can typically be toggled within the OSD menu or your device's display settings.

Abbildung 6.2: Beispielamples of the monitor's versatility, showing its use for entertainment, mobile productivity, and as an extended display for a home office.
7. Wartung
- Reinigen des Bildschirms: Wischen Sie den Bildschirm vorsichtig mit einem weichen, trockenen und fusselfreien Tuch ab. Bei hartnäckigen Flecken leicht andrücken.ampen the cloth with water or a screen-specific cleaner (apply to cloth, not directly to screen).
- Reinigung des Casing: Verwenden Sie ein weiches, trockenes Tuch, um den Monitor abzuwischen.asing. Vermeiden Sie scheuernde Reinigungsmittel.
- Lagerung: Bei längerer Nichtbenutzung sollte der Monitor an einem kühlen, trockenen Ort aufbewahrt werden, vorzugsweise in der Originalverpackung oder einer Schutzhülle.
- Kabelmanagement: Um Beschädigungen zu vermeiden, sollten Kabel nicht übermäßig gebogen oder verdreht werden.
8. Fehlerbehebung
| Problem | Mögliche Ursache | Lösung |
|---|---|---|
| Keine Anzeige / Meldung „Kein Signal“ | Falsche Kabelverbindung, unzureichende Stromversorgung, falsche Eingangsquelle. | Ensure cables are securely connected. Verify the device's USB-C port supports video output. Connect the power adapter if using HDMI or if USB-C power is insufficient. Check OSD menu for correct input source. |
| Touch-Funktion funktioniert nicht | No USB connection for touch, driver issue (rare). | Ensure the USB-C cable is full-function or that the USB-A to USB-C cable is connected for touch data. Restart the monitor and connected device. |
| Bildschirm flackert | Unstable power, faulty cable, refresh rate mismatch. | Use the provided power adapter. Try a different cable. Adjust the refresh rate in your device's display settings. |
| Image is distorted or stretched | Incorrect aspect ratio settings. | Adjust the aspect ratio in the OSD menu or your device's display settings to match the monitor's native resolution (1920x1200). |

Image 8.1: Demonstrating the importance of correct aspect ratio settings to avoid image distortion.
9. Spezifikationen
| Besonderheit | Spezifikation |
|---|---|
| Marke | Pisichen |
| Modellnummer | 16QTHCM-1200P |
| Bildschirmgröße | 16 Zoll |
| Auflösung | 1920 x 1200 Pixel (FHD) |
| Panel-Typ | IPS |
| Viewing-Winkel | 178° |
| Bildwiederholrate | 60 Hz |
| Kontrastverhältnis | 1000:1 |
| Helligkeit | 300 cd/m² |
| Farbumfang | 100 % sRGB |
| Farbtiefe | 16.7 Millionen Farben |
| Touch-Screen | 10-Punkt-kapazitive Touch-Funktion |
| Konnektivität | 2x Full-function USB-C 3.1, 1x HDMI, 1x USB-A (OTG), 1x 3.5mm Audio Jack |
| HDR-Unterstützung | Ja |
| VESA-Halterung kompatibel | Ja |
| Produktabmessungen (B x H x T) | 350 x 230 x 10 mm |
| Gewicht | 1.62 kg |
10. Garantie und Support
For warranty information and technical support, please refer to the warranty card included in your product package or contact Pisichen customer service through their official website or the retailer where the product was purchased. Please have your model number (16QTHCM-1200P) and purchase details ready when contacting support.


