1. Einleitung
The Phomemo M950 Label Maker is a versatile, portable thermal label printer designed for both home and office use. It offers dual printing modes: direct input via its integrated keyboard and wireless printing via Bluetooth connection to a mobile application. This device utilizes thermal printing technology, eliminating the need for ink cartridges, and supports various label tape types for diverse labeling needs.
2. Sicherheitshinweise
- Keep the device away from water and high humidity to prevent electric shock or damage.
- Versuchen Sie nicht, das Gerät selbst zu zerlegen oder zu reparieren. Wenden Sie sich an den Kundendienst, wenn Sie Hilfe benötigen.
- Use only Phomemo-approved label tapes to ensure optimal performance and prevent damage to the print head.
- Außerhalb der Reichweite von Kindern aufbewahren.
- Vermeiden Sie es, das Gerät direkter Sonneneinstrahlung oder extremen Temperaturen auszusetzen.
- Charge the device using a compatible Type-C USB power adapter.
3. Packungsinhalt
Please check the package contents upon unboxing. If any items are missing or damaged, contact your retailer or Phomemo customer support.
- Phomemo M950 Etikettendrucker
- 12mm Label Tape Roll (pre-installed or included separately)
- USB-Kabel Typ C.
- Benutzerhandbuch (dieses Dokument)
4. Produktüberschreitungview
Familiarize yourself with the components of your Phomemo M950 Label Maker.

Image: Phomemo M950 Label Maker showing its main features including no ink, one-touch key, keyboard editing, app editing, 203 DPI resolution, backlight support, Type-C recharge, and built-in cutter.
Hauptmerkmale:
- Tastatureingabe: Integrated QWERTY keyboard for direct label creation.
- Bluetooth-Konnektivität: Connects to smartphones for advanced label design via the Phomemo app.
- Thermodruck: No ink required, uses thermal label tapes.
- Hintergrundbeleuchteter Bildschirm: Gewährleistet Sichtbarkeit bei schlechten Lichtverhältnissen.
- Eingebauter Cutter: Für sauberes und präzises Etikettenschneiden.
- Wiederaufladbarer Akku: Integrated 1200mAh battery, rechargeable via Type-C port.
5. Einrichtung
5.1. Aufladen des Geräts
Before first use, fully charge the label maker.
- Verbinden Sie das mitgelieferte USB-Typ-C-Kabel mit dem Ladeanschluss an der Seite des Etikettendruckers.
- Verbinden Sie das andere Ende des Kabels mit einem kompatiblen USB-Netzteil (nicht im Lieferumfang enthalten) oder einem USB-Anschluss Ihres Computers.
- Die Ladeanzeigeleuchte zeigt den Ladestatus an. Sobald der Akku vollständig geladen ist, ändert sich die Farbe der Leuchte oder sie erlischt.

Image: Phomemo M950 Label Maker highlighting the Type-C charging port and its compact dimensions.
5.2. Etikettenband einlegen
Ensure the device is powered off before loading or replacing tape.
- Open the tape compartment cover located on the top or back of the device.
- Insert the label tape roll with the label side facing up, ensuring it sits securely in the compartment.
- Feed the end of the label tape through the tape guide until it protrudes slightly from the output slot.
- Schließen Sie den Deckel des Klebebandfachs fest.
5.3. Ein-/Ausschalten
Press and hold the Power button (usually marked with a power symbol) for a few seconds to turn the device on or off.
6. Bedienungsanleitung
The Phomemo M950 offers two primary methods for creating labels.

Image: Phomemo M950 Label Maker illustrating the two usage modes: direct printing from the keyboard and printing via a mobile device using the 'Print Master' app.
6.1. Keyboard Printing
This mode allows you to create labels directly on the device without needing a smartphone.
- Einschalten: Turn on the label maker. The screen will illuminate.
- Type Text: Use the QWERTY keyboard to type your desired label text. The text will appear on the display.
- Anpassen: Use the function keys (e.g., 'Fn', 'Shift', 'Symbol', 'Caps', 'Accent') to access various customization options such as font styles, sizes, symbols, and borders. The device supports multiple languages, borders, and symbols.
- Vorview: Use the 'Preview' button to see how your label will look before printing.
- Drucken: Press the 'Print' button to print the label. The built-in cutter will automatically cut the label after printing.

Image: Phomemo M950 Label Maker showcasing its extensive features including support for 23+ languages, 103+ borders, and 790+ symbols and icons for label customization.
6.2. Bluetooth App Printing
For more advanced design options, connect your label maker to the 'Print Master' mobile app.
- Lade App herunter: Download the 'Print Master' app from your mobile device's app store (App Store for iOS, Google Play for Android).
- Bluetooth aktivieren: Ensure Bluetooth is enabled on your mobile device and the Phomemo M950.
- Verbinden: Open the 'Print Master' app and follow the on-screen instructions to connect to your M950 label maker via Bluetooth.
- Designlabel: Use the app's interface to design your label. The app offers massive templates, additional fonts, borders, and icons.
- Drucken: Once your design is complete, tap the print icon in the app to send the label to the M950 for printing.

Image: Phomemo M950 Label Maker demonstrating the use of the 'Print Master' app with numerous templates, 270+ borders, 110+ fonts, 1500 icons, and 14+ languages for creative label design.
6.3. Anpassen der Druckdichte
For optimal print quality, especially with ribbon tapes, adjust the print density.
- Press the 'Fn' key, then select 'Pinter Densities' (Printer Densities).
- Choose 'High' for clearer prints, particularly when using ribbon tapes.

Image: Step-by-step guide on how to set the print density to 'High' on the Phomemo M950 Label Maker for clear prints, especially for ribbon tapes.
7. Wartung
7.1. Reinigung des Druckkopfes
Regular cleaning ensures consistent print quality.
- Turn off the label maker and open the tape compartment.
- Wischen Sie den Druckkopf vorsichtig mit einem weichen, fusselfreien Tuch ab.ampmit Isopropylalkohol gereinigt.
- Allow the print head to dry completely before closing the compartment and powering on the device.
7.2. Tape Storage
Store label tapes in a cool, dry place away from direct sunlight to preserve their quality and adhesive properties.
8. Fehlerbehebung
If you encounter issues with your Phomemo M950, refer to the following common problems and solutions.
| Problem | Mögliche Ursache | Lösung |
|---|---|---|
| Kein Strom | Niedriger Batteriestand; Gerät ausgeschaltet | Charge the device; Press and hold power button to turn on. |
| Schlechte Druckqualität | Print head dirty; Incorrect print density; Low battery | Clean print head; Adjust print density to 'High'; Charge device. |
| Label not feeding | Tape incorrectly loaded; Tape jammed; Out of tape | Re-load tape correctly; Clear any jams; Replace tape roll. |
| Bluetooth-Verbindungsfehler | Bluetooth deaktiviert; Gerät nicht gekoppelt; App-Problem | Ensure Bluetooth is on for both devices; Re-pair in app; Restart app/device. |
| Cutter funktioniert nicht | Tape jammed; Cutter mechanism obstructed | Clear any tape jams; Ensure no debris is blocking the cutter. |
9. Spezifikationen
| Besonderheit | Detail |
|---|---|
| Modellname | M950 |
| Marke | Phomemo |
| Drucktechnologie | Thermal |
| Konnektivitätstechnologie | Bluetooth, Keyboard |
| Druckerausgabe | Einfarbig |
| Maximale Druckauflösung | 203 dpi |
| Max. Mediengröße | 12 mm * 4000 mm |
| Kompatible Geräte | Smartphones |
| Leistung | 10 Watt |
| Akku-Typ | Eingebaute 1200 mAh Lithium-Ionen |
| Ladeanschluss | USB Typ C |
| Technische Daten | 15.2 x 5.4 x 11.2 cm |
| Artikelgewicht | 490 Gramm |
| Farbe | Weiß |
| Besonderheit | Portable, Backlight Screen, Built-in Cutter |
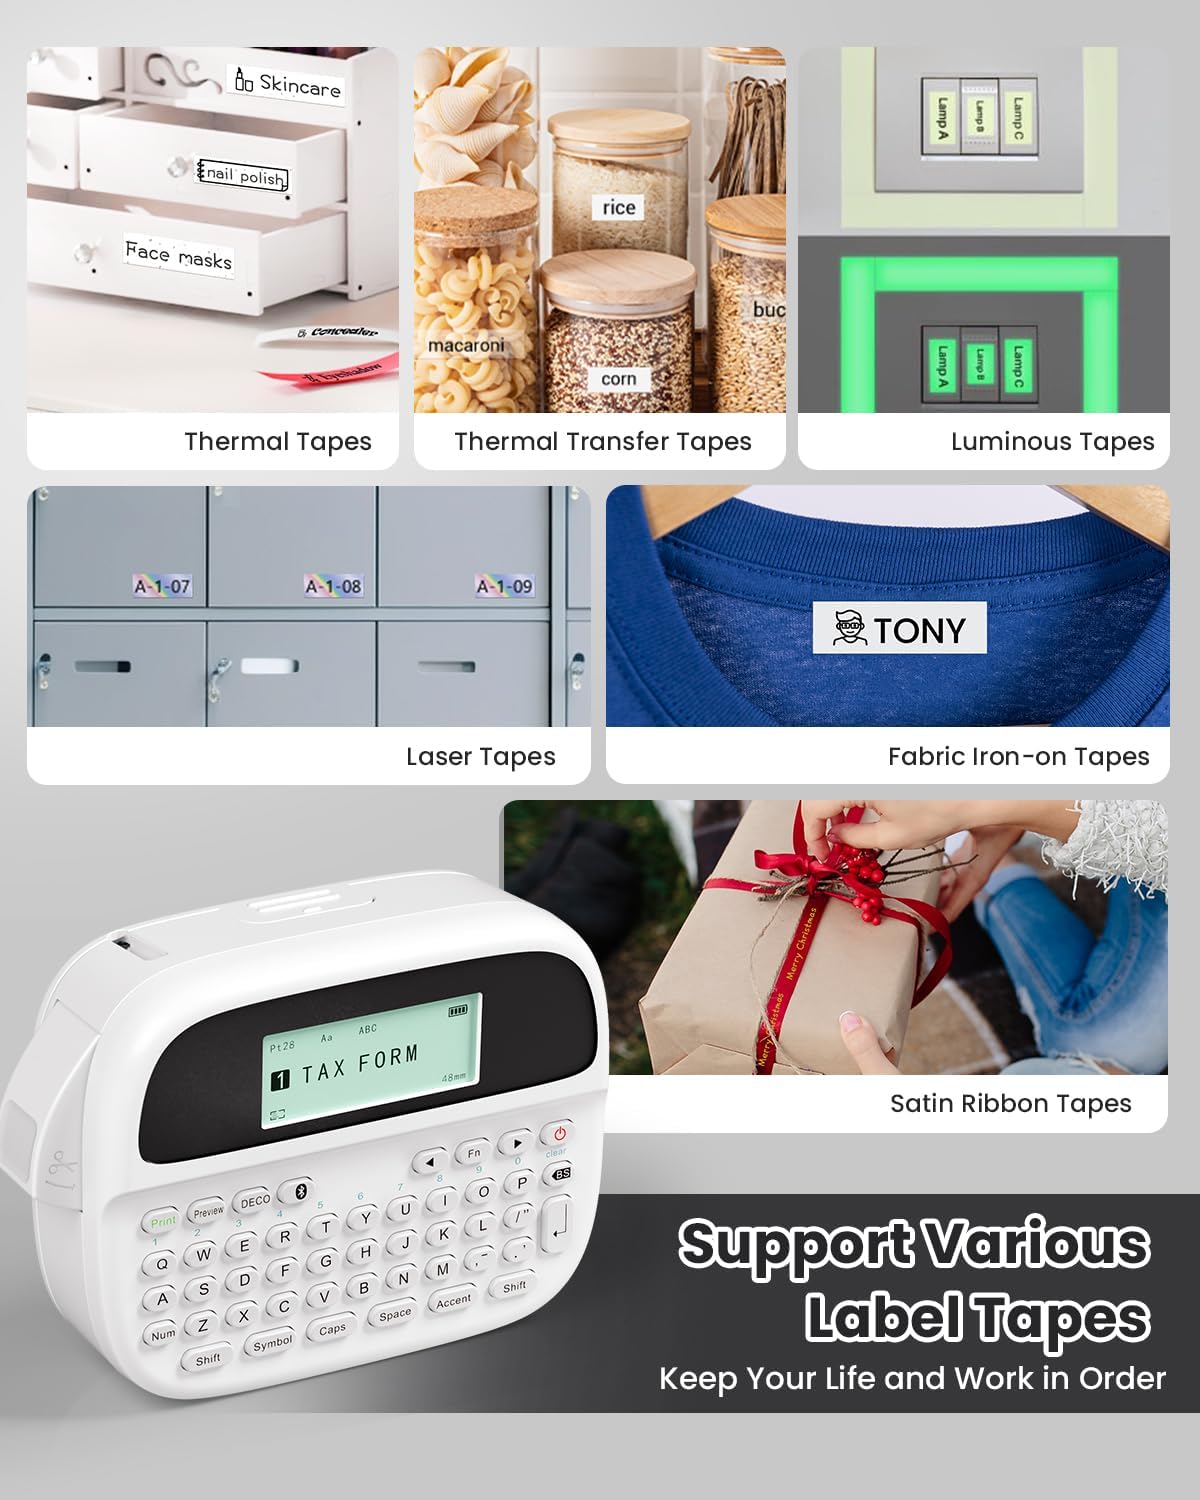
Image: Phomemo M950 Label Maker supporting various label tape types including Thermal, Thermal Transfer, Luminous, Laser, Fabric Iron-on, and Satin Ribbon tapes.

Image: Phomemo M950 Label Maker demonstrating its backlight screen feature, allowing for comfortable use even at night.
10. Garantie und Support
Informationen zu Garantie, technischem Support oder Serviceanfragen finden Sie auf der offiziellen Phomemo-Website. webBesuchen Sie die Website oder kontaktieren Sie direkt den Kundenservice. Bewahren Sie Ihren Kaufbeleg als Kaufnachweis für Garantieansprüche auf.
Phomemo Official WebWebsite: Besuchen Sie den Phomemo Store


