1. Einleitung
Thank you for choosing the goobay Digital Timer. This device is designed to help you manage power consumption and enhance home security by automatically switching electrical appliances on and off. It features up to 16 programmable settings (8 ON/OFF pairs), a random mode for anti-burglary protection, and an integrated backup battery to retain settings during power outages.
Bitte lesen Sie diese Bedienungsanleitung vor Gebrauch sorgfältig durch, um einen ordnungsgemäßen Betrieb und die Sicherheit zu gewährleisten.
2. Sicherheitshinweise
- Nur für den Innenbereich geeignet. Vor Feuchtigkeit und extremen Temperaturen schützen.
- Do not exceed the maximum load of 3680 W (230 V AC, 16 A).
- Das Gerät darf nicht auseinandergenommen oder repariert werden. Alle Wartungsarbeiten dürfen nur von qualifiziertem Fachpersonal durchgeführt werden.
- Stellen Sie sicher, dass der Timer fest an eine geerdete Steckdose angeschlossen ist.
- Außerhalb der Reichweite von Kindern aufbewahren.
- Unplug the timer from the wall outlet before cleaning. Clean only with a dry cloth.
- Do not connect appliances that generate a lot of heat, such as heaters, without supervision.
3. Produktüberschreitungview
The goobay Digital Timer is a compact and efficient device for controlling your electrical appliances.
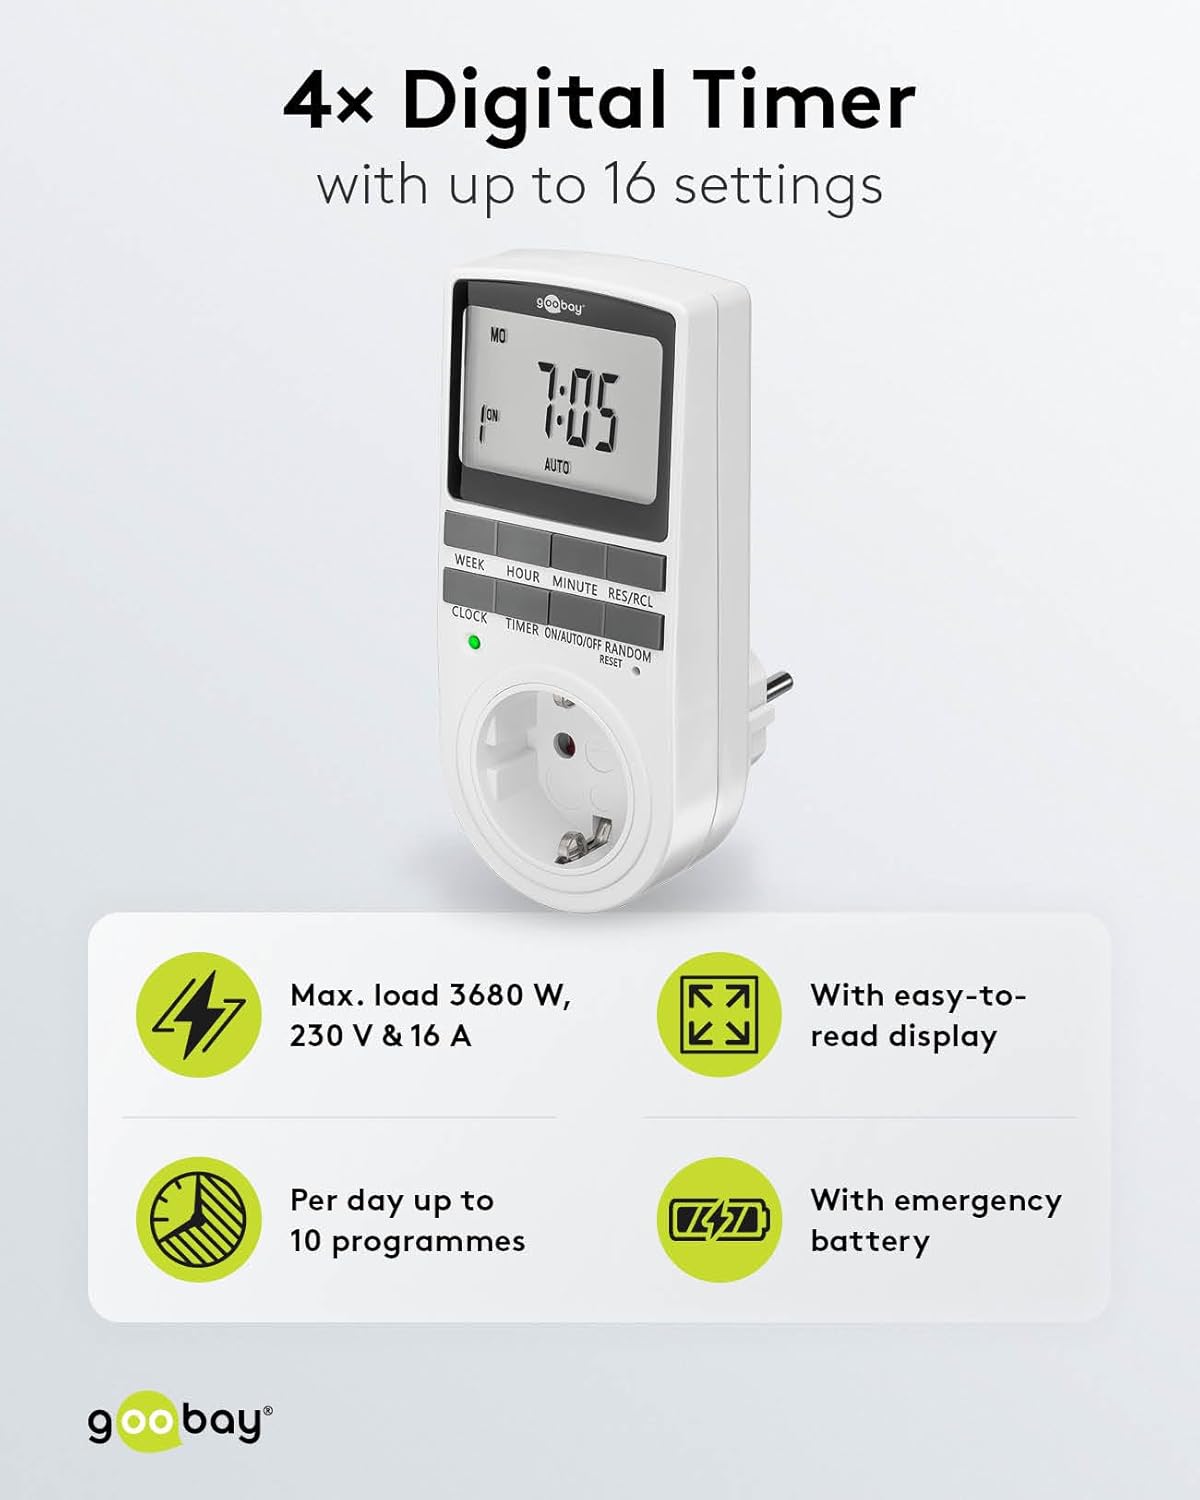
Image: goobay Digital Timer highlighting its features: Max. load 3680 W, 230 V & 16 A; Easy-to-read display; Up to 10 programs per day; Emergency backup battery.
Zu den Hauptmerkmalen gehören:
- Max. Belastung: 3680 W, 230 V & 16 A
- Programmierbare Einstellungen: Up to 8 ON/OFF program pairs (16 individual settings).
- Zufallsmodus: Simulates presence for enhanced security.
- Backup-Batterie: Retains settings for over 100 days during power outages.
- Energieeinsparung: Interrupts standby mode of connected devices.
- Kompaktes Design: Space-saving installation.

Abbildung: Seite view of the goobay Digital Timer showing its compact dimensions: 135 mm height, 60 mm width, 38 mm depth, and 155g weight.
4. Einrichtung
4.1 Erstaufladung
Before first use, plug the timer into a wall outlet for approximately 5-10 minutes to charge the internal backup battery. This ensures the display functions and settings can be retained even when unplugged.
4.2 Zurücksetzen des Geräts
If the display is blank or unresponsive, or if you wish to clear all previous settings, press the ZURÜCKSETZEN button using a small, non-metallic pointed object (e.g., a toothpick or the included reset tool). This will clear all programs and reset the clock.

Image: The goobay Digital Timer showing the LED status display, Reset function (with reset tool), Safety plug (Type F, CEE 7/4, 230V, 16A, 3680W), and Safety socket (Type F, CEE 7/3, 6A, 250V output).
4.3 Einstellen der aktuellen Uhrzeit
- Drücken Sie die UHR Taste.
- Drücken Sie die WOCHE button to select the current day of the week (MO, TU, WE, TH, FR, SA, SU).
- Drücken Sie die STUNDE Taste zum Einstellen der aktuellen Stunde (0-23).
- Drücken Sie die MINUTE Taste zum Einstellen der aktuellen Minute (0-59).
- Drücken Sie die UHR Zum Bestätigen und Verlassen des Zeiteinstellungsmodus erneut drücken.

Image: Close-up of the goobay Digital Timer's display, indicating Weekday, Selected time setting (1-10), Time of day, and Operating mode (On/Auto/Off).
5. Bedienungsanleitung
5.1 Programmierung der Ein-/Ausschaltzeiten
The timer allows for up to 8 ON/OFF program pairs (16 individual settings).
- Drücken Sie die TIMER Zum Aufrufen des Programmiermodus drücken. Im Display erscheint „1 EIN“.
- Drücken WOCHE Um den/die Tag(e) für dieses Programm auszuwählen, stehen folgende Optionen zur Verfügung:
- Individual days (MO, TU, WE, TH, FR, SA, SU)
- Groups of days (MO TU WE TH FR SA SU, MO TU WE TH FR, SA SU, MO TU WE TH FR SA, MO WE FR, TU TH SA, MO TU WE, TH FR SA)
- Drücken STUNDE um die gewünschte Einschaltzeit einzustellen.
- Drücken MINUTE die gewünschte Einschaltzeit einstellen.
- Drücken TIMER Erneut wird im Display „1 AUS“ angezeigt.
- Repeat steps 2-4 to set the desired OFF time for the same program.
- Drücken Sie weiter TIMER to cycle through program settings 2 ON, 2 OFF, up to 8 ON, 8 OFF, setting each as needed.
- Nachdem Sie alle gewünschten Programme eingestellt haben, drücken Sie die Taste UHR Taste zum Verlassen des Programmiermodus und zur Rückkehr zur aktuellen Zeitanzeige.

Image: Diagram illustrating the functions of the goobay Digital Timer's buttons: WEEK (Set weekday), HOUR (Set hours), MINUTE (Set minutes), RES/RCL (Delete or restore setting), CLOCK (Set different times of day), TIMER (Switch set times), ON/AUTO/OFF (Manual or automatic mode), RANDOM (Random mode).
5.2 Operating Modes (ON/AUTO/OFF)
Drücken Sie die EIN/AUTO/AUS Taste zum Durchschalten der Betriebsmodi:
- AUF: The connected appliance will remain continuously ON, overriding all programmed settings.
- WAGEN: The connected appliance will operate according to the programmed ON/OFF times. This is the standard operating mode for scheduled tasks.
- AUS: The connected appliance will remain continuously OFF, overriding all programmed settings.
5.3 Zufallsmodus
The random mode is designed to simulate presence for security purposes. When activated, the timer will switch ON and OFF at random intervals between 6:00 PM and 5:30 AM.
- Stellen Sie sicher, dass der Timer eingeschaltet ist. AUTO Modus.
- Drücken Sie die ZUFÄLLIG button to activate or deactivate this mode. An "R" will appear on the display when random mode is active.
5.4 Sommerzeit (DST)
Um die Sommerzeit einzustellen, drücken Sie die STUNDE Und MINUTE buttons simultaneously while in UHR mode. The time will advance or rewind by one hour. Repeat to revert.
6. Wartung
- Reinigung: Unplug the timer from the wall outlet before cleaning. Wipe the exterior with a soft, dry cloth. Do not use liquid cleaners or sprays.
- Lagerung: If storing the timer for an extended period, ensure the backup battery is charged periodically to maintain its functionality.
- Backup-Batterie: The integrated backup battery is designed to retain settings for over 100 days. No user maintenance is required for the battery.
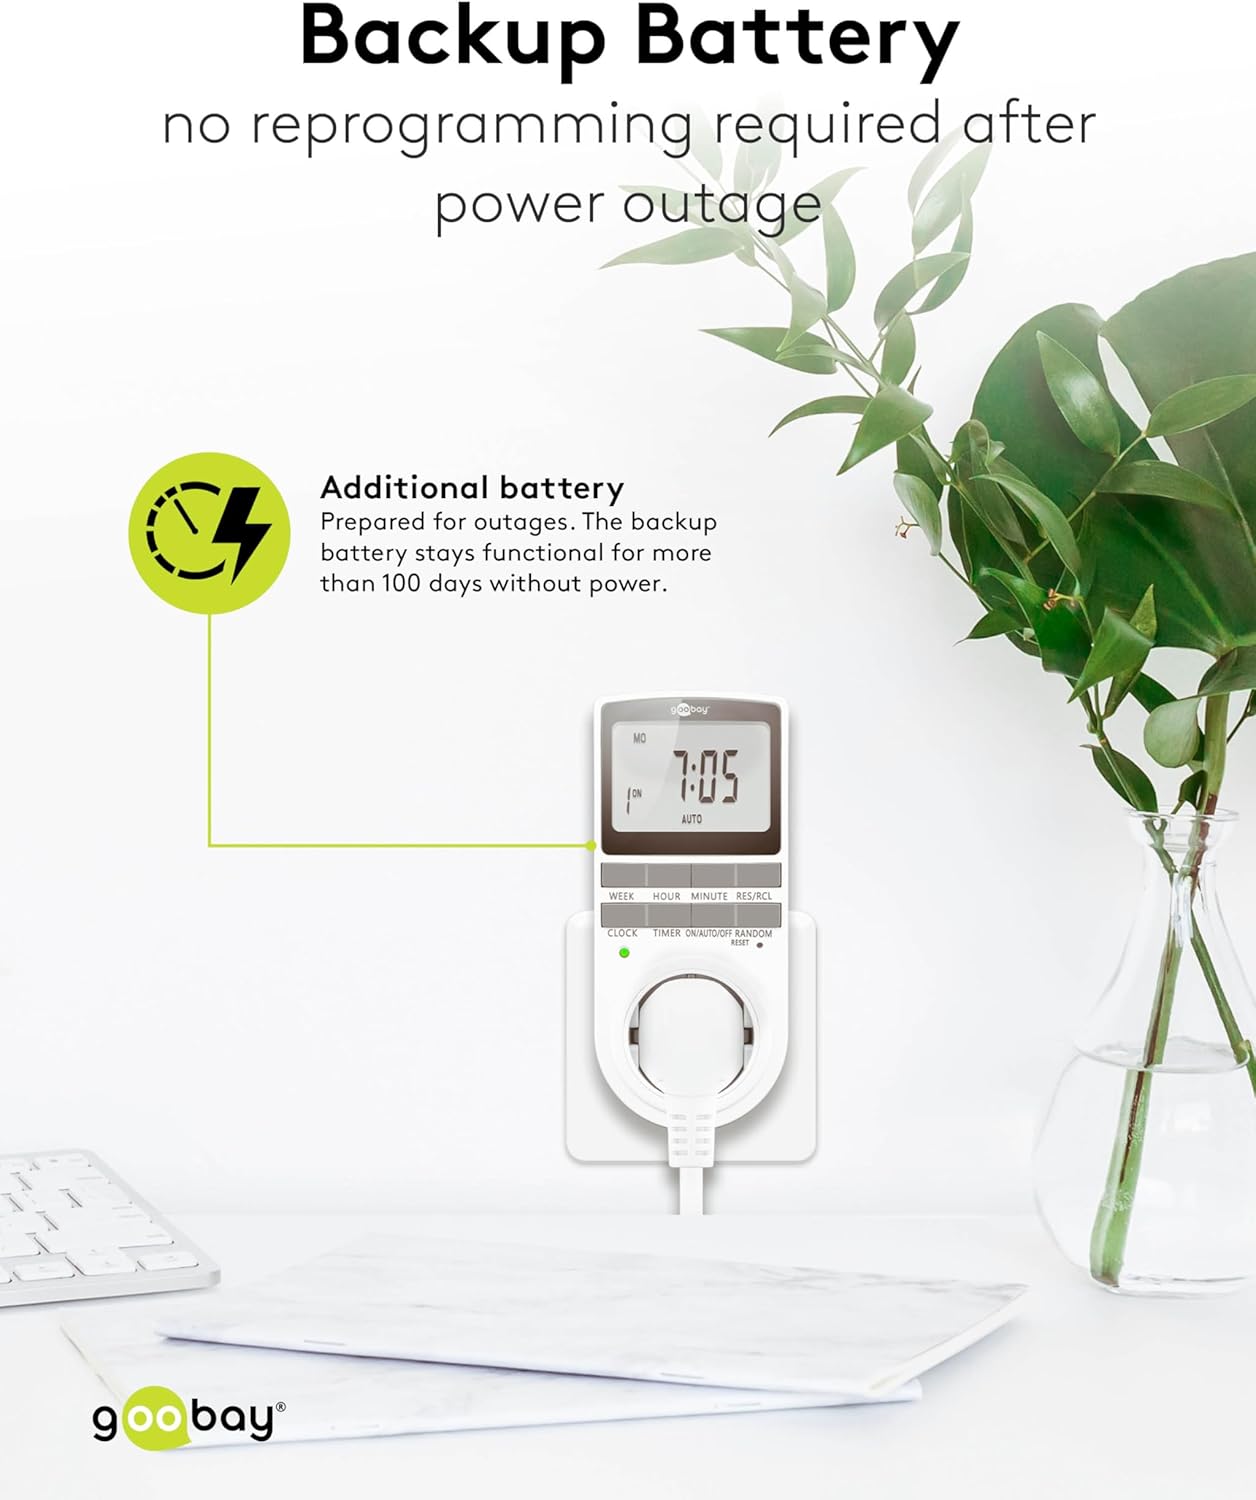
Image: The goobay Digital Timer plugged into an outlet, illustrating the backup battery feature which prevents reprogramming after a power outage.
7. Fehlerbehebung
| Problem | Mögliche Ursache | Lösung |
|---|---|---|
| Das Display ist leer oder reagiert nicht. | Backup battery is depleted or device needs reset. | Plug the timer into a live outlet for 5-10 minutes to charge the battery. If still unresponsive, press the ZURÜCKSETZEN Taste. |
| Das Gerät schaltet sich zu den programmierten Zeiten nicht ein/aus. | Der Timer ist nicht aktiv. AUTO mode, programs are incorrect, or appliance is faulty. | Stellen Sie sicher, dass der Timer auf eingestellt ist. AUTO mode. Verify programmed ON/OFF times. Check if the connected appliance works when plugged directly into the wall outlet. |
| Random mode is not working. | Der Timer ist nicht aktiv. AUTO mode or random mode is not activated. | Stellen Sie sicher, dass der Timer eingeschaltet ist. AUTO Modus. Drücken Sie die ZUFÄLLIG button to activate it (an "R" should appear on the display). |
| Die Uhrzeit ist nach einem Stromausfall falsch.tage. | Backup battery is depleted or was not charged sufficiently. | Plug the timer into a live outlet for at least 10 minutes to fully charge the backup battery. Reset and reprogram if necessary. |
8. Spezifikationen
| Marke: | Goobay |
| Modellnummer: | 74217 |
| Farbe: | Weiß |
| Material: | Acrylnitril-Butadien-Styrol-Kunststoff |
| Produktabmessungen (L x B x H): | 7.6 x 6 x 13.5 cm |
| Artikelgewicht: | 155 g |
| Versorgungsvolumentage: | 230 V (Wechselstrom) |
| max. Schaltleistung: | 3680 Watt |
| Max. Strom: | 16.0 A |
| Anzahl der Einstellungen: | 16 (8 ON/OFF program pairs) |
| Schutzklasse: | IP20 |
| Schutzklasse: | I |
| Ursprungsland: | China |
9. Garantie und Support
Specific warranty information is not provided within this manual. For details regarding warranty coverage, technical support, or service, please refer to the official goobay webWebsite oder wenden Sie sich an Ihren Händler.
You can often find additional resources and contact information on the manufacturer's webWebsite: www.goobay.com