1. Einleitung
This manual provides detailed instructions for the installation, operation, and maintenance of your Compustar CS8920-AS All-in-One 2-Way Interactive LCD Remote Starter Kit & Alarm System. Please read this manual thoroughly before using the product to ensure proper function and safety.
2. Hauptmerkmale
- Up to 3,000-FT Max Range: Control your vehicle from a significant distance.
- 2-Way Interactive LCD Remote: Receive visual and audible confirmation of commands and vehicle status.
- All-in-One System: Combines remote start, security, and keyless entry functionalities.
- Advanced Security: Includes CM900-AS control module, dual-stage shock sensor, tilt sensor, siren, and LED for comprehensive vehicle protection.
- Climate Control: Pre-set vehicle temperature for comfort upon entry.
- Diesel Engine Safe: Compatible with diesel engines, including a diesel timer.
- Smartphone Control Ready: Compatible with optional DRONE Module for smartphone integration.
3. Enthaltene Komponenten
The Compustar CS8920-AS kit includes the following components:
- CM900-AS: Remote Start & Security Control Module
- 2WQ9R-FM: 2-Way Q9 LCD Remote
- 1WG17R-FM: 1-Way G17 FM Remote (backup)
- Shock Sensor II: Dual-Stage Impact and Tilt Sensor
- Theft-Deterrent LED: Blue Security LED
- Alarm Siren: 105+db Alarm Siren
- ANT-2WFMX Antenna

Bild: Überview of the Compustar CS8920-AS kit components, including the main 2-way LCD remote, the 1-way backup remote, the CM900-AS control module, and other accessories.
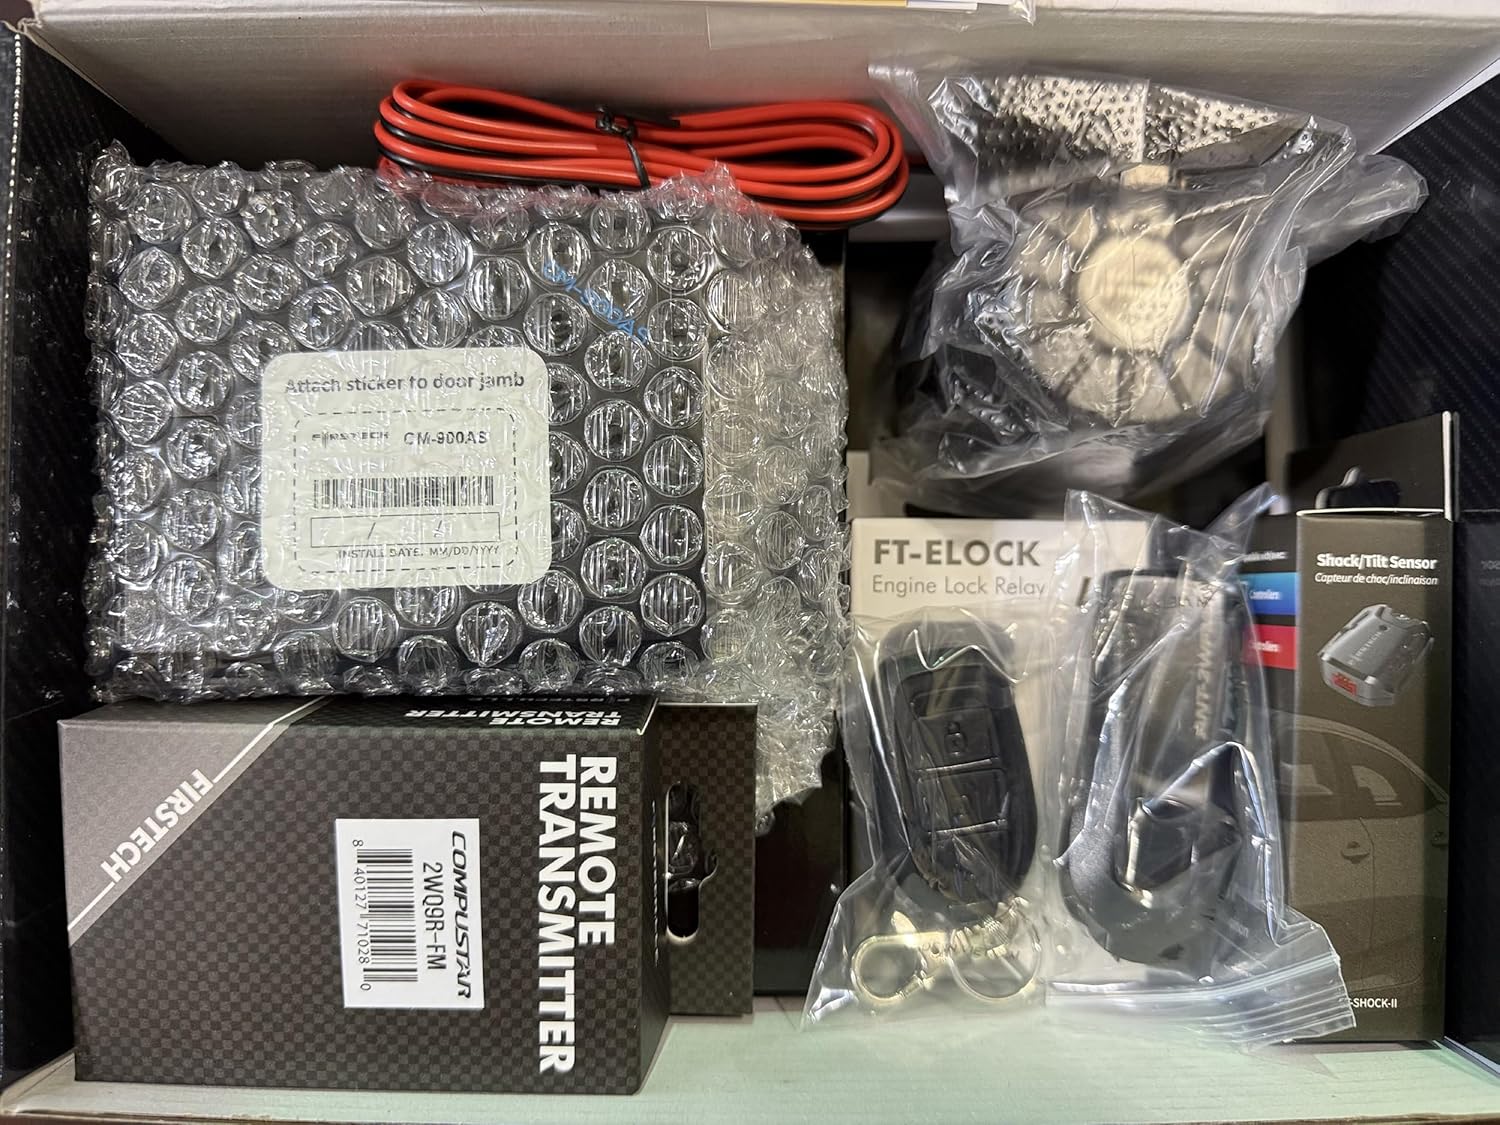
Image: The Compustar CS8920-AS kit contents neatly packaged within the product box, showing the various modules, remotes, and wiring.
4. Einrichtung und Installation
Eine professionelle Installation wird dringend empfohlen for the Compustar CS8920-AS system. Wiring diagrams and detailed installation instructions are not included in this manual and should be obtained by a certified installer. The system is designed for automatic transmission vehicles only.
4.1. Blade Module Flashing and Firmware Update
Before installation, the Blade module and Compustar controller may require flashing and firmware updates. Follow these steps:
- Ein Konto erstellen: Register an account on compustar.idatalink.com. It is recommended to use Internet Explorer and allow ActiveX if prompted.
- Komponenten sammeln: You will need a computer, an ADS-USB cable, your Compustar Controller (CM900-AS), and the Blade AL module.
- Dock Blade Module: Insert the Blade module into the designated slot on your Compustar Controller.
- Connect ADS-USB: Plug the ADS-USB cable into a USB port on your computer.
- Controller anschließen: Use the cable labeled "Idatalink module" to connect the ADS-USB to the black RS-232 data port on the Compustar Controller.
- Zugang Weblink Updater: Launch Internet Explorer and navigate to compustar.idatalink.com. Click "Flash Your Module".
- Fahrzeugauswahl: Once the hardware is detected, select the year, make, and model of your vehicle.
- Configure/Flash: You can either configure specific features for the Blade module or select "Flash" to load default settings.
- Installationsanleitung herunterladen: The site will provide an appropriate installation guide for your vehicle, available for download.
- Update Remote Starter Firmware: While the controller is still plugged in, select the "Remote Starter" tab to configure features like remote start runtime, programmable outputs, or update the controller's firmware if available.
Video: This video demonstrates the process of flashing and updating the Blade module and Compustar controller firmware using the iDatalink Weblink Updater. It covers creating an account, connecting the hardware, selecting vehicle details, and flashing the module.

Image: Close-up of the Compustar CM900-AS control module, highlighting the slot where the Blade AL module is inserted for programming and integration.
5. Bedienungsanleitung
5.1. 2-Way LCD Remote Operation (2WQ9R-FM)
The 2WQ9R-FM remote provides interactive feedback on your vehicle's status.
- Verriegelung: Press the lock button once to arm the system and lock the doors. The remote will provide visual and audible confirmation. Pressing it again will confirm the armed status.
- Entsperren: Press the unlock button once to disarm the system and unlock the doors. Depending on configuration, it may unlock only the driver's door first, then all doors with a second press. The remote will confirm the action.
- Ferngesteuerter Start: Press and hold the "Engine Start/Stop" button for approximately 2 seconds. The remote will display "Remote Start" and provide confirmation once the vehicle has started. For diesel vehicles, there may be a pre-heat delay.
- Remote Stop: While the vehicle is remote started, press and hold the "Engine Start/Stop" button to shut down the engine.
- Status prüfen: Tap the "Engine Start/Stop" button once (do not hold) to check the vehicle's current status, including door lock status, temperature, and remaining runtime.
- Changing Features: To access remote features (e.g., valet mode, AUX functions), tap the function button twice. Use the lock/unlock buttons to navigate and the function button to select. Hold the function button to exit.
Video: This video demonstrates the basic operation of the Compustar 2WQ9R-FM 2-Way LCD remote, including locking, unlocking, remote starting, remote stopping, and navigating through its feature menu.

Image: The Compustar 2-way LCD remote (2WQ9R-FM) alongside the 1-way backup remote (1WG17R-FM), showcasing their design and relative sizes.

Image: A hand holding the Compustar 2-way remote inside a car, with the remote's LCD screen displaying vehicle status and temperature.
5.2. Climate Control and Comfort
The remote start system allows you to pre-set your vehicle's climate control for optimal comfort.
- Voreingestellte Temperatur: Before exiting your vehicle, set your climate control system to the desired temperature. When remote started, the system will activate the climate control to reach this setting.
- Warm-up/Cool-down: Utilize the remote start feature to warm up your vehicle in cold weather or cool it down in hot weather, ensuring a comfortable cabin before you enter.
Video: This video highlights the convenience of using Compustar remote starters to warm up or cool down your vehicle to a desired temperature before entry, enhancing comfort in various weather conditions.

Image: Visual representation of the Compustar remote start system's ability to provide comfort by pre-heating or pre-cooling the vehicle's interior.
5.3. Smartphone Control (Optional)
The system is compatible with the optional DRONE Module, allowing for smartphone control of remote start, lock, unlock, and other features. Refer to the DRONE Module's specific instructions for setup and operation.
6. Wartung
To ensure the longevity and optimal performance of your Compustar system:
- Austausch der Fernbedienungsbatterie: The 2WQ9R-FM remote uses AAA batteries. Replace them when the low battery indicator appears on the LCD screen. The 1WG17R-FM uses nonstandard batteries; refer to its specific instructions for replacement.
- Systemprüfungen: Periodically test all functions (remote start, lock, unlock, alarm) to ensure they are working correctly.
- Professionelle Inspektion: Consider having your system professionally inspected annually to ensure all components are functioning optimally and firmware is up-to-date.
7. Fehlerbehebung
If you experience issues with your Compustar system, consider the following common solutions:
- Fernbedienung reagiert nicht: Check the remote's battery level. Replace batteries if low. Ensure you are within the 3,000-FT range.
- Fernstartfehler: Ensure all doors, hood, and trunk are securely closed. Check if the vehicle's gear selector is in Park. Verify that the vehicle's battery is charged.
- Alarmauslösung unerwartet: Die Dual-stage shock sensor and tilt sensor are sensitive. Ensure the vehicle is parked in a stable location. If false alarms persist, consult your installer for sensitivity adjustment.
- No Confirmation on 2-Way Remote: Ensure the remote has sufficient battery power and is within range. Obstructions can interfere with 2-way communication.
- Systemstörung: For complex issues, it is best to consult a professional Compustar installer. Attempting to diagnose or repair complex electrical systems without proper training can cause damage.
8. Spezifikationen
| Besonderheit | Detail |
|---|---|
| Steuermodul | CM900-AS |
| Antenne | ANT-2WFMX |
| Maximale Reichweite | 3000 FUSS |
| Kommunikationsmethode | Frequency Modulation (FMX) |
| 2-Way Remote (LCD) | 2WQ9R-FM (AAA Battery) |
| 1-Way Remote (Backup) | 1WG17R-FM (Nonstandard Battery) |
| Sicherheitsfunktionen | Dual-Stage Impact and Tilt Sensor (Shock Sensor II), Blue Security LED, 105+db Alarm Siren |
| Fernstartfunktionen | Adjustable Runtime, Anti-Grind, Cold/Hot Start, Diesel-Engine Safe / Diesel Timer, Low Battery Start, Temperature Start, Timer Start, Turbo Timer, 24 Hour Repeat w/ Cold Starting |
| Alarmfunktionen | Auxiliary Sensor Port, Door Triggers, Hood Trigger, Trunk Triggers, Arm/Disarm OEM Alarm, Trunk Status Output |
| Besondere Merkmale | 128-bit encryption, Idatalink Blade-AL Compatible, Drone Compatible (X1 not included) |
| Stromquelle | Festverdrahtet mit Batterie-Backup |
| Bandtage | 12 Volt |
| Abmessungen (L x B x H) | 10.5 x 7 x 3.5 Zoll |
| Gewicht | 2.53 Pfund |

Image: A diagram illustrating the key features of the Compustar CS8920-AS system, including 2-way communication, 3000-ft range, alarm siren, security sensor, tilt sensor, and 1-year warranty.
9. Garantieinformationen
The remotes included in this kit (2WQ9R-FM and 1WG17R-FM) come with a 1-Year Compustar Warranty. For detailed warranty terms and conditions, please refer to the official Compustar webWebsite oder wenden Sie sich an den Kundendienst.
10. Unterstützung und Kontakt
For technical support, product inquiries, or to locate an authorized installer, please visit the official Compustar website or contact their customer service. Professional assistance is recommended for any installation or complex troubleshooting.
- Offiziell WebWebsite: www.compustar.com
- iDatalink Support: compustar.idatalink.com (for module flashing and firmware)