1. Einleitung
Thank you for choosing the Olayks OLK-CG206 Conical Burr Coffee Grinder. This electric grinder is designed to provide precise and consistent coffee grounds for various brewing methods, from fine espresso to coarse French press. Featuring 48 adjustable grind settings, an electronic timer, and anti-static technology, it aims to enhance your coffee preparation experience. Please read this manual thoroughly before use to ensure proper operation and maintenance.

Image 1.1: The Olayks OLK-CG206 Conical Burr Coffee Grinder, showcasing its sleek design and integrated portafilter holder.
2. Sicherheitshinweise
- Lesen Sie alle Anweisungen, bevor Sie das Gerät in Betrieb nehmen.
- Tauchen Sie die Motorbasis nicht in Wasser oder andere Flüssigkeiten.
- Ziehen Sie den Stecker aus der Steckdose, wenn Sie das Gerät nicht verwenden, bevor Sie Teile zusammenbauen oder auseinandernehmen und bevor Sie es reinigen.
- Vermeiden Sie den Kontakt mit beweglichen Teilen.
- Betreiben Sie kein Gerät, dessen Kabel oder Stecker beschädigt ist, oder wenn das Gerät eine Fehlfunktion aufweist oder auf sonstige Weise beschädigt wurde.
- Die Verwendung von Zubehör, das vom Hersteller nicht empfohlen oder verkauft wird, kann zu Bränden, Stromschlägen oder Verletzungen führen.
- Nicht im Freien verwenden.
- Lassen Sie das Kabel nicht über die Kante eines Tisches oder einer Theke hängen und berühren Sie keine heißen Oberflächen.
- Ensure the bean hopper lid is securely in place before operating.
- Dieses Gerät ist nur für den Hausgebrauch bestimmt.
3. Produktüberschreitungview
Komponenten
- Bohnenbehälter mit Deckel
- Upper Conical Burr
- Grind Setting Adjustment Ring
- Motor Base with Lower Burr
- Digital Display and Control Panel (Cup/Start-Stop/Time buttons)
- Ground Coffee Outlet
- Siebträgerhalter
- Dosierbecher
- Reinigungsbürste

Bild 3.1: Überview of the Olayks OLK-CG206 coffee grinder, including its compact dimensions (7.68 inches wide, 4.41 inches deep, 11.69 inches high).
4. Einrichtung
- Auspacken und Reinigen: Carefully remove all packaging materials. Wash the bean hopper, hopper lid, and dosing cup with warm, soapy water. Rinse thoroughly and dry completely. Wipe the exterior of the motor base with a damp Tuch.
- Assemble the Bean Hopper: Align the icon (triangle) at the bottom of the bean hopper with the icon on the main body of the grinder. Turn the hopper clockwise to lock it securely into place. Ensure it is firmly seated to prevent accidental detachment during operation.
- Mahlgrad einstellen: Rotate the grind setting adjustment ring on the bean hopper to select your desired grind size. The settings range from 1 (finest) to 48 (coarsest). Refer to the 'Operating Instructions' section for recommended settings for different brewing methods.
- Kaffeebohnen hinzufügen: Pour whole coffee beans into the bean hopper. Do not overfill. Replace the hopper lid securely.

Image 4.1: Step 1 - Aligning the bean hopper with the main body and locking it into position.

Image 4.2: Step 2 - Adjusting the grind size by rotating the ring on the bean hopper.

Image 4.3: Step 3 - Adding whole coffee beans into the bean hopper before grinding.
5. Bedienungsanleitung
5.1 Mahlgradeinstellungen
The Olayks OLK-CG206 offers 48 precise grind settings to accommodate various coffee brewing methods. The grind size is adjusted by rotating the bean hopper. Finer settings are suitable for espresso, while coarser settings are ideal for French press.
- Espressokaffee: Settings 0-8 (Very Fine)
- Moka-Kanne: Settings 8-24 (Fine to Medium-Fine)
- Drip Coffee: Einstellungen 24-36 (Mittel)
- Französische Presse: Settings 36-48 (Coarse)

Image 5.1: Visual representation of the 48 grind settings for different coffee brewing methods.

Image 5.2: Detailed chart illustrating grind settings for Espresso, Moka Pot, Drip Coffee, and French Press.
5.2 Digital Timer and Cup Selection
The grinder features an LED control panel with touch switches for easy operation. You can select grinding by cup quantity or by time.
- Tassenauswahl: Press the 'Cup' button to cycle through 1-12 cups. The grinder will automatically grind the appropriate amount for the selected number of cups.
- Timer-Auswahl: Press the 'Time' button to adjust the grinding duration. You can set the grind time from 0.5 to 40 seconds in 0.5-second increments. This allows for consistent dosing.

Image 5.3: Close-up of the digital display and touch control panel for cup and time selection.

Image 5.4: Illustration of the digital timer and cup selection functionality.
5.3 Mahlprozess
- Prepare for Grinding: Choose your preferred method for collecting ground coffee: either place your 50-58mm portafilter directly into the holder or position the included dosing cup under the ground coffee outlet.
- Beginnen Sie mit dem Schleifen: Once the grind setting and desired quantity (cups or time) are selected, press the 'Start/Stop' button to begin grinding. The grinder will automatically stop once the selected duration or quantity is reached.

Image 5.5: Step 4 - Positioning the dosing cup or portafilter under the ground coffee outlet.

Image 5.6: Step 5 - Pressing the 'Start/Stop' button to initiate grinding after setting the time or cup quantity.
5.4 Using the Portafilter Holder and Dosing Cup
The grinder is designed for versatility, allowing direct grinding into a portafilter or the included dosing cup.
- Siebträger: The adjustable portafilter holder is compatible with 50-58mm espresso portafilters. Simply place your portafilter in the holder before grinding.
- Dosierbecher: For other brewing methods or for transferring grounds, use the 20g capacity dosing cup.

Image 5.7: The grinder configured for direct grinding into a portafilter (left) and into the dosing cup (right).

Image 5.8: Demonstrating the dual-purpose design for grinding into a portafilter or dosing cup.
How to Use the Dosing Cup:
- Turn the coffee stand upside down and tighten the dosing cup onto it.
- Pour the ground coffee from the dosing cup into your brewing device.

Image 5.9: Visual guide for using the dosing cup to collect and transfer ground coffee.
6. Reinigung und Wartung
Regelmäßige Reinigung gewährleistet optimale Leistung und verlängert die Lebensdauer Ihrer Kaffeemühle.
6.1 Anti-Static Technology
This grinder incorporates anti-static technology to minimize coffee grounds scattering and keep your workspace clean. The 20° sliding powder channel also helps reduce residual powder.

Image 6.1: Demonstrating the anti-static technology, which prevents coffee grounds from splashing.
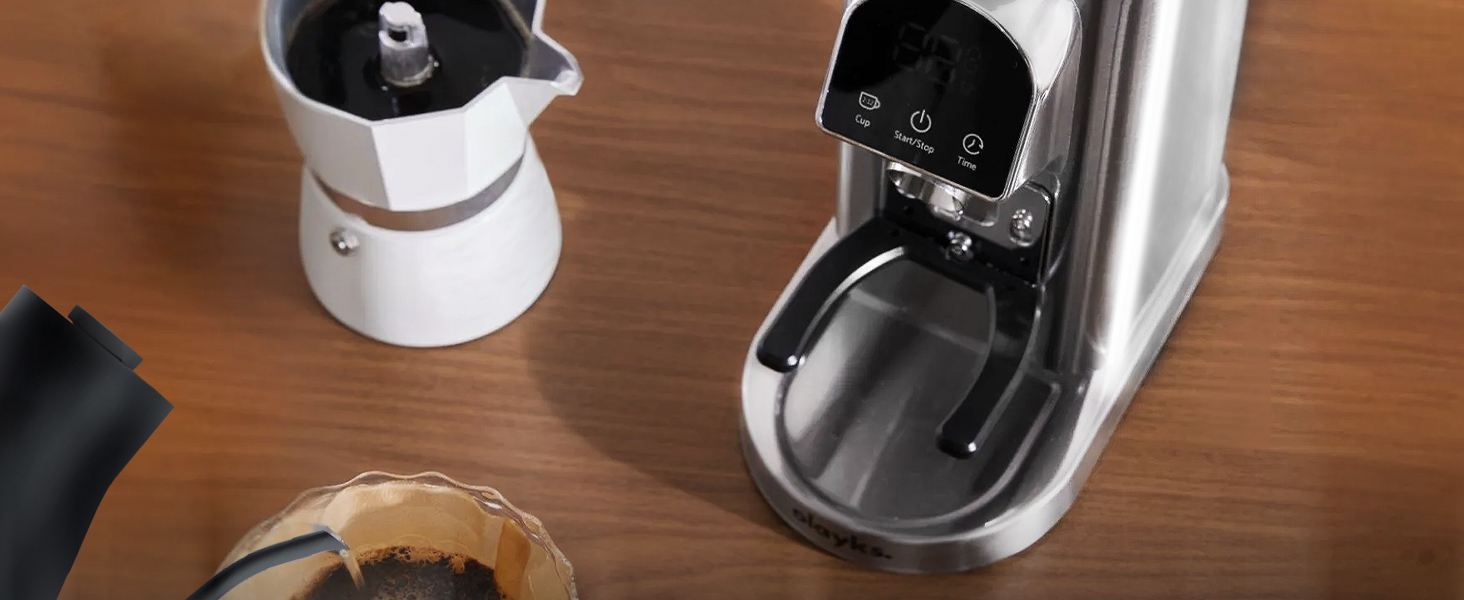
Image 6.2: Explanation of how the anti-static technology and 20° slope design contribute to a clean grinding process.
6.2 Reinigungsverfahren
- Den Schleifer vom Stromnetz trennen: Vor der Reinigung muss unbedingt sichergestellt werden, dass der Winkelschleifer vom Stromnetz getrennt ist.
- Bohnenbehälter entfernen: Turn the bean hopper counter-clockwise to unlock and remove it. Empty any remaining coffee beans.
- Oberen Grat entfernen: The upper conical burr is removable for cleaning. Gently lift it out.
- Saubere Komponenten: Use the included cleaning brush to remove coffee grounds from the upper burr, lower burr, and the grinding chamber. The brush is designed to reach internal areas without clogging.
- Wash Hopper and Lid: The bean hopper and lid can be washed with warm, soapy water. Rinse and dry thoroughly.
- Wischbasis: Wipe the exterior of the motor base with a clean, damp Mit einem Tuch abwischen. Keine Scheuermittel verwenden und den Sockel nicht in Wasser tauchen.
- Zusammenbauen: Once all parts are dry, reassemble the grinder by placing the upper burr back into position, then locking the bean hopper.

Image 6.3: Cleaning the removable upper burr with the provided brush.

Image 6.4: Illustration of the internal cleaning brush effectively removing residual grounds.

Image 6.5: The equipped brush facilitates easy cleaning of the burr grinder to prevent clogging.
7. Fehlerbehebung
| Problem | Mögliche Ursache | Lösung |
|---|---|---|
| Die Mühle startet nicht. | Not plugged in; Bean hopper not locked; Power outage. | Ensure power cord is securely plugged in; Rotate bean hopper clockwise until locked; Check power supply. |
| Ungleichmäßiger Mahlgrad | Mahlscheiben sind verschmutzt oder verstopft; Mahlgradeinstellung für Bohnensorte nicht korrekt. | Clean burrs and grinding chamber thoroughly; Adjust grind setting as needed. |
| Coffee grounds scattering | Excessive static; Grinding too fast. | The grinder has anti-static technology, but some static may occur. Ensure the collection container is properly placed. Try a slightly coarser grind or grind for shorter durations. |
| Mahlwerk stoppt während des Betriebs | Overheating; Motor overload. | Unplug the grinder and let it cool down for at least 30 minutes. Reduce the amount of coffee beans being ground at once. |
8. Spezifikationen
- Modellnummer: OLK-CG206
- Produktabmessungen: 4.5 x 4.5 x 13.8 Zoll
- Artikelgewicht: 5.17 Pfund
- Marke: Olayks
- Kapazität: 20 Grams (dosing cup)
- Bandtage: 110 Volt
- Mahlgradeinstellungen: 48 präzise Einstellungen
- Fräsertyp: 40mm Stainless Steel Conical Burrs
- Merkmale: Electronic Timer, Anti-Static Technology, Digital Display, Portafilter Holder (50-58mm compatible)
9. Garantie und Support
Olayks provides after-sales service for this product. If you have any questions or encounter any issues with your Olayks Conical Burr Coffee Grinder, please do not hesitate to contact our customer support team. We are committed to responding to your inquiries within 24 hours to ensure your satisfaction.
For support, please refer to the contact information provided with your purchase or visit the official Olayks webWebsite.


