1. Einleitung
Thank you for choosing the ADE CK2406-2 Radio-Controlled Digital Projection Alarm Clock. This device offers precise timekeeping, temperature monitoring, and convenient projection features to enhance your daily routine. Please read this manual carefully to ensure proper setup and operation of your new alarm clock.
2. Packungsinhalt
- ADE CK2406-2 Projection Alarm Clock
- External Wireless Sensor
- Netzkabel (AC-Adapter)
- 1 x CR2032 Battery (pre-installed for backup)
- 2 x AAA-Batterien (für externen Sensor)
- Benutzerhandbuch (dieses Dokument)
3. Produktüberschreitungview
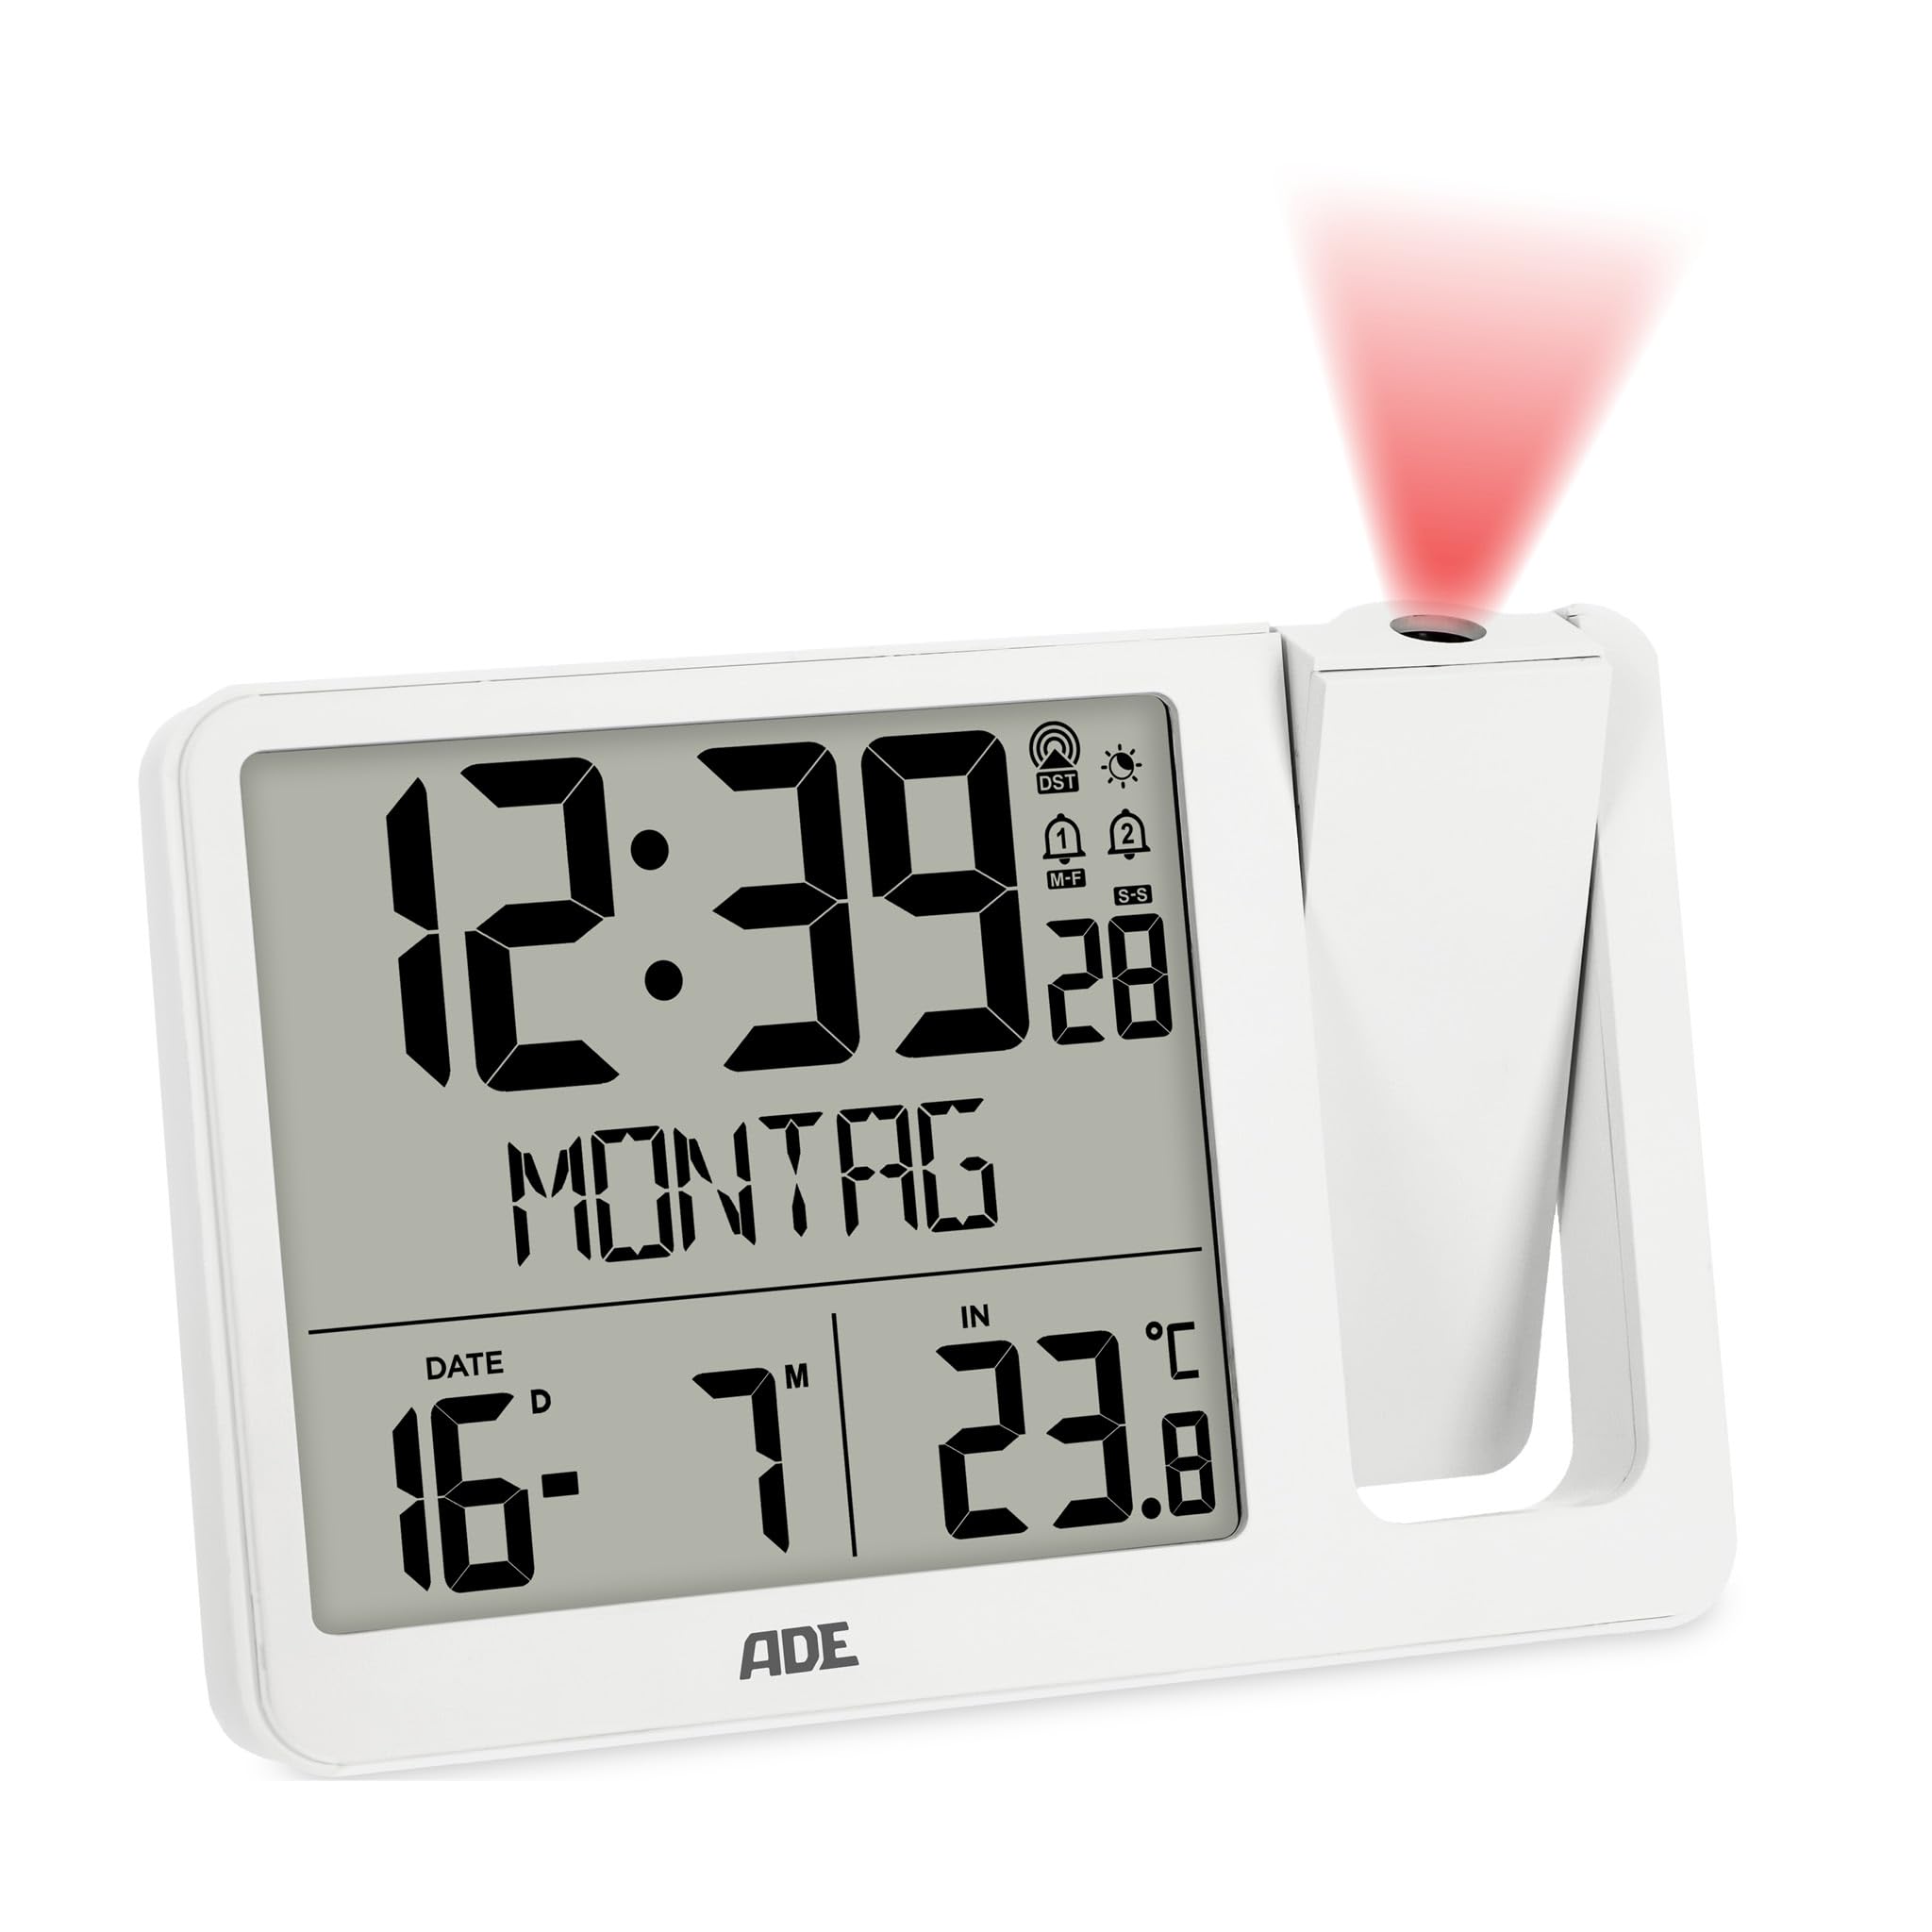
Bild 3.1: Vorderseite view of the ADE CK2406-2 Projection Alarm Clock, showing the main unit with its large LCD display and the separate external sensor.
3.1 Hauptgerät
- LCD Anzeige: Large screen (9.4 x 8.2 cm) showing time, date, day of the week, and temperature.
- Projektionsarm: Adjustable arm for projecting time and temperature onto a wall or ceiling. Can be rotated 180 degrees.
- Bedientasten: Located on the unit for setting time, alarms, display brightness, and other functions.
- USB Ladeanschluss: Zum Aufladen mobiler Geräte.
- Leistungsaufnahme: Zum Anschließen des Netzteils.
- Batteriefach: Für CR2032-Notstrombatterie.
3.2 Externer Sensor
- Temperatursensor: Measures outdoor temperature.
- Batteriefach: Für 2 x AAA-Batterien.
- Übertragungsanzeige: Light indicating data transmission.
4. Einrichtung
4.1 Stromversorgung der Haupteinheit
- Insert the pre-installed CR2032 battery into the main unit's battery compartment. This battery serves as a backup for time settings during power outages.
- Connect the provided power cable to the DC input port on the alarm clock and then plug it into a standard electrical outlet.
- The display will light up, and the clock will begin searching for the DCF radio signal to set the time automatically. This process may take several minutes.
4.2 Installing and Pairing the External Sensor
- Open the battery compartment of the external sensor.
- Insert the 2 x AAA batteries, ensuring correct polarity (+/-).
- Close the battery compartment. The sensor will automatically attempt to pair with the main unit.
- Place the external sensor in a sheltered outdoor location, away from direct sunlight and rain, to ensure accurate temperature readings.
- The main unit will display the outdoor temperature once successfully paired. If pairing fails, refer to the troubleshooting section.
5. Bedienungsanleitung
5.1 Zeit- und Datumseinstellungen
The clock automatically sets the time via the DCF radio signal. If manual adjustment is needed:
- Durch Drücken und Halten der Taste „SET“ wird der Zeiteinstellungsmodus aktiviert.
- Use the '+' or '-' buttons to adjust hours, minutes, year, month, and day.
- Drücken Sie erneut auf „SET“, um jede Einstellung zu bestätigen und zur nächsten zu gelangen.
- The day of the week will automatically update based on the date. The day of the week can be displayed in 7 languages.
5.2 Alarm Settings (Alarm 1 & Alarm 2)
Das Gerät verfügt über zwei unabhängige Alarmzeiten.
- Press the 'ALARM' button to select Alarm 1 or Alarm 2.
- Durch Drücken und Halten der Taste „ALARM“ gelangen Sie in den Alarm-Einstellungsmodus für den ausgewählten Alarm.
- Use the '+' or '-' buttons to set the desired alarm hour and minute.
- Drücken Sie 'ALARM', um zu bestätigen.
- To activate/deactivate an alarm, press the 'ALARM' button repeatedly until the alarm icon appears/disappears on the display.
5.3 Schlummerfunktion
When an alarm sounds, press the 'SNOOZE' button (usually a large button on top) to temporarily silence the alarm. The alarm will sound again after a few minutes (default snooze time is typically 5-10 minutes).
5.4 Projektionsfunktion
- Adjust the projection arm to direct the projection onto a wall or ceiling.
- Rotate the projection lens to adjust the focus and clarity of the projected image.
- The projection can be rotated 180 degrees for optimal viewing.
- Press the 'PROJECTION' button (or similar) to toggle the projection on/off or to switch between displaying time, indoor temperature, or outdoor temperature.
5.5 Displayhelligkeit
The LCD display has automatic brightness control and three manual brightness levels.
- Automatische Helligkeit: The display brightness adjusts automatically based on ambient light conditions.
- Manuelle Helligkeit: Press the 'BRIGHTNESS' button (or similar) to cycle through three manual brightness levels.
5.6 Temperaturanzeige
The clock displays both indoor and outdoor temperatures.
- Press the 'TEMP' button (or similar) to switch between indoor and outdoor temperature display on the main screen.
- The device records daily minimum and maximum temperature values, which reset at midnight.
5.7 USB-Aufladung
Connect your mobile device to the USB charging port on the alarm clock to charge it. Note that this port is for charging only and does not transfer data.
6. Wartung
- Clean the alarm clock and external sensor with a soft, dry cloth. Do not use abrasive cleaners or solvents.
- Das Hauptgerät darf keiner direkten Sonneneinstrahlung, extremen Temperaturen oder hoher Luftfeuchtigkeit ausgesetzt werden.
- Ensure the external sensor is placed in a location protected from direct weather elements.
- Replace batteries in the external sensor (2 x AAA) and the main unit's backup (1 x CR2032) as needed.
7. Fehlerbehebung
- No Display / Power: Ensure the power cable is securely connected to both the alarm clock and the power outlet. Check the outlet for power.
- Falsche Zeitangabe: Ensure the clock is receiving a clear DCF radio signal. Place the unit near a window if possible. Manual time setting is also available.
- External Sensor Not Displaying Temperature: Check if the external sensor batteries are correctly installed and not depleted. Ensure the sensor is within range of the main unit and free from obstructions. Re-pair the sensor if necessary (refer to setup section).
- Projection Unclear: Adjust the focus ring on the projection arm. Ensure the projection arm is correctly angled towards the desired surface.
- Alarm ertönt nicht: Verify that the alarm is activated (alarm icon visible on display) and the volume is not set to minimum (if adjustable).
8. Spezifikationen
| Besonderheit | Detail |
|---|---|
| Marke | ADE |
| Modellnummer | CK2406-2 |
| Farbe | Weiß |
| Produktabmessungen (L x B x H) | 15.4 x 3.81 x 10.4 cm |
| Gewicht | 410 Gramm |
| Material | Acrylnitril-Butadien-Styrol (ABS) |
| Anzeigetyp | Digital LCD |
| Stromquelle | Netzkabel (Netzadapter) |
| Pufferbatterie | 1 x CR2032 (im Lieferumfang enthalten) |
| Externe Sensorbatterien | 2 x AAA (im Lieferumfang enthalten) |
| Besondere Merkmale | Temperature display, Calendar display, Dual Alarms, Snooze, Summer time, USB Charging Port, Radio-controlled time, Projection |
9. Garantie und Support
For warranty information or technical support, please refer to the documentation provided with your purchase or contact ADE customer service through the retailer where the product was purchased. Please retain your proof of purchase for any warranty claims.


