1. Einleitung
Vielen Dank für Ihren Einkauf.asing the Voyager Bluey 12V Electric Go Kart. This manual provides essential information for the safe assembly, operation, and maintenance of your new ride-on toy. Please read all instructions carefully before use and retain this manual for future reference. This product is designed for children aged 3 to 6 years.
2. Sicherheitshinweise
WARNING: Use as Directed. Adult supervision is required at all times.
- Always ensure the child wears a helmet and appropriate safety gear.
- Operate the go-kart only on flat, dry surfaces away from traffic, swimming pools, or steep inclines.
- Vor jeder Benutzung sicherstellen, dass der Sicherheitsgurt fest angelegt ist.
- Es darf nicht mehr als ein Fahrer gleichzeitig zugelassen werden.
- Halten Sie Hände, Haare und Kleidung von beweglichen Teilen fern.
- Never modify the electrical system or components of the go-kart.

Image 2.1: The Voyager Bluey 12V Electric Go Kart, ready for use.
3. Packungsinhalt
Bitte überprüfen Sie den Packungsinhalt, um sicherzustellen, dass alle Teile vorhanden sind:
- Bluey 12V Electric Go Kart body
- Lenkrad
- Räder (4)
- Achsen und Befestigungselemente
- 12V Wiederaufladbare Batterie
- Ladegerät
- Bedienungsanleitung
- Australian Flag accessory
4. Montage und Einrichtung
Assembly typically requires a Phillips head screwdriver and takes approximately 30-60 minutes. Follow these general steps:
- Räder anbringen: Securely attach all four wheels to the axles using the provided fasteners.
- Lenkrad einbauen: Connect the steering wheel to the steering column, ensuring it clicks into place or is fastened according to specific instructions.
- Batterie anschließen: Locate the battery compartment, typically under the seat. Connect the battery terminals (red to red, black to black).
- Flagge anbringen: Insert the Australian flag accessory into its designated slot at the rear of the go-kart.

Bild 4.1: Vorderseite view of the go-kart highlighting key features like the 12V rechargeable battery, 4 mph max speed, rear drift wheels, and recommended age range of 3-7 years.
5. Laden des Akkus
The go-kart is powered by a 12V rechargeable battery. For optimal performance and battery life, follow these charging instructions:
- Grundgebühr: Laden Sie den Akku vor dem ersten Gebrauch 10–12 Stunden lang vollständig auf. Laden Sie ihn nicht länger als 18 Stunden.
- Regelmäßiges Laden: After each use, recharge the battery for 8-10 hours.
- Ladeanschluss: Locate the charging port, usually near the battery compartment or on the dashboard. Plug the charger into the port and then into a standard wall outlet.
- Indikator: Das Ladegerät verfügt möglicherweise über eine Kontrollleuchte, die den Ladezustand anzeigt (z. B. rot für Ladevorgang, grün für vollständig geladen).
- Sicherheit: Always charge the battery in a dry, well-ventilated area. Do not allow children to handle the charger or battery.
6. Bedienungsanleitung
Familiarize yourself with the controls before allowing a child to operate the go-kart.
6.1. Bedienelemente
- Stromschalter: Located on the dashboard, this switch turns the go-kart on or off.
- Vorwärts-/Rückwärtsschalter: Allows the go-kart to move forward or backward.
- Fußpedal: Press the foot pedal to accelerate. Release to brake.
- Lichter: The go-kart is equipped with vibrant lights for enhanced visibility and fun.
- MP3-Buchse: Connect an external audio device to play music through the go-kart's speakers.
- Musical Steering Wheel: Features integrated musical functions for added entertainment.

Image 6.1: Detail of the Forward/Reverse switch and power button for intuitive control.
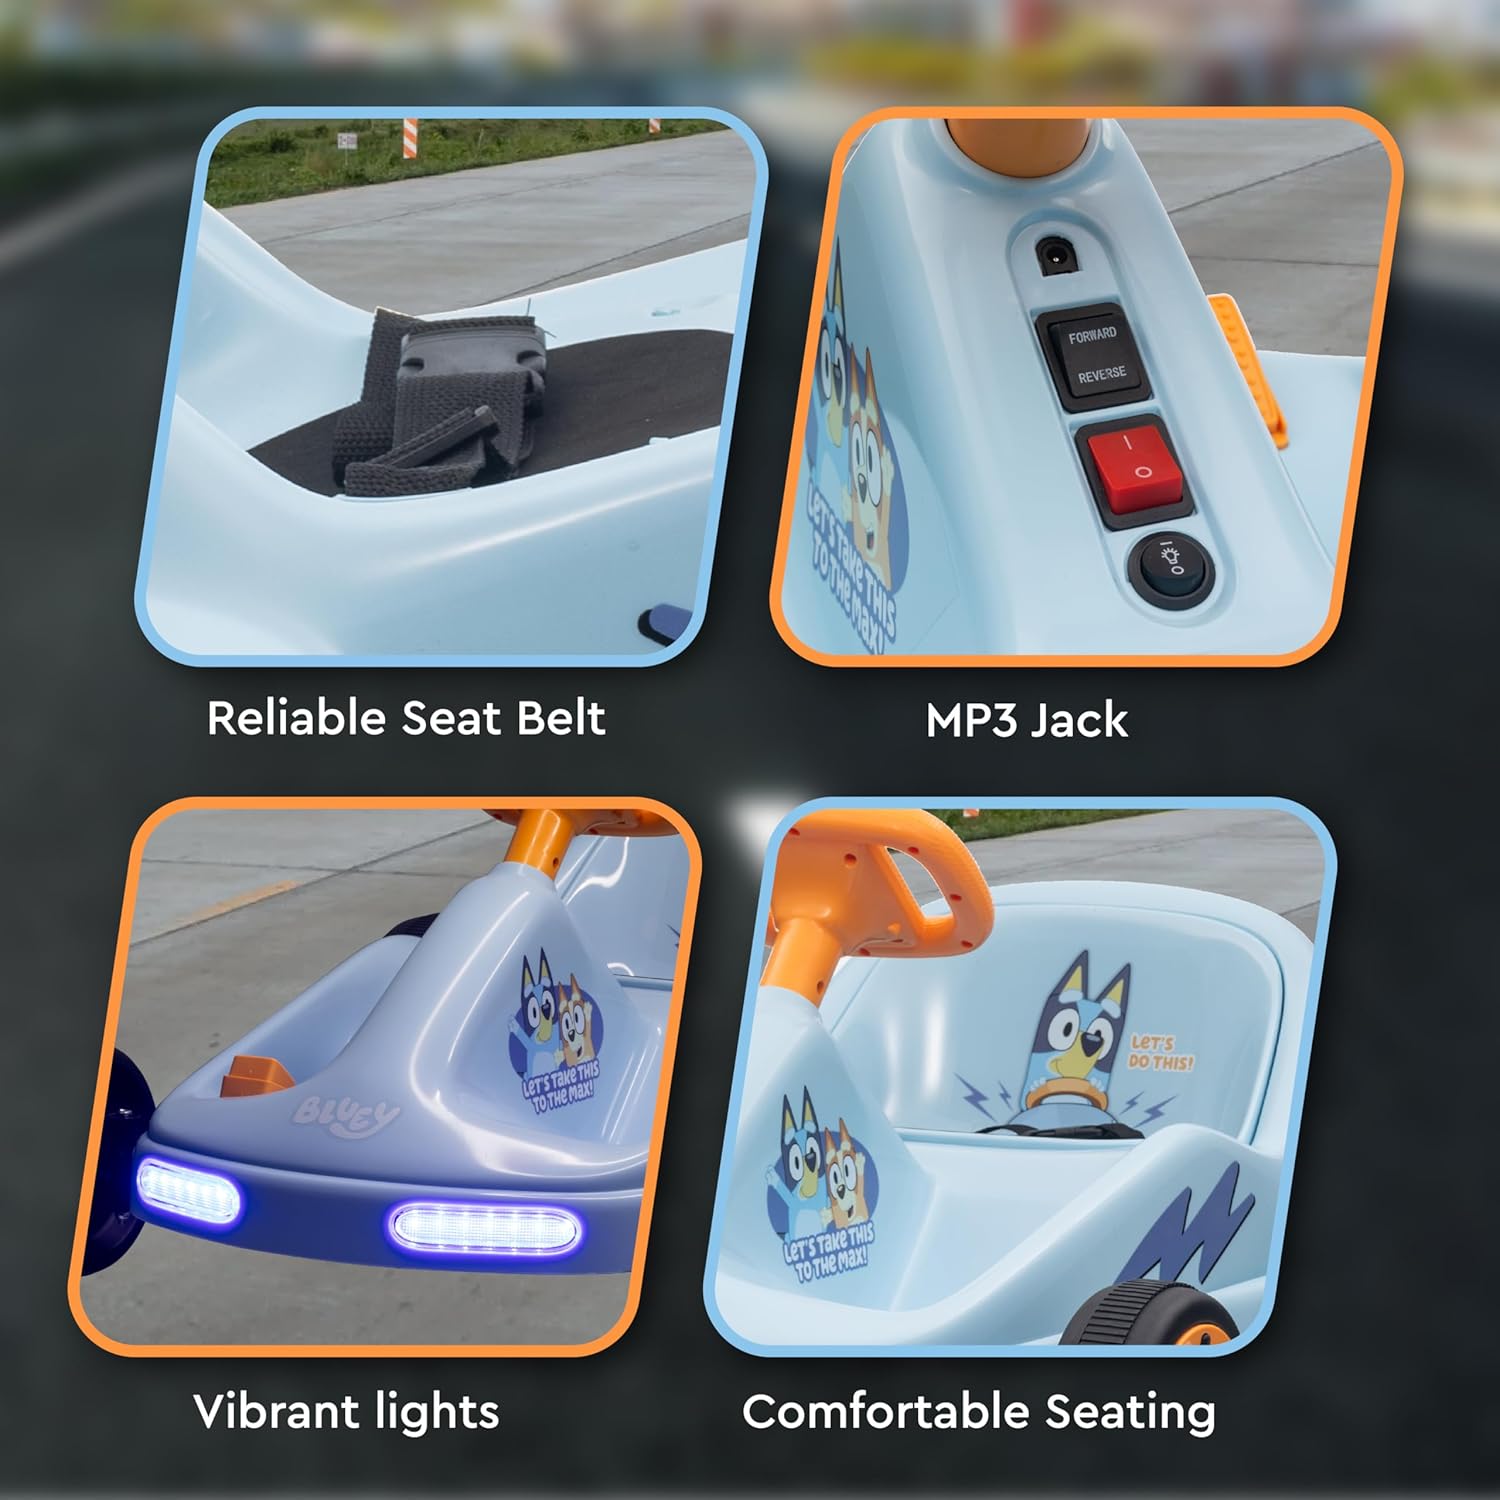
Abbildung 6.2: Detailansicht view of the reliable seat belt, MP3 jack, vibrant front lights, and comfortable seating area.
6.2. Driving the Go Kart
- Ensure the child is seated properly and the seat belt is fastened.
- Schalten Sie den Netzschalter ein.
- Select 'Forward' or 'Reverse' using the switch.
- Press the foot pedal to move. Release the pedal to stop.
- Steer using the steering wheel.

Image 6.3: The go-kart is suitable for operation on various surfaces including concrete, tile, asphalt roads, and wood floors.
7. Wartung
Regular maintenance ensures the longevity and safe operation of your go-kart.
- Reinigung: Wipe the go-kart with a soft, damp Tuch. Keine Scheuer- oder Lösungsmittel verwenden.
- Batteriepflege: Always recharge the battery after each use. If storing for extended periods, charge the battery once a month to prevent deep discharge.
- Lagerung: Store the go-kart in a dry, cool place away from direct sunlight and moisture.
- Inspektion: Überprüfen Sie regelmäßig alle Schrauben, Muttern und Verbindungen auf festen Sitz. Kontrollieren Sie Räder und Reifen auf Verschleiß.
8. Fehlerbehebung
If you encounter issues, refer to this section before contacting support.
| Problem | Mögliche Ursache | Lösung |
|---|---|---|
| Go-kart does not move | Battery is low or not connected; Power switch is off; Forward/Reverse switch is in neutral position; Loose wire connection. | Charge the battery; Turn on the power switch; Select Forward or Reverse; Check all wire connections. |
| Go-kart moves slowly | Battery is low; Overloaded; Operating on an uneven surface. | Recharge the battery; Reduce weight; Move to a flat, smooth surface. |
| Lichter funktionieren nicht | Loose wire connection; Damaged bulb/LED. | Check wire connections to the lights; Contact customer support if damaged. |
9. Spezifikationen
- Modellnummer: A12VGCLU241
- Produktabmessungen: 24.2 x 16.5 x 28 Zoll
- Artikelgewicht: 27.1 Pfund
- Batterie: 12 V wiederaufladbar
- Höchstgeschwindigkeit: ungefähr 4 Meilen pro Stunde
- Empfohlenes Alter: 3 years and up (typically 3-6 years)
- Baumaterialien: Durable PVC and Iron
- Hersteller: Sakar International
10. Garantie und Support
For warranty information or technical support, please refer to the warranty card included with your product or contact the manufacturer, Sakar International, directly. Keep your proof of purchase for any warranty claims.
Weitere Unterstützung finden Sie unter Voyager Store on Amazon.


