1. Einführung und Endeview
This instruction manual provides essential information for the safe and effective use of your iFixit Repair Toolkit, designed for Nintendo Switch and Switch Lite consoles. This toolkit equips you with the necessary precision tools to perform various repairs, extending the lifespan and enhancing the performance of your device.
The iFixit Repair Toolkit is assembled based on extensive experience to handle a wide variety of model repairs, including troubleshooting LCDs, OLEDs, and Joy-Cons.
2. Produktkomponenten
Your iFixit Repair Toolkit includes the following precision tools:
- iFixit Precision Bit Driver: A high-quality screwdriver handle designed for comfortable and precise control.
- 4 mm Bits: A selection of specialized screwdriver bits compatible with various fasteners found in Nintendo Switch consoles.
- Spudger: A versatile tool used for prying, poking, and separating components without causing damage.
- Pinzette: Precision tweezers for handling small components and delicate wires.
- Opening Picks: Thin, durable tools for safely prying open device enclosures.
- ESD-Safe Brush and Precision Cleaning Brushes: Tools for cleaning dust and debris from sensitive electronic components.
- Antistatisches Armband: Essential for preventing electrostatic discharge (ESD) damage to sensitive electronics.
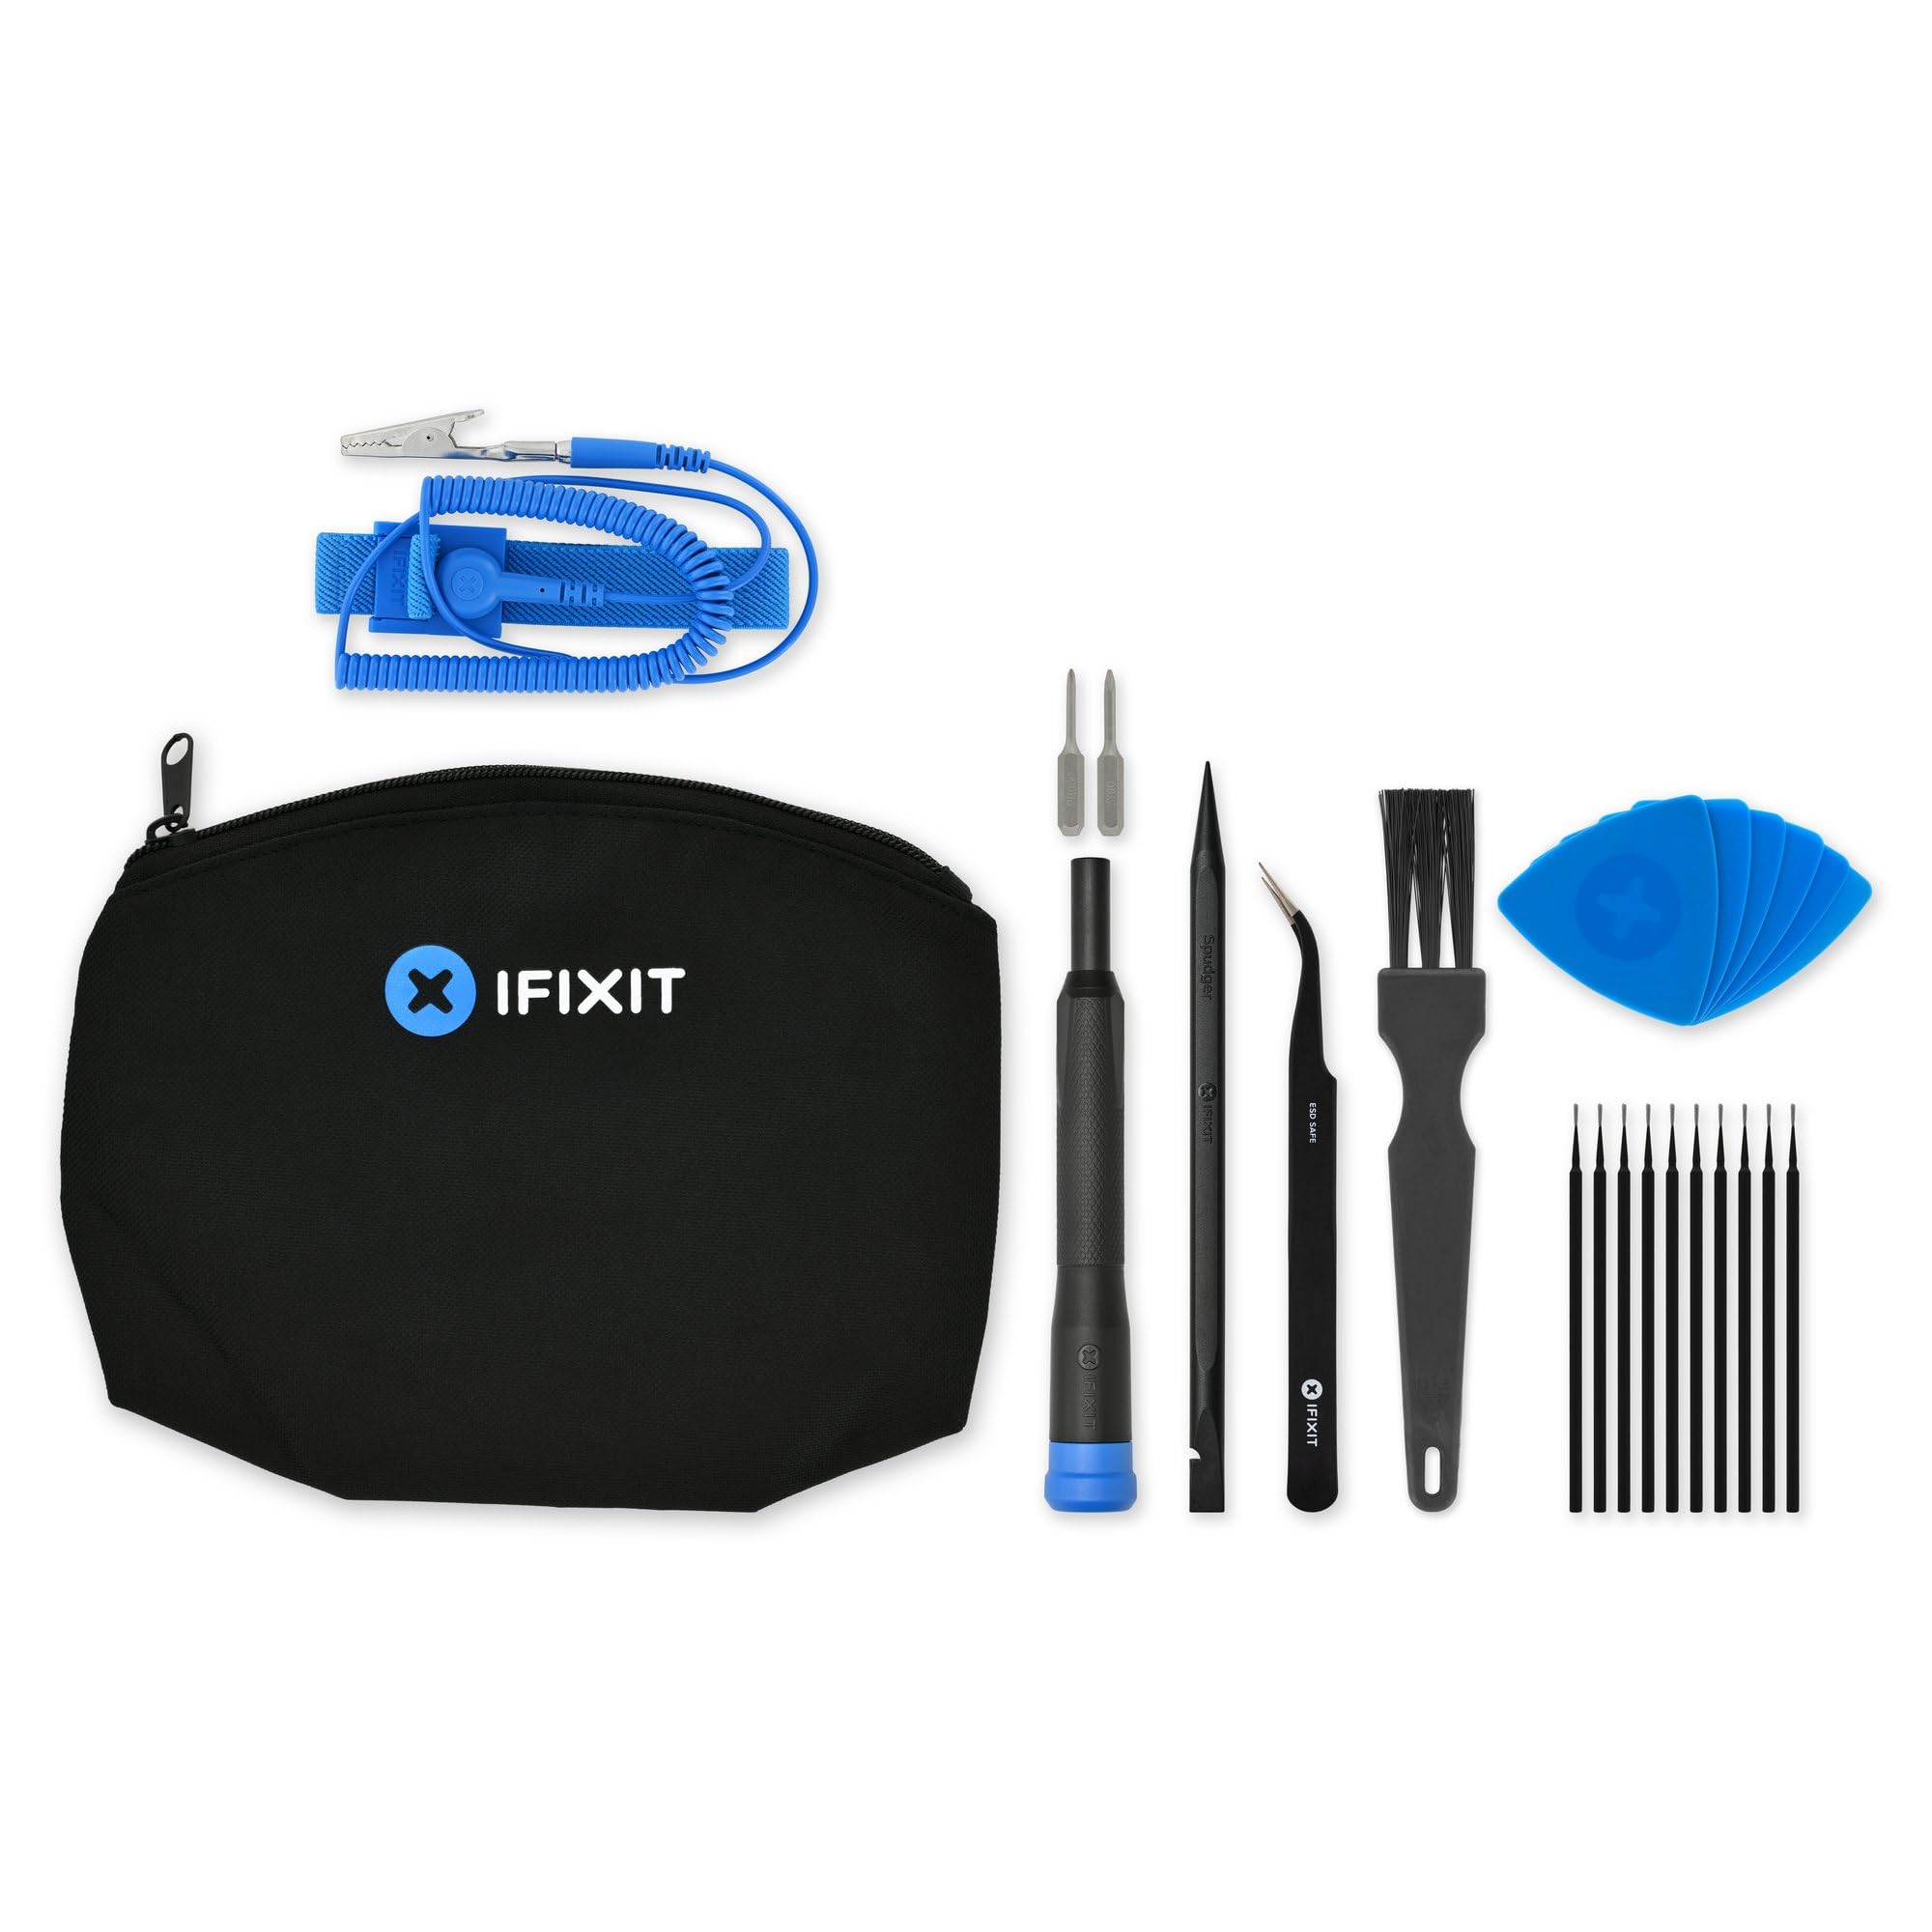
Image: Contents of the iFixit Repair Toolkit.

Bild: Detailliert view of the iFixit Nintendo Switch Repair Toolkit.
3. Einrichtung
Before beginning any repair, ensure you have a clean, well-lit, and organized workspace. Electrostatic Discharge (ESD) can damage electronic components. Follow these steps to minimize risk:
- Bereiten Sie Ihren Arbeitsbereich vor: Clear your work area of clutter. Use an anti-static mat if available.
- Wear the Anti-Static Wrist Strap:
- Wrap the wrist strap snugly around your bare wrist.
- Connect the alligator clip end of the strap to a grounded metal object (e.g., a metal computer case, a grounded pipe, or the ground pin of an electrical outlet). This equalizes your body's electrical potential with the ground, preventing static buildup.
- Komponenten organisieren: Keep track of all screws and small parts. A magnetic project mat (not included in this kit but recommended) can be helpful.
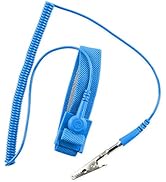
Image: iFixit Anti-Static Wrist Strap.
4. Bedienungsanleitung
This toolkit provides the fundamental tools for electronic device repair. Always refer to a specific repair guide for your device model before attempting any repair. iFixit offers a vast library of free repair guides on their webSeite? ˅ (www.ifixit.com).
Using the Precision Bit Driver and Bits:
- Select the appropriate 4 mm bit for the screw you need to remove or install. Ensure the bit fits snugly to prevent stripping the screw head.
- Insert the bit into the magnetic tip of the precision bit driver.
- Apply gentle, consistent pressure while turning the driver. For removal, turn counter-clockwise; for installation, turn clockwise. Avoid overtightening.
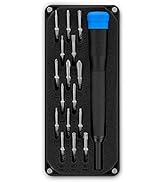
Image: iFixit Precision Bit Driver and Bit Set.
Using Spudgers and Opening Picks:
- These tools are designed to safely pry open device casings, disconnect cables, and manipulate small components without scratching or damaging sensitive parts.
- Use the thin edges of the opening picks to gently separate seams.
- The spudger can be used for leverage or to carefully lift connectors.

Image: iFixit Jimmy (Prying Tool).
Verwendung einer Pinzette:
- Use the precision tweezers for handling tiny screws, delicate cables, and small components that are difficult to grasp with fingers.
- Ensure a firm grip to prevent dropping or damaging parts.
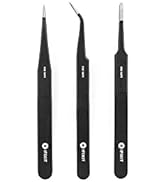
Image: iFixit Precision Tweezers Set.
Using Cleaning Brushes:
- The ESD-safe brush and precision cleaning brushes are used to gently remove dust, lint, and debris from circuit boards and other internal components.
- Always use brushes dry, or with an approved electronics cleaning solution if necessary, ensuring the device is powered off and disconnected from power.
5. Wartung
Proper maintenance of your tools ensures their longevity and continued effectiveness:
- Reinigung: After each use, wipe down tools with a clean, dry cloth to remove any residue or fingerprints. For precision bits, ensure they are free of debris.
- Lagerung: Store all tools in their designated case or a clean, dry environment to prevent loss and damage. Keep them away from moisture and extreme temperatures.
- Inspektion: Periodically inspect tools for wear or damage. Replace any damaged components to maintain precision and safety.
6. Fehlerbehebung
This section addresses common issues related to tool usage. For device-specific repair troubleshooting, please consult iFixit's comprehensive online repair guides.
| Problem | Mögliche Ursache | Lösung |
|---|---|---|
| Bit slips or strips screw head | Incorrect bit size; insufficient pressure; worn bit. | Ensure the correct bit size is used. Apply firm, consistent downward pressure while turning. Replace worn bits. |
| Gerät casing difficult to open | Hidden clips or adhesive; improper prying technique. | Consult a specific repair guide for your device model. Use opening picks and spudgers gently to locate and release clips or separate adhesive. Apply heat if recommended by the guide. |
| Small components are hard to handle | Lack of precision or steady hand. | Utilize the precision tweezers for small parts. Practice handling small items before working on the device. Ensure a stable work surface. |
7. Spezifikationen
| Besonderheit | Detail |
|---|---|
| Hersteller | iFixit |
| Teilenummer | IF145-793-1 |
| Artikelgewicht | 4.8 Unzen |
| Verpackungsabmessungen | 8.08 x 6.82 x 1.26 Zoll |
| Artikelmodellnummer | 145793-1 |
| Artikelpaket Menge | 1 |
| Batterien im Lieferumfang enthalten | NEIN |
| Batterien erforderlich | NEIN |
8. Garantie und Support
Lebenslange Garantie: The iFixit Repair Toolkit is covered by iFixit's Lifetime Warranty. If any tool breaks, it will be replaced for as long as you own it.
For detailed repair guides, solutions, and additional support, please visit the official iFixit webWebsite: www.ifixit.com. You can find device-specific instructions and a community forum to assist with your repair needs.


