Einführung
This manual provides essential information for the proper installation, operation, and maintenance of your Praxis BSA 68/73mm Bottom Bracket. Designed for compatibility with Shimano Hollowtech II cranksets, this bottom bracket features a robust construction with CNC machined 7075-T6 aluminum cups and durable sealed Enduro 2437 steel bearings.
Please read this manual thoroughly before beginning installation to ensure safe and optimal performance of your bicycle components.
Produkt überview

Abbildung 1: Abgewinkelt view of the Praxis BSA 68/73mm Bottom Bracket, showing the main body and threaded cups with orange seals.
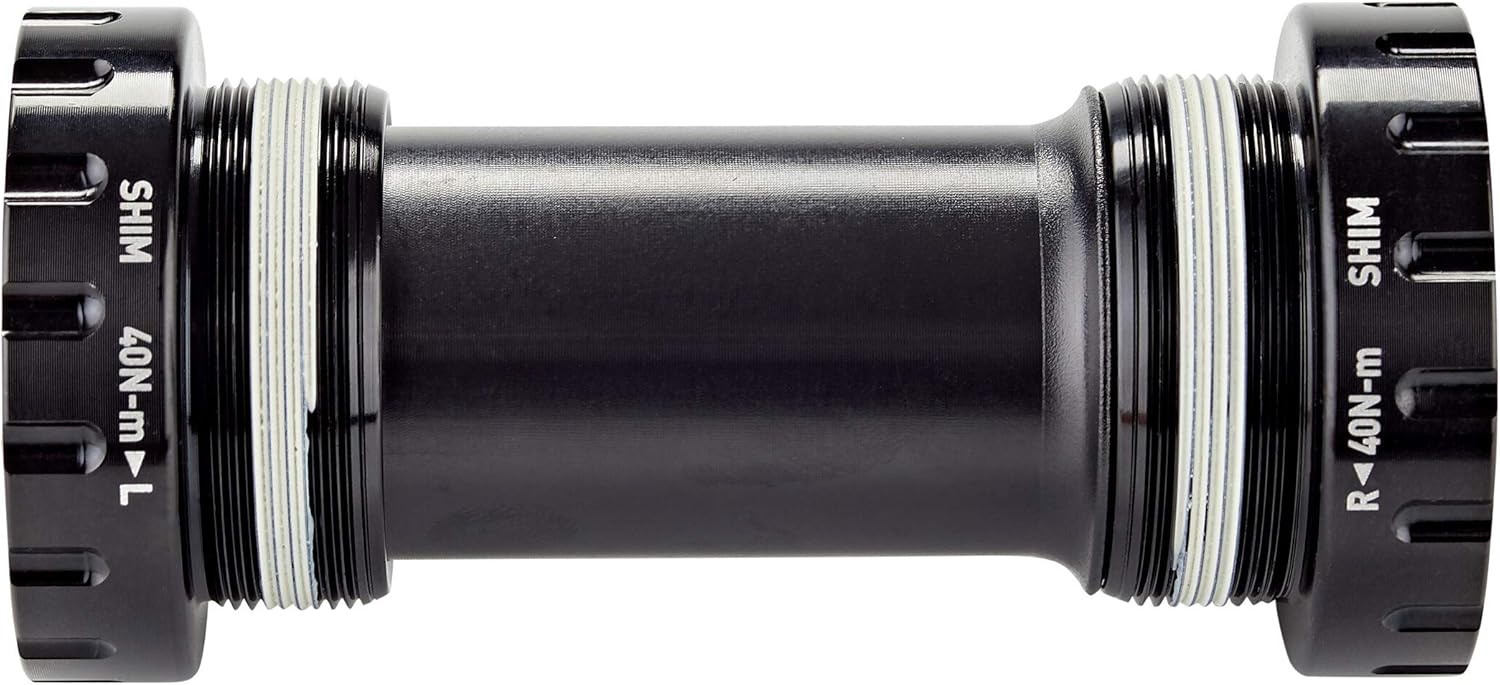
Abbildung 2: Seite view of the Praxis BSA 68/73mm Bottom Bracket, highlighting the "SHIM" and torque specifications (40N-m) on the cups.
The Praxis BSA 68/73mm Bottom Bracket is engineered for durability and smooth performance. It features precision CNC machined 7075-T6 aluminum cups for strength and a long-lasting anodized finish. Inside, sealed Enduro 2437 steel bearings provide excellent fluidity and resistance to wear.
Setup und Installation
Benötigtes Werkzeug:
- Praxis M30 Bottom Bracket Tool (specific tool required for installation)
- Drehmomentschlüssel
- Fett (für Gewinde)
- Lappen reinigen
Installationsschritte:
- Bereiten Sie den Rahmen vor: Ensure the bicycle's bottom bracket shell threads are clean and free of debris. It is recommended to have the bottom bracket shell faced and chased by a professional bicycle mechanic for optimal alignment and performance.
- Fett auftragen: Apply a thin, even layer of high-quality bicycle grease to the threads of both the bottom bracket shell and the Praxis bottom bracket cups.
- Install Drive Side Cup: Identify the drive-side cup (typically marked 'R' for right or drive side). Carefully thread it into the drive-side of the bottom bracket shell. Ensure it threads smoothly by hand to avoid cross-threading.
- Install Non-Drive Side Cup: Identify the non-drive side cup (typically marked 'L' for left or non-drive side). Carefully thread it into the non-drive side of the bottom bracket shell. Again, ensure it threads smoothly by hand.
- Torque Cups: Using the Praxis M30 Bottom Bracket Tool and a torque wrench, tighten both cups to the manufacturer's specified torque. The cups are marked with a recommended torque of 40 Nm. Adhering to this specification is crucial for proper function and longevity.
- Kurbelwelle einbauen: Refer to your crankset manufacturer's instructions for proper installation onto the newly installed bottom bracket.
Wichtiger Hinweis: Incorrect installation or over-tightening can damage the bottom bracket or bicycle frame. If you are unsure about any step, consult a professional bicycle mechanic.
Betrieb
Once properly installed, the Praxis BSA 68/73mm Bottom Bracket operates seamlessly with your Shimano Hollowtech II compatible crankset. Its sealed Enduro 2437 steel bearings are designed to provide smooth, low-friction rotation for efficient power transfer.
No specific user operation is required for the bottom bracket itself beyond ensuring it is correctly installed and maintained. The bottom bracket facilitates the rotation of your crankset, allowing you to pedal your bicycle.
Wartung
Regular maintenance will extend the lifespan and ensure the smooth operation of your Praxis BSA 68/73mm Bottom Bracket.
- Regelmäßige Reinigung: Periodically clean the exterior of the bottom bracket and the surrounding frame area to prevent accumulation of dirt and grime, which can ingress into the bearings over time.
- Spiel prüfen: Every few months, or if you notice any unusual noises from the bottom bracket area, check for play in the crankset. To do this, firmly grasp both crank arms and attempt to move them side-to-side relative to the frame. Any noticeable movement indicates potential wear or loosening.
- Nachziehen: If play is detected, or as part of a comprehensive bike service, check the torque of the bottom bracket cups using your torque wrench and Praxis M30 Bottom Bracket Tool. Re-tighten to 40 N-m if necessary.
- Lagerprüfung: While the bearings are sealed, extreme conditions or prolonged use may lead to wear. If the bottom bracket feels rough or noisy during rotation (after removing the chain from the chainrings and spinning the cranks by hand), it may be time for bearing replacement or bottom bracket overhaul/replacement. This typically requires specialized tools and expertise.
Vorsicht: Do not attempt to disassemble the sealed bearings unless you have the proper tools and knowledge, as this can damage the unit.
Fehlerbehebung
| Problem | Mögliche Ursache | Lösung |
|---|---|---|
| Creaking/Clicking Noise from BB Area |
|
|
| Crankset has Side-to-Side Play |
|
|
| Rough or Grinding Feel when Pedaling |
|
|
Wenn die Probleme nach dem Ausprobieren dieser Lösungen weiterhin bestehen, wird empfohlen, einen qualifizierten Fahrradmechaniker hinzuzuziehen.
Technische Daten
| Besonderheit | Detail |
|---|---|
| Modellname | Pedalier BSA 68mm Road Shimano 68-0001 |
| Teilenummer | 68-0001 |
| Marke | Praxis |
| Kompatibilität | BSA 68/73mm Road frames, Shimano Hollowtech II cranksets |
| Material | CNC Machined 7075-T6 Aluminum Cups |
| Lager | Sealed Enduro 2437 Steel Bearings |
| Farbe | Schwarz |
| Empfohlenes Drehmoment | 40 Nm |
| Verpackungsabmessungen (L x B x H) | 4.37 x 2.24 x 2.13 Zoll |
| Paketgewicht | 0.13 Kilogramm |
Garantie und Support
Specific warranty information for the Praxis BSA 68/73mm Bottom Bracket is not provided in this manual. Please refer to the official Praxis website or contact their customer support for detailed warranty terms and conditions.
For technical support, installation queries, or any issues not covered in this manual, please visit the Praxis Cycles official webWebsite oder wenden Sie sich an deren Kundendienstabteilung.


