1. Einleitung
This manual provides detailed instructions for the installation, operation, and maintenance of your ACI Windshield Washer Pump. Designed as a direct replacement part, this pump ensures proper function of your vehicle's windshield washing system. Please read this manual thoroughly before attempting any installation or maintenance.
1.1. Produktüberschreitungview
The ACI Windshield Washer Pump is an essential component for maintaining clear visibility by delivering washer fluid to the windshield. This unit is manufactured to meet or exceed original equipment specifications, ensuring reliable performance.
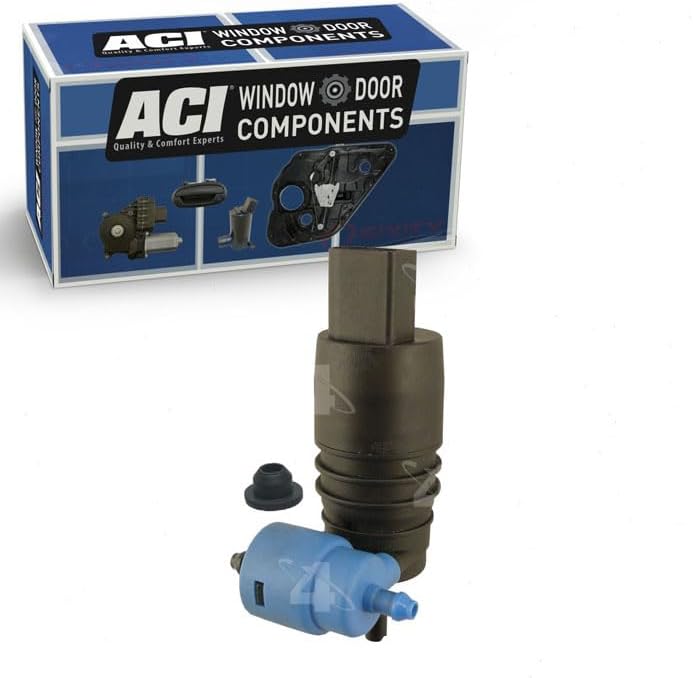
Figure 1: ACI Windshield Washer Pump and its retail packaging.
1.2. Fahrzeugkompatibilität
This ACI Windshield Washer Pump is compatible with the following Audi Q5 models:
- Audi Q5: 2009, 2010, 2011, 2012, 2013, 2014, 2015, 2016, 2017, 2018
Always confirm vehicle fitment using your vehicle's specific year, make, and model to ensure proper compatibility before installation.
2. Sicherheitshinweise
Working on automotive systems can be hazardous. Adhere to all safety precautions to prevent injury or damage to your vehicle.
- Tragen Sie stets geeignete persönliche Schutzausrüstung, einschließlich Schutzbrille und Handschuhen.
- Vor Beginn jeglicher Arbeiten sicherstellen, dass das Fahrzeug ausgeschaltet und der Zündschlüssel abgezogen ist.
- Disconnect the vehicle's battery if instructed or if working near electrical components.
- Allow the engine and surrounding components to cool down before working to avoid burns.
- Wenn Sie sich bei einem Arbeitsschritt unsicher sind, konsultieren Sie einen qualifizierten Kfz-Techniker.
- Halten Sie Kinder und Haustiere vom Arbeitsbereich fern.
3. Packungsinhalt
Upon opening the package, verify that all components are present and undamaged. The standard package for the ACI Windshield Washer Pump typically includes:
- 1 x ACI Windshield Washer Pump
- Necessary mounting hardware (if applicable, may vary by model)
- Originalverpackung

Figure 2: ACI branding indicating genuine replacement parts.
If any items are missing or damaged, contact your retailer or ACI customer support immediately.
4. Installationsanweisungen
This section outlines the general procedure for replacing a windshield washer pump. Specific steps may vary slightly depending on your vehicle's configuration. Refer to your vehicle's service manual for precise instructions if needed.
4.1. Erforderliches Werkzeug
- Basic hand tools (screwdrivers, pliers, socket set)
- Drain pan (for washer fluid)
- Saubere Lappen
- New windshield washer fluid
4.2. Removal of Old Pump
- Locate the Washer Fluid Reservoir: The washer fluid reservoir is typically located under the hood, often on one side of the engine bay.
- Drain Washer Fluid: If possible, drain the existing washer fluid from the reservoir. This can often be done by disconnecting a hose from the pump or reservoir and allowing the fluid to flow into a drain pan.
- Elektrischen Stecker trennen: Carefully disconnect the electrical connector from the old washer pump.
- Schläuche abtrennen: Disconnect the washer fluid hoses from the pump. Be prepared for some residual fluid to leak out.
- Alte Pumpe ausbauen: The pump is usually secured to the reservoir with a rubber grommet or a clip. Gently pull or unclip the pump from the reservoir.
4.3. Installation of New Pump
- Prepare New Pump: Ensure the new ACI pump has its rubber grommet properly seated (if applicable).
- Install Pump into Reservoir: Carefully insert the new pump into the opening on the washer fluid reservoir. Ensure it is seated firmly and securely.
- Schläuche anschließen: Reconnect the washer fluid hoses to the appropriate outlets on the new pump. Ensure a snug fit to prevent leaks.
- Elektrischen Stecker anschließen: Reconnect the electrical connector to the new pump.
- Wassertank auffüllen: Fill the washer fluid reservoir with fresh, appropriate windshield washer fluid.
- Testsystem: Turn on the vehicle's ignition (do not start the engine unless necessary for testing) and activate the windshield washer system to check for proper operation and leaks. Observe the spray pattern and ensure fluid is delivered to the windshield.
- Sichere Komponenten: Reinstall any removed components (e.g., fender liners, covers) that were necessary to access the pump.
Notiz: This is a direct replacement auto part. If you encounter difficulties or are not confident in performing the installation, it is recommended to seek assistance from a certified mechanic.
5. Bedienungsanleitung
Once the ACI Windshield Washer Pump is installed, its operation is integrated with your vehicle's existing controls. To operate the windshield washer system:
- Stellen Sie sicher, dass die Zündung eingeschaltet ist.
- Activate the windshield washer function using the lever or button on your steering column or dashboard, as per your Audi Q5's owner's manual.
- The pump will activate, spraying washer fluid onto the windshield, and the wipers will typically engage automatically.
Refer to your Audi Q5 owner's manual for specific instructions on operating your vehicle's windshield washer system.
6. Wartung
Proper maintenance of your windshield washer system ensures optimal visibility and extends the life of the pump.
- Flüssigkeitsstand prüfen: Regularly check the washer fluid level in the reservoir and refill as needed with a high-quality windshield washer fluid suitable for your climate. Do not use plain water, especially in freezing temperatures.
- Düseninspektion: Periodically inspect the washer nozzles on your hood or cowl for clogs or misalignment. Clear any blockages with a thin pin if necessary.
- Schlauchinspektion: Check washer fluid hoses for cracks, leaks, or loose connections.
- Winterpflege: In cold climates, use winter-formulated washer fluid to prevent freezing and ensure proper operation.
7. Fehlerbehebung
If you experience issues with your windshield washer system after installing the ACI pump, consider the following common troubleshooting steps:
| Problem | Mögliche Ursache | Lösung |
|---|---|---|
| No fluid sprays onto windshield |
|
|
| Schwacher oder ungleichmäßiger Sprühstrahl |
|
|
| Pumpe läuft, aber keine Flüssigkeit |
|
|
If these steps do not resolve the issue, it may indicate a more complex problem requiring professional diagnosis.
8. Spezifikationen
Key specifications for the ACI Windshield Washer Pump (Model: 505ZCC2JJVAJ37QVKE3W496QJM):
| Attribut | Detail |
|---|---|
| Hersteller | ACI |
| Brand (Distributor) | Sixity Auto |
| Modellnummer | 505ZCC2JJVAJ37QVKE3W496QJM |
| Artikelgewicht | 4.2 Unzen |
| Technische Daten | 5.5 x 2.81 x 2 Zoll |
| ASIN | B0DRWF4B48 |
| Zuerst verfügbar | 30. Dezember 2024 |
9. Garantie und Support
This ACI Windshield Washer Pump is a genuine ACI part. For specific warranty information, please refer to the documentation included with your purchase or contact the seller, Sixity Auto, directly. Warranty terms typically cover manufacturing defects.
For technical support, installation assistance, or warranty claims, please contact Sixity Auto customer service through the platform where the purchase was made or via their official contact channels.


