1. Einleitung
This manual provides essential information for the safe and efficient use of your Philips B4000 Soundbar. Please read these instructions carefully before using the product and retain them for future reference. The Philips B4000 Soundbar is designed to enhance your television's audio experience with clear 2.0 channel sound and versatile connectivity options.

Image: The Philips B4000 Soundbar, its remote control, and a television displaying colorful content, illustrating the product in use.
2. Packungsinhalt
Überprüfen Sie, ob alle Artikel in Ihrem Paket vorhanden sind:
- Philips B4000 Soundbar
- Fernbedienung
- 2 x AAA-Batterien (für die Fernbedienung)
- Wandhalterungen
- Kurzanleitung
- Garantiekarte
3. Produktüberschreitungview
The Philips B4000 Soundbar features a compact design with integrated speakers and various input options for seamless integration with your home entertainment system.

Image: The Philips B4000 Soundbar positioned below a television in a living room, emphasizing its 2.0 channel audio, 60W maximum output power, and dual full-range speakers.
4. Einrichtung und Installation
4.1 Platzierungsoptionen
The soundbar offers flexible placement to suit your setup:
- Platzierung des TV-Ständers: Place the soundbar on a flat surface directly in front of your TV. Ensure it does not obstruct the TV's remote sensor.
- Wandhalterung: Use the included wall mount brackets to attach the soundbar to the wall below your TV. Refer to the Quick Start Guide for detailed wall mounting instructions.
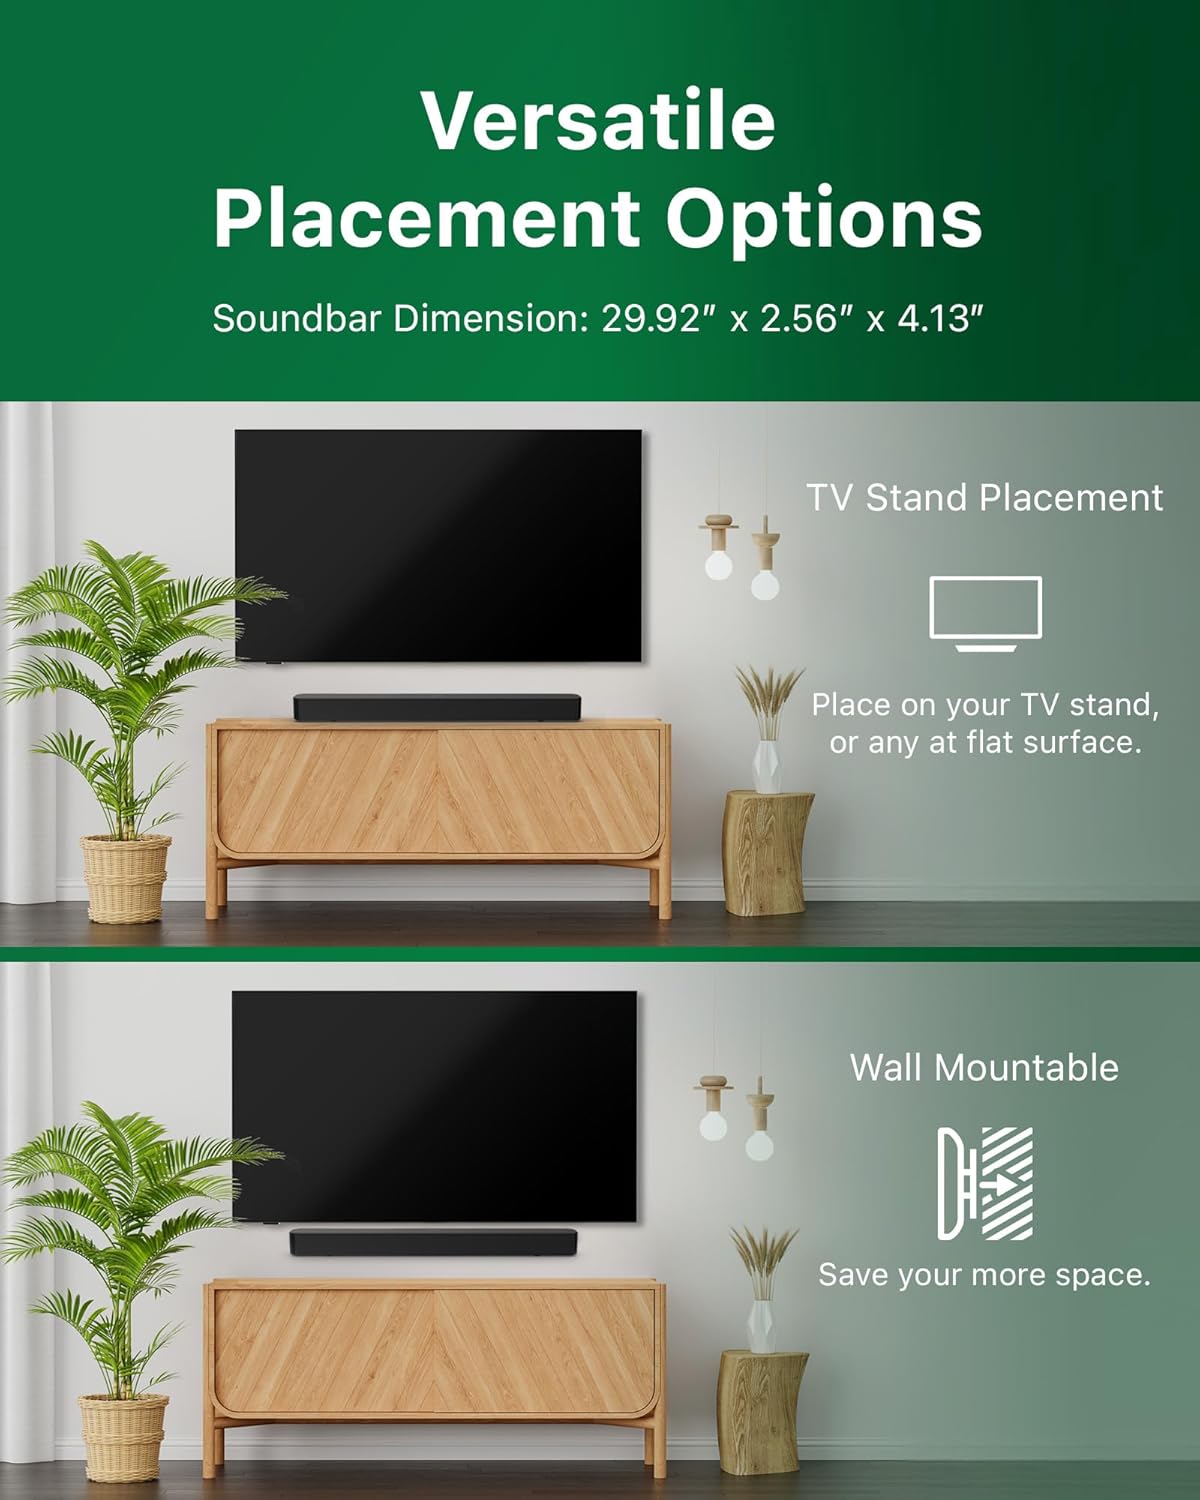
Image: Illustrations demonstrating the two primary placement methods for the soundbar: resting on a TV stand and securely mounted on a wall.
4.2 Anschluss an Ihren Fernseher
Die Soundbar unterstützt mehrere Anschlussarten:
- HDMI ARC (Empfohlen): Connect an HDMI cable (not included) from the HDMI ARC port on your TV to the HDMI ARC port on the soundbar. This allows for audio return and control via your TV remote.
- Bluetooth: For wireless audio streaming, pair your soundbar with a Bluetooth-enabled device.
- USB: Connect a USB device for audio playback.
- DC IN: Connect the power adapter to the DC IN port.

Image: A visual representation of the soundbar's available audio input ports, including HDMI (ARC), USB, Bluetooth, and DC IN for power.
4.3 Roku TV-fähige Einrichtung
The Philips B4000 Soundbar is Roku TV Ready certified, simplifying setup and control when paired with a Roku TV.
- Connect the soundbar to your Roku TV via HDMI ARC.
- Your Roku TV should automatically detect and configure the soundbar.
- Use your Roku TV remote to control the soundbar's power and volume.

Image: The Philips B4000 Soundbar seamlessly integrated with a television, illustrating its 'Roku TV Ready' certification for simplified setup and control.
4.4 Einrichtung der Fernbedienung
Insert the two included AAA batteries into the remote control, ensuring correct polarity.
5. Bedienung
5.1 Ein-/Ausschalten
Drücken Sie den Netzschalter an der Soundbar oder an der Fernbedienung, um das Gerät ein- oder auszuschalten.
5.2 Eingangsauswahl
Press the 'Source' button on the remote control to cycle through available input sources (HDMI ARC, Bluetooth, USB).
5.3 Lautstärkeregelung
Use the 'Volume Up' and 'Volume Down' buttons on the remote control to adjust the audio level. If connected via HDMI ARC to a Roku TV, your TV remote may also control the volume.
5.4 Bluetooth-Kopplung
- Press the 'Bluetooth' button on the remote control to enter Bluetooth pairing mode. The indicator light on the soundbar will flash.
- On your mobile device, search for Bluetooth devices and select 'Philips B4000'.
- Once paired, the indicator light will become solid, and you can stream audio wirelessly.
5.5 Klangmodi und Equalizer
The soundbar may offer various sound modes or equalizer settings to optimize audio for different content types (e.g., Movie, Music, News). Use the remote control to access and adjust these settings. While specific equalizer details are not extensively documented, experimentation with available settings is encouraged to find your preferred audio profile.

Image: The Philips soundbar remote control in the foreground, with a television screen in the background displaying the EasyLink 2.0 menu for adjusting sound styles, including Bass, Treble, and Custom Equalize options.
6. Wartung
Um die Langlebigkeit und optimale Leistung Ihrer Soundbar zu gewährleisten, beachten Sie bitte folgende Wartungshinweise:
- Reinigung: Reinigen Sie die Oberfläche der Soundbar mit einem weichen, trockenen Tuch. Verwenden Sie keine flüssigen Reiniger oder Scheuermittel, da diese die Oberfläche beschädigen können.
- Belüftung: Ensure the soundbar's ventilation openings are not blocked. Proper airflow prevents overheating.
- Lagerung: Wenn Sie die Soundbar über einen längeren Zeitraum lagern, trennen Sie sie vom Stromnetz und bewahren Sie sie an einem kühlen, trockenen Ort auf.
7. Fehlerbehebung
If you encounter issues with your Philips B4000 Soundbar, refer to the following common problems and solutions:
| Problem | Mögliche Ursache | Lösung |
|---|---|---|
| Kein Ton von der Soundbar |
|
|
| Statisches oder verzerrtes Geräusch |
|
|
| Probleme mit der Bluetooth-Kopplung |
|
|
| Fernbedienung funktioniert nicht |
|
|
8. Spezifikationen
| Besonderheit | Detail |
|---|---|
| Modellname | TAB4000/37 |
| Lautsprechertyp | Soundbar |
| Surround Sound-Kanalkonfiguration | 2.0 |
| Maximale Lautsprecherausgangsleistung | 60 Watt |
| Konnektivitätstechnologie | Bluetooth (5.4), HDMI ARC, USB |
| Besondere Merkmale | Advanced Bluetooth 5.4 Connectivity, Bass Boost, Roku TV Ready™ Certification, Wall mountable |
| Technische Daten | 4.1"T x 30"B x 2.56"H |
| Artikelgewicht | 4.89 Pfund (2.22 Kilogramm) |
| Stromquelle | Battery Powered (for remote), AC Power (for soundbar) |
| Eingangslautstärketage | 120 Volt |
| Im Lieferumfang enthaltene Komponenten | Battery, Quick Start Guide, Remote, Wall Mount Bracket, Warranty Card |
9. Garantie und Support
9.1 Garantieinformationen
The Philips B4000 Soundbar comes with a Limited Warranty. Please refer to the included Warranty Card for specific terms, conditions, and duration of coverage. Retain your proof of purchase for warranty claims.
9.2 Kundendienst
Für weitere Unterstützung, technischen Support oder Serviceanfragen besuchen Sie bitte die offizielle Philips Support-Website. webSie können die Website besuchen oder sich an den Kundendienst wenden. Die Kontaktdaten finden Sie in der Regel auf der Philips-Website. webauf der Website oder in der Kurzanleitung.


