1. Einleitung
Thank you for choosing the Start Black Arc 250 Inverter Welding Machine. This professional-grade, versatile welding equipment is designed for both MMA (Shielded Metal Arc Welding) and TIG (Gas Tungsten Arc Welding) processes. Its compact and portable design, weighing approximately 3.8 kg, ensures high performance and efficiency for a wide range of metalworking tasks.
This manual provides essential information for the safe and effective operation, setup, and maintenance of your welding machine. Please read it thoroughly before use and keep it for future reference.
Hauptmerkmale:
- MMA/TIG Processes: Supports both electrode (MMA) and TIG welding (TIG torch not included).
- High Welding Capacity: 100% duty cycle at 250A, allowing for continuous operation.
- Außergewöhnliche Portabilität: Lightweight design (3.8 kg) for easy transport and handling.
- Überhitzungsschutz: Built-in protection mechanism to prevent damage from excessive heat.
- Anti-Stick Function: Prevents electrode sticking, improving weld quality and process efficiency.
- Digitaler Bildschirm: For precise current adjustment and monitoring.
- Einstellbarer Strom: Welding current range from 20A to 250A.
2. Wichtige Sicherheitshinweise
Welding can be dangerous. Always follow safety precautions to prevent injury or damage. Read and understand all safety warnings before operating the machine.
Allgemeine Sicherheitshinweise:
- Elektrischer Schock: Welding current can cause fatal electric shock. Ensure proper grounding. Do not touch live electrical parts. Wear dry welding gloves and protective clothing.
- Dämpfe und Gase: Welding fumes and gases can be hazardous to your health. Work in a well-ventilated area. Use a fume extractor if necessary.
- Lichtbogenstrahlen: Arc rays can burn eyes and skin. Wear a welding helmet with appropriate shade filter and protective clothing. Protect bystanders with welding screens.
- Feuer und Explosion: Schweißfunken und heißes Metall können Brände oder Explosionen verursachen. Halten Sie brennbare Materialien vom Schweißbereich fern. Halten Sie einen Feuerlöscher griffbereit.
- Heiße Teile: Hot parts can cause severe burns. Allow the machine and welded materials to cool before handling.
- Lärm: Zu viel Lärm kann das Gehör schädigen. Tragen Sie Gehörschutz.
Specific Operational Safety:
- Always use electrodes suitable for the material and process.
- Ensure adequate ventilation in the work area to dissipate fumes and heat.
- The TIG torch is not included with this machine. If performing TIG welding, ensure you have the correct torch and accessories.
- Always wear complete Personal Protective Equipment (PPE), including a welding helmet, gloves, protective clothing, and safety shoes.
- Betreiben Sie die Maschine nicht im D-Modus.amp oder nassen Bedingungen.
- Überprüfen Sie Kabel und Anschlüsse regelmäßig auf Beschädigungen.
3. Packungsinhalt
Bitte überprüfen Sie beim Auspacken, ob alle unten aufgeführten Artikel vorhanden und unbeschädigt sind:
- 1 x Start Black Arc 250 Inverter Welding Machine
- 1 x Electrode Holder Clamp
- 1 x Erdung Clamp
- 1 x Benutzerhandbuch (dieses Dokument)
Note: A TIG torch is not included and must be purchased separately for TIG welding operations.
4. Produktüberschreitungview
Familiarize yourself with the components and controls of your Start Black Arc 250 welding machine.

Abbildung 4.1: Insgesamt view of the Start Black Arc 250 Inverter Welding Machine, showing its compact yellow and black casing, digital display, control knob, and included electrode and ground clamps.
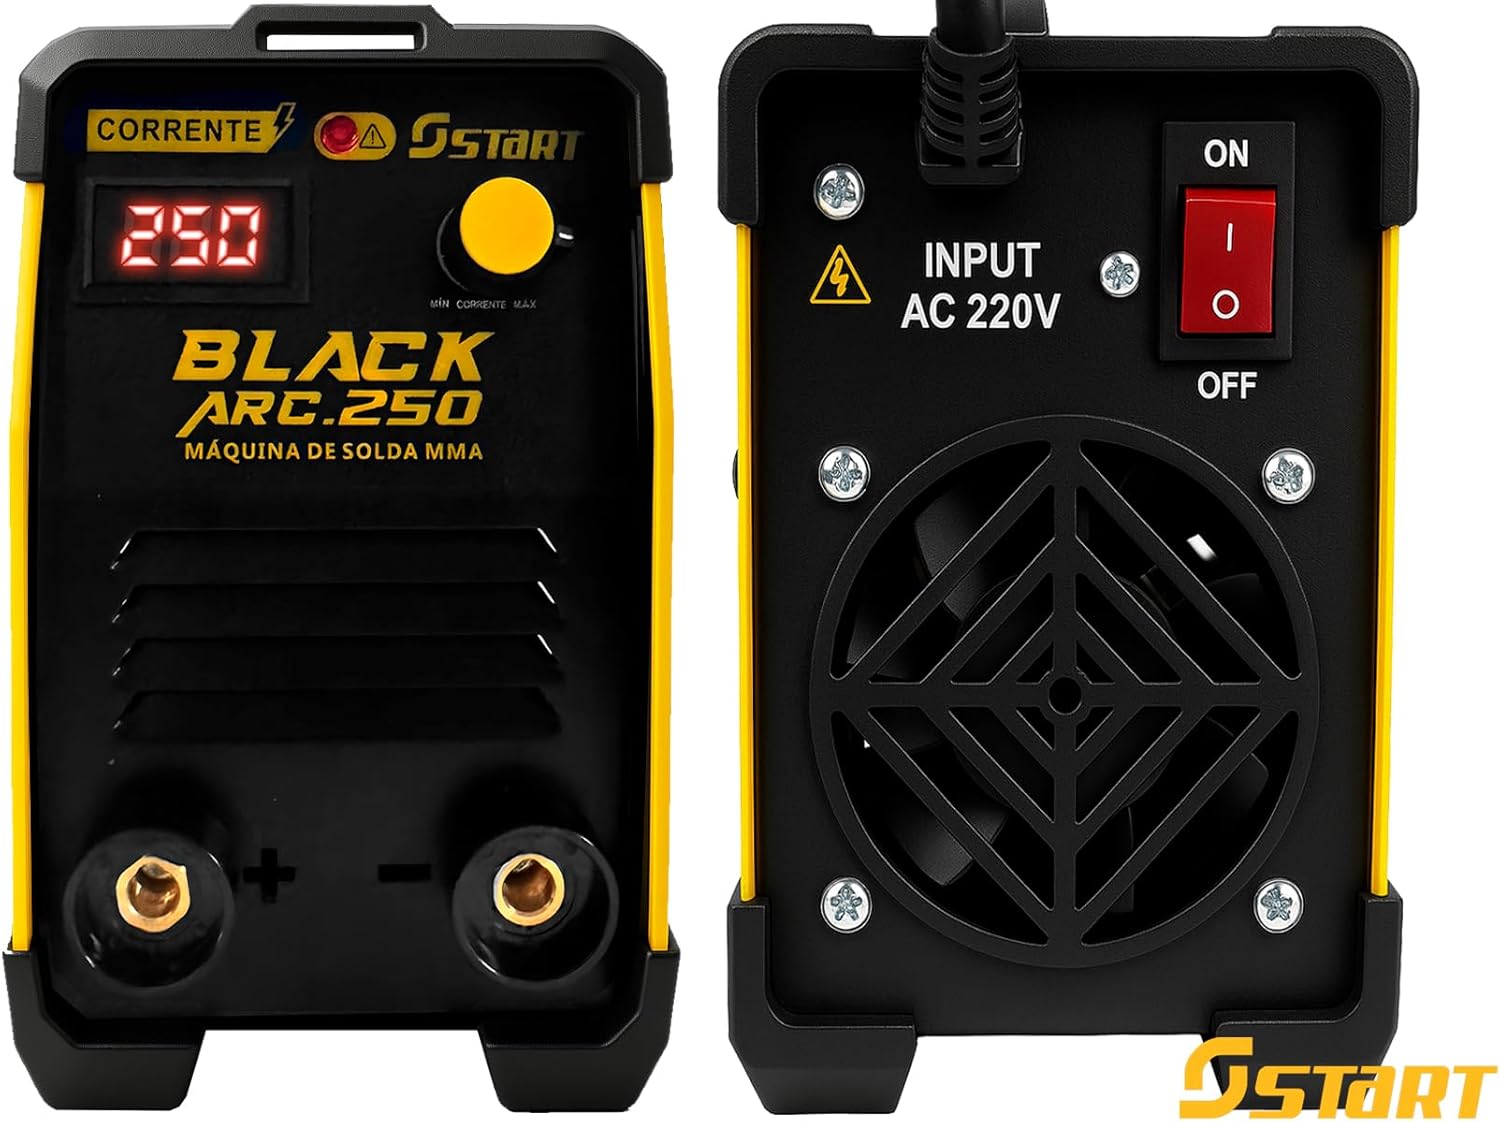
Figure 4.2: Front panel with digital current display, current adjustment knob, and positive/negative terminals. Rear panel showing the AC 220V input, power switch, and cooling fan.

Figure 4.3: Visual representation of key features including digital display, 100% duty cycle, MMA and TIG welding capabilities, and 250A current capacity.
Bedienelemente und Anzeigen:
- Digitaler Bildschirm: Shows the set welding current in Amperes.
- Stromeinstellknopf: Used to precisely set the welding current (20-250A).
- Positiver (+) Anschluss: For connecting the electrode holder (MMA) or TIG torch.
- Negativer (-) Anschluss: Zum Anschluss der Erdungamp.
- Netzschalter (EIN/AUS): Befindet sich auf der Rückseite.
- Input AC 220V: Stromanschluss.
- Lüfter: Located on the rear panel for heat dissipation.
- Überhitzungsanzeige: (If present, typically a light) Illuminates when the machine is overheating.
5. Technische Daten
| Besonderheit | Spezifikation |
|---|---|
| Modell | Black Arc 250 (Model Number: 2109) |
| Eingangslautstärketage | 220V Monophase |
| Eingangsstrom | 25 A |
| Schweißverfahren | MMA (Shielded Metal Arc), TIG (Lift Arc, with dry torch - not included) |
| Einstellbarer Strombereich | 20 - 250A |
| Arbeitszyklus | 100% bei 250A |
| Kompatible Elektroden | Up to 3.25mm (e.g., AWS E6013, E7018) |
| Schweißbare Materialien | Kohlenstoffstahl, Edelstahl |
| Anti-Stick Function | Ja |
| Offener Kreislauf Voltage (Gesang) | 56 V |
| Schutzklasse | IP21S |
| Abmessungen (L x B x H) | 34 cm x 15 cm x 27.5 cm (ca. 13.4 x 5.9 x 10.8 Zoll) |
| Gewicht | 3.8 kg (ca. 8.4 Pfund) |
| Material | Stahl |
| Stromquellentyp | Elektro-Leistung |

Figure 5.1: Approximate dimensions of the welding machine: 30cm length, 12cm width, 19cm height (Note: Product specifications list 34 x 15 x 27.5 cm, use table values as primary).
6. Einrichtung und Anschlüsse
Before connecting the machine, ensure the power switch is in the OFF position and the work area is clean, dry, and well-ventilated.
6.1 Stromanschluss:
- Ensure your power supply is 220V monophase and can handle a 25A input current.
- Connect the machine's power cord to a suitable grounded 220V outlet.
6.2 MMA (Electrode) Welding Setup:
- Schließen Sie den Elektrodenhalter cl anamp Kabel an die positiv (+) terminal on the front panel.
- Verbinden Sie die Erdungsklemmeamp Kabel an die negativ (-) terminal on the front panel.
- Befestigen Sie die Bodenklemme sicher.amp to the workpiece or a sturdy metal workbench that is in direct contact with the workpiece. Ensure a clean, bare metal connection for optimal conductivity.
- Setzen Sie die entsprechende Elektrode in den Elektrodenhalter ein.
6.3 TIG Welding Setup (Optional, TIG torch not included):
For TIG welding, you will need a separate TIG torch (dry torch type) and a gas cylinder with regulator (e.g., Argon). This machine supports Lift Arc TIG.
- Connect the TIG torch cable to the positiv (+) terminal on the front panel.
- Verbinden Sie die Erdungsklemmeamp Kabel an die negativ (-) terminal on the front panel.
- Befestigen Sie die Bodenklemme sicher.amp zum Werkstück.
- Connect the gas hose from the TIG torch to the gas regulator on your shielding gas cylinder.
7. Bedienungsanleitung
7.1 Powering On and Current Adjustment:
- After completing all connections, turn the power switch on the rear panel to the ON position.
- The digital display on the front panel will illuminate, showing the current setting.
- Use the current adjustment knob to set the desired welding current. Refer to electrode manufacturer guidelines or welding charts for appropriate current settings based on electrode type and material thickness.
7.2 MMA (Electrode) Welding:
- Ensure proper PPE is worn.
- Einen Lichtbogen erzeugen Sie, indem Sie die Elektrode leicht an das Werkstück halten und sie dann schnell etwas anheben.
- Maintain a consistent arc length and travel speed for a stable weld bead.
- The Anti-Stick function will reduce the current if the electrode sticks to the workpiece, making it easier to detach without damaging the electrode or machine.
7.3 TIG (Lift Arc) Welding (with optional TIG torch):
- Ensure proper PPE is worn and shielding gas is flowing.
- Gently touch the tungsten electrode to the workpiece.
- Slowly lift the torch to initiate the arc. The machine will automatically detect the lift and start the welding current.
- Halten Sie einen kurzen Bogen und eine gleichmäßige Fahrgeschwindigkeit ein.
8. Wartung
Regular maintenance ensures the longevity and optimal performance of your welding machine. Always disconnect the machine from the power supply before performing any maintenance.
8.1 Reinigung:
- Reinigen Sie die Außenseite des Geräts regelmäßig mit einem trockenen, weichen Tuch.
- Use compressed air to blow out dust and debris from the cooling vents and internal components. Ensure the air is dry and oil-free.
- Clean the terminals and cable connections to ensure good electrical contact.
8.2 Inspektion:
- Regularly inspect all cables, including the power cord, electrode holder cable, and ground clamp cable, for cuts, cracks, or damage. Replace damaged cables immediately.
- Check the electrode holder and ground clamp für Verschleiß.
- Stellen Sie sicher, dass alle Befestigungselemente fest angezogen sind.
8.3 Lagerung:
Store the welding machine in a clean, dry, and dust-free environment when not in use. Protect it from extreme temperatures and humidity.
9. Fehlerbehebung
This section addresses common issues you might encounter. For problems not listed here or if solutions do not resolve the issue, contact customer support.
| Problem | Mögliche Ursache | Lösung |
|---|---|---|
| Maschine lässt sich nicht einschalten | Keine Stromversorgung; Netzschalter ausgeschaltet; Defektes Netzkabel/Steckdose | Check power connection; Turn power switch ON; Test outlet with another device; Inspect power cord. |
| No welding arc or weak arc | Poor ground connection; Incorrect current setting; Wet/damaged electrode; Faulty cables | Sicherstellen, dass die Erdung geschlossen istamp has clean, bare metal contact; Adjust current; Use dry, undamaged electrodes; Inspect and replace cables if necessary. |
| Overheat indicator is on | Machine is overheating due to prolonged use or insufficient ventilation | Stop welding and allow the machine to cool down; Ensure adequate ventilation around the machine; Check for blocked cooling vents. |
| Elektroden kleben häufig | Low current setting; Incorrect electrode angle; Anti-Stick not functioning | Increase welding current; Adjust electrode angle; Ensure Anti-Stick feature is active (it is automatic on this model). |
10. Garantie und Support
Garantieinformationen:
Your Start Black Arc 250 Inverter Welding Machine is covered by a manufacturer's warranty against defects in materials and workmanship. Please refer to the warranty card included with your purchase for specific terms and conditions, including the warranty period.
Extended warranty options may be available for purchase, offering additional coverage against failures and defects for 12 or 24 months beyond the standard warranty period. Please check with your retailer for details on purchasing extended protection plans.
Kundendienst:
If you have any questions, require technical assistance, or need to report a problem with your welding machine, please contact the retailer or manufacturer's customer service department. Have your product model (Black Arc 250), model number (2109), and purchase date ready when contacting support.


