1. Einleitung
This manual provides detailed instructions for the setup, operation, and maintenance of your Prechen 12.3-inch Portable Monitor, Model HD-123. Please read this manual thoroughly before using the product to ensure proper functionality and to prevent damage. Keep this manual for future reference.
2. Produktüberschreitungview
The Prechen HD-123 is a 12.3-inch IPS stretched bar display designed for use as a secondary monitor. It features a 1920x720 resolution, 300 nits brightness, 1200:1 contrast ratio, and 178° wide viewing angles. It includes built-in speakers and supports both USB-C and HDMI connectivity.
Häfen und Kontrollen

Bild: Nahaufnahme view of the monitor's side, highlighting the 3.5mm headphone jack, power button, menu button, return button, and shortcut keys for brightness and volume. Two USB-C ports and one HDMI port are also visible.
- USB-C-Anschlüsse (x2): One port supports both video transmission and power delivery (full-featured USB 3.1). The other is for power only.
- HDMI-Anschluss: Für Videoeingang.
- 3.5mm Kopfhörerbuchse: Für Audioausgabe.
- Netzschalter: Schaltet den Monitor ein/aus.
- Menü-Schaltfläche: Öffnet das On-Screen-Display-Menü (OSD).
- Zurück-Taste: Navigiert zurück im OSD-Menü.
- Tastenkombinationen: Adjust brightness and volume directly.
3. Einrichtung
Anschließen des Monitors
Der Monitor unterstützt zwei primäre Anschlussmethoden: USB-C (einzelnes Kabel) und HDMI (mit separater Stromversorgung).

Image: Illustration demonstrating how to connect the monitor using a single USB-C cable for both video and power, and an alternative method using an HDMI cable for video and a USB-A to USB-C cable for power.
- USB-C-Anschluss (Einzelkabel):
- Ensure your device (laptop, smartphone, etc.) has a full-featured USB-C port that supports DisplayPort Alternate Mode and power delivery.
- Verbinden Sie ein Ende des mitgelieferten USB-C-zu-USB-C-Kabels mit dem USB-C-Anschluss Ihres Geräts.
- Connect the other end of the USB-C to USB-C cable to the monitor's full-featured USB-C port. The monitor should automatically receive video signal and power.
- HDMI Connection (with separate power):
- Connect one end of an HDMI cable to your device's HDMI output.
- Connect the other end of the HDMI cable to the monitor's HDMI port.
- Connect the provided USB-A to USB-C power cable to a power source (e.g., wall adapter, laptop USB-A port) and the monitor's power-only USB-C port.
VESA-Montage
The monitor supports 75x75mm VESA mounting for flexible positioning.

Abbildung: Die Rückseite view of the monitor, indicating the 75x75mm VESA mounting pattern. A separate stand is shown next to it, demonstrating alternative placement options.
- Locate the four screw holes on the back of the monitor.
- Attach the monitor to a compatible 75x75mm VESA mount or arm using appropriate screws (not included).
4. Bedienungsanleitung
Ein-/Ausschalten
- Press the Power Button to turn the monitor on.
- Press and hold the Power Button for 3 seconds to turn the monitor off.
Bildschirmmenü (OSD)
Press the Menu Button to access the OSD menu. Use the shortcut keys (brightness/volume) to navigate and adjust settings. Press the Return Button to exit a submenu or the OSD menu.
- Helligkeit Kontrast: Passen Sie die Helligkeits- und Kontrastwerte des Displays an.
- Farbeinstellungen: Farbtemperatur, Farbton und Sättigung anpassen.
- Eingabequelle: Wählen Sie manuell zwischen USB-C- und HDMI-Eingang, falls die automatische Erkennung fehlschlägt.
- Audioeinstellungen: Stellen Sie die Lautstärke für die eingebauten Lautsprecher oder die angeschlossenen Kopfhörer ein.
- Seitenverhältnis: Change the display aspect ratio if needed.
Anzeigemodi
Wenn das Gerät an einen Computer angeschlossen ist, können Sie den Anzeigemodus über die Anzeigeeinstellungen Ihres Betriebssystems konfigurieren:
- Duplikat-Modus: Der Monitor spiegelt den Inhalt Ihres Hauptbildschirms wider.
- Erweiterungsmodus: The monitor acts as an extension of your primary display, providing additional screen space.
- Nur zweiter Bildschirm: Only the portable monitor displays content.
5. Wartung
- Reinigen des Bildschirms: Mit einem weichen, fusselfreien Tuch leichtampMit Wasser oder einem Bildschirmreiniger abspülen. Reiniger nicht direkt auf den Bildschirm sprühen.
- Reinigung des Casing: Wischen Sie den Monitor ab.asinMit einem weichen, trockenen Tuch abwischen. Scheuermittel vermeiden.
- Lagerung: Bei längerer Nichtbenutzung sollte der Monitor an einem kühlen, trockenen Ort, fern von direkter Sonneneinstrahlung und extremen Temperaturen aufbewahrt werden.
- Handhabung: Handle the monitor with care to avoid dropping or impacting the screen.
6. Fehlerbehebung
- Kein Signal:
- Stellen Sie sicher, dass alle Kabel fest angeschlossen sind.
- Verify that your device's USB-C port supports video output (DisplayPort Alt Mode) if using a single USB-C cable.
- If using HDMI, ensure the monitor is receiving power via the separate USB-C power cable.
- Try selecting the input source manually through the OSD menu.
- Kein Strom:
- Check the power cable connection and the power source.
- Ensure the power adapter (if used) is functioning correctly.
- Flackernder Bildschirm:
- Prüfen Sie die Kabelverbindungen auf festen Sitz.
- Versuchen Sie es mit einem anderen Kabel oder Anschluss.
- Stellen Sie sicher, dass die Grafiktreiber Ihres Geräts auf dem neuesten Stand sind.
- Kein Ton:
- Adjust the volume through the monitor's OSD menu and your connected device.
- Ensure the audio output is directed to the monitor in your device's sound settings.
7. Spezifikationen
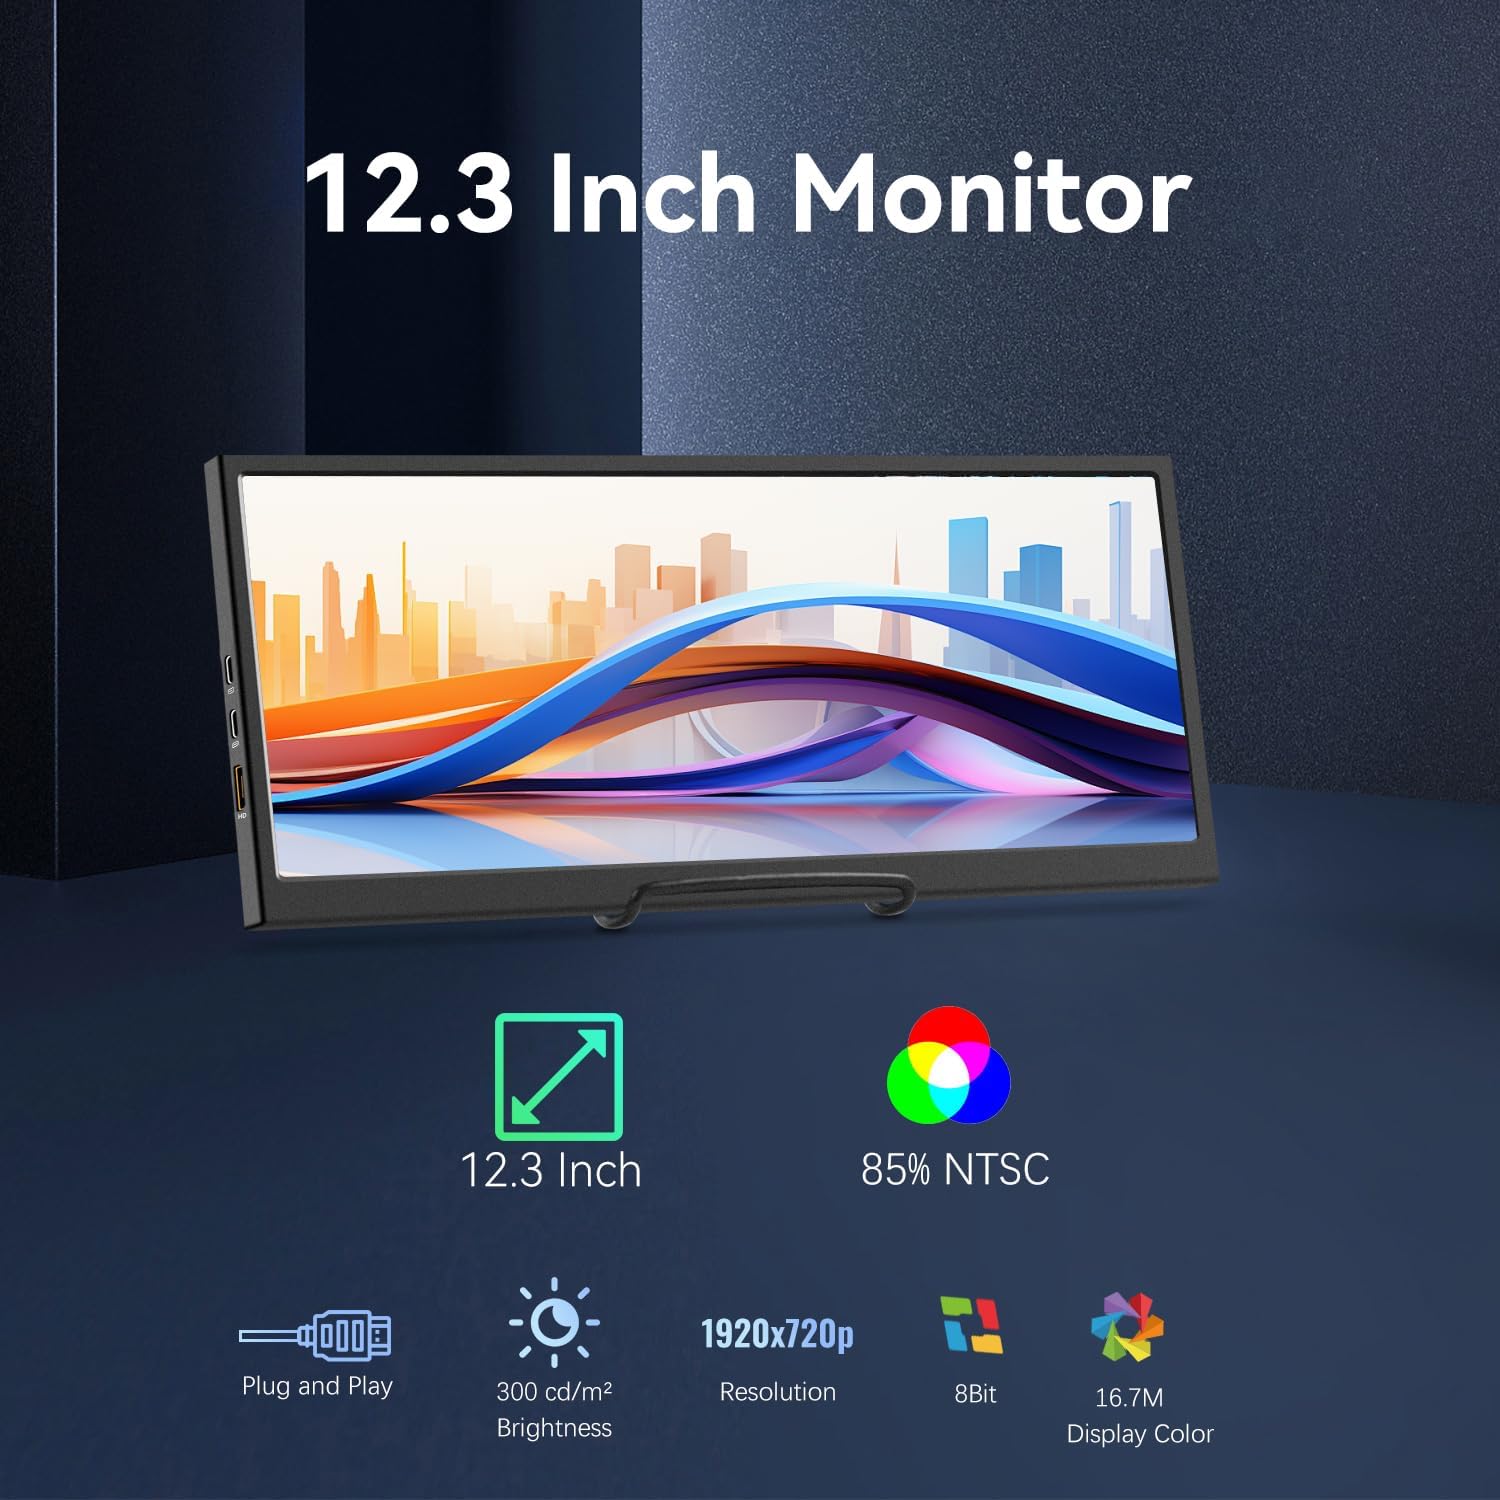
Image: Visual representation of the monitor's key features: 12.3-inch screen, 85% NTSC color gamut, Plug and Play functionality, 300 cd/m² brightness, 1920x720p resolution, 8-bit color, and 16.7M display colors.
| Besonderheit | Spezifikation |
|---|---|
| Modellnummer | HD-123 |
| Bildschirmgröße | 12.3 Zoll |
| Panel-Typ | IPS-LCD |
| Auflösung | 1920 x 720 Pixel |
| Helligkeit | 300 cd/m² (Nits) |
| Kontrastverhältnis | 1200:1 |
| Viewing-Winkel | 178° |
| Farbumfang | 85 % NTSC |
| Farbtiefe | 8-Bit (16.7 Millionen Farben) |
| Konnektivität | 2x USB-C (1 full-featured, 1 power-only), 1x HDMI |
| Audio | Built-in Speakers, 3.5mm Headphone Jack |
| Montage | 75x75mm VESA Compatible |
| Material | Metall |
| Technische Daten | 0.59 x 11.8 x 5.1 Zoll |
| Artikelgewicht | 2.14 Pfund |
8. Garantieinformationen
Prechen products are covered by a limited warranty against defects in materials and workmanship. The specific warranty period may vary by region and retailer. Please retain your proof of purchase for warranty claims. For detailed warranty terms and conditions, refer to the warranty card included with your product or contact customer support.
9. Unterstützung
If you encounter any issues or have questions regarding your Prechen 12.3-inch Portable Monitor, please contact our customer support team. Provide your product model number (HD-123) and a detailed description of the issue for faster assistance.
- Online-Hilfe: Besuchen Sie die offizielle Prechen-Website. webWebsite mit häufig gestellten Fragen und Support-Ressourcen.
- E-Mail-Support: Die Kontakt-E-Mail-Adresse finden Sie auf Ihrer Produktverpackung oder Garantiekarte.


