1. Einleitung
This manual provides detailed instructions for the installation, operation, and maintenance of your MOES WHT-9000-MS Smart Programmable Thermostat. This device is designed for controlling 120V/240V electric baseboard heaters and offers smart features including Wi-Fi connectivity, remote control via the Smart Life/TUYA APP, and compatibility with Alexa and Google Home.
2. Sicherheitshinweise
WARNING: Installation must be performed by a qualified electrician. Disconnect power at the circuit breaker before installation to prevent electrical shock or damage to the product. This thermostat is designed for high-voltage electric heating systems (120V/240V) and requires at least four wires (including neutral or a second live wire) in the electrical box. Do not use with low-voltage-Systeme.
Halten Sie sich bei der Installation stets an die örtlichen Elektrovorschriften und -vorschriften.
3. Packungsinhalt
- MOES WHT-9000-MS Smart Thermostat
- Befestigungsschrauben (2)
- Benutzerhandbuch (dieses Dokument)
4. Produktüberschreitungview
The MOES WHT-9000-MS Smart Thermostat features a frosted display for clear readability and an easy-grip knob for manual temperature adjustments. It integrates seamlessly with smart home ecosystems for enhanced control and energy efficiency.

Abbildung 4.1: MOES Smart Thermostat with its corresponding mobile application interface, showing current temperature and settings.
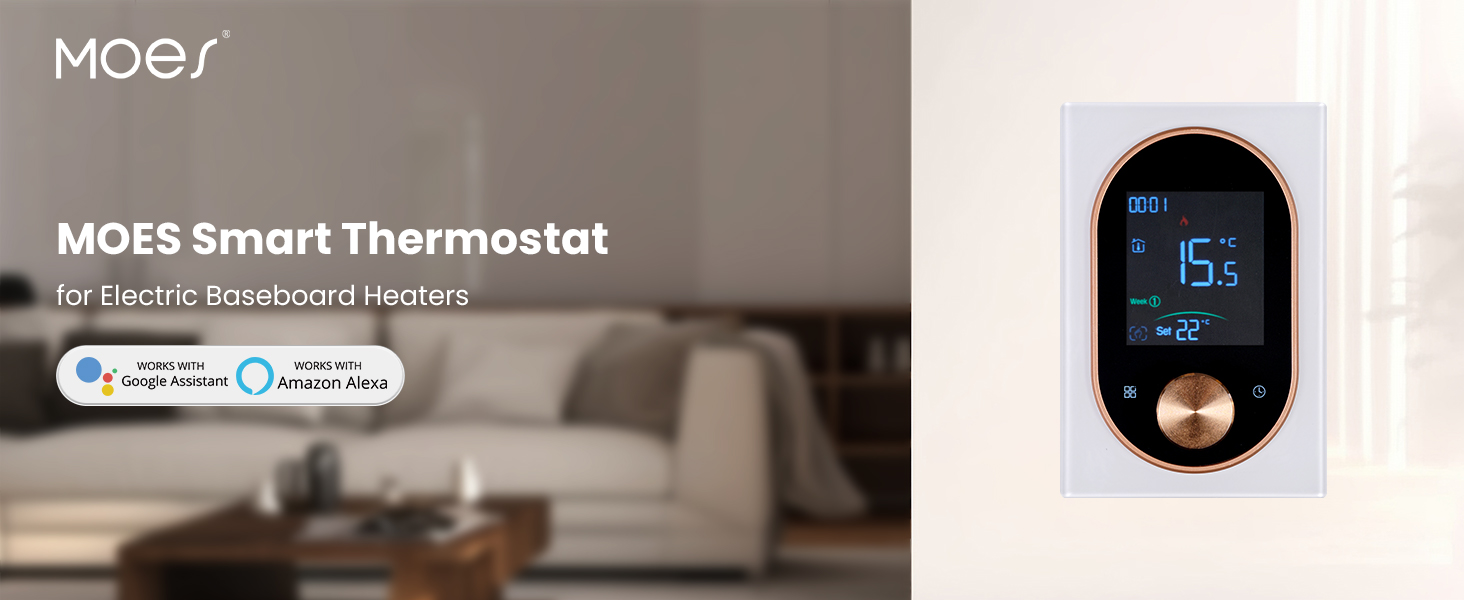
Abbildung 4.2: The MOES Smart Thermostat, highlighting its compatibility with electric baseboard heaters and smart home systems.
5. Einrichtung und Installation
5.1 Voraussetzungen vor der Installation
- Ensure your heating system is a high-voltage electric heating system (120V/240V).
- Verify that your electrical box has at least four wires, including a neutral or a second live wire.
- Turn off power to the heating circuit at the main electrical panel before proceeding.
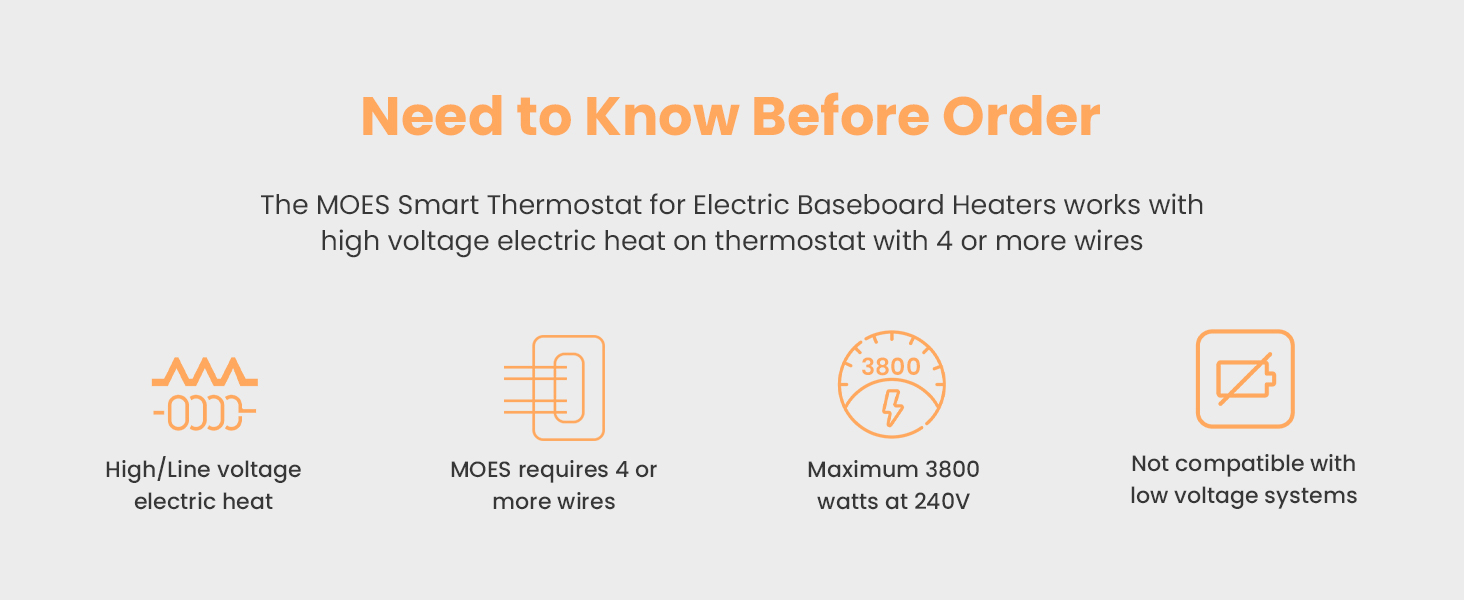
Abbildung 5.1: Important considerations before installing the thermostat, including voltage, wiring, and wattage-Grenzen.
5.2 Verdrahtung und Montage
- Trennen Sie die Stromversorgung am Leistungsschalter.
- Remove your old thermostat (if applicable) and identify the existing wiring.
- Connect the MOES thermostat wires according to the wiring diagram provided. Ensure all connections are secure.
- Mount the thermostat base plate to the wall using the provided screws.
- Befestigen Sie die Thermostat-Anzeigeeinheit an der Grundplatte.
- Stellen Sie die Stromversorgung am Leistungsschalter wieder her.

Abbildung 5.2: Detaillierte view of the thermostat's backplate with wiring terminals and overall dimensions for installation reference.
5.3 App-Download und Kopplung
- Download the "Smart Life" or "TUYA Smart" app from your smartphone's app store.
- Registrieren Sie sich oder melden Sie sich in Ihrem Konto an.
- Follow the in-app instructions to add a new device. The thermostat should enter pairing mode automatically upon first power-up or by holding the knob for a few seconds.
- Stellen Sie sicher, dass Ihr Telefon während des Kopplungsvorgangs mit einem 2.4-GHz-WLAN-Netzwerk verbunden ist.
6. Bedienungsanleitung
6.1 Manuelle Steuerung
Use the easy-grip knob on the thermostat to manually adjust the desired temperature. Rotate clockwise to increase the temperature and counter-clockwise to decrease it. The current temperature and set temperature will be displayed on the frosted screen.
6.2 Informationen anzeigen
The thermostat's display shows:
- Aktuelle Raumtemperatur
- Temperatur einstellen
- Uhrzeit und Wochentag
- Wi-Fi-Verbindungsstatus
- Heizungsanzeige
7. Smart Features and App Integration
7.1 Fernsteuerung per App
Once paired with the Smart Life or TUYA Smart app, you can control your thermostat from anywhere using your smartphone. Adjust settings, monitor temperature, and manage schedules remotely.

Abbildung 7.1: A user adjusting the thermostat settings remotely using the mobile application.
7.2 Programmierbare Zeitplanung
Set custom weekly schedules through the app to automatically adjust heating based on your daily routine. This feature helps optimize energy consumption and maintain comfort.

Abbildung 7.2: The mobile app displaying options for setting a weekly heating schedule, allowing for different temperatures at various times of the day.
7.3 Sprachsteuerung
The MOES Smart Thermostat is compatible with Amazon Alexa and Google Home. Link your thermostat to your preferred voice assistant for hands-free temperature control using simple voice commands.
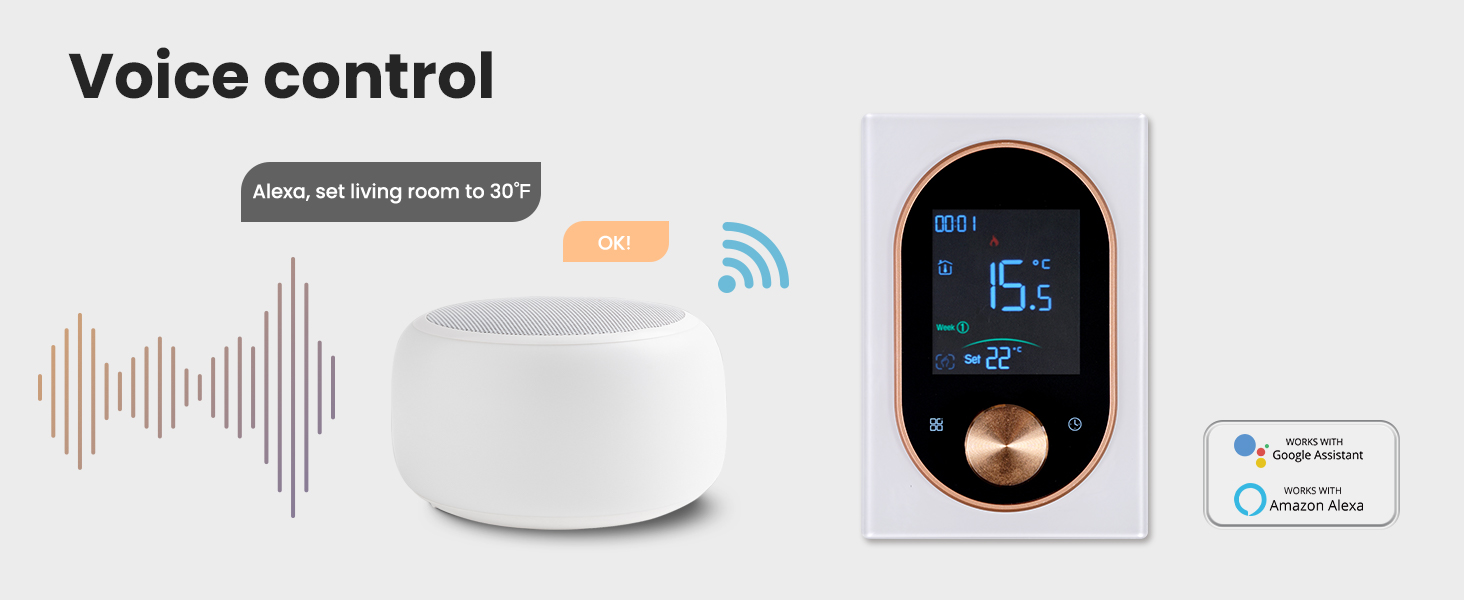
Abbildung 7.3: An illustration of using a smart speaker to control the MOES thermostat via voice commands.
7.4 Intelligent Detection
The thermostat features intelligent detection capabilities, such as automatically pausing heating when an open window is detected, further contributing to energy savings.
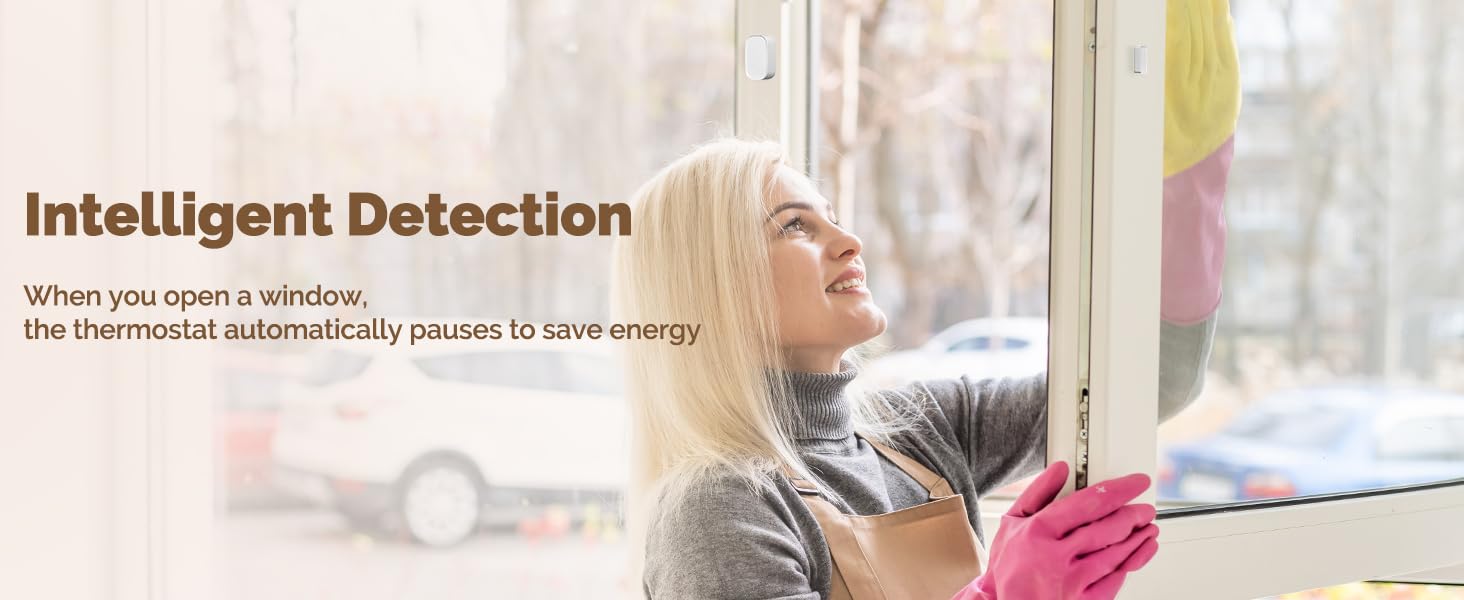
Abbildung 7.4: The thermostat's intelligent detection feature, which can pause heating when an open window is detected to conserve energy.
8. Wartung
To ensure optimal performance and longevity of your MOES Smart Thermostat, follow these simple maintenance guidelines:
- Reinigung: Gently wipe the thermostat's exterior with a soft, dry, or slightly damp cloth. Avoid using abrasive cleaners, solvents, or chemical sprays, as these can damage the finish or internal components.
- Displaypflege: Keep the frosted display clean and free from dust to maintain clear readability.
- Vermeiden Sie Hindernisse: Ensure no objects are blocking the thermostat's sensors, which could affect temperature readings.
9. Fehlerbehebung
If you encounter issues with your MOES Smart Thermostat, refer to the following common problems and solutions:
| Problem | Mögliche Ursache | Lösung |
|---|---|---|
| Thermostat hat keinen Strom/Display ist aus. | No power from the circuit breaker; incorrect wiring. | Check the circuit breaker and ensure it is ON. Verify wiring connections are secure and correct according to the installation guide. |
| Verbindung zu WLAN oder App nicht möglich. | Incorrect Wi-Fi password; 5GHz Wi-Fi network; thermostat out of range; pairing mode not active. | Ensure correct 2.4GHz Wi-Fi password. Confirm your router supports 2.4GHz. Move thermostat closer to router. Activate pairing mode (refer to app instructions). |
| Die Temperaturanzeige scheint ungenau zu sein. | Thermostat ist direkter Sonneneinstrahlung oder Zugluft ausgesetzt; Sensor blockiert. | Relocate thermostat if possible, or shield it from direct environmental influences. Ensure no objects are covering the thermostat's sensors. |
| Die Heizung schaltet sich nicht wie geplant ein/aus. | Incorrect schedule settings in the app; manual override active. | Review and adjust your schedule settings in the Smart Life/TUYA app. Check if manual mode is active and switch to program mode if desired. |
10. Spezifikationen
| Besonderheit | Detail |
|---|---|
| Marke | MOES |
| Modellname | Knopfthermostat |
| Artikelmodellnummer | WHT-9000-MS |
| Besonderheit | Programmierbar |
| Farbe | Weiß |
| Konnektivitätstechnologie | W-lan |
| Bandtage | 120 Volts / 240 Volts (High Voltage) |
| Steuerungstyp | App Control, Manual Knob |
| Konnektivitätsprotokoll | WLAN (2.4 GHz) |
| Montagetyp | Wandhalterung |
| Hersteller | WENZHOU NOVA NEUE ENERGIE CO., LTD |
| Verpackungsabmessungen | 5.75 x 3.82 x 2.91 Zoll |
| Artikelgewicht | 12.3 Unzen |
| Datum der ersten Verfügbarkeit | 16. Juni 2025 |

Abbildung 10.1: The MOES Smart Thermostat seamlessly integrated into a modern living space, demonstrating its compact design.
11. Garantie und Support
For specific warranty details, technical assistance, or customer support, please refer to the official MOES website or contact MOES customer service directly. It is recommended to retain your purchase receipt as proof of purchase for any warranty claims.
You can visit the MOES store online for additional product information and support resources: MOES Official Store


